PLEASE NOTE - The current dash update (2.0.9199.0) will restore the banned 360's ability to save to the Hard Drive. However it will not uncripple the 360 - any content created by it (GamerTag's, Achievements, Saves) will still be corrupted on other consoles. You must still 'uncripple' (see below) to restore the 360's ability to create trusted content. Did your 360 get banned in this wave of bans? HD install not working? Gamertag and saves keep corrupting? This is how to fix this (aka 'uncrippling').
To start with, you'll need to know a few things. This is going to involve a small amount of soldering, and a little knowledge of Nandpro and Hex (and a lot of patience if you've got a 256/512mb Jasper). Also, and an important point: THIS WILL NOT UNBAN YOUR 360 - ALL THIS DOES IS TO ALLOW TRUSTED CONTENT ON YOUR CONSOLE. That out of the way, lets get on with the tut.
Part 1: Cable creation, and hooking it up:
You will need:
1. DB25 25-way male plug + wires - or the male end from a printer cable leave the wires attached, cut off the female end.
2. 5 X 100 ohm resistors.
3. 1 X Switching diode.
4. Soldering iron, flux and solder.
5. A PC running Windows (32bit XP worked for me), and with a Parallel Printer Port.
6. NandPro - Dwnld here:
http://rapidshare.de...dPro20.rar.html *EDIT* USE NANDPRO 2.0E available from the usual places!
7. Hex Workshop - Dwnload here:
http://www.hexworkshop.com/8. FindSecdata - found at the usual places.
Now, you need to make your cable, and solder it to your 360 motherboard. These threads in the forum will show you how to do this - read them carefully and choose the method you want to use - YOU DO NOT NEED TO USE JTAG WIRES - THESE ARE THE ONES WITH THE 330OHM RESISTORS ATTACHED AND THEIR CONNECTIONS TO THE J2D2 AREA OF THE MOBO!
http://forums.xbox-s...howtopic=690493http://forums.xbox-s...p;#entry4523337http://forums.xbox-s...howtopic=691873Just hook up the wires as shown colour to colour, 360 to DB25, not forgetting the resistors where it tells you to put them, and the switching diode with it's black band facing the 360 mobo).
Part 2: Dumping Your NAND.
Now back to your PC. Unrar NandPro, and if you're PC's like mine, unrar it to C:\Documents and Settings\Administrator.
Double click 'port95nt.exe', let it do it's thing, you may need to reboot. Now restart your PC, and go into the PC's bios. This differs from PC to PC, but make sure your Parallel Printer Port (Or LPT) is ON. Boot into Windows.
Take your now wires up 360, and plug in it's power supply (DO NOT TURN THE 360 ON) and hook up its AV/VGA or which ever cable you use. Now plug the DB25 plug thats attached to your 360, and plug it in to your PC's printer port.
Now go to the START button on your PC, and click on the 'Run' button. A 'Run' window will pop up. Type 'CMD' and click 'OK' A DOS promt window will open:
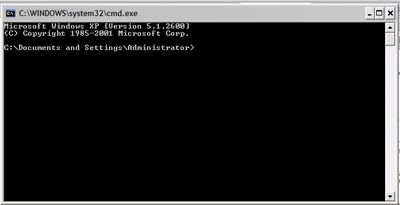
You see it's pointing to my folder where I installed NandPro to? If yours defaults to another address, install NandPro in that folder. We are now going to dump your NAND.
Type into the DOS prompt window:
nandpro lpt: -r16 nand.bin
and press 'enter' NandPro will now start to read the NAND of the 360. If you have a 256 or 512mb Jasper, replace the '16' in the above command line with 256 or 512. One thing to know - if you've got a 256 or 512 Jasper this will take hours just for one dump, and you're gonna need at least two dumps. You might be better off building a USB reader device, see
this thread on how to (yes it involves a bit of reading).
You may get errors reading or it just won't read. You will need to first - check your LTP settings in your PC's bios - change them and re-try dumping. If you've tried all configs in the bios, try another PC. If it still doesn't work, try removing the resistors and/or switching diode and then try dumping. It will work eventually, but if not - TRY ANOTHER PC!
Right, we've got our first NAND dump - congrats! It'll be in the folder you install NAndPro to (in my case C:\Documents and Settings\Administrator) and it's called nand.bin. Now dump your nand a second time using this command line in the DOS prompt window:
nandpro lpt: -r16 nand2.bin
Leave this dumping (grab a beer/coffee). You should now have nand2.bin in the same folder as nand.bin. Brilliant. Now you need to check the qualiy of the dumps. See here on how to do this:
http://www.free60.or...king_for_errors*EDIT* Link above dead - the three main pieces of software for checking the dumps are:
1. Degraded.
2. 360 Flash Tool
3. A Hex Editor.
This guide uses various bits of software to check the NAND dumps. Some of them need a bit of a prompt to work.
1. Getting Degraded to work: Degraded v1.1 won't open NAND files without the string "2004-2005 Micros... ect" at the begining of the hex. Open your NAND file with Hex Workshop, look at the writing on the left - where it reads '2004-200X' if the X is a 5 you're fine and can open it in Degraded; if not highlight the X number, and type 5 then save the .bin. It'll open in Degraded (REMEMBER this is just to validate your dump, not part of the hex editing to get the Hard Drive functions back! You'll have to google for the 1BL number, and this is just for checking that the NAND dump is OK - when you save it in the Hex editor, don't overwrite your NAND, call it summit like Degnand.bin).
A good dump will have no bad blocks. However - you will see some with (the 02c can be any block value in your dump):
'bad block @ 0X2C
block 0X2C found @ 0x3FF'
This is also a good dump, as the block has been reallocated to the end of the NAND - perfectly normal.
However if you see just:
'bad block @ 0X2C'
With no reallocation, then your NAND dump is bad! Redump!
2. 360 Flash Tool (again you need the 1BL Key in the 'keys' menu). Open your NAND in this - in the lower portion you'll see 'bad kv' etc (this is normal - you don't have your CPU key). In the other data at the top under 'CX Sections' you should see info in all boxes - if not (as in they are completley blank, not grayed out), then redump!
3. Hex editor. Open your first nand dump, select 'file compare' in your Hex Editor, and open your second NAND dump - if they pass Degraded and 360 Flash Tool
(and always check in both of these!), and it says in the hex editor they're identical - you should be good to go!
Anyhow, now you've verified your dumps are all tickity-boo - SAVE THEM ONTO DISC/USB STICK IN THEIR UNALTERED STATE - IF YOU EVER NEED TO RESTORE YOUR NAND BECAUSE YOU BORK IT IN THE NEXT SECTION YOU WILL NEED THESE AS THEY WERE!
Part 3: Unlocking Teh Power Of Trusted Content - Or Hex Editing Your NAND.
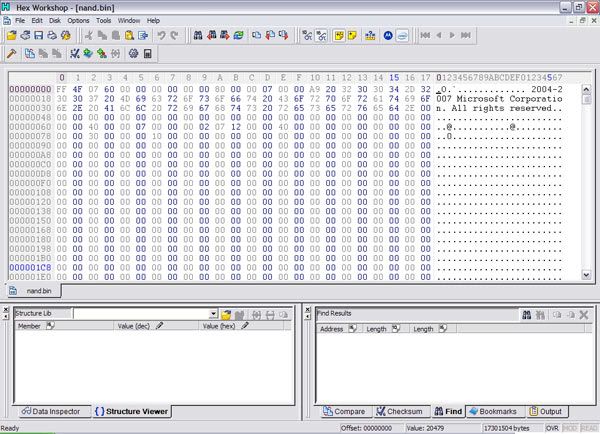
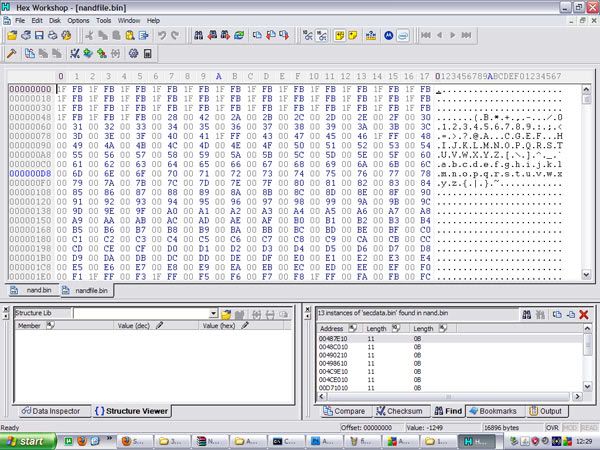
*Edit* There is now a tool called FindSecdata - available at the usual places. Use this instead of the zeroing method first. FindSecData will scan your nand and come up with suggestions for command line entries to get your 360 uncrippled. Try FindSecData first, and then try the zeroing method if FindSecData doesn't work.Now you've got your NAND.bin or whatever you called it, open it up in Hex Workshop (click on the 'open file' icon, or go to 'File Open'). It'll look similar to this:
Welcome to the world of Hex........ Now go to 'Edit' in the drop down menu, and select 'Find'. A box will appear, in the first drop down, select 'Text String' tick the 'Find All Instances' box, and enter 'secdata.bin' in the 'Value' box. Click OK.
It will scan NAND.bin for all occurances of sectdata.bin, and in the box in the bottom right corner, it will list how many of these there are. Click on the first one. You'll see it will go to the secdata hex you've clicked on. It'll look something like this:
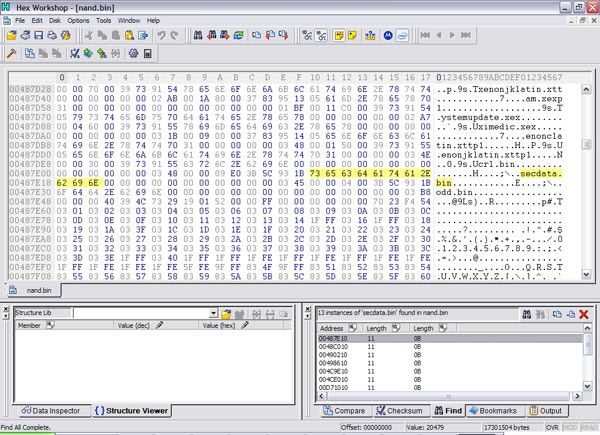
Now look at the hex highlighted in the lovely 'salmon' colour in this picture:
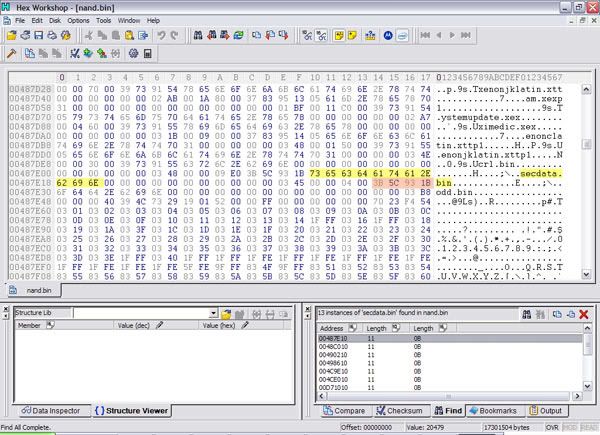
The four block number 3B 5C 93 1B this is the date stamp of the authoring of the secdata, and it always appears after the 00 00 04 00 hex after the secdat.bin hex number.
Go through
all of the occurrances of secdata and note these date stamp hex's down under their address headings (in the pictures case its 00487E10) If your secdata starts midway through a line, you HAVE to use that address.
Now you need to understand Hex a bit. The blocks go up in numeric and then text value, so it'll start at 00 and go through to FF, with FF being the highest value, meaning that hex 0F is a higher value than 09, and B1 is higher than A8. So in this example the value is 3B 5C 93 1B (if there was another secdata with 3B 6A 4E 93, that would be the higher value). Look at the hex values of the date stamps from all of the secdata and the highest value one is the latest bad HD corrupting hex!
Write the address of the highest secdata block down! (In this case its 00487E10). Use this:
http://www.mrcalcula...com/hexdec.htmlIt's a hex calculator if this one doesn't work google and find one that can to hex division, click the 'Hex' button and enter the address value (ie in this case 00487E10) and divide by 04200. Note down the number before the decimal point, which will be a three figure hex number - say 11D or 158 etc depending on your NAND, in this case it's 119.
Now go back to NANDPRO, and with your 360 still hooked up enter:
NandPro lpt:-r16 nandfile.bin 0x0119 1
(change 119 to whatever address line you came up with in your calculation, remember the -r16 should be -r256 or -r512 if you've got a 256mb or 512mb Jasper)
This will dump this sector of your NAND. Now with the freshly dumped NAND piece, open it up in Hex Workshop, and check that it starts with 1F FB and repeats for a bit. It should also have a single secdata.bin if you search....also the last none filled line should be 4200. It should look like this:
Highlight all of the hex like this:
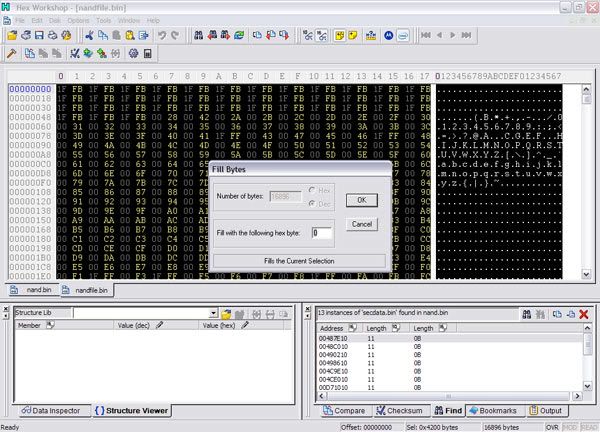
and select 'Edit Fill' from the drop down menu. Make sure that in the 'Fill with the following hex byte' the value is '0' and click 'OK'. Now save this file and call it 'nandzero'.
Open up NANDPRO again, and this time, enter:
NandPro lpt:-w16 nandzero.bin 0x0119 1
change 0119 to whatever address line you came up with in your hex division calculation (and again, the -w256 or -w512 if you've got a mighty Jasper)
this will write the zero'd 4200 size file to address 0119 (or which ever address you came up with in your calculation). Disconnect 360 from PC (leave your NAND wires attached in case it goes wrong), boot 360 and you're away

Cheers to Bannzzay - also there's a tool about called FSTool - haven't tested it, but I think it works, and it's a lot less hassle - JUST MAKE SURE YOU KEEP YOUR NAND BACKUPS BEFORE USING!
This is dedicated to the non-sharers of this info that were charging to do this for others....*raspberry*


 Author
Topic: How To Uncripple A Banned 360 (not Unban!) (Read 3092 times)
Author
Topic: How To Uncripple A Banned 360 (not Unban!) (Read 3092 times)