Post by: haloloser on August 29, 2005, 12:32:00 AM
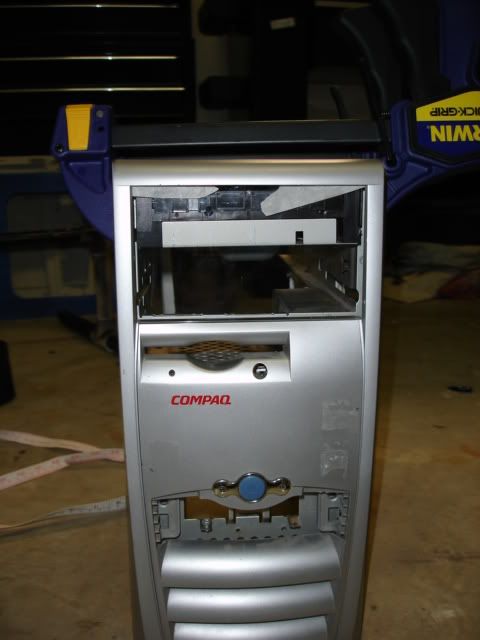
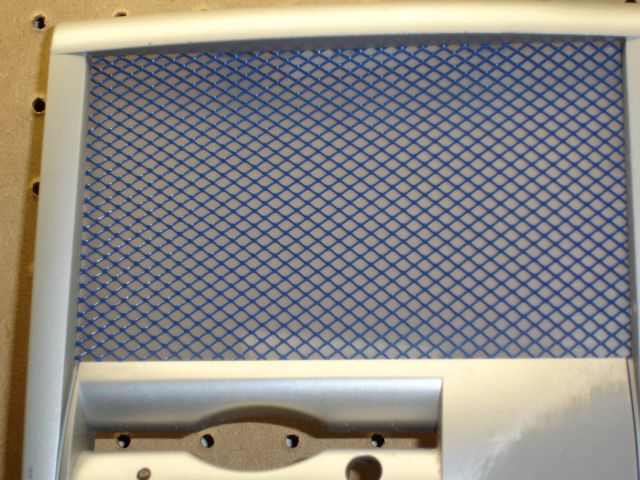
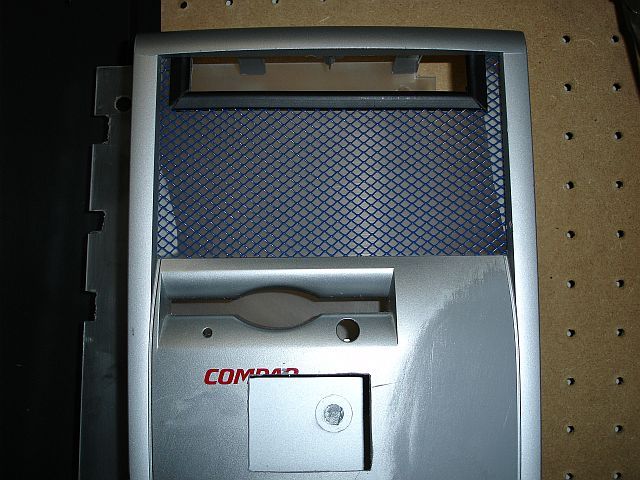
(IMG:http://img.photobucket.com/albums/v305/haloloser/frontofwetbox.jpg)
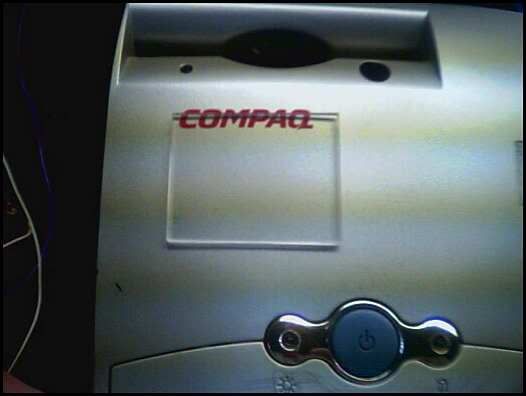
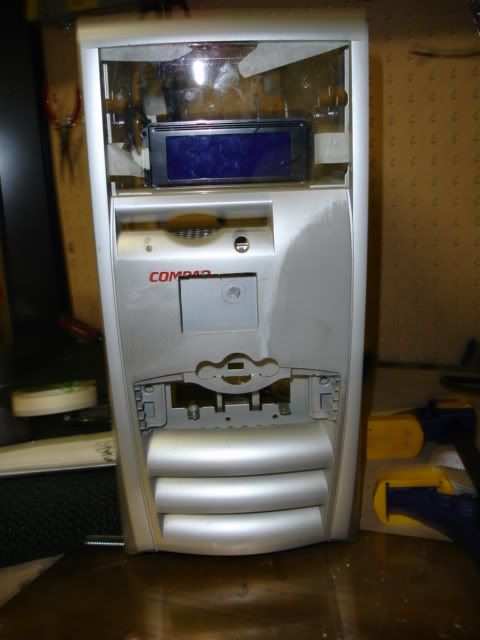
started with an old compaq presario 6000 case.
(IMG:http://img.photobucket.com/albums/v305/haloloser/sidepanelwindowonwetbox.jpg)
made a nice window. kinda odd shaped, but its that way for a reason.
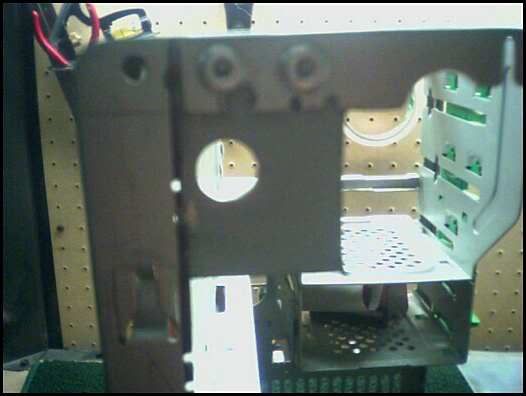
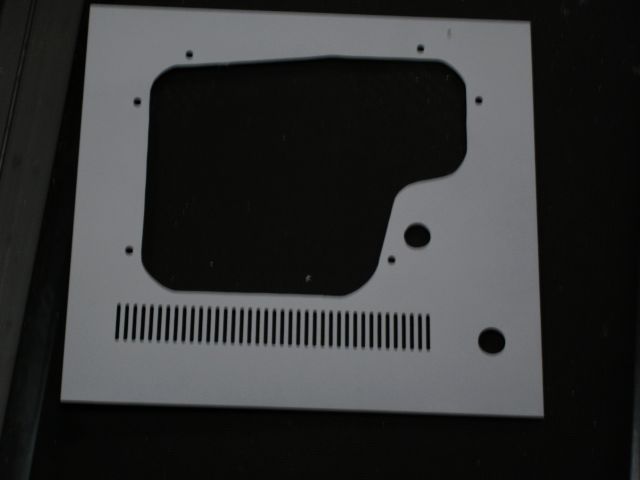
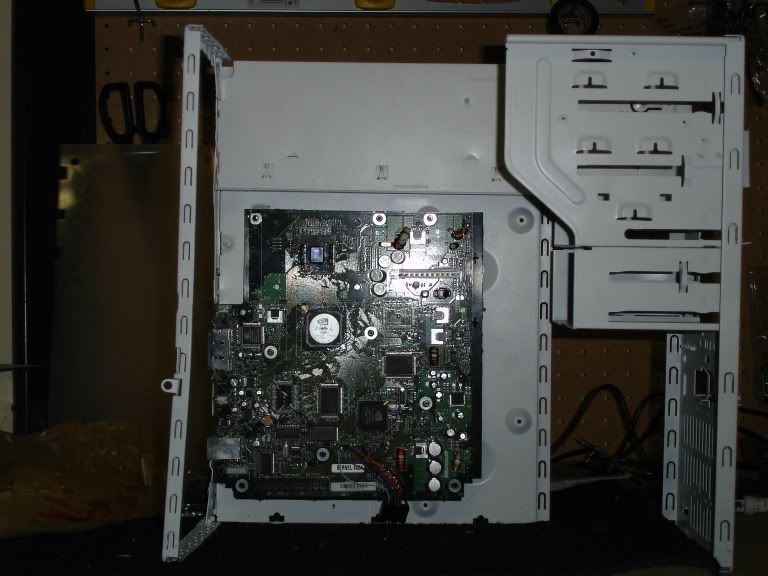
(IMG:http://img.photobucket.com/albums/v305/haloloser/chassiswithoutcase.jpg)
drilled the rivets out and was left with the bare chassi.
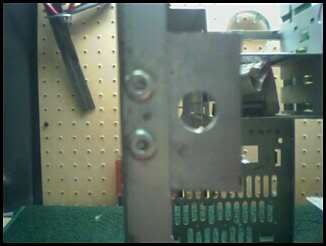
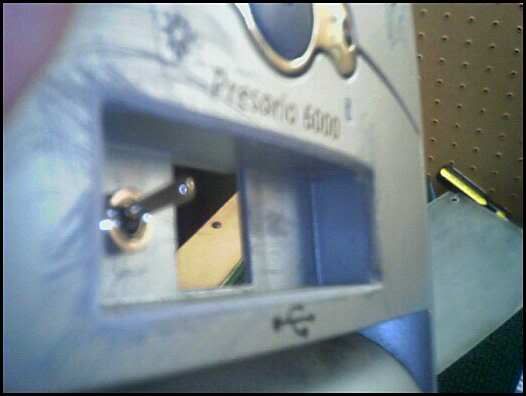
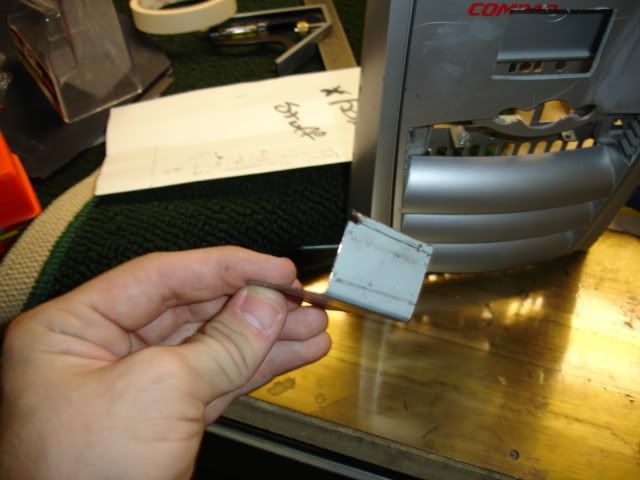
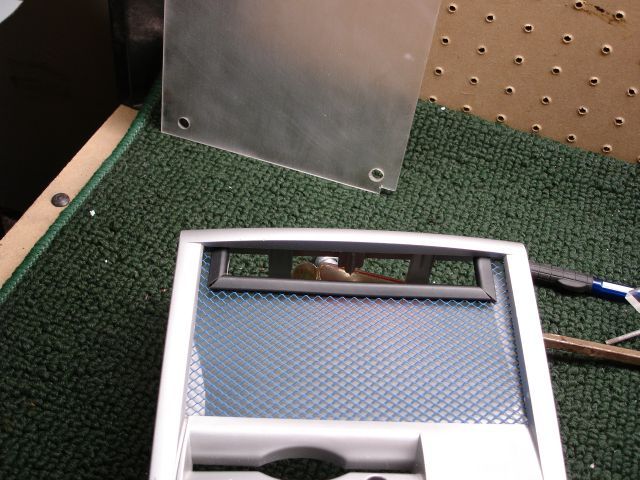
(IMG:http://img.photobucket.com/albums/v305/haloloser/usbintrappeddoor.jpg)
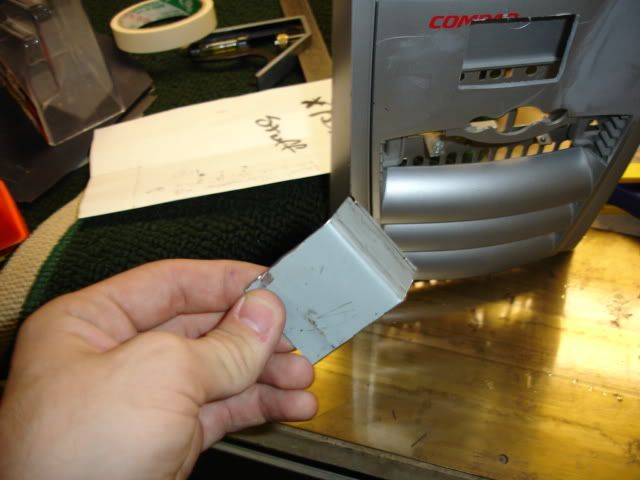
some usb ports, i dont want those showing...
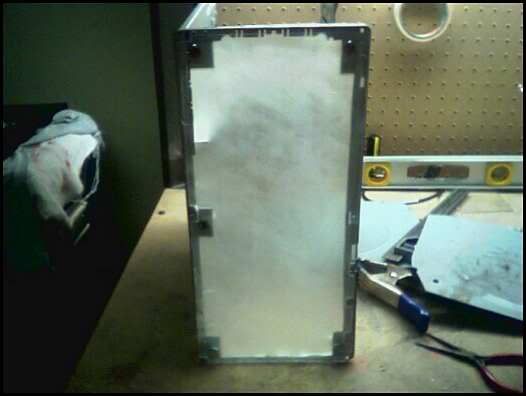
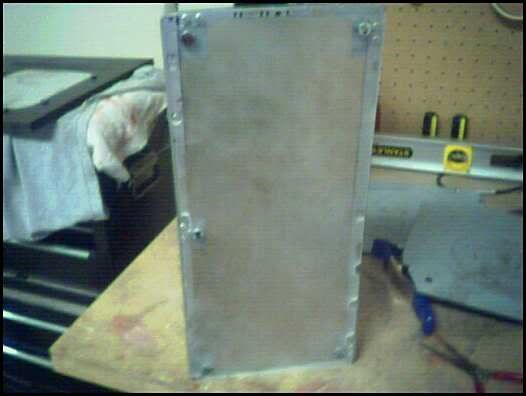
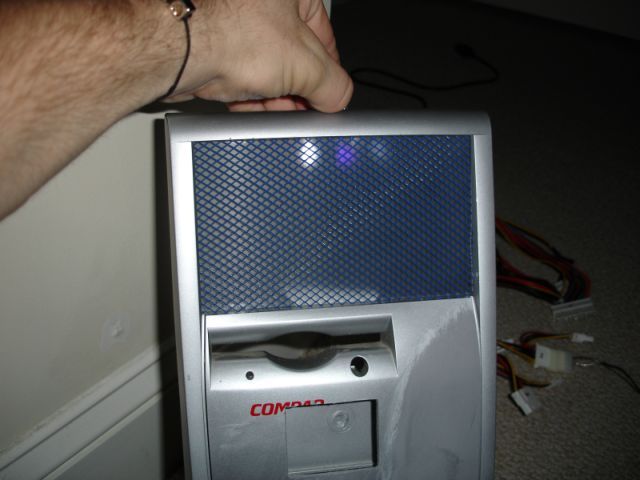
(IMG:http://img.photobucket.com/albums/v305/haloloser/trappeddoor.jpg)
fabricated a trapped door for them.
Post by: haloloser on August 29, 2005, 12:38:00 AM
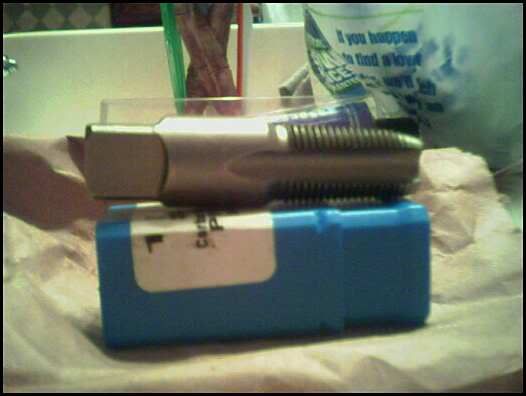
some goodies from the hardware store. that metal flex conduit will be for wire sleeving. its gonna look nice after it gets a buff. im going for a polished undustrial look.
(IMG:http://img.photobucket.com/albums/v305/haloloser/etchingbits.jpg)
etching bits, skeet, skeet.
(IMG:http://img.photobucket.com/albums/v305/haloloser/etchnoleds.jpg)
halo 2 etch. makes me happy to be a gamer.
(IMG:http://img.photobucket.com/albums/v305/haloloser/ledsupclose.jpg)
yummm, lights. look like it would taste good.
(IMG:http://img.photobucket.com/albums/v305/haloloser/ashley.jpg)
another shot.
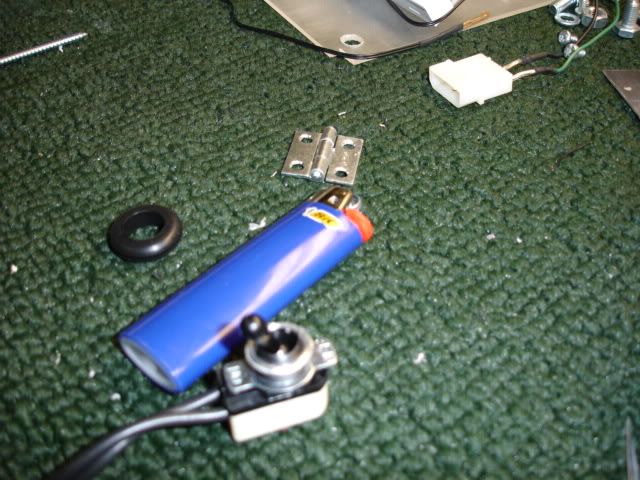
(IMG:http://img.photobucket.com/albums/v305/haloloser/rivetgun.jpg)
i decided i didnt want the standard computer i/o's for an xbox, so i got rid of the back panel. i picked up a rivet gun while i was at it. those are impressive little tools.
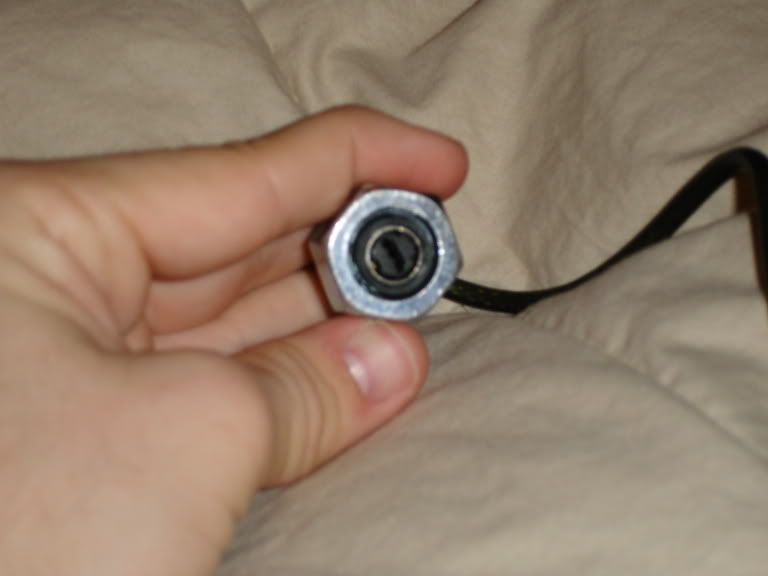
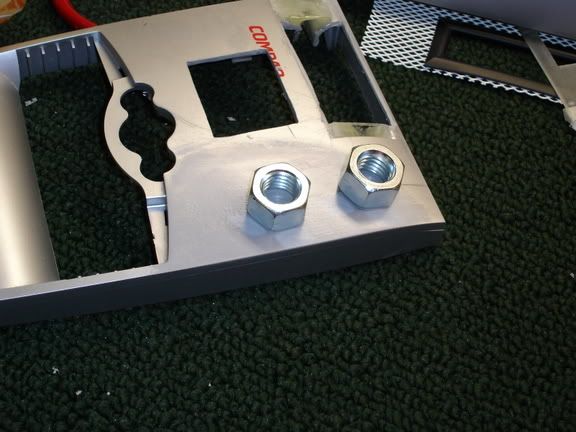
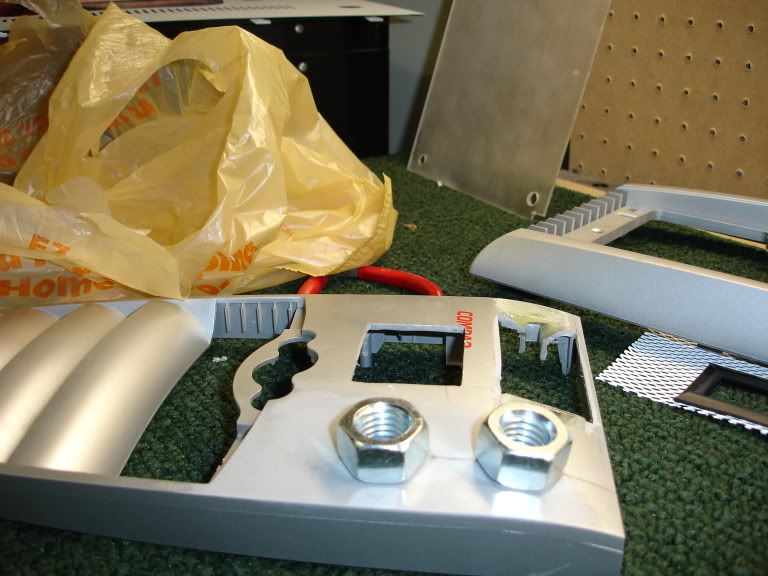
(IMG:http://img.photobucket.com/albums/v305/haloloser/renamenewnutboltclose.jpg)
i got some little nuts and bolts for some nice accents. remember, polished industrial. after a buffing those things will be blingin.
Post by: haloloser on August 29, 2005, 12:51:00 AM
coat number two on the side panel. the orange peel we all know and love. still have one more wetsand with 600, and some clear at this poing. id give the paint another week or so to finish.
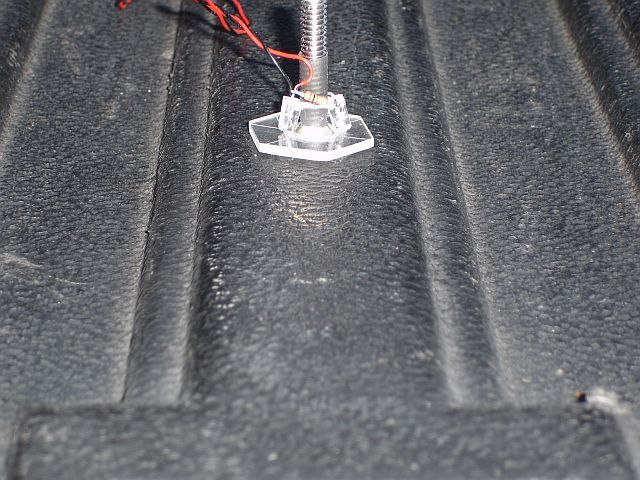
(IMG:http://img.photobucket.com/albums/v305/haloloser/frostedplex.jpg)
ill be using a frosted piece of plex to cover the hole in the back of the case that i made from removing the i/o's. it will be attached with some custom brackets, and more of those accent bolts.
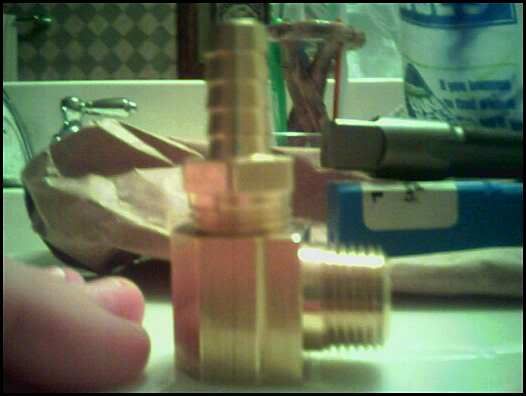
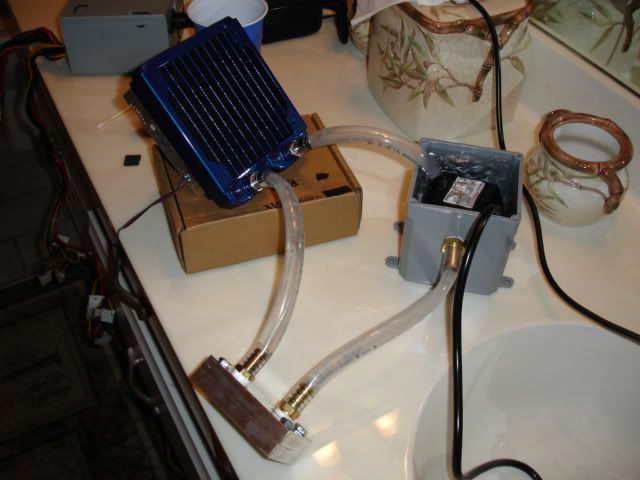
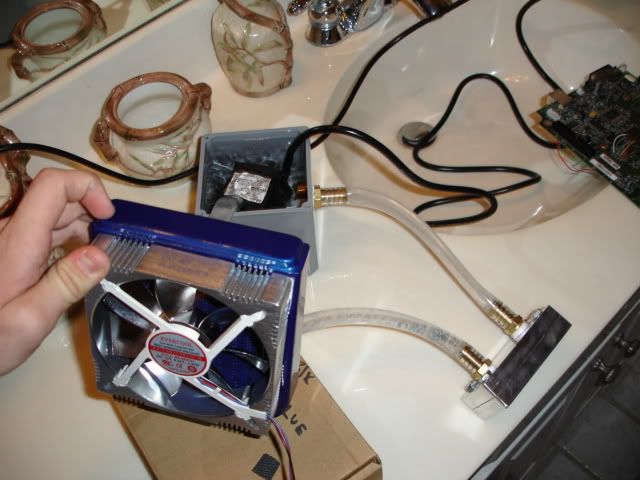
(IMG:http://img.photobucket.com/albums/v305/haloloser/inletinresaftertap.jpg)
this is a pic of the underground electrical box that im using for the res/submersable pump house. ive used a 1/2" id hose barb to tap a hole in the side for the returning water.
(IMG:http://img.photobucket.com/albums/v305/haloloser/resleaktestwflash.jpg)
after the addition of some teflon tape, i took the box for a leak test with the newely acquired submersable pond pump. it pumps 200gph, and with 5ft of head pressure its an amazing deal at 18.00us.
(IMG:http://img.photobucket.com/albums/v305/haloloser/resleaktestwoutflash.jpg)
another shot.
(IMG:http://img.photobucket.com/albums/v305/haloloser/testfitwidowbest.jpg)
here we have the window test mounted. i didnt want to drill the bolt holes in the finished paint job so i went ahead and did it.
(IMG:http://img.photobucket.com/albums/v305/haloloser/windowtestfitwithbolts.jpg)
another shot.
tomorrow ill put some more pics up. tell me what you think. i dont want to hear anything negative about watercooling an xbox being a rediculous idea. trust me, i completely understand that it is, and i wont get any prefomance upgrades with it either. the way i look at it is, no xbox ever really needed a terabyte of memory, but it was done, and done well. as long as i do a good job, ill be fulfilling the goals of a modder. until next time.
-haloloser-
Post by: Agrooreo on August 29, 2005, 01:02:00 AM
Post by: zweef_jr on August 29, 2005, 03:58:00 AM
Post by: bosstitan187 on August 29, 2005, 05:14:00 AM
this thign i tight as hell keep us posted
Post by: GamerKid8987 on August 29, 2005, 05:58:00 AM
 looks like pamela anderson in a bikini:)
Post by: COTA-GodlyOne on August 29, 2005, 06:46:00 AM
QUOTE(GamerKid8987 @ Aug 29 2005, 02:09 PM)
wow lol,havent seen that before :blink: looks like pamela anderson in a bikini:)

yup, completly fabricated, and wet.
Post by: blue bandicoot on August 29, 2005, 09:15:00 AM
Post by: BuddyLeeX on August 29, 2005, 09:27:00 AM
Post by: Granulated on August 29, 2005, 10:50:00 AM
1. The side window would have been great by itself. The etching would have been great by itself. Together, it just doesn't quite look right...maybe that's just me, but I would almost try to window the other side of the case and put the etching there. Probably too late for that.
2. The etching. Great work! I did a case themed on the Halo 2 Limited Edition case, and I wanted to etch the logo, but I've never etched before. I spraypainted. What comes in the etching kit?

(Damn chrome spraypaint...fingerprinted to hell. I wish I could find the pictures I took right after I finished it)
3. Does the trapdoor actually open? That's freakin sweet!
Post by: neb15 on August 29, 2005, 11:33:00 AM
i think itll be awsome when done.
Post by: haloloser on August 29, 2005, 01:38:00 PM
i got my pump from ebay because i live in a small town. i checked some local pet stores and hardware stores, but noone carried a pump that could do what i wanted it to for a decent price. if they did, it was too big for my need. if you are interested in a good small pump check out salemoreforless at ebay. he had 99.3% positive feedback, and shipped super fast. i ended up getting it on the shipping, but the object was farily heavy when packed, so it was understandable.
finally, a mini update.
(IMG:http://img.photobucket.com/albums/v305/haloloser/uvledsandresistors.jpg)
i came home today from school to find that my leds had arrived. 100 uv leds and 100 free 470 ohm resistors.
(IMG:http://img.photobucket.com/albums/v305/haloloser/wetboxroxmysox.jpg)
nice effect i think. its gonna look good with some uv dye in the water.
does anyone know how many amps are on the 12v rail in the stock xbox psu. if anyone could let me know that would be great.
Post by: GamerKid8987 on August 29, 2005, 01:49:00 PM
Post by: bosstitan187 on August 29, 2005, 01:52:00 PM

Post by: COTA-GodlyOne on August 29, 2005, 01:54:00 PM
Post by: MakeGalzSayDamn on August 29, 2005, 02:09:00 PM
- keep us updated mate!
Post by: porsche6714 on August 29, 2005, 02:14:00 PM
Post by: haloloser on August 29, 2005, 10:00:00 PM
top left bracked riveted in. the excess will be removed when i get a new dremel.
shot of the middle bracket.
this isnt the final mount, i just wanted to get an idea of what i was working with. ill either mount the radiator on the back window or on the top like a blow hole.
another shot.
final product will have some nice window trim to give it a proffesional look. just an idea of what it will look like.
Post by: IAmCanadian on August 30, 2005, 12:51:00 AM

Post by: EmTea on August 30, 2005, 04:23:00 AM
Keep up the nice work.
Post by: (((XYU))) on August 30, 2005, 04:55:00 AM
Post by: haloloser on August 30, 2005, 09:47:00 PM
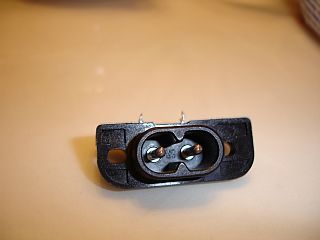
Model PP-388
Type Submersible
Size 2.10" x 2.0" x 2.4"
GPH (gallons per hour) 200
Approx. Max. Head Lift 5 ft
Watts (115v/60h) 12
Discharge Size 5/8" OD
Recommended Tubing Size 5/8" ID
Power Cord Length 6 ft
Manufacturers Warranty 1 Year
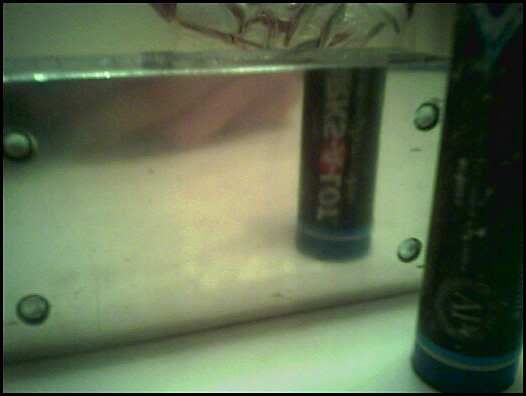
this is an image of it. its so compact it was awsome for its purpose. i absolutely love it.

salemoreforless is the seller with 99.3 % positive feedback.
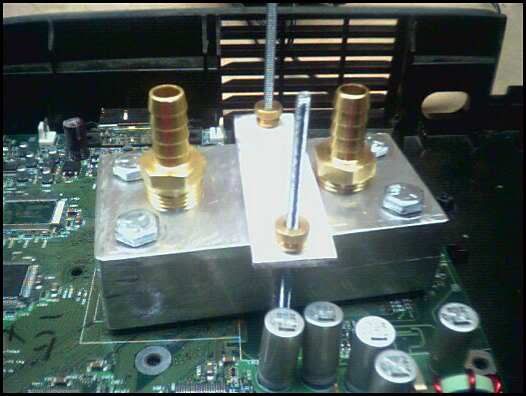
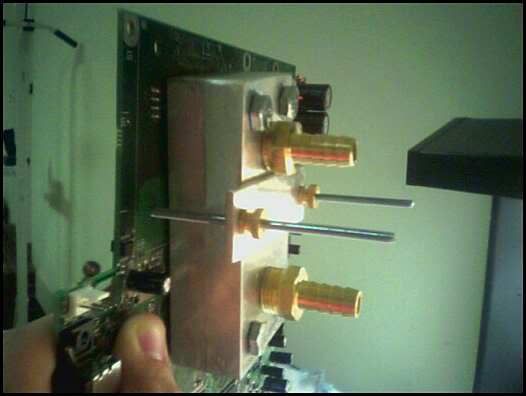
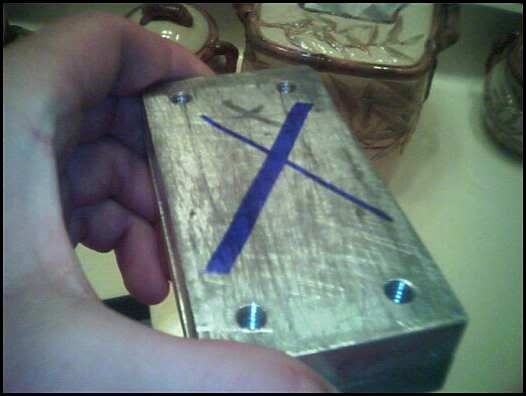
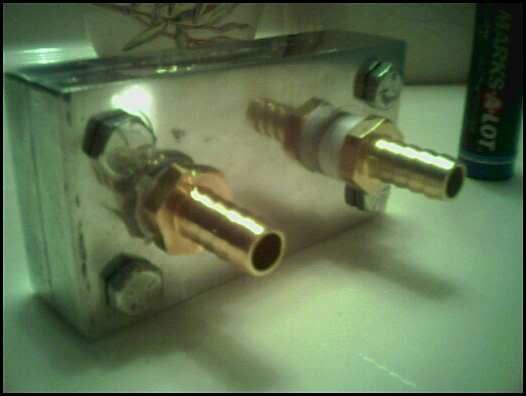
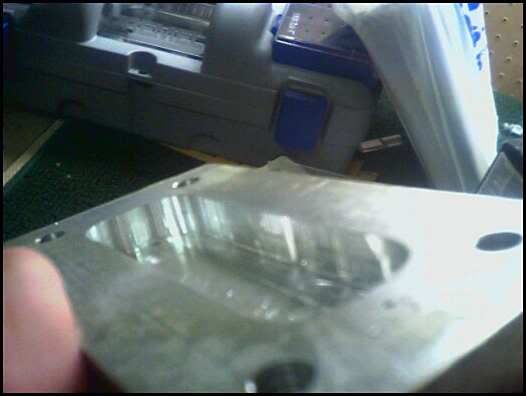
also, my grandfather an i took a good portion of the afternoon figuring out how to design the block. he though smaller id tubing was the way to go, so we both had to sacrifice a little bit settling with 3/8" id barbs. with the cpu and its chipset being so close together we decided to go with one large block instead of two. since we are using two 1/2" thick bars of 6061 aluminum that will be bolted together i think it will work well, considering this isnt a cutting edge computer or anything. also we went with one large channel running the length of the block with two outlets on each side. its a mixture of cross drilling and routing. ive made a few very rough concept sketches.
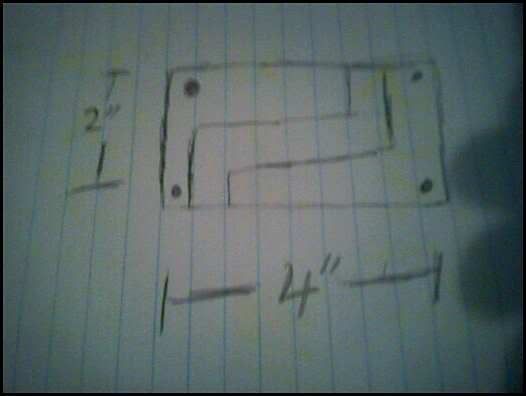
top veiw of the tunneling on the block. both top and bottum sides will be routed.
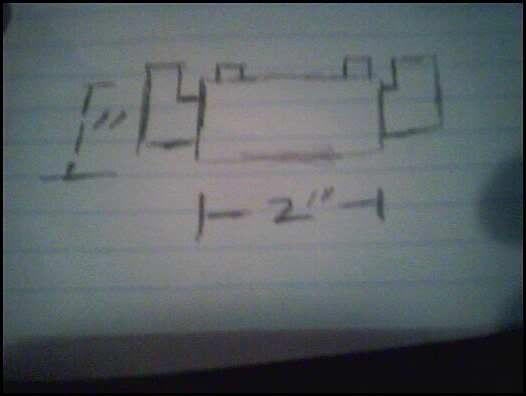
side view.
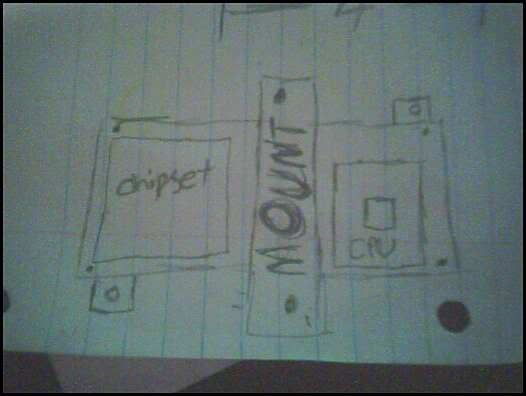
finally, with the addition of the large block i will have not trouble mounting like i would have with two smaller blocks. ill just be able to use the existing holes in the mainboard.
in closing, i had to help a friend this evening, so i couldnt get a dremel. tomorrow ill have to find a 3/8" npt pipe tap so we can complete the blocks hopefully by tomorrow evening. in addition, i was curious as to how i was going to be able to use an xecutor 3 chip i had installed on a v1.0 that had broken, and the i realized. the box that i play xbox live on has already had an x2.6 on it. so all ill have to do is add the chip, and reflash a 1.6 bios. all the apps are already installed. chances are once i finish the case ill work on a dual hdd mod with a 250gig. does anyone know how hard it is to reflash a bios like that, or if its even possible? i usually stay away from the software part of xbox modding. untill tomorrow hopefully.
-haloloser-
Post by: wanny1 on August 31, 2005, 08:33:00 AM
Post by: haloloser on August 31, 2005, 09:47:00 PM
when he pulled this chunk of metal from behind the counter i was expecting to pay around 30 bucks only because it was my last resort, but it only ended up being like ten bucks.
also picked up a elbow for the block so i dont have to run the hose so close to the board.
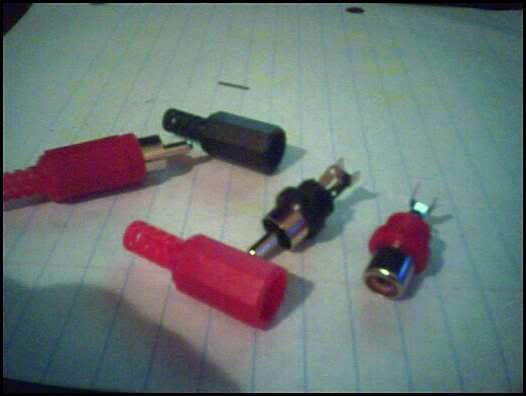
finally picked up some rca jacks, so i can wire up my hippad so that i can remove it easily without having to desolder it from the motherboard.
untill next time.
-haloloser-
Post by: bosstitan187 on September 01, 2005, 04:53:00 AM
Post by: haloloser on September 01, 2005, 05:03:00 PM

we began with a .5" thick chunk of 6061 aluminum.
next we cut two 2"x4" chunks off, and tack welded them together. this way we could drill four bolt holes in each corner. they surve two perposes: 1. to sandwich the blocks together 2. astetics or however you spell it.

we drilled the bolt holes, and tapped the bottum portion of the block. we grinded the weld off, and got a test bolt going on. looks pretty good.
hopefully by the end of next week i will be leak testing them. at this point the hose barb holes till need to be drilled and tapped, and the channel needs to be milled out. im going to work on the hippad, and maybe i might get to positioning the controller ports tonight. ill post more pics later. untill next time, dont buy gas unless you dont have to.
-haloloser-
Post by: mr. newbie on September 01, 2005, 06:03:00 PM
Post by: aepuppetmaster on September 01, 2005, 07:07:00 PM
- puppetmaster
Post by: haloloser on September 01, 2005, 08:02:00 PM
as for the aluminum. when i first concieved this project it was because i had all kind of extra parts laying around, and this case was just begging for some kind of mod. in the beginning this was supposed to be a low budget learning experience for my upcoming pc mod. well, this has turned into a full blown project now. keeping with the low budget i talked to my grandad about a month or more ago about building something to cool a computer, showing him examples with copper. he said they use .5" thick aluminum where he works sometimes, so he checked for me and they had a large piece he saved for me. aluminum actually conducts better then copper (only by a few degrees), and its almost as soft. so with it being free, and it being able to conduct relatively the same, i went with it.
there will be one large channel running through the center of the block with two 3/8" id hose barbs are each end. when the block is finished being rounted a layer of plumbers goop will be applied to the inside of both the top and bottum blocks, and finally sandwiched together using the bolts in the four corners.
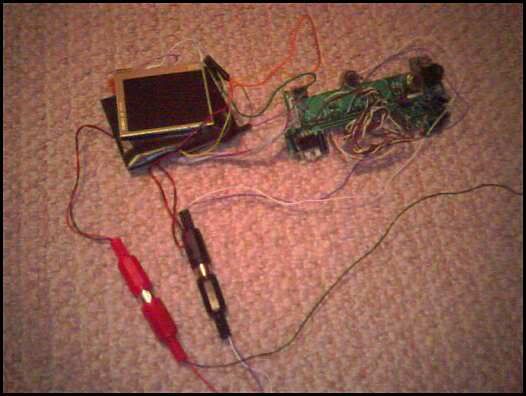
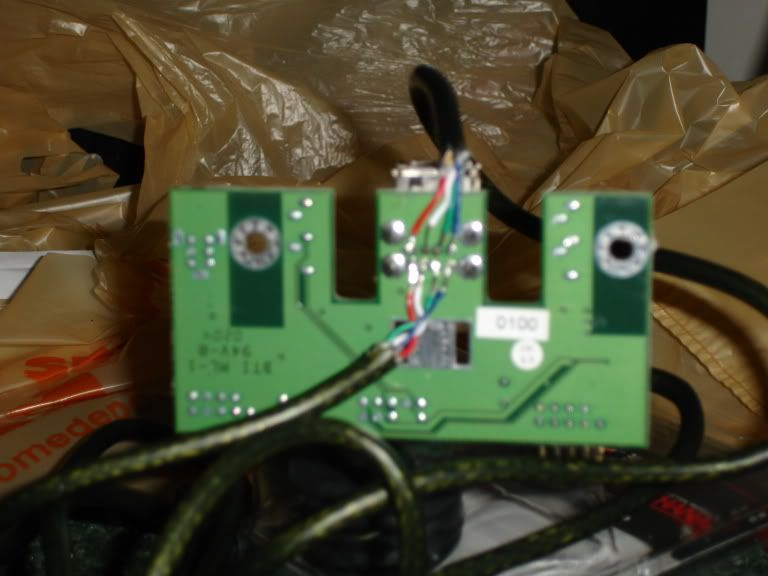
this is a pic of the lcd laying beside the rca jacks. i used one for video and its ground, and another for 12v and its ground. i wont be posting any pictures untill at least tuesday. hope you enjoy.
a final teaser.

dont mind the evo x, it wont be that way for long.
Post by: aepuppetmaster on September 01, 2005, 08:24:00 PM
Post by: JaredC01 on September 01, 2005, 08:49:00 PM
Aluminum dissipates heat much quicker than copper does, but can only absorb a small amount of heat at one time.
Copper, on the other hand, dissipates heat much slower than aluminum, but can absorb more at one time.
Since copper can pull out large amounts of heat, it makes it more effective than aluminum at directly absorbing heat. Since aluminum can dissipate heat very quickly, it makes it more effective at removing the absorbed heat than copper.
This is why you most commonly find aluminum heatsinks with copper cores.
Post by: aepuppetmaster on September 01, 2005, 08:55:00 PM
Post by: JaredC01 on September 01, 2005, 08:57:00 PM
QUOTE(aepuppetmaster @ Sep 1 2005, 10:06 PM)
im still skeptical, high end heat sinks are all copper (like my hyper 6, my old venus 12), middle of the road stuff is copper core and aluminum (to save cost) and low end oem stuff is aluminum, wouldn't u see no copper heatsinks if it were bad for that type of think. just my 2 cents. sorry to et off topic tho, taking the glorry away from ur mod.
-
Title: Project Wetbox Wip
Post by: aepuppetmaster on September 01, 2005, 09:01:00 PM
-
good point but than i'll come back with this, take the xp-90 for example, and its more $$ brother the xp-90c (the c standing for copper). they have the exact design and same fan size/cfm but the higher end and beter performing one is made out of copper.
-
Title: Project Wetbox Wip
Post by: JaredC01 on September 01, 2005, 09:04:00 PM
-
Post by: aepuppetmaster on September 01, 2005, 09:01:00 PM
Post by: JaredC01 on September 01, 2005, 09:04:00 PM
QUOTE(aepuppetmaster @ Sep 1 2005, 10:12 PM)
good point but than i'll come back with this, take the xp-90 for example, and its more $$ brother the xp-90c (the c standing for copper). they have the exact design and same fan size/cfm but the higher end and beter performing one is made out of copper.
-
Title: Project Wetbox Wip
Post by: aepuppetmaster on September 01, 2005, 09:07:00 PM
-
2nd'd this will be my last off topic post, and its purpose is to simple state that i and i hope everyone else (even tho it was only the 2 of us) stop any further discusions about the diffrence and pro's/cons of copper and aluminum.
-
Title: Project Wetbox Wip
Post by: haloloser on September 01, 2005, 10:21:00 PM
-
well i cant find the article where i actually read that a silver waterblock outpreformed its copper opponent, but its not something i would lie about. either way, copper or not, im not cooling a 3400+ overclocked to heck. i mean we are wroking with a pentium three or something to that effect, and if the cpu heatsink doesnt need a fan, im sure anything with water running through the middle of it will work just fine, and be alot more quite then a 80mm running at 12v. im not sure if im going to order a pc radiator or just get a heatercore from a car. ill find out tuesday. untill then.
-haloloser-
-
Title: Project Wetbox Wip
Post by: haloloser on September 06, 2005, 09:46:00 PM
-
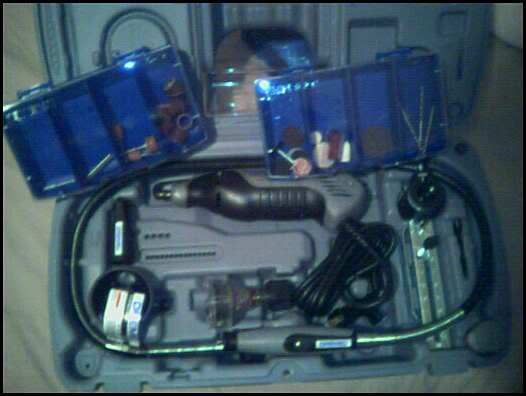
i just got back from the beach yesterday. i havnt actually done a whole lot, but i wanted to make a wee update. i really didnt do anything but work out where to put the xlcd and hippad. anyways, this is my new dremel, i took the old one back and they exchanged it no questions asked. oh, i swapped the x2.6 for the x3, and im amlost finished with the 5th harry potter book.
-
Title: Project Wetbox Wip
Post by: haloloser on September 07, 2005, 04:51:00 PM
-
i was gonna mount the lcd screen today, but a buddy of mine came over so i just worked on the pain a wee bit. tomorrow ill have some good stuff to post.


just some shots of the reflection. im not really sure if im going to repaint it or not. up close it has some imperfections i want to get rid of. for now its fine. we'll be getting a new camera probably by the end of this week, so thats awsome news.
-
Title: Project Wetbox Wip
Post by: haloloser on September 08, 2005, 08:23:00 PM
-
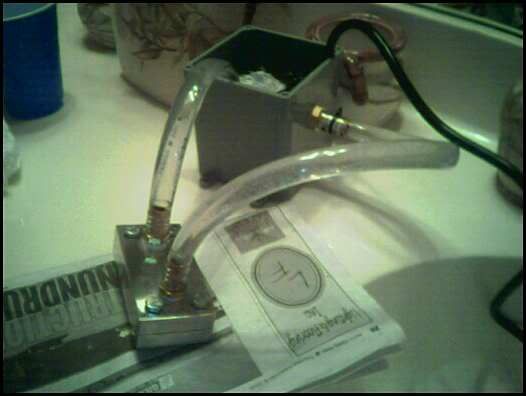
the waterblock was finished today. i bought some rubber gromets along with some bolts to hold it down , and thumb screws. im going to athens this weekend, but when i get home ill order a radiator, heatshrink, and a few fans. i just have a few shots of the block. i was planning on working on the front panel today, but i got busy doing this and at lowes. i actaully found out how to use to dremel to polish things finally, and im very pleased with the results.
this is a test mount on a brokin motherboard i have. it obviously wont be laying down in the computer...
i was skeptical to just have the one support running across the middle, but it did the job great. in not actually going to stay like this. i have some more plans to spruce the look of it up.
yuck, let the lapping begin!!!
the block is back together with some silicone drying. you cant tell, but ive polished the bolts too, and they look really good as well.
tadaa.
another, tadaaa.
almost forgot the channel. its probably 3/16" of and ince from the bottum.
i really appreciate all the work my grandad did on this with me, and for me. i think he did an amazing job, and he'll probably be helping me more before the project comes to an end. monday ill leak test this beast. until next time.
-haloloser-
-
Title: Project Wetbox Wip
Post by: aepuppetmaster on September 08, 2005, 08:27:00 PM
-
 .
.
-
Title: Project Wetbox Wip
Post by: haloloser on September 11, 2005, 11:59:00 PM
-
leak tested the waterblock today when i got back home, and i was having a few slight leek problems with the hose barbs. to fix the problem i added a little silicone to the barb and im waiting on it to dry. im gonna try and scrounge up a y splitter so i can start on my dual hdd mod. until next time.
-haloloser-
-
Title: Project Wetbox Wip
Post by: SpookieStylez on September 12, 2005, 12:40:00 AM
-
sS
-
Title: Project Wetbox Wip
Post by: haloloser on September 12, 2005, 10:24:00 PM
-
little update. i worked on homework on and off all day. a guy brought his xbox to me to be modded also, so i worked on that for a bit as well.
at any rate, i did a weee bit, and these are the pics.

tadaaa, my dad got a new camera today, but i couldnt use it because it was charging. its a sony cybershot p200. that means i have good pics on the way.
i leak tested again before 48 hours because i couldnt wait for it to dry completely. the silicone did its job, and it didnt leak anyways.
just another little shot of my little makeshift loop.
picked up a dpdt switch for my dual hdd mod, and i found a good place to mount it. i also have some hinges for the trapped door, but i forgot to take a picture of them.
a little hippad teaser. this piece of plex will be flush mounted in the front panel. dont worry about the A:/ drive slot. it will be bondoed over.
http://www.dangerden...=3&cat=5&page=1
i orderd a danger den black ice pro radiator. its only big enough for one 120mm fan, but i think it will be more then enough for the xbox.
http://www.dangerden...4&cat=37&page=1
they also have really good deals on this fan. its 120mm and 80cfm. i was thinking about going with a uv blue clear fan, but i thought this matched the theme better. we will know when it gets here.
http://www.dangerden...0&cat=55&page=1
finally stoped buying when i got the uv blue die. it should be shipped out tomorrow so hopefully i will get it before the end of the week.
sorry guys, no pics. i cant insert dynamic links. ill post them when they come in.
-
Title: Project Wetbox Wip
Post by: aepuppetmaster on September 12, 2005, 11:06:00 PM
-
once agian i got to hand it to u. this make me wish i had the $$$ to water cool my xbox, or pc for that mater.
-
Title: Project Wetbox Wip
Post by: Hozy on September 13, 2005, 04:51:00 AM
-
Sorry to comment, Looking good but that channel in your custom waterblock, A waterblock i made for my s939 amd, it's better heat dispersion & cooling if you have a channel that's sort of like a maze/snail trail then to have just a tunnel for the water to go though, because thats just like the waters passing through doing nothing,
Also a little wary about the waterblock, dont crush the gpu/cpu & if you want to secure that SOB use some Arctic Silver thermal "ADHESIVE"
Apart from that, Mad props
Regards
HoZy
-
Title: Project Wetbox Wip
Post by: haloloser on September 13, 2005, 08:18:00 AM
-
i know its better heat dispersion with a snaking channel, and i also knew if someone came in here that knew much about watercooling that they would say something about the channel. you have to take into account, im not overclocking (as if i could if i wanted) or intense gaming for like 5 hours at a time, and the stock heatsink doesnt even have a fan. i really dont think its a very big deal though. to be honest, i think the block would cool just about as good as the stock heatsink with no water in it. that thing is a piece of junk. i appreciate the feeback, but the block has already been made. if it doesnt work ill make a new one, but you have to agree, it should do at least as well as the stock cooler. its also going to look a heck of alot better, and be more quiet then an 80mm running at 12v.
as for the mounting bracket. i really dont think that the arctic silver adhesive would have the umph to hold this thing on. im in the process of looking for some tension springs to go under the thumb screws. dont be nervous by the look of it on that board because its broken. also, you have to remember that the block requires a good bit of pressure (look towards the stock cooler again).
i appreciate the friendly advice, but ive done quite a bit of research and testing on this subject, and i feel as if the measures ive taken will do the job. i didnt put all the things that might make negative effects happen in here because ill do that at the end when its finished.
thanks
-haloloser-
-
Title: Project Wetbox Wip
Post by: Hozy on September 13, 2005, 04:09:00 PM
-
Regards
HoZy
-
Title: Project Wetbox Wip
Post by: haloloser on September 14, 2005, 12:48:00 AM
-
ok i figured the dash thing out, but i have the craziest news. so ive been studying all day for this awful american gov. test that im having a really bad day. i finally figure out all that garbage with the dash out, and then im like well hey im not really tired. i turn on xbox live, and get into a rumble training game. freaking ogre 2 is in the game with me. i got raped needless to say. tomorrow ill be done with the test, and have less to worry with as far as school is concerned. ill post some good pics tomorrow hopefully.
-haloloser-
-
Title: Project Wetbox Wip
Post by: haloloser on September 14, 2005, 09:53:00 PM
-
ok so i found some kind of scratch remover/polish stuff that my dad has today when i was washing my truck. i threw a coat on the top of the thing i painted and i was amazed.

i havnt figured out this new camer yet. i cant get the detail i want in some shots, and i pic of tiny details in others that you dont see in real life.
another shot. it still looks very good considering, or at leas i think so.
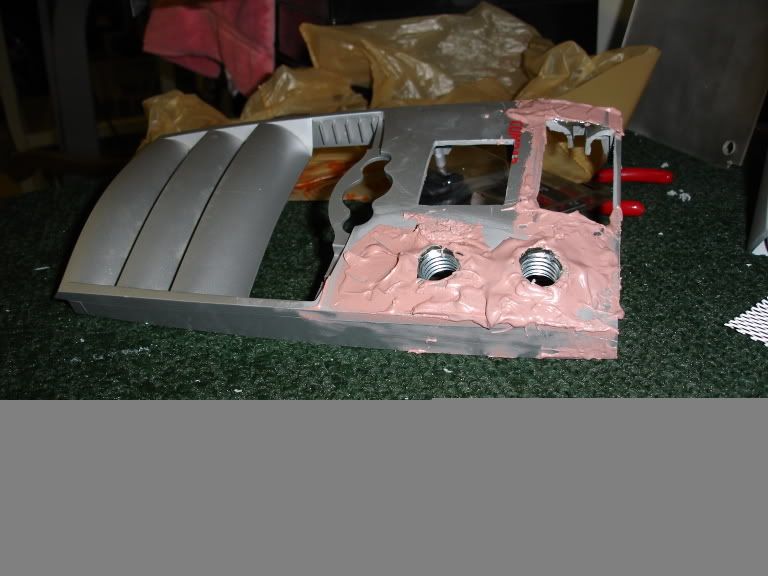
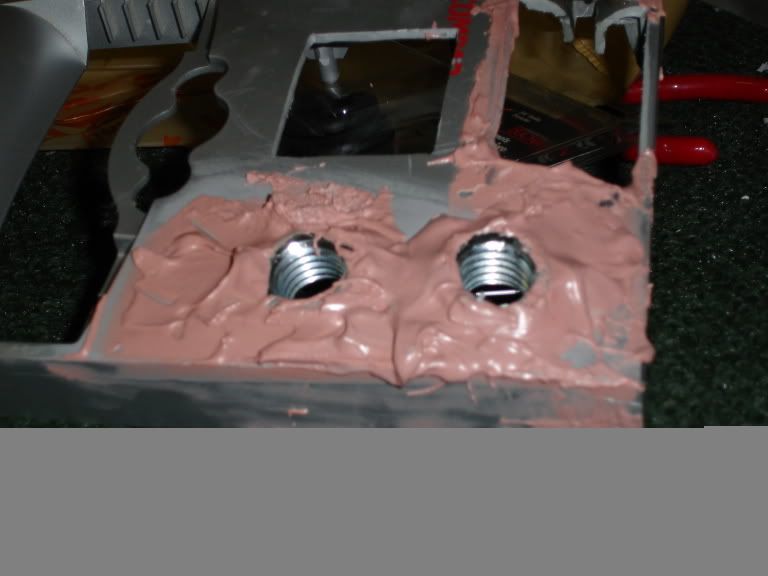
the next step was to mount the dvd drive. i was dreading this task, but with the help of these new clamps it was a breeze. i just clamed it, used the adjustable square to make sure it was level. i finally marked where the top and bottum ended with the sharpie. i took the chassi to the work table and blasted some rivets on the top and bottum as a guide, and to hold it up. i put one behind it also to hold it in place... i also forgot to take a pciture of that, but ill show you what i have thus far.
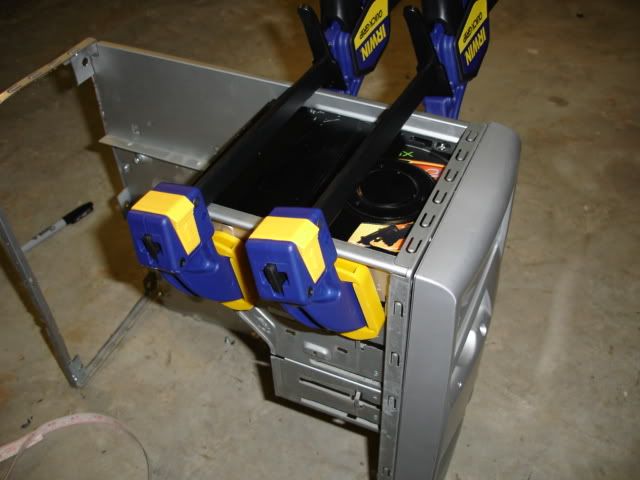
in this photo the drive is mounted, and the piece of plex that will soon be frosted is sitting in front of it so i could make an accurate measurment. the xlcd will but under the dvd drive. im not looked forward to that because im actually going to have to build a mounting bracket.
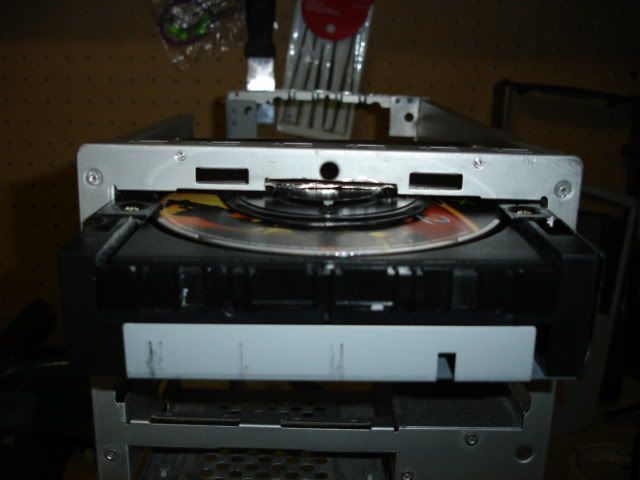
i had to notch the chassi so that the drive spindle wouldnt hit the top and stop it.
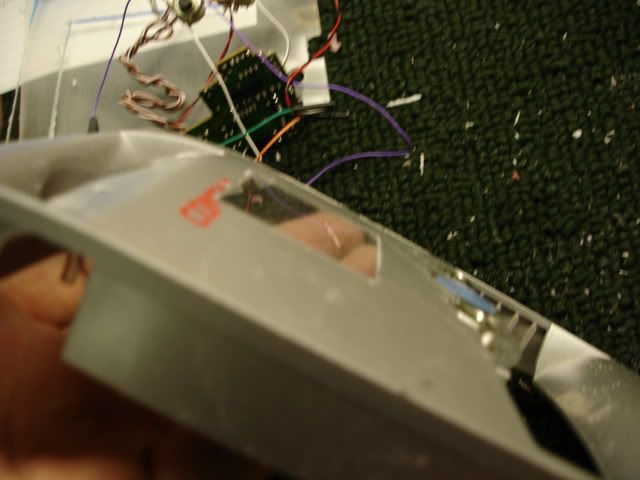
this is where the camera starts to lose detail. i flush mounted that window for the hippad screen, it looks really nice in real life.
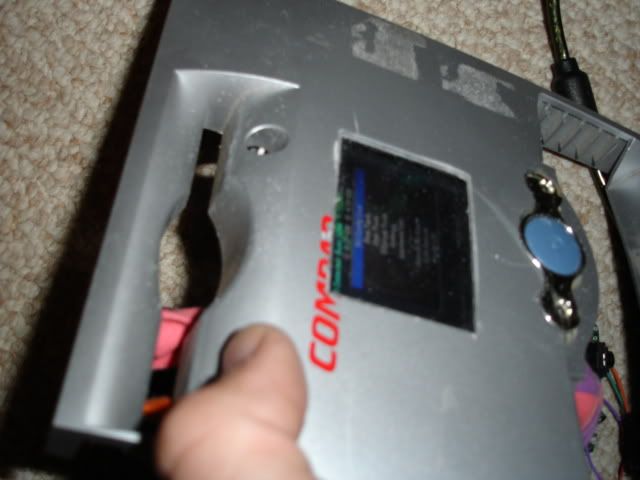
pici with x3cl. its not actualy mounted in these pics but ill be using double sided tape to secure it.

final blury shot of angelina. its the skin for my dash. ill do a little bit more work tomorrow.
hopefully next time ill get some better pics. till next time.
-haloloser-
-
Title: Project Wetbox Wip
Post by: brojimh on September 15, 2005, 12:07:00 PM
-

-
Title: Project Wetbox Wip
Post by: haloloser on September 15, 2005, 09:21:00 PM
-
a dude came over today to get a little help on his box, so i didnt get a whole lot done. my stuff came in today, but i have a few more things to order tonight before im completely finished ordering for this project. here are the pics.
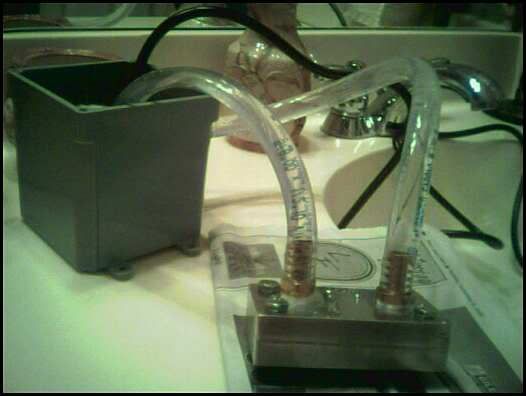
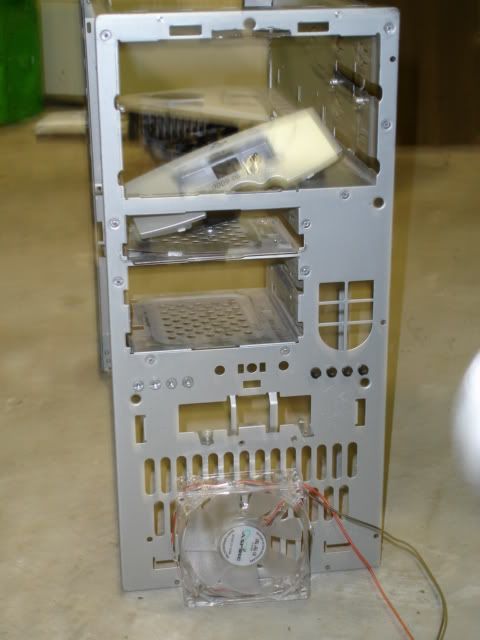
first order of buisness was to hook the loop up and get my testin on. i was super excited to get this thing cranked up.
if you look in the background you can see my tester psu for the fan. its a bit louder then i want it to be, im probably going to add a 7v switch since i will probably play live on it more then anything.
dont worry about the white on the fan, it wll be painted back. also, expect the frame of the fan to be just as shiny as the waterblock before its all over with.
the next order of buisness was to figure out a method for mounting the xlcd. that sheet of plex will be frosted all except for infront of the blue portion of the lcd. the dvd drive will also have a frosted plex bezel.
this is what i came up with. its just an l shaped bracket that will be riveted to the inside of the 5 3/4" drive bay slot. this is just the right bracket, i still have one more.
another shot. im afraid that im going to have trouble finding a srew or bolt small enough to fit thorugh thos holes. its proabaly an 1/8" which sucks.
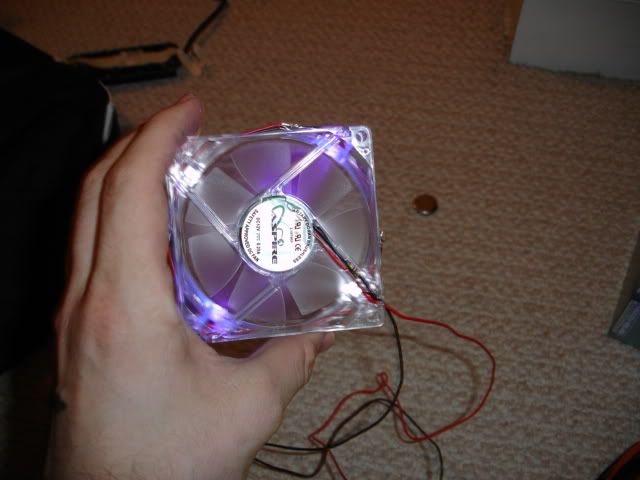
lastley i had a clear 80mm fan laying around begging for some leds.
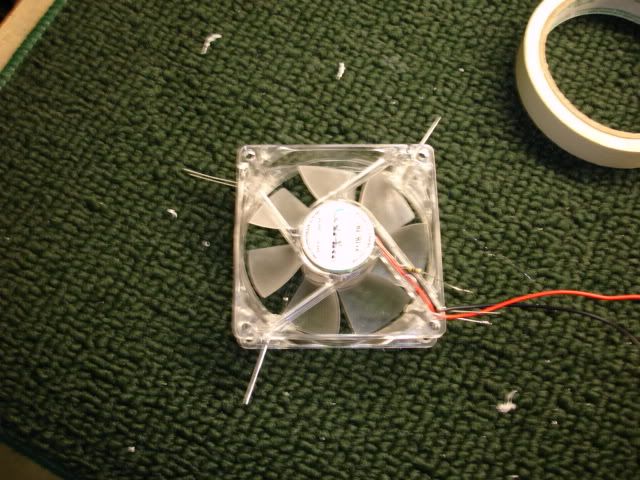
here we go wiring it up, the leds have been glued in place with hot glue.
as if you could tell from the blury pic, there is a resistor coming straight from the fan's pcb. it was wired that way so that i wouldnt have extra wires coming out everwhere.
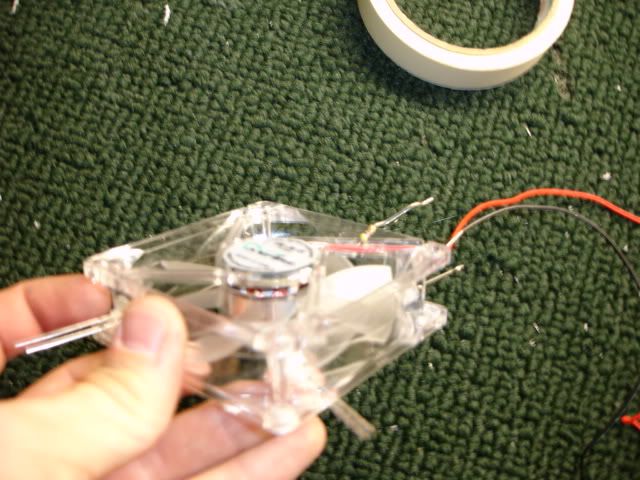
it will probably go right here, but i havnt decided yet.
this is the actual color of the fan. it has two whte and two uv leds. i took this pic with the lights and flash, so it doesnt show how bright it is.
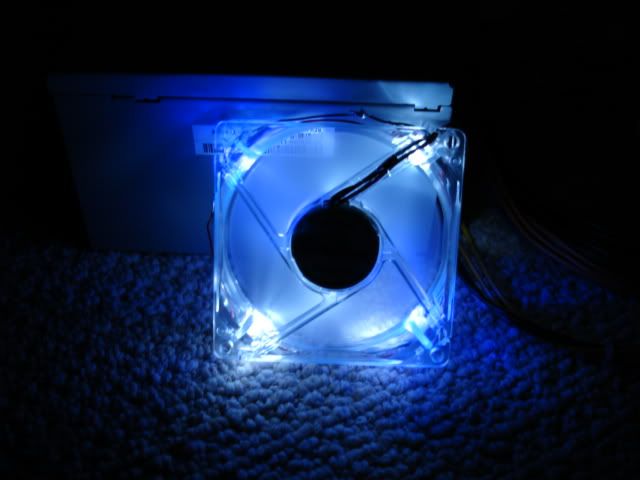
ok it looks really nice in the dark, but it isnt blue. i guess it just has something to do with the ultra violet light that makes it appear blue. im going to athens, ga this weekend, but when i get back ill do some more.
-haloloser-
-
Title: Project Wetbox Wip
Post by: KoDKingVegeta on September 17, 2005, 09:35:00 PM
-
Post by: aepuppetmaster on September 01, 2005, 09:07:00 PM
Post by: haloloser on September 01, 2005, 10:21:00 PM
-haloloser-
Post by: haloloser on September 06, 2005, 09:46:00 PM
Post by: haloloser on September 07, 2005, 04:51:00 PM
just some shots of the reflection. im not really sure if im going to repaint it or not. up close it has some imperfections i want to get rid of. for now its fine. we'll be getting a new camera probably by the end of this week, so thats awsome news.
Post by: haloloser on September 08, 2005, 08:23:00 PM
this is a test mount on a brokin motherboard i have. it obviously wont be laying down in the computer...
i was skeptical to just have the one support running across the middle, but it did the job great. in not actually going to stay like this. i have some more plans to spruce the look of it up.
yuck, let the lapping begin!!!
the block is back together with some silicone drying. you cant tell, but ive polished the bolts too, and they look really good as well.
tadaa.
another, tadaaa.
almost forgot the channel. its probably 3/16" of and ince from the bottum.
i really appreciate all the work my grandad did on this with me, and for me. i think he did an amazing job, and he'll probably be helping me more before the project comes to an end. monday ill leak test this beast. until next time.
-haloloser-
Post by: aepuppetmaster on September 08, 2005, 08:27:00 PM
.
Post by: haloloser on September 11, 2005, 11:59:00 PM
-haloloser-
Post by: SpookieStylez on September 12, 2005, 12:40:00 AM
sS
Post by: haloloser on September 12, 2005, 10:24:00 PM
at any rate, i did a weee bit, and these are the pics.
tadaaa, my dad got a new camera today, but i couldnt use it because it was charging. its a sony cybershot p200. that means i have good pics on the way.
i leak tested again before 48 hours because i couldnt wait for it to dry completely. the silicone did its job, and it didnt leak anyways.
just another little shot of my little makeshift loop.
picked up a dpdt switch for my dual hdd mod, and i found a good place to mount it. i also have some hinges for the trapped door, but i forgot to take a picture of them.
a little hippad teaser. this piece of plex will be flush mounted in the front panel. dont worry about the A:/ drive slot. it will be bondoed over.
http://www.dangerden...=3&cat=5&page=1
i orderd a danger den black ice pro radiator. its only big enough for one 120mm fan, but i think it will be more then enough for the xbox.
http://www.dangerden...4&cat=37&page=1
they also have really good deals on this fan. its 120mm and 80cfm. i was thinking about going with a uv blue clear fan, but i thought this matched the theme better. we will know when it gets here.
http://www.dangerden...0&cat=55&page=1
finally stoped buying when i got the uv blue die. it should be shipped out tomorrow so hopefully i will get it before the end of the week.
sorry guys, no pics. i cant insert dynamic links. ill post them when they come in.
Post by: aepuppetmaster on September 12, 2005, 11:06:00 PM
Post by: Hozy on September 13, 2005, 04:51:00 AM
Also a little wary about the waterblock, dont crush the gpu/cpu & if you want to secure that SOB use some Arctic Silver thermal "ADHESIVE"
Apart from that, Mad props
Regards
HoZy
Post by: haloloser on September 13, 2005, 08:18:00 AM
as for the mounting bracket. i really dont think that the arctic silver adhesive would have the umph to hold this thing on. im in the process of looking for some tension springs to go under the thumb screws. dont be nervous by the look of it on that board because its broken. also, you have to remember that the block requires a good bit of pressure (look towards the stock cooler again).
i appreciate the friendly advice, but ive done quite a bit of research and testing on this subject, and i feel as if the measures ive taken will do the job. i didnt put all the things that might make negative effects happen in here because ill do that at the end when its finished.
thanks
-haloloser-
Post by: Hozy on September 13, 2005, 04:09:00 PM
Regards
HoZy
Post by: haloloser on September 14, 2005, 12:48:00 AM
-haloloser-
Post by: haloloser on September 14, 2005, 09:53:00 PM
i havnt figured out this new camer yet. i cant get the detail i want in some shots, and i pic of tiny details in others that you dont see in real life.
another shot. it still looks very good considering, or at leas i think so.
the next step was to mount the dvd drive. i was dreading this task, but with the help of these new clamps it was a breeze. i just clamed it, used the adjustable square to make sure it was level. i finally marked where the top and bottum ended with the sharpie. i took the chassi to the work table and blasted some rivets on the top and bottum as a guide, and to hold it up. i put one behind it also to hold it in place... i also forgot to take a pciture of that, but ill show you what i have thus far.
in this photo the drive is mounted, and the piece of plex that will soon be frosted is sitting in front of it so i could make an accurate measurment. the xlcd will but under the dvd drive. im not looked forward to that because im actually going to have to build a mounting bracket.
i had to notch the chassi so that the drive spindle wouldnt hit the top and stop it.
this is where the camera starts to lose detail. i flush mounted that window for the hippad screen, it looks really nice in real life.
pici with x3cl. its not actualy mounted in these pics but ill be using double sided tape to secure it.
final blury shot of angelina. its the skin for my dash. ill do a little bit more work tomorrow.
hopefully next time ill get some better pics. till next time.
-haloloser-
Post by: brojimh on September 15, 2005, 12:07:00 PM
Post by: haloloser on September 15, 2005, 09:21:00 PM
first order of buisness was to hook the loop up and get my testin on. i was super excited to get this thing cranked up.
if you look in the background you can see my tester psu for the fan. its a bit louder then i want it to be, im probably going to add a 7v switch since i will probably play live on it more then anything.
dont worry about the white on the fan, it wll be painted back. also, expect the frame of the fan to be just as shiny as the waterblock before its all over with.
the next order of buisness was to figure out a method for mounting the xlcd. that sheet of plex will be frosted all except for infront of the blue portion of the lcd. the dvd drive will also have a frosted plex bezel.
this is what i came up with. its just an l shaped bracket that will be riveted to the inside of the 5 3/4" drive bay slot. this is just the right bracket, i still have one more.
another shot. im afraid that im going to have trouble finding a srew or bolt small enough to fit thorugh thos holes. its proabaly an 1/8" which sucks.
lastley i had a clear 80mm fan laying around begging for some leds.
here we go wiring it up, the leds have been glued in place with hot glue.
as if you could tell from the blury pic, there is a resistor coming straight from the fan's pcb. it was wired that way so that i wouldnt have extra wires coming out everwhere.
it will probably go right here, but i havnt decided yet.
this is the actual color of the fan. it has two whte and two uv leds. i took this pic with the lights and flash, so it doesnt show how bright it is.
ok it looks really nice in the dark, but it isnt blue. i guess it just has something to do with the ultra violet light that makes it appear blue. im going to athens, ga this weekend, but when i get back ill do some more.
-haloloser-
Post by: KoDKingVegeta on September 17, 2005, 09:35:00 PM
QUOTE(haloloser @ Sep 16 2005, 05:32 AM)
a dude came over today to get a little help on his box, so i didnt get a whole lot done. my stuff came in today, but i have a few more things to order tonight before im completely finished ordering for this project. here are the pics.
-
Title: Project Wetbox Wip
Post by: bLiZzArDo on September 17, 2005, 09:44:00 PM
-
Man, that's looking insane, keep up the good work.
-
Title: Project Wetbox Wip
Post by: devilmaycry666 on September 17, 2005, 10:23:00 PM
-

-
Title: Project Wetbox Wip
Post by: Granulated on September 18, 2005, 12:21:00 AM
-
Shaolin's tips to better pictures!
1. Use a tripod! Helps muchos!
2. Proper lighting is essential!
3. The best way to get detail is to back up, and use the digital zoom on a tripod, rather than trying to take close up pictures. Also, make sure you're taking the highest resolution pictures possible. Easy to resize and crop later!
-
Title: Project Wetbox Wip
Post by: freakinshoe on September 18, 2005, 09:06:00 AM
-
looking great,,
and for ppl that dont know, welding aluminum is hard, to do proper u need a high intesity box. i cant weld aluminum, but i weld with mig, tig, and stick everyday, for my job. and what ive gathered welding on aluminum is a pain in the ass.
-
Title: Project Wetbox Wip
Post by: haloloser on September 18, 2005, 02:53:00 PM
-
i didnt actually weld that block together. i man named bud that works for my granddad did it. it really didnt need to be as strong weld, so we tacked it with the mig machine. the idea was that it just needed to stay together for long enogh for us to drill the holes in the block, and then we grinded the welds off. thanks for the tips on the pics. i actually have a wee tripod that ill start using, and i just found out how to adjust the resolution on the pictures, so the next ones i post should be pretty nice. thanks for the tips and compliments.
-haloloser-
-
Title: Project Wetbox Wip
Post by: bucko on September 18, 2005, 03:02:00 PM
-
 nice work so far dude keep it up!!!
-
Title: Project Wetbox Wip
Post by: sorienor on September 20, 2005, 01:54:00 AM
-
More updates!
-
Title: Project Wetbox Wip
Post by: DeadManWalking on September 20, 2005, 03:43:00 AM
-
-
Title: Project Wetbox Wip
Post by: The_Vulture on September 20, 2005, 04:06:00 AM
-
Im new to this and that's beyond my hopes but DAMN that looks sweat and sounds freaking cool , who cares what other people think if ya wanna do it do it!
-
Title: Project Wetbox Wip
Post by: haloloser on September 20, 2005, 08:50:00 PM
-
so today i was planning on getting alot more finished but i didnt. i think thats the story of my life. i was a little disapointed when i tried to polish the fan, and after about 20 minutes of wetsand and then some polish i hadnt made a dent. i believe im going to leave that for a rainy day because i was very frustrated with it. hopefully i can get a little more done tomorrow, but im not sure because of this large algebra test i have coming up.
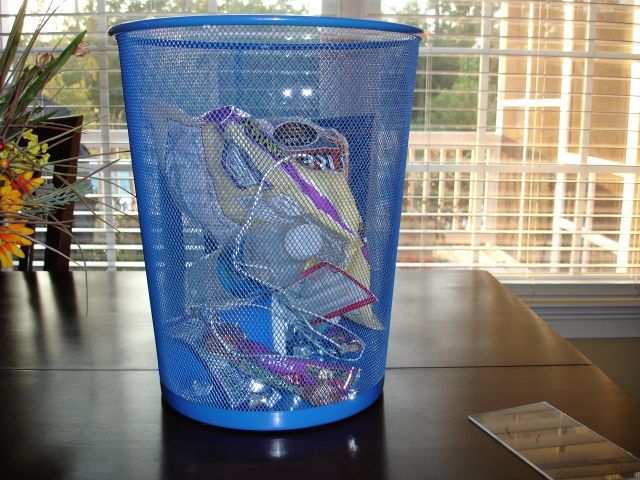
i got this idea when messing with computers. i have been using this for a trashcan, but when i explained what i was going to use him for he was glad to help.
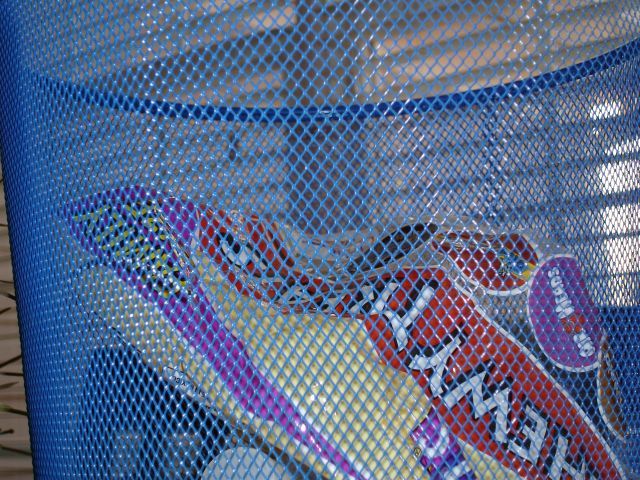
a little closer shot of the metal mesh.
this is my idea. of coaurse there will be a bezel for the dvd drive made with the same technique. what i have done is taken a piece of plex, frosted it with 600 grit, and placed a portion of the wire mesh in front of it. in my haste to see how it would look, i forgot that i wasnt going to frost the portion in fron of the xlcd. i will have to cut another piece of plex, bu its ok. also, the mesh around the lcd will be cut to match the unfrosted section of the plex, and have some nice rubber trim around it.
it will have a nice glow when i actually install the leds correctly (countersunk in the side). this picture really doesnt show anything but me trying to capture an idea. obviously, it didnt work.

you wouldnt believe how long it took to complete the other bracket and mount them. i decided that im going to zip tie the screen in place after quite a bit of testing. the lcd looks a little crooked here, but thats because of the angle i took the picture at. in case you couldnt tell i used some of those pointers, and they are getting much better.
if nothing else i will paint the chassi tomorrow. that means i can really get some mounting and things like that done when its finished. until then.
-haloloser-
-
Title: Project Wetbox Wip
Post by: Zeusydude on September 20, 2005, 09:08:00 PM
-
wow thats wierd, just one thing about pc -> xbox, all of them are cool, its just they all look the same
-
Title: Project Wetbox Wip
Post by: haloloser on September 20, 2005, 09:42:00 PM
-
i dont mean to be a prat, but just think about what you said. every xbox mod originated from a technique used in pc case modding. as a matter of fact, there are 100's of pc cases that look completely different then the next. thats a heck of alot more then can be said for an xbox. of course it wouldnt really matter if you just left the case the way it was, but if you mod xboxs you should definately be able to respect its roots. almost every xbox on this forum looks exactly the same with a two tone paint job and some leds of choice. im personally sick of those. i will agree, usually the xbox to pc mod is just that, typical. take a second to read through the entire log, and see if anything i have done so far has resembled your typical xbox to pc mod. i havnt even started the wire management process (which should make the entire project), or added the temp lcd and its associated bondo work. not to mention that the xbox has a complete watercooling setup equiped with a custom waterblock. that in itself makes it something above and beyond your average. my worste pet peeve is when someone tries to flame a project before its even near completion. watch it unfold. i wont let this become another typical xbox mod.
-haloloser-
-
Title: Project Wetbox Wip
Post by: Zanzang on September 20, 2005, 11:03:00 PM
-
Post by: bLiZzArDo on September 17, 2005, 09:44:00 PM
Post by: devilmaycry666 on September 17, 2005, 10:23:00 PM
Post by: Granulated on September 18, 2005, 12:21:00 AM
1. Use a tripod! Helps muchos!
2. Proper lighting is essential!
3. The best way to get detail is to back up, and use the digital zoom on a tripod, rather than trying to take close up pictures. Also, make sure you're taking the highest resolution pictures possible. Easy to resize and crop later!
Post by: freakinshoe on September 18, 2005, 09:06:00 AM
and for ppl that dont know, welding aluminum is hard, to do proper u need a high intesity box. i cant weld aluminum, but i weld with mig, tig, and stick everyday, for my job. and what ive gathered welding on aluminum is a pain in the ass.
Post by: haloloser on September 18, 2005, 02:53:00 PM
-haloloser-
Post by: bucko on September 18, 2005, 03:02:00 PM
nice work so far dude keep it up!!!
Post by: sorienor on September 20, 2005, 01:54:00 AM
Post by: DeadManWalking on September 20, 2005, 03:43:00 AM
Post by: The_Vulture on September 20, 2005, 04:06:00 AM
Post by: haloloser on September 20, 2005, 08:50:00 PM
i got this idea when messing with computers. i have been using this for a trashcan, but when i explained what i was going to use him for he was glad to help.
a little closer shot of the metal mesh.
this is my idea. of coaurse there will be a bezel for the dvd drive made with the same technique. what i have done is taken a piece of plex, frosted it with 600 grit, and placed a portion of the wire mesh in front of it. in my haste to see how it would look, i forgot that i wasnt going to frost the portion in fron of the xlcd. i will have to cut another piece of plex, bu its ok. also, the mesh around the lcd will be cut to match the unfrosted section of the plex, and have some nice rubber trim around it.
it will have a nice glow when i actually install the leds correctly (countersunk in the side). this picture really doesnt show anything but me trying to capture an idea. obviously, it didnt work.
you wouldnt believe how long it took to complete the other bracket and mount them. i decided that im going to zip tie the screen in place after quite a bit of testing. the lcd looks a little crooked here, but thats because of the angle i took the picture at. in case you couldnt tell i used some of those pointers, and they are getting much better.
if nothing else i will paint the chassi tomorrow. that means i can really get some mounting and things like that done when its finished. until then.
-haloloser-
Post by: Zeusydude on September 20, 2005, 09:08:00 PM
Post by: haloloser on September 20, 2005, 09:42:00 PM
-haloloser-
Post by: Zanzang on September 20, 2005, 11:03:00 PM
QUOTE(haloloser @ Sep 20 2005, 11:53 PM)
i dont mean to be a prat, but just think about what you said. every xbox mod originated from a technique used in pc case modding. as a matter of fact, there are 100's of pc cases that look completely different then the next. thats a heck of alot more then can be said for an xbox. of course it wouldnt really matter if you just left the case the way it was, but if you mod xboxs you should definately be able to respect its roots. almost every xbox on this forum looks exactly the same with a two tone paint job and some leds of choice. im personally sick of those. i will agree, usually the xbox to pc mod is just that, typical. take a second to read through the entire log, and see if anything i have done so far has resembled your typical xbox to pc mod. i havnt even started the wire management process (which should make the entire project), or added the temp lcd and its associated bondo work. not to mention that the xbox has a complete watercooling setup equiped with a custom waterblock. that in itself makes it something above and beyond your average. my worste pet peeve is when someone tries to flame a project before its even near completion. watch it unfold. i wont let this become another typical xbox mod.
-
Title: Project Wetbox Wip
Post by: dynamike1 on September 21, 2005, 01:57:00 AM
-
-
Title: Project Wetbox Wip
Post by: haloloser on September 21, 2005, 08:25:00 PM
-
of course the algebra test got me like i thought it would. i did manage to do a few things today before i actually started studying. tomorrow is free, so hopefully i will work on everything a good bit.
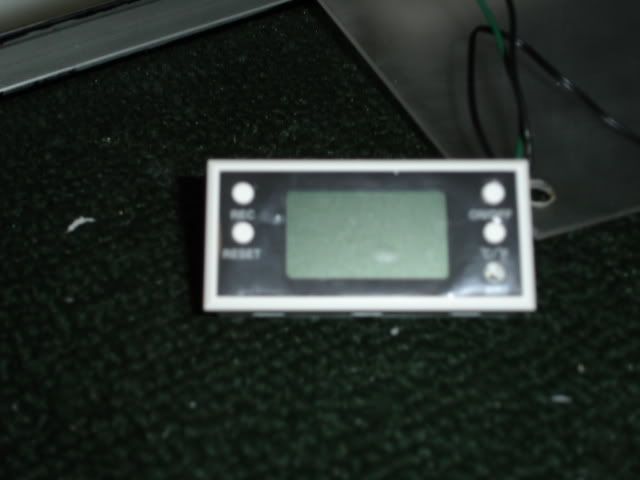
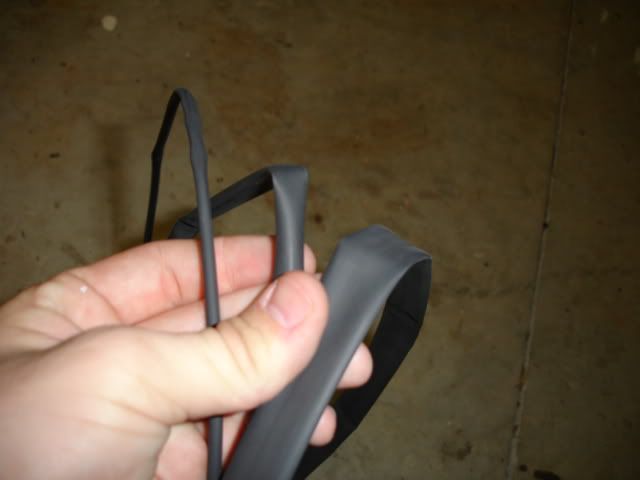
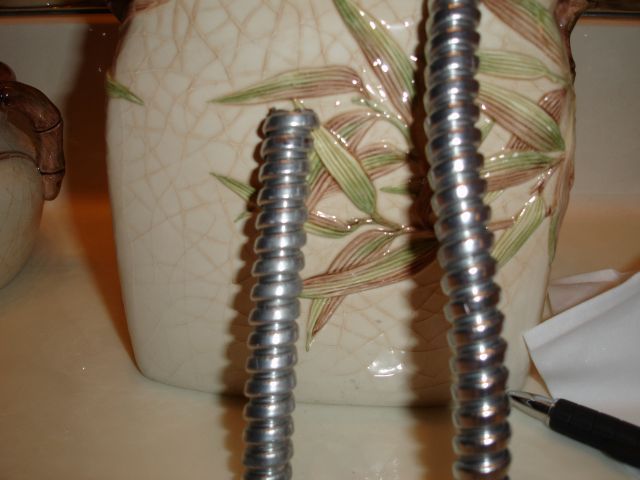
a little fairy dressed in black and purple came today when i was at school and brought me presents. its 2ft. of black 1/8, 1/4, and 1/2" heatshrink tubing, and a compunurse advance. i had no idea but this thermometer comes in two versions, and i just happened to get the one that is powered by a watch battery. i was furious when i got it. even worse, the battery was dead...
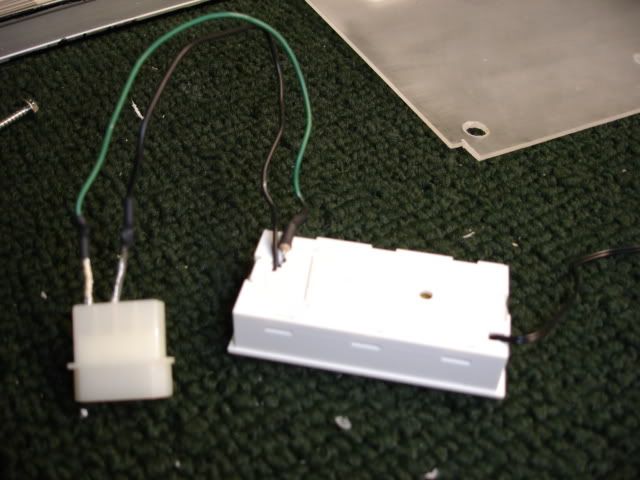
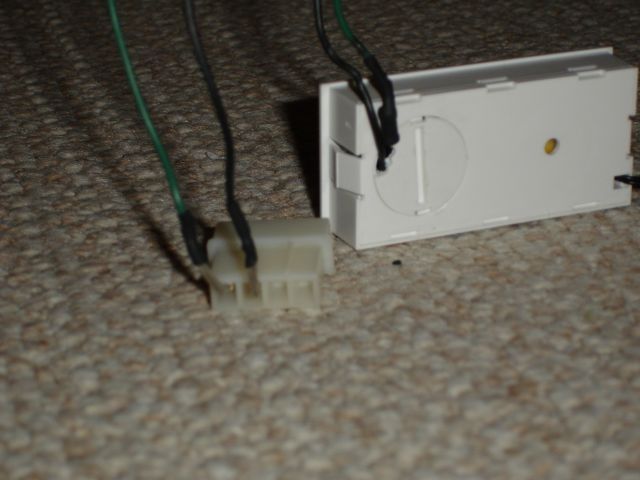
i couldnt find the power requirements for the lcd so i looked up the watch batteries output. then i calculated how much resistance i would need to get the same output as the watch battery (10k ohm) and wired that bad boy up. this is the way it looks now. i think its pretty proffesional. crappy pictures of my heat shrink in action.
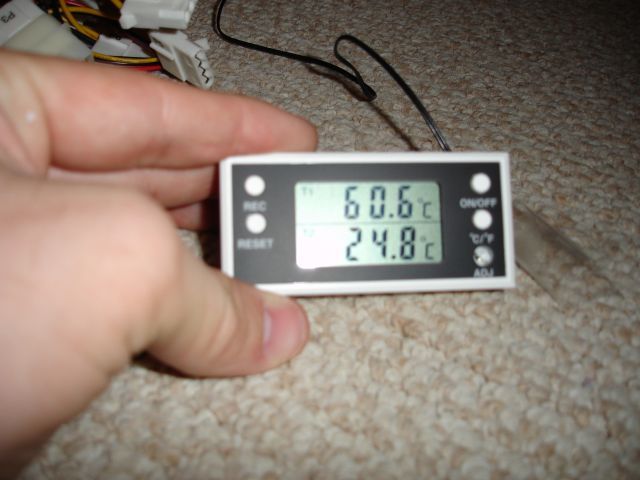
here she is up and running.
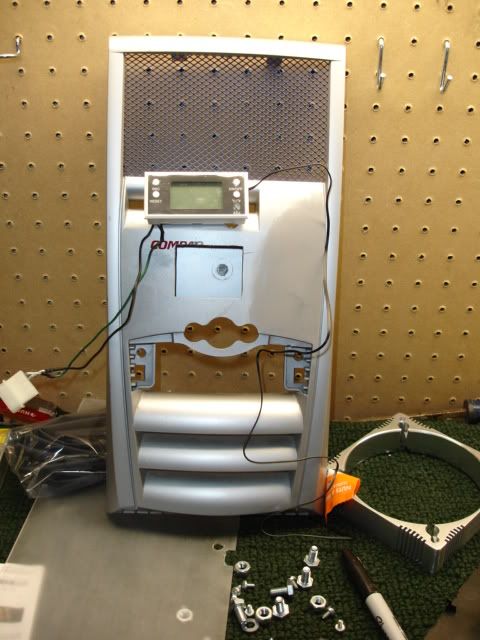
the lcd will be placed right here. obviously it will be mounted flush in a piece of plex, and the plex will be epoxied over the 3 1/2" bay hole. finally the edges will be bondoed and painted for a nice finish.
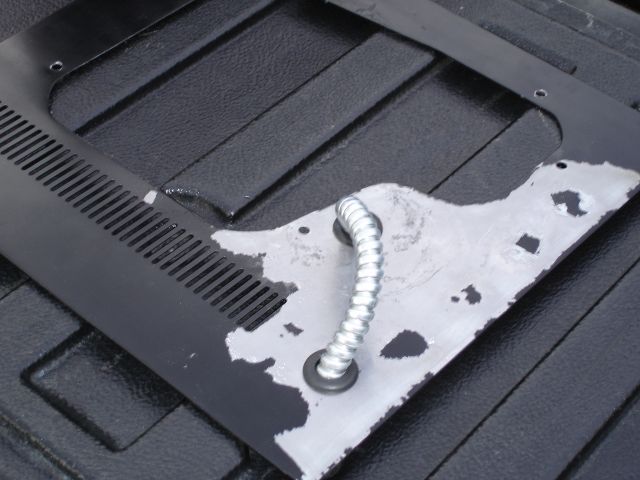
this is my heatshrink device, a 120v, 10amp swtich for the submersable pump, a rubber grommet that is too small, and a hing for the usb cover.
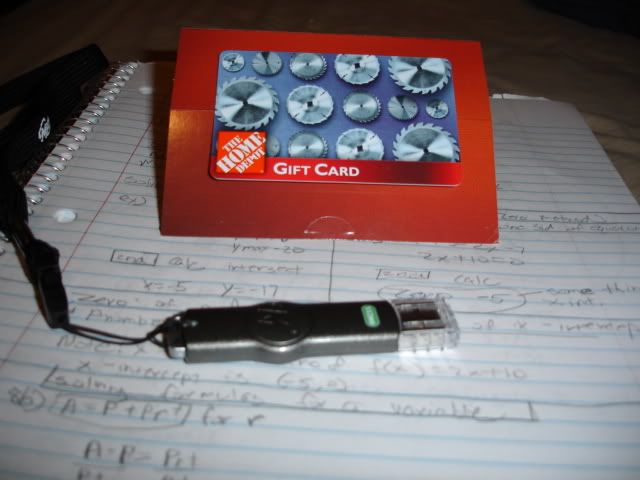
im ashamed to call myself a computer dork because i have only just now purchased a slash memory stick. 512mb $35 mail in rebate is a good deal in my book. my dad also gave me this homedepot gift card, and this is all sitting on algebra notes. sweet.
i painted the chassi white today, but i forgot to take a picture. ill post it tomorrow.
-haloloser-
-
Title: Project Wetbox Wip
Post by: ClintiePoo on September 21, 2005, 08:30:00 PM
-
Good luck on the Algebra dude. I bought a TI-89 and used it up until Calculus, when they said I couldn't.
Sweet mods.
-
Title: Project Wetbox Wip
Post by: haloloser on September 22, 2005, 09:19:00 PM
-
so i had this really good idea to get rid of that blank space on the right side of the side panel window. my original idea didnt work out, but the one that kinda came up by mistake is 100x better anyways. the only problem is that i didnt have a drill bit even remotely close to the size hole that needed to be drilled for the grommets to fit. i masked everything off so that i wouldnt destory the paintjob, or so i thought, and dremeled the holes out...

i really love the effect, but when i pulled the tape off i guess it had gotten so hot that it pulled the pain off with it. i was so pissed, and i then had to strip the whole side again and prime.
i gave the thing a ma bob accent a polish, and it looks really nice in person. you cant really tell because my photography skills are not up to par.
after the ordeal i got some more done on the drive stealth thingy. looks pretty nice. im ready to see the xlcd fired up. it will be the same concept as the dvd drive except in a lower spot.
another shot.
the reason why i didnt get much done today.
-haloloser-
-
Title: Project Wetbox Wip
Post by: haloloser on September 26, 2005, 09:40:00 PM
-
started back working today. got some things done.
for starters i went to homedepot today and picked up some bolts. i finally figured out how i am going to mount the ports.
this is where they will sit. if you look over a bit you will see that i have cut the hole for the temp. lcd, and make a cover out of plex for the rest of the 3 1/2 drive slot.
another shot.
i cut the holes for the bolts, and jb welded them into place. while that was drying i started the daunting task of mounting the motherboard. i was dreading it, but it turned out to be really easy.
i cut the bottum off of another xbox and just mounted it liek the pc motherboard...
then i mounted the borken mobo on just for kicks and giggles.
when i felt the jb had dried sufficiently enough i added the bondo.
if you are proficient with bondo, do yourself a favor and dont stop using it. i had forgotten how hard it was to work with.
another pic. i felt like this was the first time i had ever applied it before.
finally, started working on the usb ports. i used the other part of the controller extension cord to wired these up. they will be for ports three and four. call me a halo snob, but i wont have more then one other person on my tv. its just not worth it.
untill tomorrow. haloloser.
-
Title: Project Wetbox Wip
Post by: haloloser on September 27, 2005, 08:09:00 PM
-
i worked on extending the wires for the xlcd today for my whole life. it took forever, and by the time i finished i was ready to kill someone. 16 wires, two solder points, an additional 32 solder points for the wires i used to extend, and heat shrink. anyways, that was my biggest task so far and now its over.
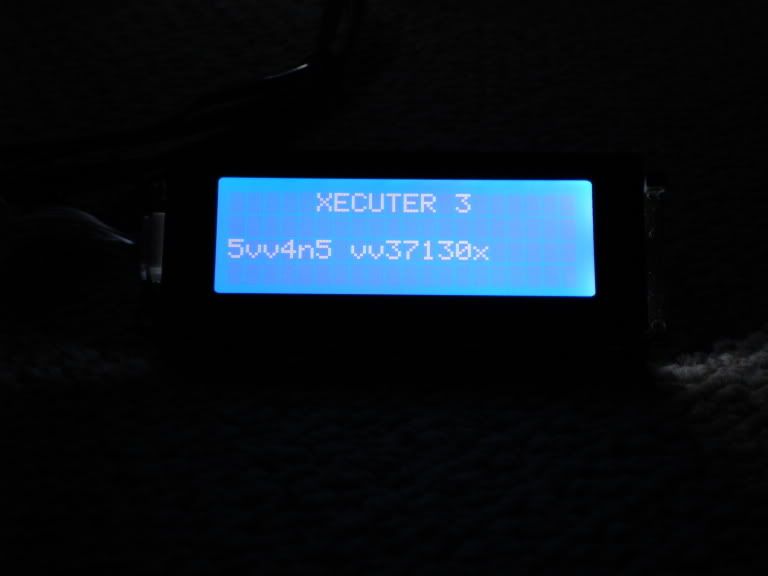
picture of the screen working.
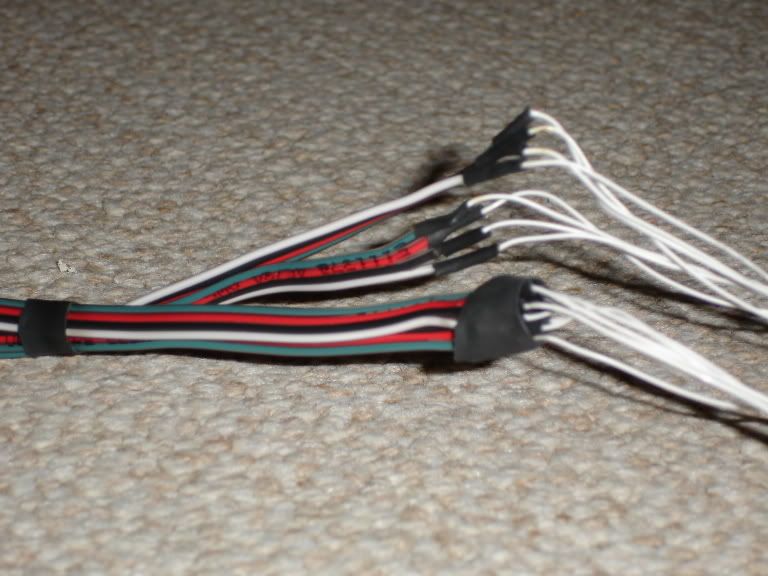
i used four strands of wire that had four wires connected together. it looks about as good as i think it could get.
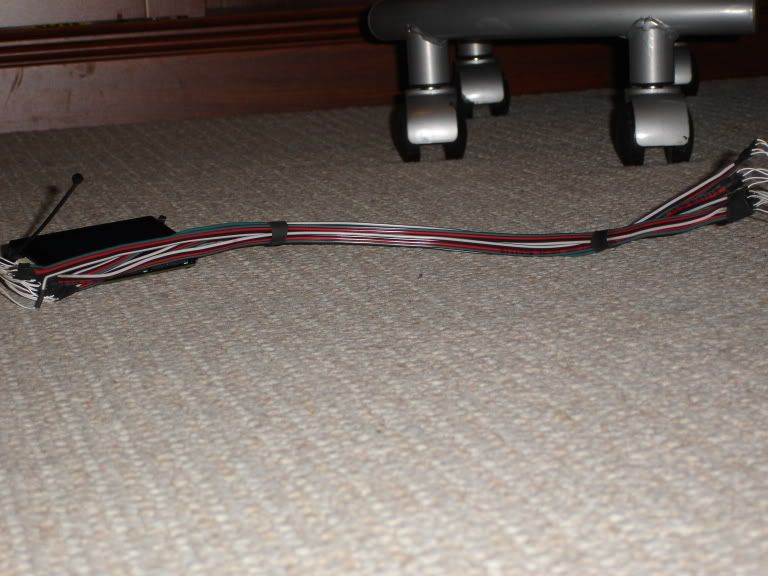
this is how much i extended it. i added about 1 1/2'.
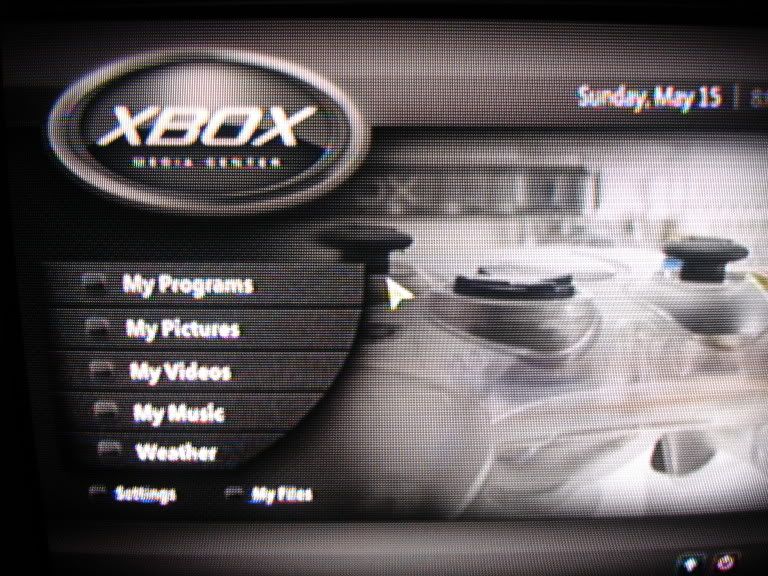
i also, finished wiring the usb ports up. here is the pic of xbmc with the arrow for the mouse. i have never used this program until about two weeks ago, and i absoultely love it. if someone could explain to me why i lock up sometimes when i click on an option that would be awsome.
finally, i started sanding on the bondo. i have some spot putty on it right now. the pictures dont show what it really looks like.
a pic of it standing up. you can see how the drive cover is doing its job. tomorrow ill wetsand and maybe get some primer on.
im not sure if i want to extend the dvd power cable after today. i might save that until sometime in the future. ive also run into another problem. i cannot find an ide cable that will fit the specifications i need. im going to try and email llama tomorrow because i just dont know anyone else who might be able to build one for me. if you know where i can get the cable and connectors myself i would greatly appreciate that also. im also going to work on some of the inner wire management tomorrow. i hope i can get a good bit done. untill next time.
-haloloser-
-
Title: Project Wetbox Wip
Post by: haloloser on September 28, 2005, 12:40:00 AM
-
ok guys, the newest information is that i just entered (or at least i think i did), the acryan great worklog contest. the idea is that i will be judged not only on the moding itself, but the quality of the worklog as well. i think its probably safe to say that i have the only console entered into it right now, but i believe that they will appreciate something like this in the contest. SO... give me your constructive criticism, ideas, anything. just basically interact with me. if you have anymore questions, or you would like to know more about what it actually is, check the link out in my siggy or shoot me a pm. thanks.
-haloloser-
-
Title: Project Wetbox Wip
Post by: ubernewb on September 28, 2005, 12:59:00 AM
-
first off, this looks like it's going to be an awesome mod when it's finished. definately original
i love the controller port idea (but personally i think i would have left the nut sticking out a bit to go with the whole 'industrial' look.. ) .. i also like the temp screen.
and of course the coolest part would be the watercooling.. very slick
-
Title: Project Wetbox Wip
Post by: Modderxtrordanare on September 28, 2005, 01:05:00 AM
-
Ubernewb, you should seriously do that watercooling mod we were talking about.
-
Title: Project Wetbox Wip
Post by: bosstitan187 on September 28, 2005, 07:17:00 AM
-
wow simpley amazing dude this thing is fucking tight as hell
-
Title: Project Wetbox Wip
Post by: FearX351 on September 28, 2005, 09:48:00 AM
-
If you ever plan on selling it I may buy it
-
Title: Project Wetbox Wip
Post by: Shoo Box on September 28, 2005, 03:53:00 PM
-

-
Title: Project Wetbox Wip
Post by: bosstitan187 on September 28, 2005, 05:09:00 PM
-
bump for ma boi
-
Title: Project Wetbox Wip
Post by: Modderxtrordanare on September 28, 2005, 05:22:00 PM
-
I thought english was the language spoken or translated into for these forums.. JK
Bump for an awesome case
-
Title: Project Wetbox Wip
Post by: haloloser on September 28, 2005, 09:40:00 PM
-
thanks so much for the support guys, i really appreciate it. i was begenning to think my constant updates were getting annoying, but i suppose i have a reason to update now.
so anyways, i went to one of my most favorite stores today, and got a few things. i walked out of there with a really awsome idea for case feet. this is what i purchased.
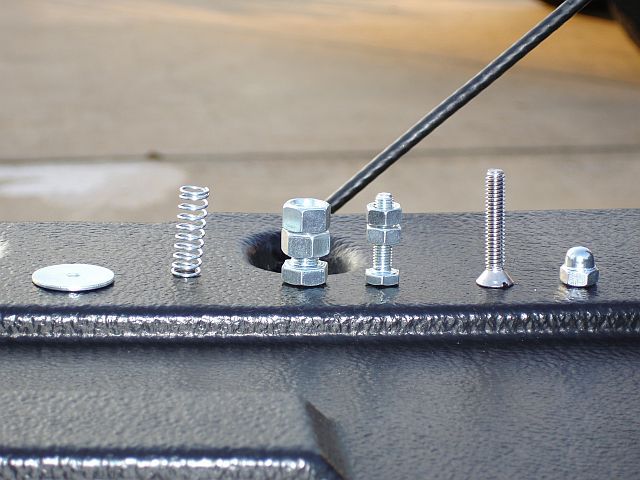
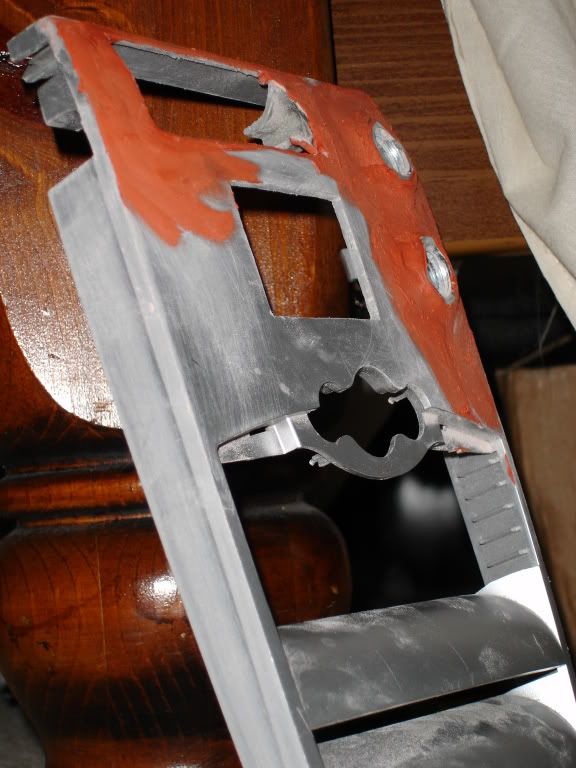
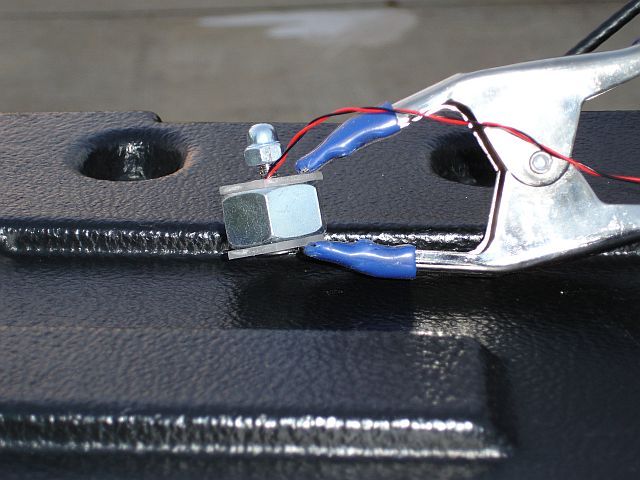
from left to right, ill name off what they will be used for. washers to go on top of the springs to the immediate right. both will be used as a tension device for the waterblock. eject button, power button, counter sinking screw for the case feet, and an accorn nut for the inside of the case where the feet will be attached.
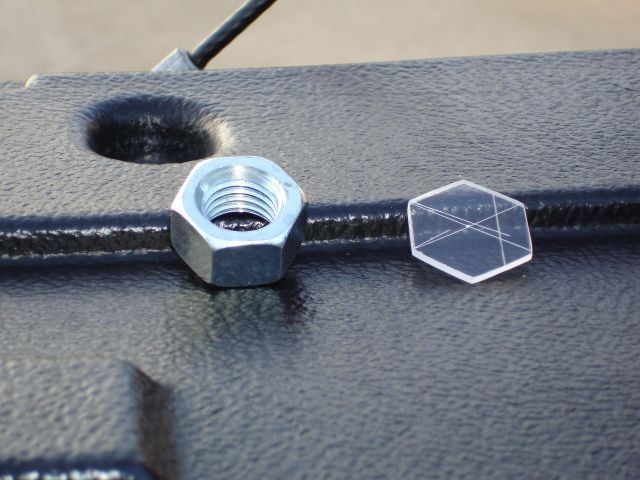
i left out a picture of this nut, but its ok. i started making the case feet by cutting a piece of plex roughly the same size and shape as the bolt. one for the top and bottum of each bolt so there will be eight of them total.
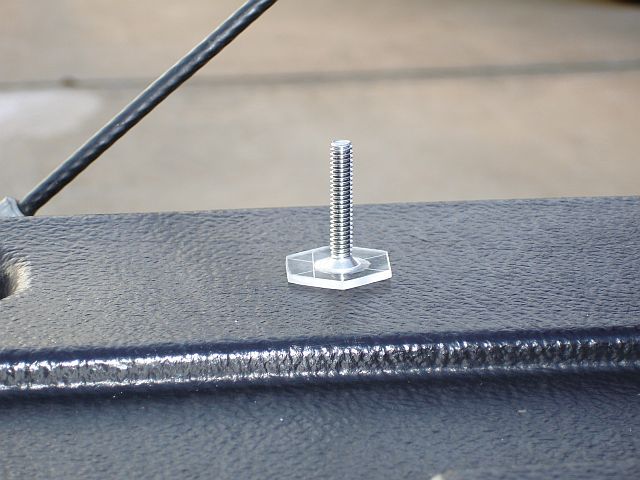
next i marked the center of the plex piece and drilled a hole. i beveled the edges of it so that the screw would fit flush with the plex.
i then added shrink wrap to the bolts so that the leds wouldnt short. here is a picture with the leds in place.
here she is in the light. i have to remove some of the bolt so the acorn will hole it firmly in place. i have it clamped together just to get an idea.
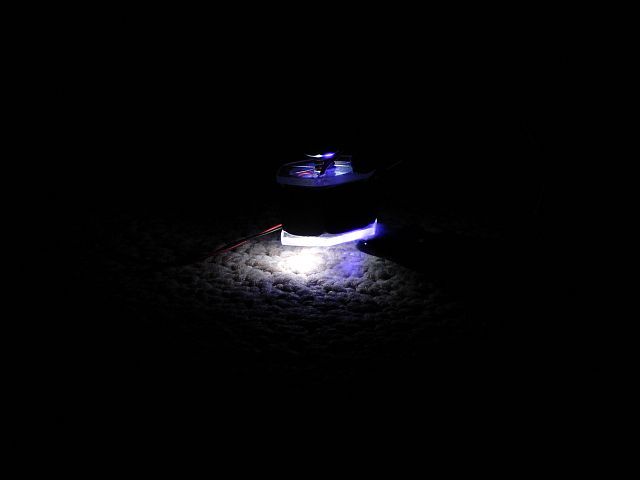
here we are all lit up. not that impressive, huh? i know how to fix it, back to the drawing board.
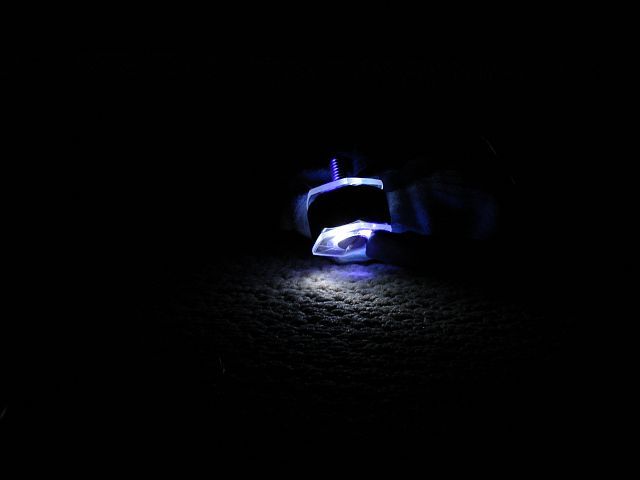
tadaaa!!! i added two more leds facing upwards to illuminate the top piece of plex as well.
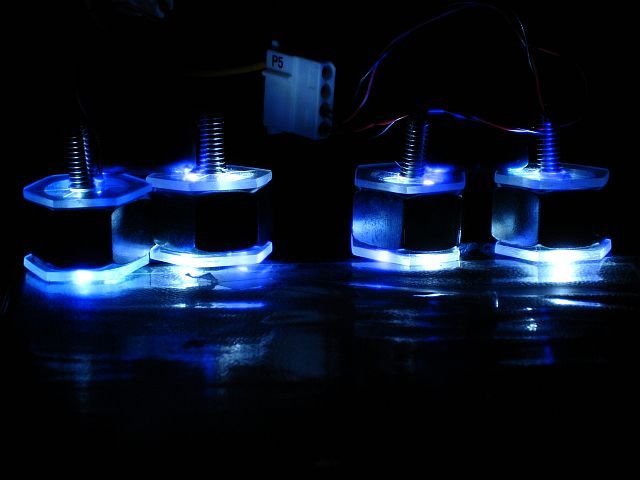
finally, a shot with them all finished. it took forever, but it was one of those things that i wll really appreciate later. tell me what you think of the feet. if anyone is interested i can sketch up a quick tut. just let me know.
-haloloser-
-
Title: Project Wetbox Wip
Post by: haloloser on September 29, 2005, 05:09:00 PM
-
i finished and mounted the feet today. i dont have the digi cam yet, so i am posting a teaser. i cant help it i needed a break from work, and my messy work bench. ill post better pics later. this is a picture of the feet.

-
Title: Project Wetbox Wip
Post by: bosstitan187 on September 29, 2005, 05:40:00 PM
-
DANG that tight dude keep it up
-
Title: Project Wetbox Wip
Post by: jayda on September 29, 2005, 06:05:00 PM
-
)
( hope you didnt mind me posting stuff in your thread )
-
Title: Project Wetbox Wip
Post by: haloloser on September 29, 2005, 06:58:00 PM
-
and yes you're the 1st console mod on this Great Worklog Contest. We never said it has to be pc-modding or casemodding in the rules... as long as it is a Worklog, an ongoing worklog Well, a worklog about modding your shoe wil stretch this a bit too far, use some self-restraint Well the doors are open now... let's see where this takes us.
-
Title: Project Wetbox Wip
Post by: Shoo Box on October 02, 2005, 12:58:00 PM
-
-
Title: Project Wetbox Wip
Post by: bosstitan187 on October 02, 2005, 01:14:00 PM
-
that awsome dude its get better every day keep us posted
-
Title: Project Wetbox Wip
Post by: haloloser on October 05, 2005, 08:38:00 PM
-
ok guys, i started out firday with a routine visit to my cardiologist in atlanta. everything was going fine, and then about midway through my eckocardiogram, my heart had a slight arithimia. i have a rare heart condition called indocartiofibroelastosis. ill go into more detail later. ive just been cooped up in a hospital room for so long i had to do something. anyways, they decided that i would need a deffiberlator for safety purposes. the surgery , and installation went fine, and then i had an allergic reaction to one of the antibiotics that i was being given through and iv. my sistolic bloob pressure dropped to 42 (its normally around 112), but they were able to resusitate me. at any rate, i deffinately have a higher power, and a whole lot of people to thank for praying for me and getting my through this. im just gonna post a few pics of my hospital stay, so progress should be slow for the next week or two. dont forget about me though, ive had alot of good ideas come to me just sitting around. cheers.

this is when i arrived in the hospital on friday. thats a heart monitor, and it could definately use some wire management.

this is a model of a deffiberlator. i actually have one of these inside of me now. the picture is taken with my dad's wedding band beside it for scale.

a really nice nurse at the hospital. she was probably my favorite.

finally, a pic of the scar. i have to get some sleep now. ill keep it updated. nighty, night.
-haloloser-
-
Title: Project Wetbox Wip
Post by: b15ginz on October 05, 2005, 08:54:00 PM
-
ok..
computer/xbox whatever ur making (i just looked at the pictures) everything look amazing.
the hospital visit? why share? personal stuff should be left outside. althou i do feel for you..i hope all is well. god bless. (to ur health..not ur case)
-
Title: Project Wetbox Wip
Post by: ClintiePoo on October 06, 2005, 01:39:00 AM
-
-
Title: Project Wetbox Wip
Post by: Rebel-Soul on October 06, 2005, 07:26:00 AM
-
Post by: dynamike1 on September 21, 2005, 01:57:00 AM
Post by: haloloser on September 21, 2005, 08:25:00 PM
a little fairy dressed in black and purple came today when i was at school and brought me presents. its 2ft. of black 1/8, 1/4, and 1/2" heatshrink tubing, and a compunurse advance. i had no idea but this thermometer comes in two versions, and i just happened to get the one that is powered by a watch battery. i was furious when i got it. even worse, the battery was dead...
i couldnt find the power requirements for the lcd so i looked up the watch batteries output. then i calculated how much resistance i would need to get the same output as the watch battery (10k ohm) and wired that bad boy up. this is the way it looks now. i think its pretty proffesional. crappy pictures of my heat shrink in action.
here she is up and running.
the lcd will be placed right here. obviously it will be mounted flush in a piece of plex, and the plex will be epoxied over the 3 1/2" bay hole. finally the edges will be bondoed and painted for a nice finish.
this is my heatshrink device, a 120v, 10amp swtich for the submersable pump, a rubber grommet that is too small, and a hing for the usb cover.
im ashamed to call myself a computer dork because i have only just now purchased a slash memory stick. 512mb $35 mail in rebate is a good deal in my book. my dad also gave me this homedepot gift card, and this is all sitting on algebra notes. sweet.
i painted the chassi white today, but i forgot to take a picture. ill post it tomorrow.
-haloloser-
Post by: ClintiePoo on September 21, 2005, 08:30:00 PM
Sweet mods.
Post by: haloloser on September 22, 2005, 09:19:00 PM
i really love the effect, but when i pulled the tape off i guess it had gotten so hot that it pulled the pain off with it. i was so pissed, and i then had to strip the whole side again and prime.
i gave the thing a ma bob accent a polish, and it looks really nice in person. you cant really tell because my photography skills are not up to par.
after the ordeal i got some more done on the drive stealth thingy. looks pretty nice. im ready to see the xlcd fired up. it will be the same concept as the dvd drive except in a lower spot.
another shot.
the reason why i didnt get much done today.
-haloloser-
Post by: haloloser on September 26, 2005, 09:40:00 PM
for starters i went to homedepot today and picked up some bolts. i finally figured out how i am going to mount the ports.
this is where they will sit. if you look over a bit you will see that i have cut the hole for the temp. lcd, and make a cover out of plex for the rest of the 3 1/2 drive slot.
another shot.
i cut the holes for the bolts, and jb welded them into place. while that was drying i started the daunting task of mounting the motherboard. i was dreading it, but it turned out to be really easy.
i cut the bottum off of another xbox and just mounted it liek the pc motherboard...
then i mounted the borken mobo on just for kicks and giggles.
when i felt the jb had dried sufficiently enough i added the bondo.
if you are proficient with bondo, do yourself a favor and dont stop using it. i had forgotten how hard it was to work with.
another pic. i felt like this was the first time i had ever applied it before.
finally, started working on the usb ports. i used the other part of the controller extension cord to wired these up. they will be for ports three and four. call me a halo snob, but i wont have more then one other person on my tv. its just not worth it.
untill tomorrow. haloloser.
Post by: haloloser on September 27, 2005, 08:09:00 PM
picture of the screen working.
i used four strands of wire that had four wires connected together. it looks about as good as i think it could get.
this is how much i extended it. i added about 1 1/2'.
i also, finished wiring the usb ports up. here is the pic of xbmc with the arrow for the mouse. i have never used this program until about two weeks ago, and i absoultely love it. if someone could explain to me why i lock up sometimes when i click on an option that would be awsome.
finally, i started sanding on the bondo. i have some spot putty on it right now. the pictures dont show what it really looks like.
a pic of it standing up. you can see how the drive cover is doing its job. tomorrow ill wetsand and maybe get some primer on.
im not sure if i want to extend the dvd power cable after today. i might save that until sometime in the future. ive also run into another problem. i cannot find an ide cable that will fit the specifications i need. im going to try and email llama tomorrow because i just dont know anyone else who might be able to build one for me. if you know where i can get the cable and connectors myself i would greatly appreciate that also. im also going to work on some of the inner wire management tomorrow. i hope i can get a good bit done. untill next time.
-haloloser-
Post by: haloloser on September 28, 2005, 12:40:00 AM
-haloloser-
Post by: ubernewb on September 28, 2005, 12:59:00 AM
first off, this looks like it's going to be an awesome mod when it's finished. definately original
i love the controller port idea (but personally i think i would have left the nut sticking out a bit to go with the whole 'industrial' look.. ) .. i also like the temp screen.
and of course the coolest part would be the watercooling.. very slick
Post by: Modderxtrordanare on September 28, 2005, 01:05:00 AM
Post by: bosstitan187 on September 28, 2005, 07:17:00 AM
Post by: FearX351 on September 28, 2005, 09:48:00 AM
If you ever plan on selling it I may buy it
Post by: Shoo Box on September 28, 2005, 03:53:00 PM
Post by: bosstitan187 on September 28, 2005, 05:09:00 PM
Post by: Modderxtrordanare on September 28, 2005, 05:22:00 PM
QUOTE
bump for ma boi
I thought english was the language spoken or translated into for these forums..
JKBump for an awesome case
Post by: haloloser on September 28, 2005, 09:40:00 PM
so anyways, i went to one of my most favorite stores today, and got a few things. i walked out of there with a really awsome idea for case feet. this is what i purchased.
from left to right, ill name off what they will be used for. washers to go on top of the springs to the immediate right. both will be used as a tension device for the waterblock. eject button, power button, counter sinking screw for the case feet, and an accorn nut for the inside of the case where the feet will be attached.
i left out a picture of this nut, but its ok. i started making the case feet by cutting a piece of plex roughly the same size and shape as the bolt. one for the top and bottum of each bolt so there will be eight of them total.
next i marked the center of the plex piece and drilled a hole. i beveled the edges of it so that the screw would fit flush with the plex.
i then added shrink wrap to the bolts so that the leds wouldnt short. here is a picture with the leds in place.
here she is in the light. i have to remove some of the bolt so the acorn will hole it firmly in place. i have it clamped together just to get an idea.
here we are all lit up. not that impressive, huh? i know how to fix it, back to the drawing board.
tadaaa!!! i added two more leds facing upwards to illuminate the top piece of plex as well.
finally, a shot with them all finished. it took forever, but it was one of those things that i wll really appreciate later. tell me what you think of the feet. if anyone is interested i can sketch up a quick tut. just let me know.
-haloloser-
Post by: haloloser on September 29, 2005, 05:09:00 PM
Post by: bosstitan187 on September 29, 2005, 05:40:00 PM
Post by: jayda on September 29, 2005, 06:05:00 PM
)(
hope you didnt mind me posting stuff in your thread )
Post by: haloloser on September 29, 2005, 06:58:00 PM
and yes you're the 1st console mod on this Great Worklog Contest. We never said it has to be pc-modding or casemodding in the rules... as long as it is a Worklog, an ongoing worklog Well, a worklog about modding your shoe wil stretch this a bit too far, use some self-restraint Well the doors are open now... let's see where this takes us.
Post by: Shoo Box on October 02, 2005, 12:58:00 PM
Post by: bosstitan187 on October 02, 2005, 01:14:00 PM
Post by: haloloser on October 05, 2005, 08:38:00 PM
this is when i arrived in the hospital on friday. thats a heart monitor, and it could definately use some wire management.
this is a model of a deffiberlator. i actually have one of these inside of me now. the picture is taken with my dad's wedding band beside it for scale.
a really nice nurse at the hospital. she was probably my favorite.
finally, a pic of the scar. i have to get some sleep now. ill keep it updated. nighty, night.
-haloloser-
Post by: b15ginz on October 05, 2005, 08:54:00 PM
computer/xbox whatever ur making (i just looked at the pictures) everything look amazing.
the hospital visit? why share? personal stuff should be left outside. althou i do feel for you..i hope all is well. god bless. (to ur health..not ur case)
Post by: ClintiePoo on October 06, 2005, 01:39:00 AM
Post by: Rebel-Soul on October 06, 2005, 07:26:00 AM
QUOTE(b15ginz @ Oct 5 2005, 11:05 PM)
ok..
-
Title: Project Wetbox Wip
Post by: SilverStone641 on October 06, 2005, 08:08:00 AM
-
well said. Very good rebel
-
Title: Project Wetbox Wip
Post by: jameschatz on October 06, 2005, 10:13:00 AM
-
-
Title: Project Wetbox Wip
Post by: haloloser on October 06, 2005, 10:23:00 AM
-
thank you guys for all the support. i really appreciate it. normally i wouldnt go posting things like that, but its the rules of the competition. you have to remember that its the worklog that wins the contest, not the project. i wanted to keep everyone informed. again thanks for all the thoughts and prayers. ill be up and working sometime soon on the little things. probably soldering a little here and there. i just have to keep active, so i dont turn into a blob.
-haloloser-
-
Title: Project Wetbox Wip
Post by: b15ginz on October 06, 2005, 02:35:00 PM
-
Post by: SilverStone641 on October 06, 2005, 08:08:00 AM
Post by: jameschatz on October 06, 2005, 10:13:00 AM
Post by: haloloser on October 06, 2005, 10:23:00 AM
-haloloser-
Post by: b15ginz on October 06, 2005, 02:35:00 PM
QUOTE(Rebel-Soul @ Oct 6 2005, 09:37 AM)
actually i think seeing as this is a comunity and we are trying to follow his xbox work iam glad he told us about that... its a serious thing and it oculd have gone worse and how would u be... oh where is haloloser then we find out he had a complication... no id rather kno he is having some serious problems so i can keep him in prayers and hope he rejoins us asap... catch my drift?
-
Title: Project Wetbox Wip
Post by: Rebel-Soul on October 06, 2005, 07:25:00 PM
-
Post by: Rebel-Soul on October 06, 2005, 07:25:00 PM
QUOTE(b15ginz @ Oct 6 2005, 04:46 PM)
i do get ur drift and i respect it. but pictures?
-
Title: Project Wetbox Wip
Post by: b15ginz on October 06, 2005, 08:24:00 PM
-
i never said it was nasty..i said i couldve done without seeing the staples. enough. get better soon. we all cant wait to see the finished product
if u want cool pictures..i got pictures from when i cut my forearm with a razor blade.......now...who wants a real show and telll...?
EDIT: i wasnt trying to commit suicide, so dont ask..it was by accident. althou i a lot of pople thought i was trying to commit, it was a month or 2 after my mom died. so it raised red flags.
taken with a cell phone camera. my fiance has them on her computer.
-
Title: Project Wetbox Wip
Post by: eminvil_12 on October 07, 2005, 01:24:00 AM
-
Post by: b15ginz on October 06, 2005, 08:24:00 PM
if u want cool pictures..i got pictures from when i cut my forearm with a razor blade.......now...who wants a real show and telll...?
EDIT: i wasnt trying to commit suicide, so dont ask..it was by accident. althou i a lot of pople thought i was trying to commit, it was a month or 2 after my mom died. so it raised red flags.
taken with a cell phone camera. my fiance has them on her computer.
Post by: eminvil_12 on October 07, 2005, 01:24:00 AM
QUOTE(b15ginz @ Oct 7 2005, 01:35 PM)
i never said it was nasty..i said i couldve done without seeing the staples. enough. get better soon. we all cant wait to see the finished product
-
Title: Project Wetbox Wip
Post by: thedominor on October 07, 2005, 01:44:00 PM
-
Oh my frickin gosh! I want it! I just got into modding recently, but am a avid reader, and been looking around at ideas. Recently thinking of an xpod so i can have a clear case all around, I want to see my mobo and the insides of my box, just like in a pc case!! But now this! The bar just keeps getting higher! I'd love to do a pc case mod like this, but I don't know if it is feasible. It would take a lot of hard work like you've been doing. Wow! ::drool:: I think I'm going to try to cram my mod into a xcm or le crystal and leave the super modding for some other time. GOOD WORK and I can barely wait to see more!
Oh and I'm very sorry to hear about your operation, and I hope you get much better very soon. (and I didn't mind the pics, but I won't say more).
::checks email notification of replies::
Till later!
-
Title: Project Wetbox Wip
Post by: CollinstheClown on October 07, 2005, 10:28:00 PM
-
, just messing. .. So, thats were those LED feet came from eh? Nice work! Good idea with the watercooling of both the CPU and GPU with one block. I was going to do it with 2 blocks but said, "Eh, screw it.". Well, I gota get going, glad to hear your medical condition is under control now, cya!
-CollinstheClown
-
Title: Project Wetbox Wip
Post by: SniperKilla on October 08, 2005, 12:08:00 PM
-
-
Title: Project Wetbox Wip
Post by: xboxhackern00b on October 09, 2005, 03:58:00 PM
-
your deffiberlator is made by the same company that makes my insulin pump...just thought i'd say that and so far box is looking sweet
-
Title: Project Wetbox Wip
Post by: haloloser on October 09, 2005, 08:46:00 PM
-
until tomorrow.
-haloloser-
-
Title: Project Wetbox Wip
Post by: haloloser on October 09, 2005, 08:49:00 PM
-
one more quick question. this may be a noobie question, but i have my music saved in xbmc, in my playlist folder. my xbmc is in e:/ apps, but when i play them they dont show up on my xlcd. im so confused as to why it wont work. do i need a script or something, or do i just need to put my music in a different location?
-haloloser-
-
Title: Project Wetbox Wip
Post by: halonstuff on October 10, 2005, 11:43:00 AM
-
i dont know if you figured this out yet, but do you have the lcd enabled under the settings for the xbmc?
-
Title: Project Wetbox Wip
Post by: haloloser on October 11, 2005, 12:01:00 AM
-
well i posted earlier, but the server is messed up i guess. i havnt really got much finished. i was going to the metal supplier today, but me and my dad decided to go tomorrow. i also worked on the front panel, and got another coat of paint on the side panel. had to almost completely redesign the entire mounting scheme and everything, but hopefully tomorrow i will be able to get some good stuff done.
i looked what the macro function did, and also how to use it. my up close pictures should become more clear now. thanks for the suggestion.
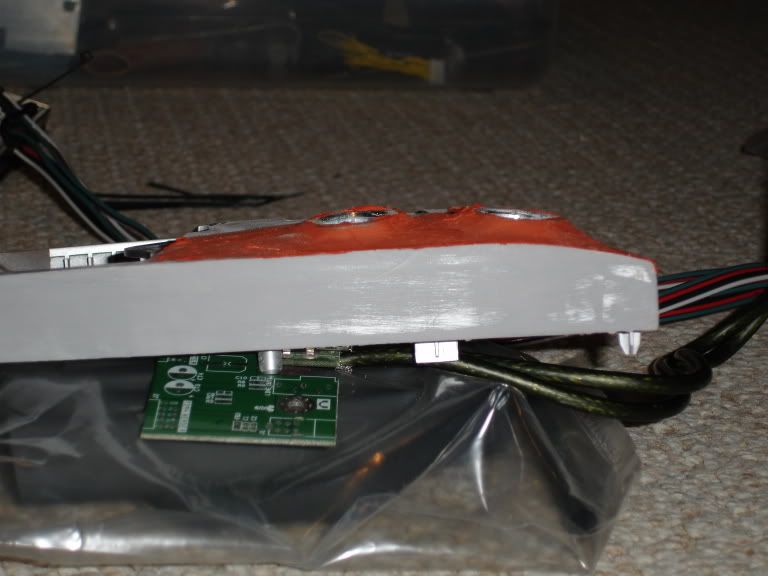
i took this off of an old psu because i need to mount it in a different place. definately alot more clear then it used to be.
i also found out why i couldnt get the lcd to work. i feel like such a moron now. i completely missed the whole tab devoted to the lcd. thats all for now, but i should have some good stuff up tomorrow.
-haloloser-
-
Title: Project Wetbox Wip
Post by: Modderxtrordanare on October 11, 2005, 12:17:00 AM
-
-
Title: Project Wetbox Wip
Post by: Rebel-Soul on October 11, 2005, 09:38:00 AM
-
-
Title: Project Wetbox Wip
Post by: haloloser on October 12, 2005, 06:24:00 PM
-
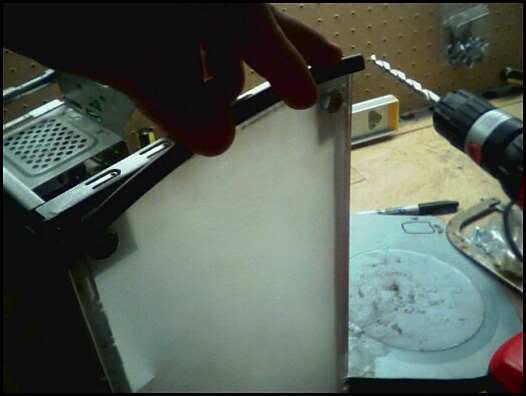
well, ive had to postpone the diamond plate for a couple of days because its super expensive. my dad and i have been pricing it all over town, and it still looks like the cheepest we can get a 3'x3' sheet is about 50 dollars. since thats the next major step in the project, ive been at somewhat of a standstill for those days. o well, what can you do.
so ive had this idea in my head for some case handles for about a month now, and i just got around to trying it. im really not pleased with the way it turned out, and now i have to come up with a completely new idea for handles.
the idea was to make two c shaped brackets out of aluminum, and then sandwich a piece of plexi in between them. then i was going to drill and hole in the bottum of the handle and counter sink an led or two to illuminate the side of the plexi. it never made it that far. sounds like a very idea, alas i could not fminish what i started. this is what i ended up with.
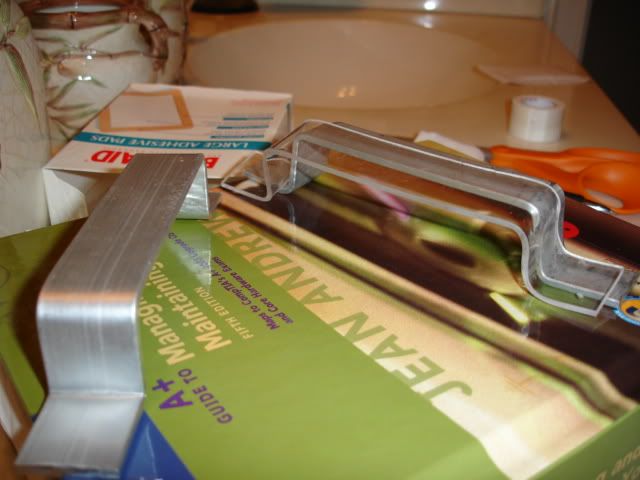
im in a foul mood now, and i have homework. i might work on the project tomorrow. it just depends on if i still feel like it wouold be better off in the trash in the morning or not.
-haloloser-
-
Title: Project Wetbox Wip
Post by: Rebel-Soul on October 12, 2005, 07:38:00 PM
-
-
Title: Project Wetbox Wip
Post by: bosstitan187 on October 12, 2005, 07:55:00 PM
-
get well soon bud
-
Title: Project Wetbox Wip
Post by: haloloser on October 12, 2005, 09:02:00 PM
-
man that sounds awsome. is it aluminum or steel? if you can find out how much it would be to ship that would be incredible. thanks for the support. i get my staples out tomorrow, so ill post a pic of all the bruises. thanks again.
-haloloser-
-
Title: Project Wetbox Wip
Post by: thedominor on October 13, 2005, 10:52:00 AM
-
I kinda like the idea of handles, just like on the new the G5 macs. It makes it so much easier to move the computer or xbox in this case, around, and i think it looks nice too. But you should do whatever you like to.
-
Title: Project Wetbox Wip
Post by: haloloser on October 13, 2005, 08:00:00 PM
-
so i finally got the diamond plate ive been winning about for a few days now. i actually got it for fourty dollars, and i probably could have gotten it cheaper... i was afraid i was going to run out. now i know that that was a stupid thought.
mmmm, shiney.
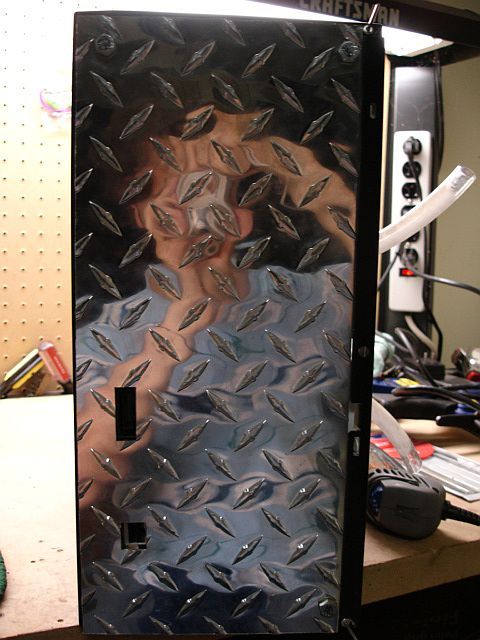
i got the back panel test mounted. it looks ok now, but when i get the rad mounted and everything finished i think it going to be sick.
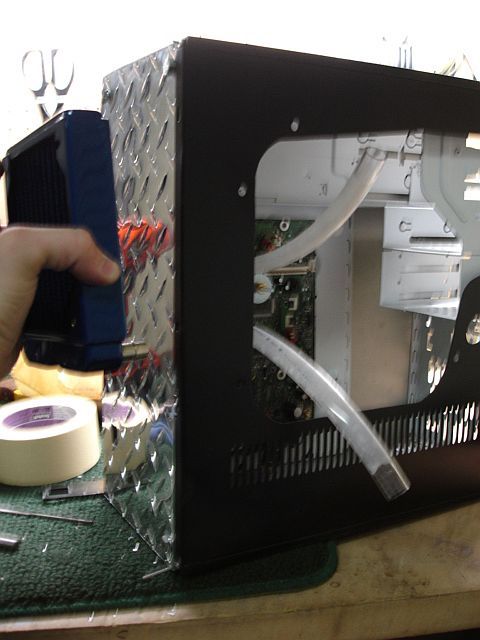
ill be fitting the radiator here. i was originally planning on using the cheap tubing from lowe's, but i might go with some tygon from online. some of the bends that the hoses will need to do might need elbows otherwise. we will see when the time comes.
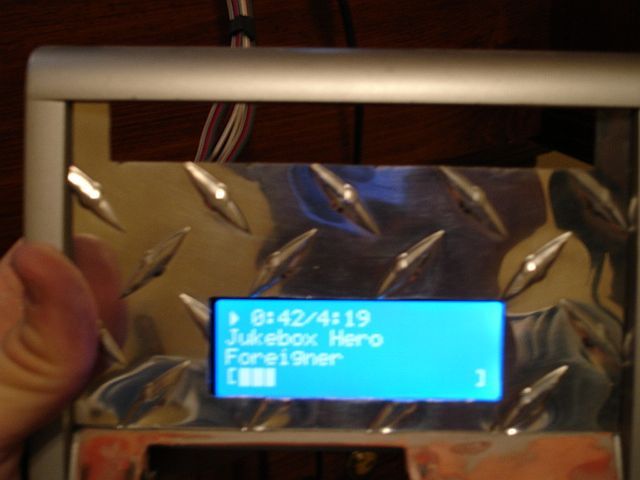
i love this pictures.
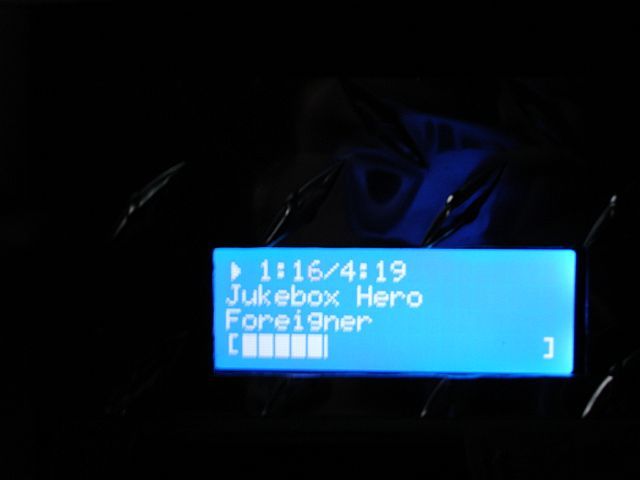
you know you love jukebox hero.

since everyone was grossed out by the staples, i decided to post a small picture of it incision after they were removed. alot of the swelling is gone, and the bruising is going away now also. the skatepark finally opened today in town, and its going to be quite a while before i can ride it. thats lame, but at least its open.
my grandmother passed away today, and we're all pretty upset about it. its been a rough couple of weeks, so continue to keep us in your prayers. thanks alot guys. until next time.
-haloloser-
-
Title: Project Wetbox Wip
Post by: Northcarolina ReDn3k on October 13, 2005, 08:05:00 PM
-
damn, alot of shit going on for you. But you arent giving up. Good job man.
-
Title: Project Wetbox Wip
Post by: _GhOsT_ on October 13, 2005, 08:19:00 PM
-
-
Title: Project Wetbox Wip
Post by: haloloser on October 13, 2005, 08:44:00 PM
-
thanks alot guys. we might go out of town tomorrow, but there is a chance we will stay here. the visitation is going to be saturday, and then the barial is going to be on monday in jacksonville.
hahaha, i knew somone would ask about the bike sooner or later. i used to be really competitave with the whole bmx thing, but then i started playing halo and getting hurt too much. needless to say, i dont really ride much anymore. to answere you question its a fit, van homan. its all custom, but thats the frame. after about seven years of riding that i would rather build an xbox then getting on that bike. now im proud to call myself a modder. represent!!!!
-haloloser-
-
Title: Project Wetbox Wip
Post by: SilverStone641 on October 13, 2005, 09:55:00 PM
-
yeah, that little butt-crack is his arm pit. that looks quite painful. Nice set of bruises man!
-
Title: Project Wetbox Wip
Post by: snow rider221 on October 13, 2005, 11:49:00 PM
-
Wow, i had a tough period of time like yours a little while back, except less serius injuries and a not as important death. I went to santa-barbara and we brought our bikes with us. While the bike was on the back of the car the quick release for the tire came loose, and whe nwe got there, we decided to go on a bike ride on about the 3rd day of a 2 week trip. Well i get on my bike and were riding for like 2 minutes, when i try to do a trick off of a speedbump... Well seeing as i was going full speed and i lifted up on the handelbard really hard, front tire came right off. Next thing i remember is waking up 14 hours later in my bed. In those 14 hours i recived like 40 stitches, all in my face, and my face was literally the size of a balloon. Well things are going all right for the next week, and i'm all drugged up, and i get the call that my dog i've had since i was 5 years old died back home while i was still out of town. My face is better now, just some fat scars, but it was a pretty rough time. I dont think its as rough as yours, but i think my pictures would beat your pictures on the grosse scale !
If anyone wants I'll post pictures, but only if people want me to and its alright with haloloser.
Sorry for spelling errors... i cant see my keyboard, its dark
-
Title: Project Wetbox Wip
Post by: Cyclone268 on October 14, 2005, 07:57:00 AM
-
Looks like 1 hell of an awesome mod project!! Sorry about all those problems your havin.. if u need ANY help with ANYTHING just let me know.. and ill do my best.
P.S. Ur Grandpa Pwns!!
Oliver
-
Title: Project Wetbox Wip
Post by: devilmaycry666 on October 14, 2005, 08:16:00 AM
-
-
Title: Project Wetbox Wip
Post by: snow rider221 on October 14, 2005, 08:27:00 AM
-
how much is diamond plate usually for like a 1' by 1' piece??
-
Title: Project Wetbox Wip
Post by: devilmaycry666 on October 14, 2005, 11:37:00 AM
-
Post by: thedominor on October 07, 2005, 01:44:00 PM
Oh my frickin gosh! I want it! I just got into modding recently, but am a avid reader, and been looking around at ideas. Recently thinking of an xpod so i can have a clear case all around, I want to see my mobo and the insides of my box, just like in a pc case!! But now this! The bar just keeps getting higher! I'd love to do a pc case mod like this, but I don't know if it is feasible. It would take a lot of hard work like you've been doing. Wow! ::drool:: I think I'm going to try to cram my mod into a xcm or le crystal and leave the super modding for some other time. GOOD WORK and I can barely wait to see more!Oh and I'm very sorry to hear about your operation, and I hope you get much better very soon. (and I didn't mind the pics, but I won't say more).
::checks email notification of replies::
Till later!
Post by: CollinstheClown on October 07, 2005, 10:28:00 PM
, just messing. .. So, thats were those LED feet came from eh? Nice work! Good idea with the watercooling of both the CPU and GPU with one block. I was going to do it with 2 blocks but said, "Eh, screw it.". Well, I gota get going, glad to hear your medical condition is under control now, cya!-CollinstheClown
Post by: SniperKilla on October 08, 2005, 12:08:00 PM
Post by: xboxhackern00b on October 09, 2005, 03:58:00 PM
Post by: haloloser on October 09, 2005, 08:46:00 PM
until tomorrow.
-haloloser-
Post by: haloloser on October 09, 2005, 08:49:00 PM
-haloloser-
Post by: halonstuff on October 10, 2005, 11:43:00 AM
Post by: haloloser on October 11, 2005, 12:01:00 AM
i looked what the macro function did, and also how to use it. my up close pictures should become more clear now. thanks for the suggestion.
i took this off of an old psu because i need to mount it in a different place. definately alot more clear then it used to be.
i also found out why i couldnt get the lcd to work. i feel like such a moron now. i completely missed the whole tab devoted to the lcd. thats all for now, but i should have some good stuff up tomorrow.
-haloloser-
Post by: Modderxtrordanare on October 11, 2005, 12:17:00 AM
Post by: Rebel-Soul on October 11, 2005, 09:38:00 AM
Post by: haloloser on October 12, 2005, 06:24:00 PM
so ive had this idea in my head for some case handles for about a month now, and i just got around to trying it. im really not pleased with the way it turned out, and now i have to come up with a completely new idea for handles.
the idea was to make two c shaped brackets out of aluminum, and then sandwich a piece of plexi in between them. then i was going to drill and hole in the bottum of the handle and counter sink an led or two to illuminate the side of the plexi. it never made it that far. sounds like a very idea, alas i could not fminish what i started. this is what i ended up with.
im in a foul mood now, and i have homework. i might work on the project tomorrow. it just depends on if i still feel like it wouold be better off in the trash in the morning or not.
-haloloser-
Post by: Rebel-Soul on October 12, 2005, 07:38:00 PM
Post by: bosstitan187 on October 12, 2005, 07:55:00 PM
get well soon bud
Post by: haloloser on October 12, 2005, 09:02:00 PM
-haloloser-
Post by: thedominor on October 13, 2005, 10:52:00 AM
Post by: haloloser on October 13, 2005, 08:00:00 PM
mmmm, shiney.
i got the back panel test mounted. it looks ok now, but when i get the rad mounted and everything finished i think it going to be sick.
ill be fitting the radiator here. i was originally planning on using the cheap tubing from lowe's, but i might go with some tygon from online. some of the bends that the hoses will need to do might need elbows otherwise. we will see when the time comes.
i love this pictures.
you know you love jukebox hero.
since everyone was grossed out by the staples, i decided to post a small picture of it incision after they were removed. alot of the swelling is gone, and the bruising is going away now also. the skatepark finally opened today in town, and its going to be quite a while before i can ride it. thats lame, but at least its open.
my grandmother passed away today, and we're all pretty upset about it. its been a rough couple of weeks, so continue to keep us in your prayers. thanks alot guys. until next time.
-haloloser-
Post by: Northcarolina ReDn3k on October 13, 2005, 08:05:00 PM
Post by: _GhOsT_ on October 13, 2005, 08:19:00 PM
Post by: haloloser on October 13, 2005, 08:44:00 PM
hahaha, i knew somone would ask about the bike sooner or later. i used to be really competitave with the whole bmx thing, but then i started playing halo and getting hurt too much. needless to say, i dont really ride much anymore. to answere you question its a fit, van homan. its all custom, but thats the frame. after about seven years of riding that i would rather build an xbox then getting on that bike. now im proud to call myself a modder. represent!!!!
-haloloser-
Post by: SilverStone641 on October 13, 2005, 09:55:00 PM
Post by: snow rider221 on October 13, 2005, 11:49:00 PM
If anyone wants I'll post pictures, but only if people want me to and its alright with haloloser.
Sorry for spelling errors... i cant see my keyboard, its dark
Post by: Cyclone268 on October 14, 2005, 07:57:00 AM
P.S. Ur Grandpa Pwns!!
Oliver
Post by: devilmaycry666 on October 14, 2005, 08:16:00 AM
Post by: snow rider221 on October 14, 2005, 08:27:00 AM
Post by: devilmaycry666 on October 14, 2005, 11:37:00 AM
QUOTE(snow rider221 @ Oct 14 2005, 11:38 AM)
how much is diamond plate usually for like a 1' by 1' piece??
-
Title: Project Wetbox Wip
Post by: haloloser on October 14, 2005, 11:46:00 AM
-
1. anyone is welcome to post any pictures they want in this thread (please use discression). if you are going to post pictures i would please ask you to resize them to 640x480 pixels, and in your case if they are going to be graphic i would incourage you to make them even half that size. i dont mind, but it seems that some members of the community are offended by those type pictures.
2. i called all around town and got different prices everywhere i called. if you are going to get diamond plate, you probably want to go with aluminum. chances are unless you are going to paint it, you will probably have to take steal to the chromers to get a nice finish. you can also buy sheets that small at lowe's, but they are pretty expensive. try calling your metal fab places, as well ash sheet metal and aluminum venders.
HOLY CRAP! the cheepest i could get a piece that big was $75
you have no idea. that guy can build anything, im not kidding. i dont know if any of you would remember this, but he invented the colman garden plow.
i really appreciate all the support. im about to go, and try to get some stuff done. ill probably have pics this afternoon.
-
Title: Project Wetbox Wip
Post by: haloloser on October 14, 2005, 08:22:00 PM
-
so today i just focused on getting the fan ready for reassembly, and getting the radiator mounted. (a minor miscaluculation brought the project to a screeching hault for tonight).
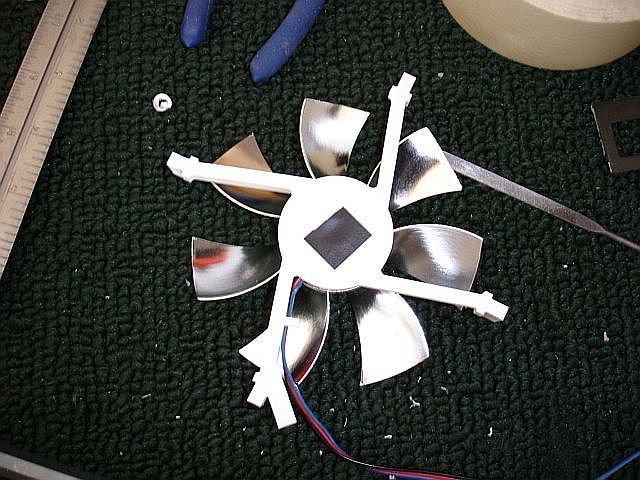
i removed the sticker.
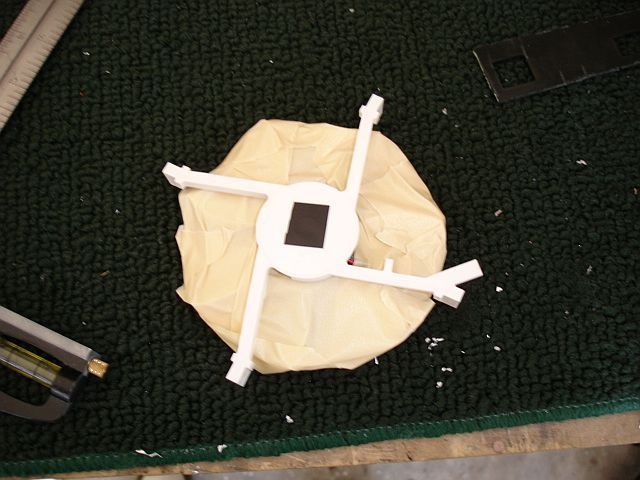
i taped that beast up, and painted it.
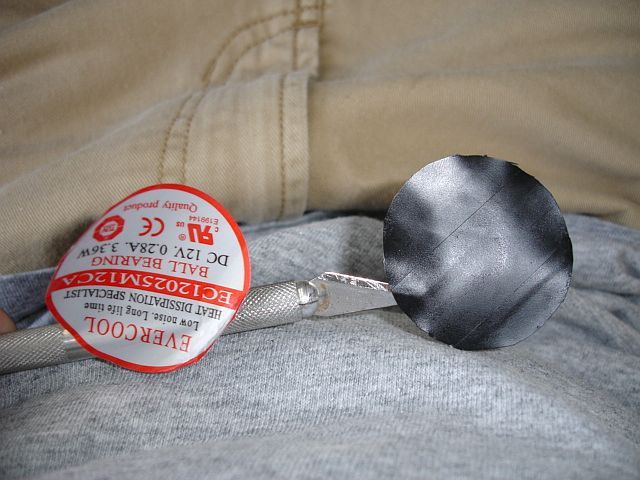
in the mean time i made a black sticker out of electrical tape. i think it looks a heck of alot better.
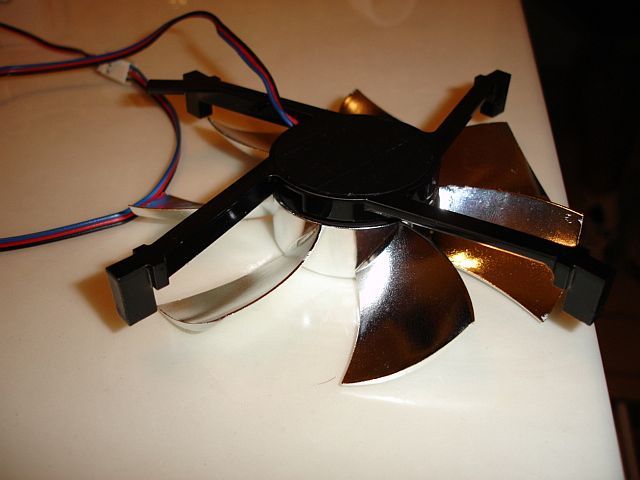
all done.
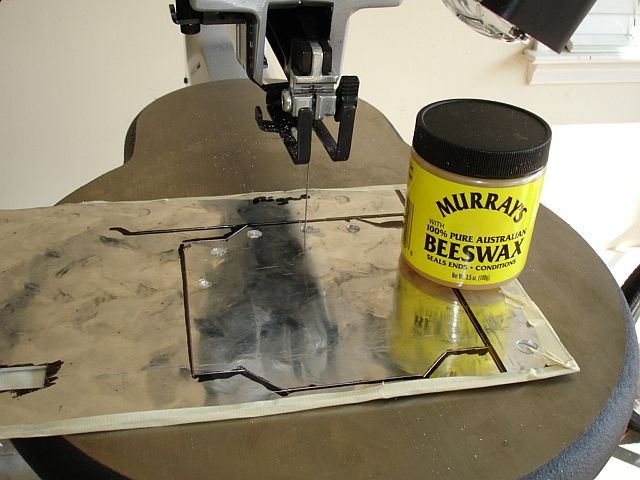
dont forget to lubricate your blade children. it actually recomended using this in the book. i thought it was helarious.
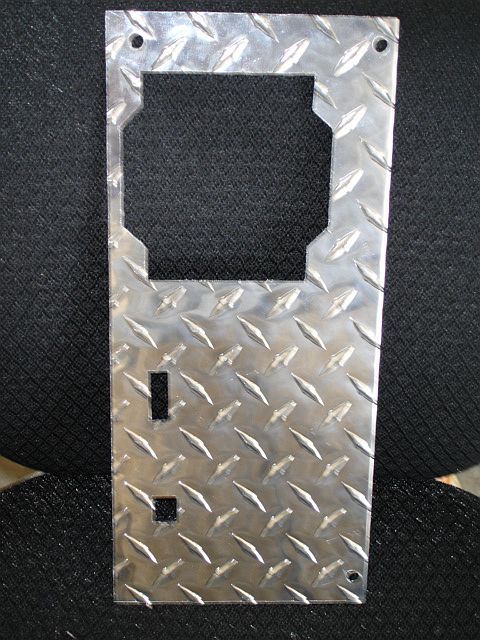
almost finished. all we need now is the barb holes
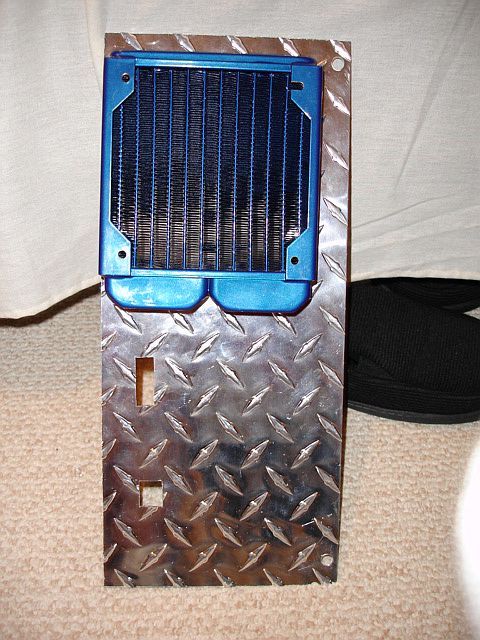
and test mounted. it looks a little crooked because only the bottum is screwed in. now... the rad is supposed to be flush with the right side, not the left. this puts the bard from the waterblock and the barb from the rad just out of line enough to throw the entire project off. now i have to complete reconstruct another back i/o plate. i started to make the cuts for it tonight, but i got too frustrated and started rushing. i had to quit before i ruined something.
-haloloser-
-
Title: Project Wetbox Wip
Post by: b15ginz on October 14, 2005, 10:32:00 PM
-
75 bucks for diamond plate? where do u shop? goto lowes. hardwar, its about 30-50 bucks for a nice slabe of it.
-
Title: Project Wetbox Wip
Post by: haloloser on October 14, 2005, 11:12:00 PM
-
you actually pay about 40 dollars for a sheet thats about 1 1/2' by 2'. i payed 40 dollars for a 3x3' piece. i meant that a sheet 4'x8' would cost about 75 dollars. that was a cheap as i could get it in town.
-
Title: Project Wetbox Wip
Post by: snow rider221 on October 14, 2005, 11:43:00 PM
-
wow looking good!!!
it keeps getting better every post!! I decided not to post my pictures after taking another look at them, there pretty graphic. haha oh well at least were both better and back modding!
-
Title: Project Wetbox Wip
Post by: eminvil_12 on October 15, 2005, 03:46:00 AM
-
yeh i am loving this thread.
by the way haloloser are you australian???
-
Title: Project Wetbox Wip
Post by: haloloser on October 15, 2005, 05:16:00 AM
-
snow: thanks for putting thought in before you posted them. like i said, i really dont mind, its just some of the members arent to keen on those kind of pics. i normally can handle stuff like that, but i guess because i had to go through it, the pics really didnt bother me.
eminvil: im from south georgia. im about 3 1/2 hurs south east of atlanta, and 1 1/2 hours north of valdosta in a small town called albany georgia. its great to have support form all the member, but especially when the older members get behind me. thanks.
umm, i guess i was up about 3 hours ago trying to figure out how i was going to fix the back panel, and now im up getting ready for a visitation. i decided to give it one last look, and figured out what i was going to do. it was definately a God thing because now i dont have to reconstruct the back panel. i have to orders some parts and stuff soon. next time i work on it i should have some pretty neat stuff finished.
-haloloser-
-
Title: Project Wetbox Wip
Post by: jameschatz on October 15, 2005, 06:51:00 AM
-
-
Title: Project Wetbox Wip
Post by: devilmaycry666 on October 16, 2005, 04:08:00 AM
-
Post by: haloloser on October 14, 2005, 11:46:00 AM
QUOTE
If anyone wants I'll post pictures, but only if people want me to and its alright with haloloser.
QUOTE
how much is diamond plate usually for like a 1' by 1' piece??
1. anyone is welcome to post any pictures they want in this thread (please use discression). if you are going to post pictures i would please ask you to resize them to 640x480 pixels, and in your case if they are going to be graphic i would incourage you to make them even half that size. i dont mind, but it seems that some members of the community are offended by those type pictures.
2. i called all around town and got different prices everywhere i called. if you are going to get diamond plate, you probably want to go with aluminum. chances are unless you are going to paint it, you will probably have to take steal to the chromers to get a nice finish. you can also buy sheets that small at lowe's, but they are pretty expensive. try calling your metal fab places, as well ash sheet metal and aluminum venders.
QUOTE
how much is diamond plate usually for like a 1' by 1' piece??
HOLY CRAP! the cheepest i could get a piece that big was $75
QUOTE
P.S. Ur Grandpa Pwns!!
you have no idea. that guy can build anything, im not kidding. i dont know if any of you would remember this, but he invented the colman garden plow.
i really appreciate all the support. im about to go, and try to get some stuff done. ill probably have pics this afternoon.
Post by: haloloser on October 14, 2005, 08:22:00 PM
i removed the sticker.
i taped that beast up, and painted it.
in the mean time i made a black sticker out of electrical tape. i think it looks a heck of alot better.
all done.
dont forget to lubricate your blade children. it actually recomended using this in the book. i thought it was helarious.
almost finished. all we need now is the barb holes
and test mounted. it looks a little crooked because only the bottum is screwed in. now... the rad is supposed to be flush with the right side, not the left. this puts the bard from the waterblock and the barb from the rad just out of line enough to throw the entire project off. now i have to complete reconstruct another back i/o plate. i started to make the cuts for it tonight, but i got too frustrated and started rushing. i had to quit before i ruined something.
-haloloser-
Post by: b15ginz on October 14, 2005, 10:32:00 PM
Post by: haloloser on October 14, 2005, 11:12:00 PM
Post by: snow rider221 on October 14, 2005, 11:43:00 PM
it keeps getting better every post!! I decided not to post my pictures after taking another look at them, there pretty graphic. haha oh well at least were both better and back modding!
Post by: eminvil_12 on October 15, 2005, 03:46:00 AM
by the way haloloser are you australian???
Post by: haloloser on October 15, 2005, 05:16:00 AM
eminvil: im from south georgia. im about 3 1/2 hurs south east of atlanta, and 1 1/2 hours north of valdosta in a small town called albany georgia. its great to have support form all the member, but especially when the older members get behind me. thanks.
umm, i guess i was up about 3 hours ago trying to figure out how i was going to fix the back panel, and now im up getting ready for a visitation. i decided to give it one last look, and figured out what i was going to do. it was definately a God thing because now i dont have to reconstruct the back panel. i have to orders some parts and stuff soon. next time i work on it i should have some pretty neat stuff finished.
-haloloser-
Post by: jameschatz on October 15, 2005, 06:51:00 AM
Post by: devilmaycry666 on October 16, 2005, 04:08:00 AM
QUOTE(haloloser @ Oct 14 2005, 02:57 PM)
HOLY CRAP! the cheepest i could get a piece that big was $75
-
Title: Project Wetbox Wip
Post by: devilmaycry666 on October 16, 2005, 04:11:00 AM
-
-
Title: Project Wetbox Wip
Post by: eminvil_12 on October 16, 2005, 04:14:00 AM
-
Seriously its really good stuff, though i wouldnt use it in your fro because well i dont know. But you could give some of us members a laugh
PS: Cant wait for a few more updates.
cheers mate
-
Title: Project Wetbox Wip
Post by: haloloser on October 16, 2005, 10:58:00 AM
-
i didnt know what they meant, but i knew that stuff was really greasy. im sure eminvil can vouch for that stuff probably being good enough to serve the purpose. thanks for the advice because ill go look for it. i got the beeswax from walmart in the hair section.
-
Title: Project Wetbox Wip
Post by: haloloser on October 17, 2005, 07:06:00 PM
-
i got back from the barrial today. it wasnt quite as bad as i thought it would be. i spent the majority of the car ride reading harry potter, so instead of doing schoolwork when i got home, i worked a little bit. ive been intertaining this idea in my head for a while now, and i finally got to it today. i didnt spend alot of time taking the pictures becase the back still needs lots of work. this is what i have so far, and it looks pretty dang good, or at least i think so.
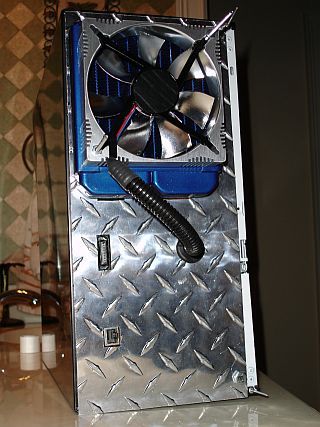
i just test fit the fan today. it took me forever to come up with a mounting scheme, but im pleased with the way it turned out. like i said its not complete yet, but it gets the point across.

another shot. kinda sideways. i think the sleeving and the rubber grommet just pulled it together.
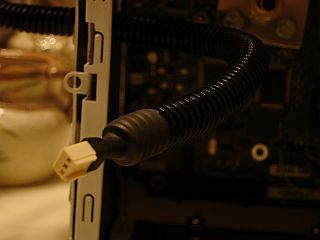

not even macro helped this picture in the light so i took one in the dark. its amazing what a simple wire sleave, and some heat shrink can do it add to the look.
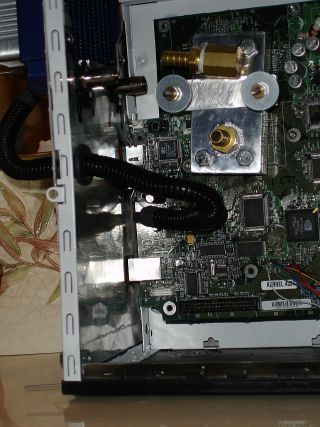
this was the worste pic, but it was meant to be a teaser. the waterblock is upside down in the picutre. i would leave it this way, but in order not to have to rebuild the back panel i have to flip it so that the top barb from the waterblock and radiator will match with a 90 degree elbow. ill hopefully have more to post tomorrow. keep the comments comming. i love to hear what you guys think.
-haloloser-
-
Title: Project Wetbox Wip
Post by: bosstitan187 on October 17, 2005, 07:33:00 PM
-
TIGHT!
-
Title: Project Wetbox Wip
Post by: dougMod on October 18, 2005, 07:41:00 AM
-
looks like a nice clean job.
-
Title: Project Wetbox Wip
Post by: haloloser on October 18, 2005, 08:31:00 AM
-
thanks guys. it really does feel like its starting to come together. if i could get that freakin side panel painted and finished i would be in buisness. im probably going to work on some minor things today, and ill have some stuff posted later on.
dougmod, man its good to see you back. i thought that almost all of the older members had abandoned the site, but i still see them every now and again. i have to admit its very reassuring.
i wish i had a video camcorder, but i do not. usually the only technology that we acquire around this house is the stuff i ask for. like i said i wish i had one, but i have other things that i need more. its more practical for me to get a new computer right now because im not a big movie maker. now, a video capture card; thats something i need!
-
Title: Project Wetbox Wip
Post by: Shoo Box on October 18, 2005, 08:53:00 AM
-
Post by: devilmaycry666 on October 16, 2005, 04:11:00 AM
QUOTE(haloloser @ Oct 14 2005, 11:33 PM)
Post by: eminvil_12 on October 16, 2005, 04:14:00 AM
Seriously its really good stuff, though i wouldnt use it in your fro because well i dont know. But you could give some of us members a laugh
PS: Cant wait for a few more updates.
cheers mate
Post by: haloloser on October 16, 2005, 10:58:00 AM
Post by: haloloser on October 17, 2005, 07:06:00 PM
i just test fit the fan today. it took me forever to come up with a mounting scheme, but im pleased with the way it turned out. like i said its not complete yet, but it gets the point across.
another shot. kinda sideways. i think the sleeving and the rubber grommet just pulled it together.
not even macro helped this picture in the light so i took one in the dark. its amazing what a simple wire sleave, and some heat shrink can do it add to the look.
this was the worste pic, but it was meant to be a teaser. the waterblock is upside down in the picutre. i would leave it this way, but in order not to have to rebuild the back panel i have to flip it so that the top barb from the waterblock and radiator will match with a 90 degree elbow. ill hopefully have more to post tomorrow. keep the comments comming. i love to hear what you guys think.
-haloloser-
Post by: bosstitan187 on October 17, 2005, 07:33:00 PM
Post by: dougMod on October 18, 2005, 07:41:00 AM
Post by: haloloser on October 18, 2005, 08:31:00 AM
dougmod, man its good to see you back. i thought that almost all of the older members had abandoned the site, but i still see them every now and again. i have to admit its very reassuring.
i wish i had a video camcorder, but i do not. usually the only technology that we acquire around this house is the stuff i ask for. like i said i wish i had one, but i have other things that i need more. its more practical for me to get a new computer right now because im not a big movie maker. now, a video capture card; thats something i need!
Post by: Shoo Box on October 18, 2005, 08:53:00 AM
QUOTE(C89ZX7R @ Oct 18 2005, 04:36 PM)
pointer , a video camcorder won't turn a UV led blue
-
Title: Project Wetbox Wip
Post by: jameschatz on October 18, 2005, 09:18:00 AM
-
Yer wat the hell was the point in screwing up this post wiv sum random piece of crap.
And even if a camcorder doesnt make the uv leds blue its picture quality is horrible and i wud much rather hav a cleaner pic wivblue leds than that picture
Anyways back on topic haloloser ur box is looki wicked cant wait to see it finished
-
Title: Project Wetbox Wip
Post by: Granulated on October 18, 2005, 09:55:00 AM
-
Wow. I haven't checked on this since page 2 or so, but I think my jaw hit the floor...great work!
-
Title: Project Wetbox Wip
Post by: Apprentice modder on October 18, 2005, 10:36:00 AM
-

-
Title: Project Wetbox Wip
Post by: thedominor on October 18, 2005, 11:53:00 AM
-
-
Title: Project Wetbox Wip
Post by: ninjax on October 18, 2005, 04:24:00 PM
-
-
Title: Project Wetbox Wip
Post by: V1GiLaNtE on November 13, 2005, 07:32:00 PM
-
Wow i should be studying for my chemistry test but this is just fucking amazing..if i fail this test i owe it to YOU..but thats aight cause your mod is sooo pimp
-
Title: Project Wetbox Wip
Post by: haloloser on November 14, 2005, 02:20:00 AM
-
hmmm... maybe ill install some underwater speakers in the res. that way when i mod my shrinking machine into the case as well, i can hear it when i go swimming in the res hahaha.
i just got back from athens, so tomorrow im going to work on the xbox again. ill answere a few questions for the time being.
it does actually look like a lot of extra room, but once the pump/res house is completed most of it will be gone. soooo, i just going to leave it simple. there will be some of the metal conduit used for wire management and astetics (spelliing), but that will pretty much complete the inside of the case.
the lighting will be a combination of uv and white leds. im probably going to add a uv cathode too, but i cant put it on the bottum because of the pump house. it might fit on the top, im just going to have to measure. expect an update tomorrow. thanks for the interest and support guys, i really appreciate it!
until next time.
-haloloser-
-
Title: Project Wetbox Wip
Post by: haloloser on November 14, 2005, 08:36:00 PM
-
didnt do a whole lot today. i actually assmebled my drill press, and messed with it a bit. i have to say that it is an amazing machine, and will make a great addition to my workforce.
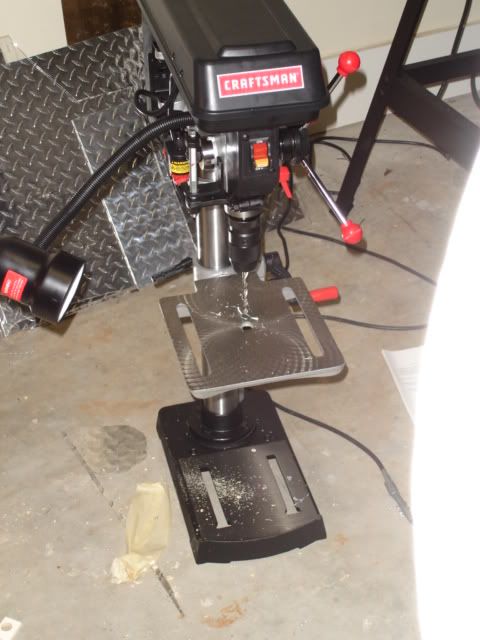
spectacular!!
i didnt really do anything else. i was trying to work out a way to mount the psu cover. i finally deicded to bite the bullet, and test to see if ti would work. here is the result.
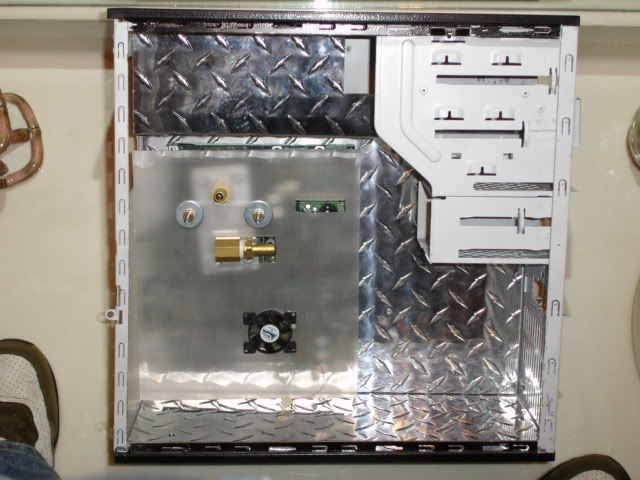
its a really terrible picture, but you get the idea. its all mounted. all i have next is to finish the pump/res house, and attach the drive bay cover. should be completely finished with the internal fabrication ver soon.
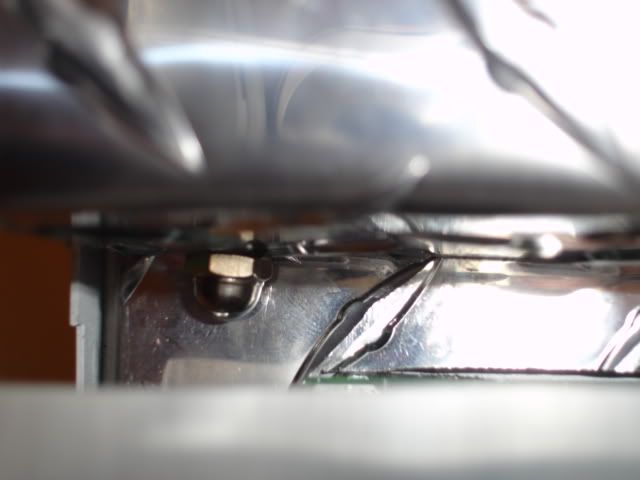
i used countersinking machine screws to attach the cover to the previous pc psu support. this way there will be no screw head to be poking the psu under the cover. number two, i used accorn head nuts to keep with the theme.
tomorrow im going to get some allen head machine screws to replace all the hex heads i have on the case. im gonna pic up a tap too, so i can complete the little house. until next time.
-haloloser-
-
Title: Project Wetbox Wip
Post by: llwahooll on November 14, 2005, 09:55:00 PM
-
good job man and be carefull that drill press lol i had a bad exp with on o those lol
-
Title: Project Wetbox Wip
Post by: haloloser on November 15, 2005, 12:05:00 AM
-
hahaha, im trying to be careful with it. thanks for looking out. as for the belts, i had to change them before i started doing anything. hahaha, it comes set to like 3200 rpms or something like that. i honest.y doubt that i wll ever have much wood to drill with it so i nocked to all the way down to 620 which is much better for drilling plastics. im excited to see the diamond plate shinning with some lights. you have to keep in mind its not polished yet either. when its over it should look chrome plated.
-haloloser-
-
Title: Project Wetbox Wip
Post by: llwahooll on November 15, 2005, 12:39:00 AM
-
yeah i cant wait to see this done lol
-
Title: Project Wetbox Wip
Post by: haloloser on November 15, 2005, 10:17:00 PM
-
went to a really cool store today and picked up some nuts, bolts, and a tap. i got them all from a really good deal. they are also going to replace all the hex head bolts on the project thus far.
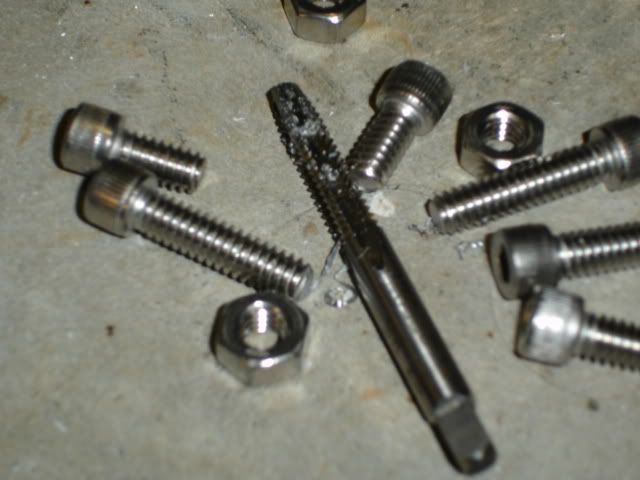
i started to attach the bay cover to the the bay holder, but the bolt stuck out too far so i have to go with another method.
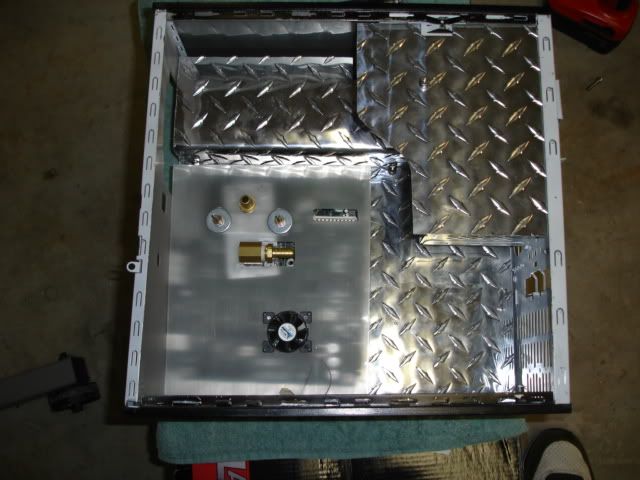
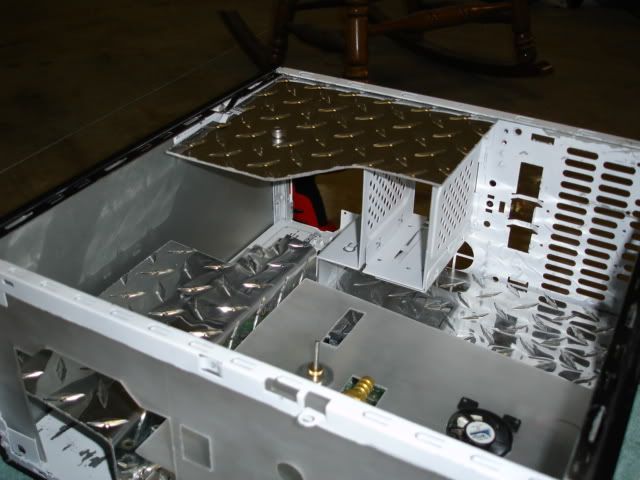
an idea of what it should look like.
i also started on the pump/res house. i got the two side pieces on. tomorrow ill add the front and back pieces, and fabricate the top.
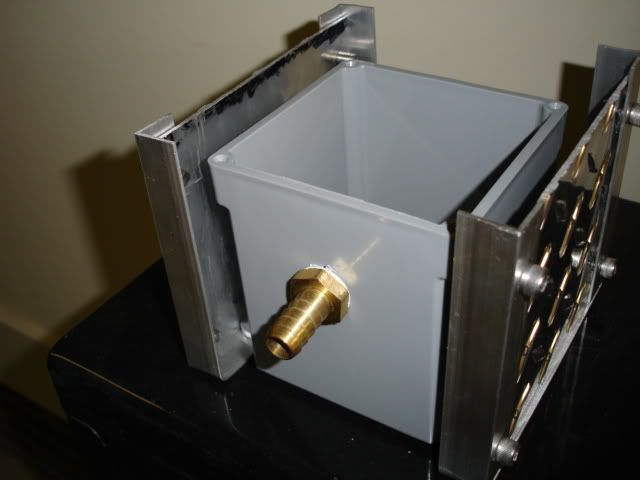
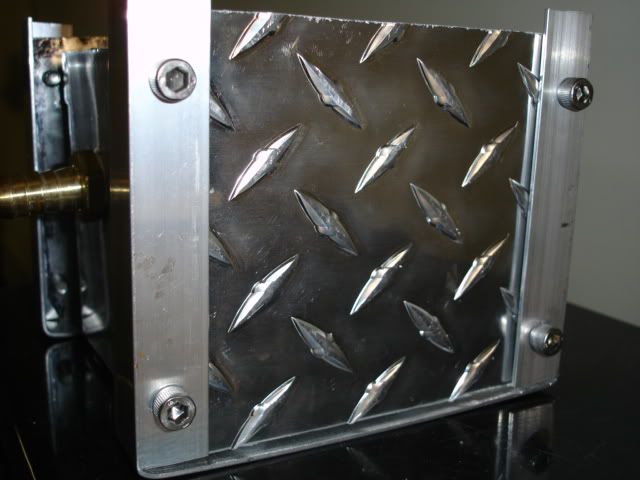
another view with the bolts. i think its looking good. ill get some more pics up tomorrow.
-
Title: Project Wetbox Wip
Post by: snow rider221 on November 15, 2005, 11:18:00 PM
-
looks great!! i cant get over how great the diamond plating looks!
-
Title: Project Wetbox Wip
Post by: eminvil_12 on November 16, 2005, 12:53:00 AM
-
yeh its looking very good.
painting that diamond plate a dark blue or something or the plexi with a translucent paint would look great.
keep up the good work
-
Title: Project Wetbox Wip
Post by: Chewonit64 on November 18, 2005, 11:35:00 PM
-
It's been awhile since someone posted in this thread so here we go. I might as well use it to ask a question. I'll probably get flamed for this, but what does WIP stand for?
-
Title: Project Wetbox Wip
Post by: paulharris2005 on November 19, 2005, 03:57:00 AM
-
work in progress
feel free to flame if ive got it wrong
lol
-
Title: Project Wetbox Wip
Post by: Chewonit64 on November 20, 2005, 01:40:00 AM
-
Wow, that makes me feel like a tool. Updates soon?
-
Title: Project Wetbox Wip
Post by: --DANNY-- on November 20, 2005, 05:03:00 AM
-
Looking better and better every update!
Keep up the superb work man!
-Danny
-
Title: Project Wetbox Wip
Post by: haloloser on November 21, 2005, 11:21:00 AM
-
thanks guys, im about to go to school, but i should have an update up this evening. i doubt i will be painting the diamond plate. hopefully by the time i get it all finished, when i put the side panel on it wont look like ive used too much. i think it will really work will with the "polished induistrial" look that im going for. i used to be the same way about that acronym, so dont feel like a tool (unless of course, its a dremel because those guys can do pretty much anything). anyways, ill get something up later.
-haloloser-
-
Title: Project Wetbox Wip
Post by: haloloser on November 21, 2005, 10:13:00 PM
-
what a hoot, that was what, five days ago. im sorry ive been out of town and stuff, but its back to the grind.
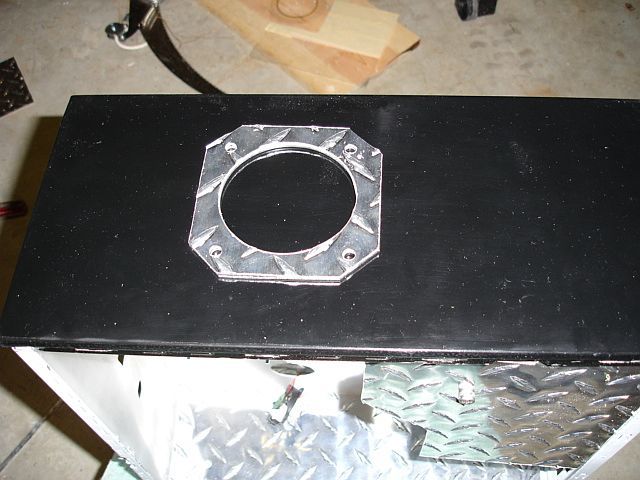
i got tired of workin on the pump house, so i had and idea. i think its going to look great in the end.
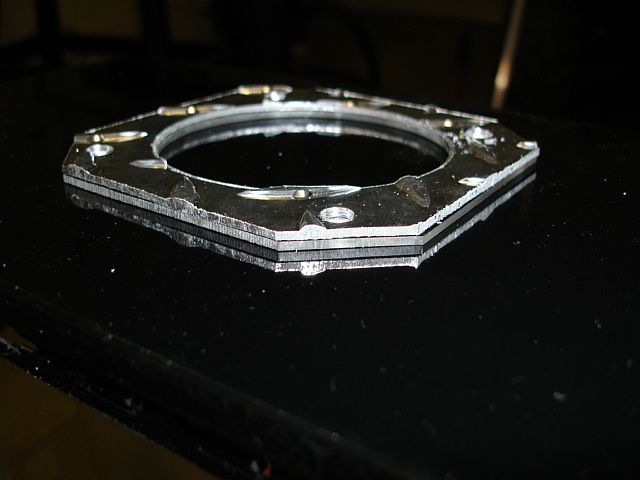
i used a small piece as a spacer that will be lit.
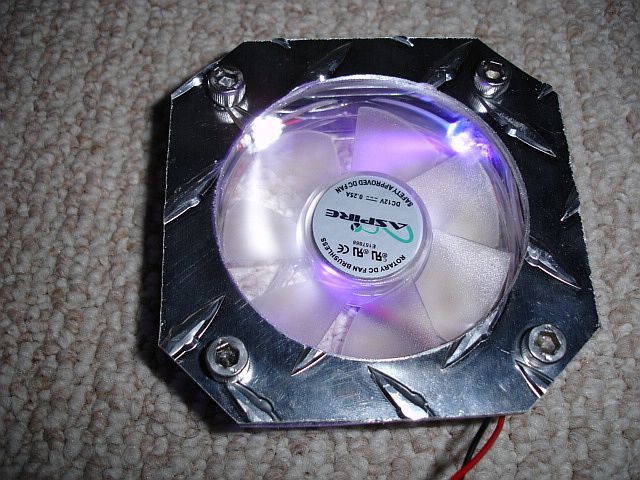
kinda what it will look like from the top. the fan will be mounted inside the case, while the diamond plate and plex will be mounted on top as pictured before.
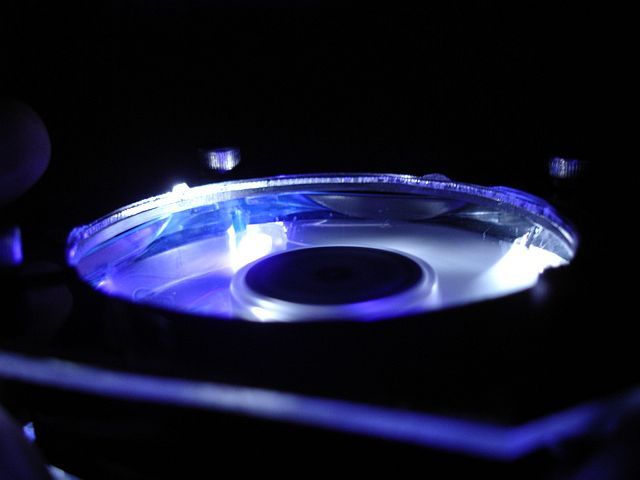
a pic in the dark.
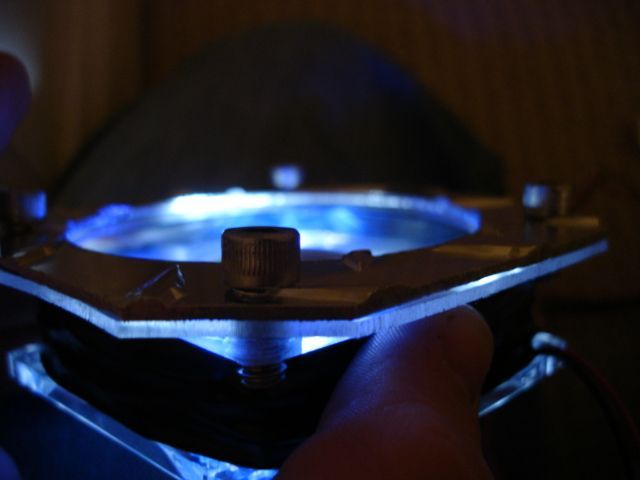
see how sick thats gonna look when its mounted. im gonna put it together tomorrow, and hopefully it will look as good as this picture does.
things i still have to do before the blowhole will be completed:
grind and polish the edges of the diamondplate and plex.
cut the hole in the case top
mount
ill post more pics tomorrow.
-
Title: Project Wetbox Wip
Post by: sully2010 on November 21, 2005, 10:54:00 PM
-
I thought you were going to use that diamond steel to put a jewel in the middle.
-
Title: Project Wetbox Wip
Post by: snow rider221 on November 22, 2005, 08:19:00 PM
-
wow the fan is simply amazing!! nice work
-
Title: Project Wetbox Wip
Post by: haloloser on November 24, 2005, 02:07:00 AM
-
im still trying to think of a way to incorparate the jewel into the project somehow, but as of right now im not having any luck. its four am and ive been playing halo all night. happy turkey day. here are some picas of the finished product. im very close do being finished with the inside of the case, so be prepared for everything to start coming together.
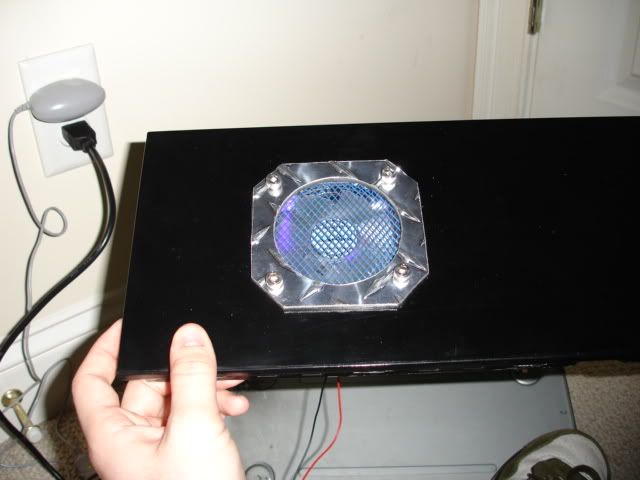
yay, ugly pic of the idea
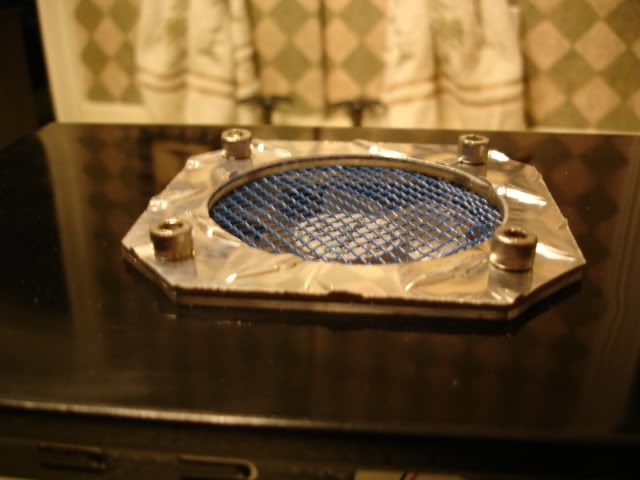
here she is mounted. keep in mind alot of the metal work still needs to be filed down on the edges.
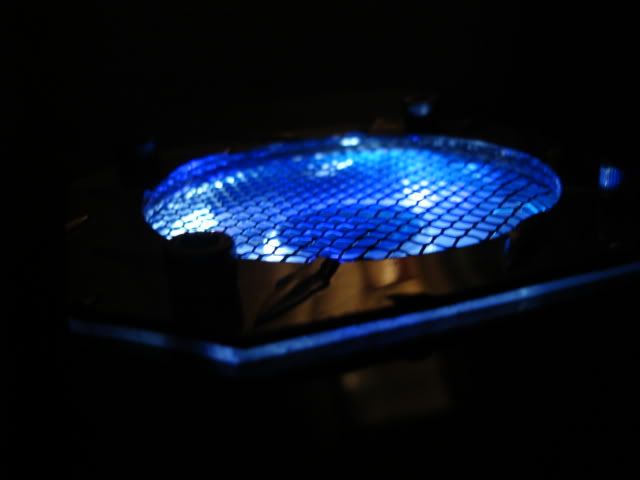
this is the good stuff. skeet.

i started to grow a beard. i look like o have a double chin in the picuture, but my gf looks cute. she is the mastermind behind the project.
-
Title: Project Wetbox Wip
Post by: twinski9909 on November 24, 2005, 02:13:00 AM
-
ahhhhhhh <3
-
Title: Project Wetbox Wip
Post by: thesamarchy on November 24, 2005, 02:56:00 AM
-
I'll trade you a few of my Nintendo 64 games for this.
Deal?
I'm serious.
-
Title: Project Wetbox Wip
Post by: snow rider221 on November 24, 2005, 11:17:00 AM
-
-
Title: Project Wetbox Wip
Post by: haloloser on November 26, 2005, 01:30:00 PM
-
i was going to paint the mesh black, but it hink im going to leave it blue to match the radiator. it is a good idea to go with a styalized grill, but this really looks good in person. the photos dont really give it justice. this is my longest running worklog, and it seems as if i dont get a move on we will be celebrating its birthday. its just the little tedious things that are really taking a long time.
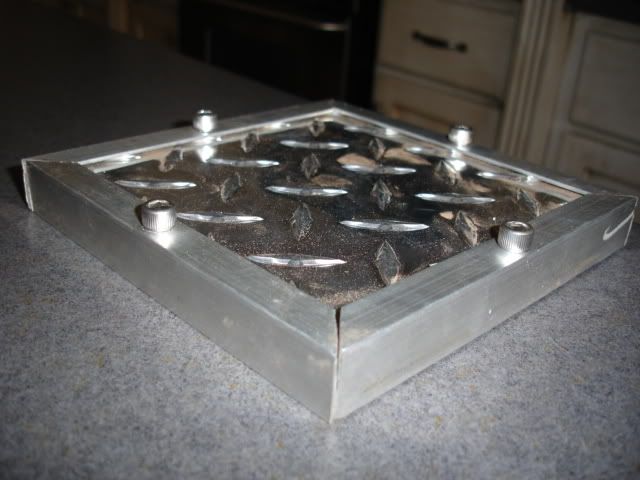
here is the top. im going to have to finish two weeks early just so i can get everything grinded and polished smooth!!!!
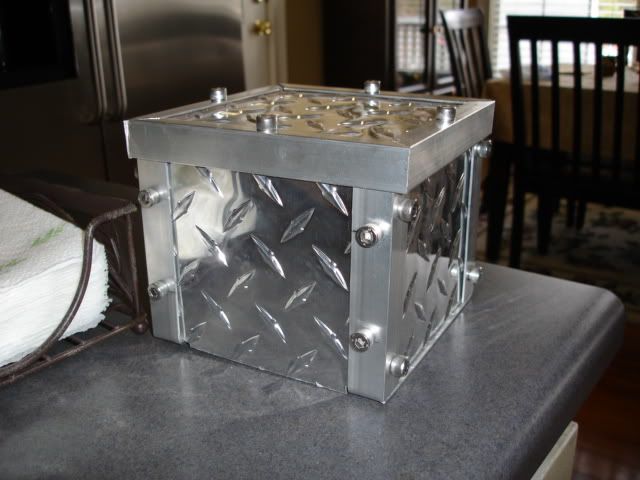
here we are with the pump/res house. its about 90% complete. the holes for the fan, output, and return hoses have to be cut.
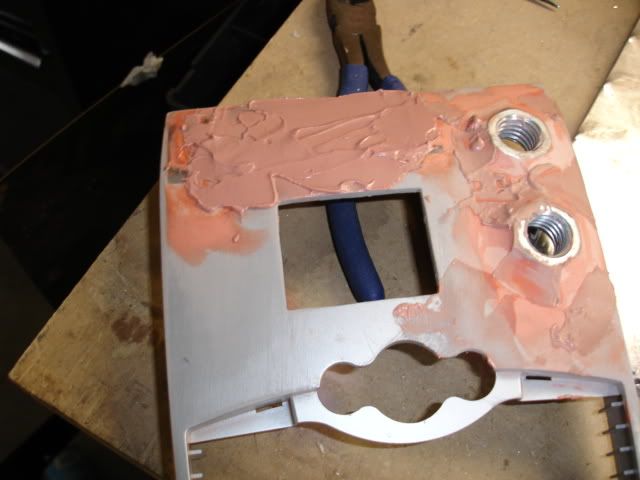
instead of using the compunurse im going to get a more simple digital display that will be mounted inside the case. i just couldnt get the display to fit correctly on the curve of the front panel so i did the responsible thing and just made a compramise. i bent a piece of plex over the hole that was there. glued it in place, and finally bondoed the hole.
ill be mounting this thermometer on the far left corner of the psu cover. i think its going to look pretty sweet. i wont actually mount the whole bay device obviously, but one of the lcds will be inserted.

i think that this is the first mod that ive actually completed. me and my girlfriend constructed it last niight.
happy holidays!
-
Title: Project Wetbox Wip
Post by: b15ginz on November 27, 2005, 06:51:00 PM
-
happy holidays!
[/quote]
dude i havent made a ginger bread house since like 5th grade. im a college grad now...22. brings back the memories!!!!!!
-
Title: Project Wetbox Wip
Post by: blubberpud on November 28, 2005, 10:43:00 AM
-
...makes me hungry....... the ginger bread house looks good too
-
Title: Project Wetbox Wip
Post by: snow rider221 on November 28, 2005, 11:48:00 AM
-
looking good! about what % do you think you have completed???
-
Title: Project Wetbox Wip
Post by: diablomastabarb on November 28, 2005, 05:55:00 PM
-
i've been watching this thread since you started it, and you've come a long way, keep it up man. Awesome work
-
Title: Project Wetbox Wip
Post by: haloloser on November 28, 2005, 06:19:00 PM
-
thats so funny. im twenty years old now, and this is the first time ive ever built a gingerbread house. me and my girlfriend built it, and i had a blast.
i know what you guys are thinking, and here is a pic.

the worklog can be found here http://www.envador.c.../GingerbreadPC/
well, since ive worked out the problems with the temp lcd position ive actually cut out alot of work. now that the front doesnt crack every time i try and fix it i have alot less to do. also, getting the paint finalized should be a breaze now because tomorrow im going to see a man about a powder coat. after thats finished i should be getting donw to the nitty gritty. pretty much all that will be left is to file the edges of the diamond plate. im also going to have to polish all the smudges and fingerprints off of it. i have to find some simple handles that i want to add to the top, and finally wire everything up. thats going to be a job in and of itself. i should have a dual hdd mod, so any kinks i have with that will have to be worked out as well. if anyone on this forum can get me a ide cable with four connectors at a custom length i would be forever grateful ive sent out a couple of emails, and llamma said he would help, but i havnt been able to contact him since the initial email.
diablo and xgamer, you guys really make me feel good about it. i didnt really realize how long this thing was getting until now, and hopefully ill be able to draw it to a conclusion before too long. ive already started planning for my upcoming pc project, and im super excited about it. i know if i start on that this will never get finished, so the sooner the better.
-
Title: Project Wetbox Wip
Post by: haloloser on November 29, 2005, 08:41:00 PM
-
so today wasnt a complete waste of time, but it was dang close. remember the psu sleeving job i did?
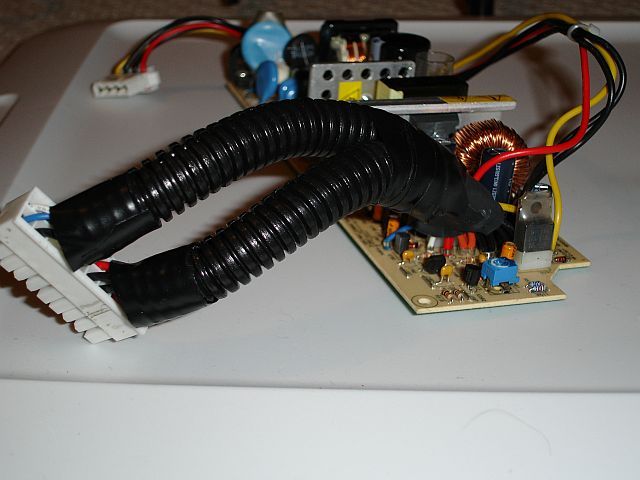
yeah, i was never really happy with it. ive been waiting to come up with something to replace that janky job, and this is was i came up with.
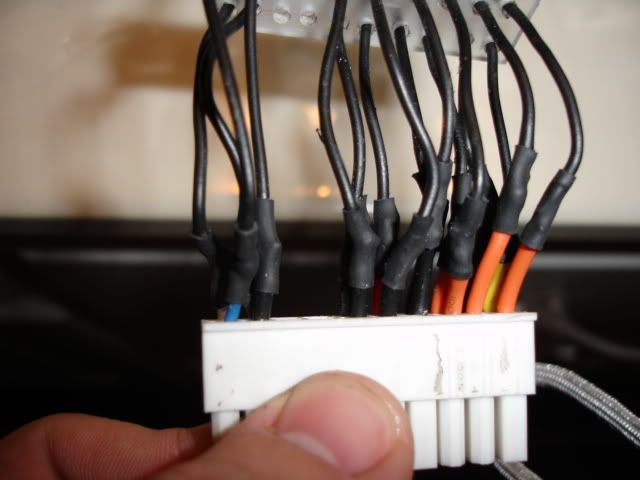
alot of freaking soldering and heatshrinking. i took 16 black wires, got rid of the unsightly colored ones, and finally made some plex seperators.
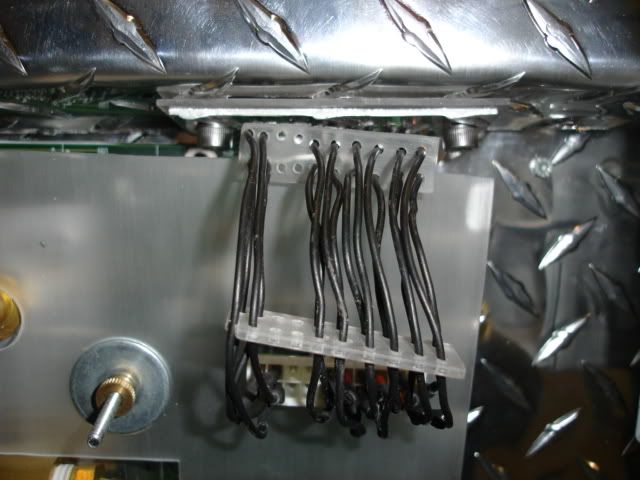
here you can see how they work.
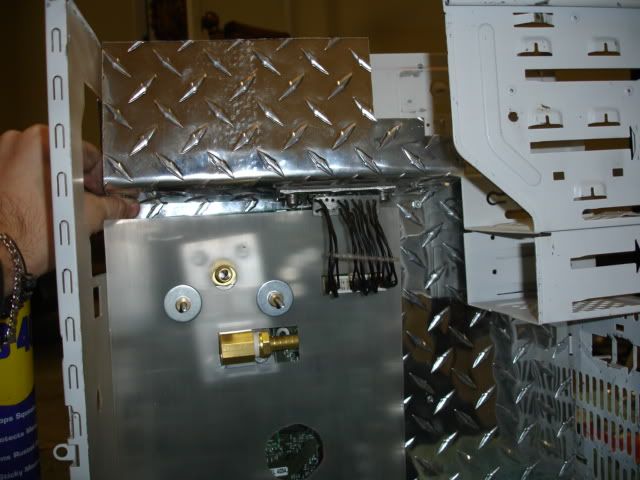
from farther away.
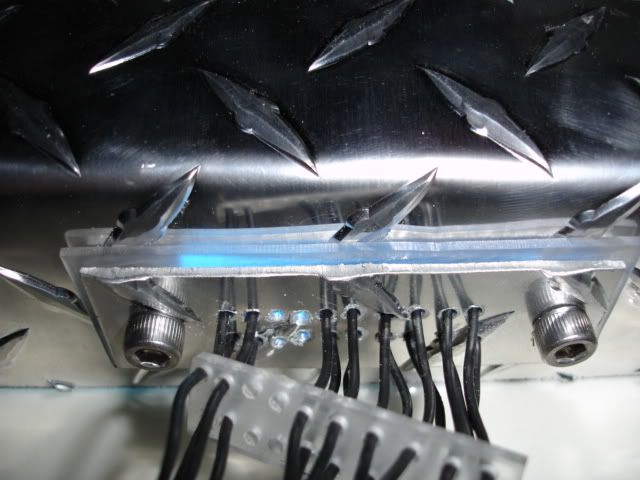
this is the mounting scheme with some lights.
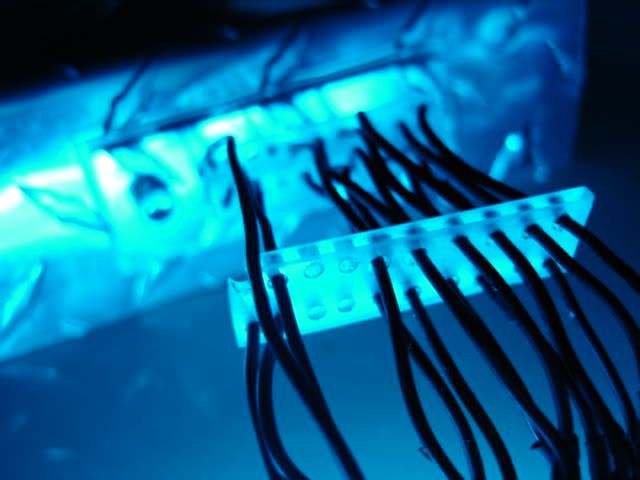
im a sucker for frosted plex. i just love the way it captures the light.
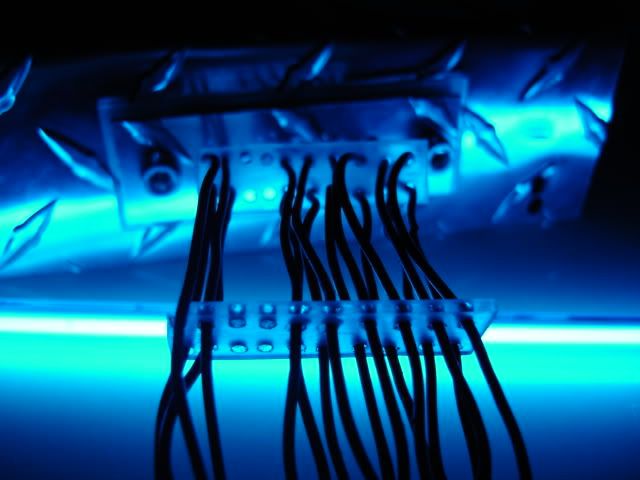
one more for good measure.
ok, now for the second portion of the update. ive spent alot of time putting the finishing touches on the front because tomorrow im seriously going to talk to someone about getting it powdercoated. i put some primer on it so i could see what imperfections i needed to make up. i did a pretty good job, there are a few touch ups, but thats to be expected.
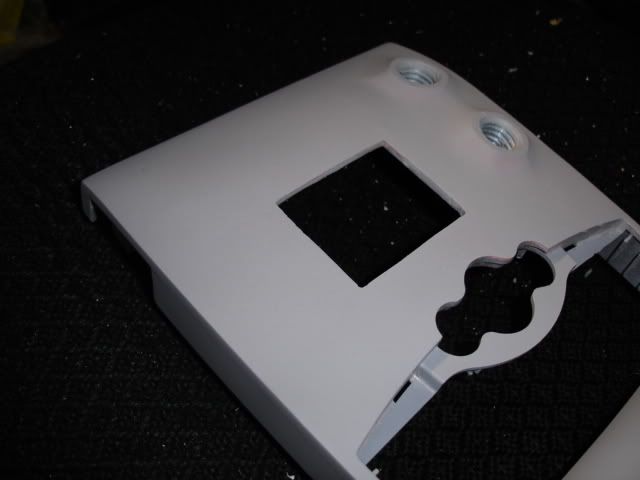
can you tell there was ever a floppy drive slot.
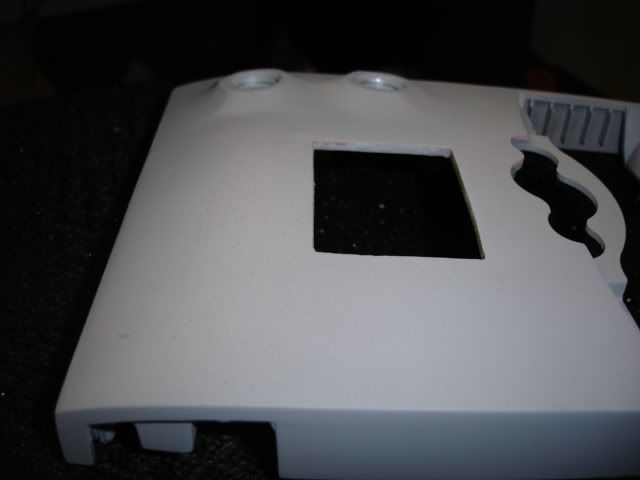
can you see the hole in the lower left corner?
hopefully tomorrow i can get something productive done!
-haloloser-
-
Title: Project Wetbox Wip
Post by: Arjun on November 29, 2005, 09:22:00 PM
-
Nice job man. Do you know how powder coating works? Everything is baked at a really high temperatue, and I don't think it'll last...
-
Title: Project Wetbox Wip
Post by: haloloser on November 29, 2005, 09:30:00 PM
-
ok maybe not powdercoated, but sprayed with automotive paint. i knew it was something like that. my friends always used to get their bike frames done by one or the other, but i was always too much of a tightwad.
-
Title: Project Wetbox Wip
Post by: haloloser on December 01, 2005, 10:49:00 PM
-
few little things. cut the excess audio knob off of the hippad controller
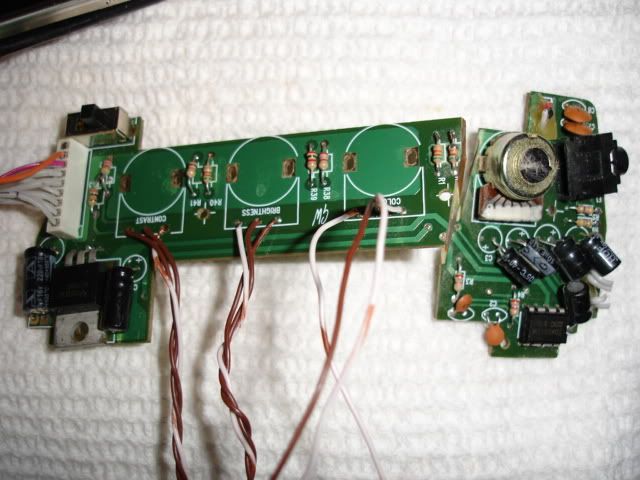
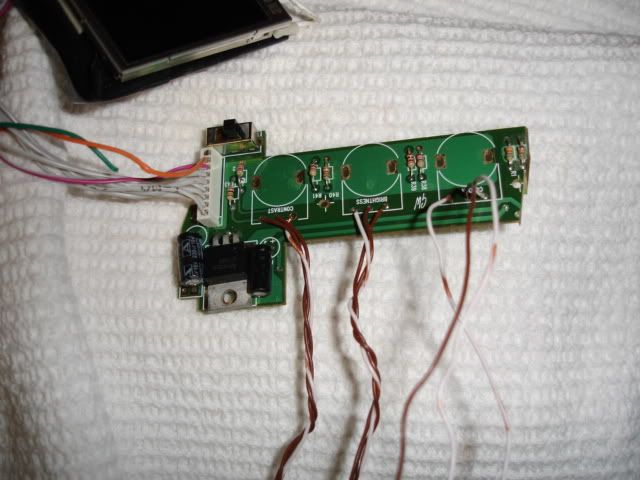
fits much better inside the case now.
also started cutting the holes for the inlets and outlets.
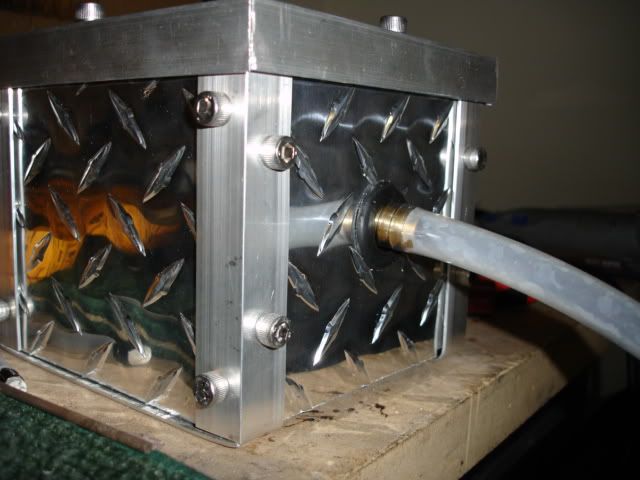
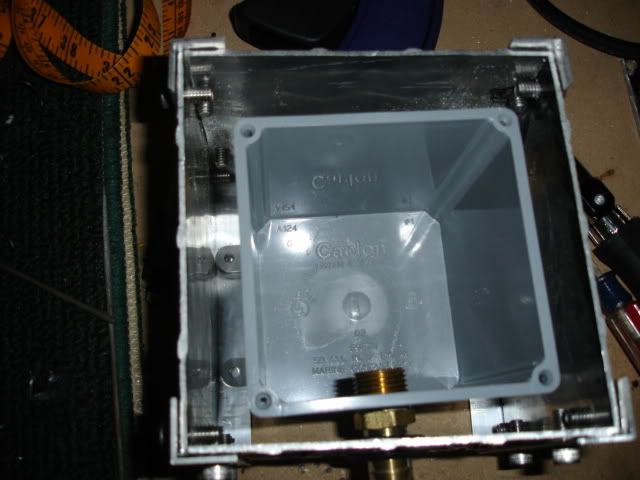
i still have to cut a hole in the top.
-
Title: Project Wetbox Wip
Post by: haloloser on December 04, 2005, 12:12:00 PM
-
a few new pictures. i took the liberty of making my own y splitter for the hdd power, so that it would fit more conveniently into the psu cover. i also made it so that it would have one rca style jack for leds, and another rca style jack for the blow hole in the top of the case. there is also one standard molex connector for a cathode, and another for the hdd or dual hdd mod that will probably not happen becasue i cant get my hands on an ide cable. my dad has an auto painting place insured, and might be able to get me a good deal on getting the case sprayed so we will know shortly. as soon as i get the case painted ill be about 95% complete becauase all that will be left is mounting the pump house and wiring everything up.
i made another wire holder bracket deal like i did on the 20pin connector to keep the two molex seperate.
nice and compact. shouldnt cause any trouble in its little storage shed.
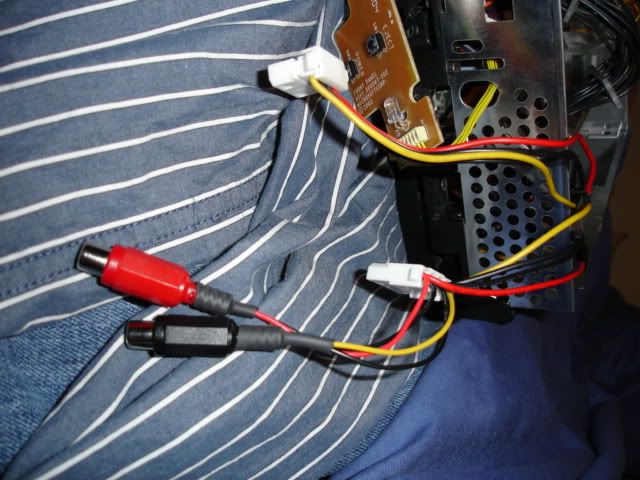
close up view of the rca style power connectors.
ill get some new stuff posted soon hopefully.
-haloloser
-
Title: Project Wetbox Wip
Post by: snow rider221 on December 04, 2005, 12:30:00 PM
-
lookin good! Are you using one of the 5 inch playstation lcd's ?
-
Title: Project Wetbox Wip
Post by: haloloser on December 06, 2005, 07:57:00 PM
-
well ladies and gents, wetbox is in her final stages right now. tomorrow i should get something up on it, but lets just face it, all the things that are left to do are boring besides the final shots. ive taken a break for the past few days to begin construction on my new pc. ill post a little bit about it here, and also the link. once wetbox is complete make sure to keep check on the pc mod.
specs:
motherboard-dfi lanparty ut nf4
processor-amd athalon 64 3700+
memory-corsair xms 2x512
video card-evga 7800gt
hdd-western digital raptor 36.5gig
hdd-western digital caviar 80gig
dvd drive-Pioneer 110D
monitor-SAMSUNG 740N
keyboard-Saitek PZ30AU Black
mouse-logitech mx510
psu-antec trupower
water:
rads-2 x black ice pro
processor-tdx waterblock
gpu-acetel maze 4
pump-mcp 350
any of you remember the rust mod that was posted here a month or so ago. ill be using the same technique on this pc, but there will be quite a few add ons.
a few pics of the beginning stages.
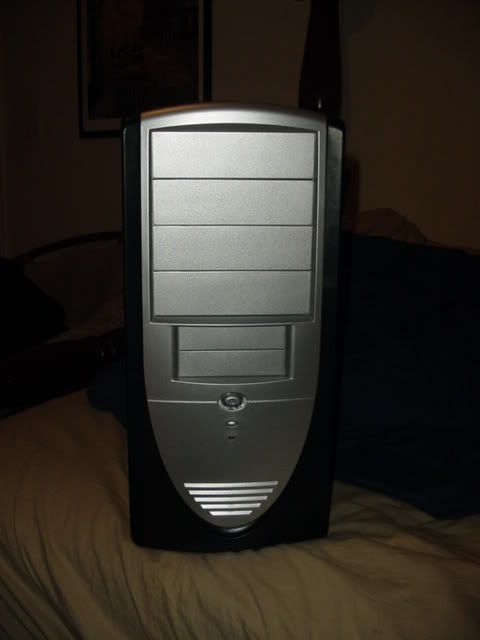
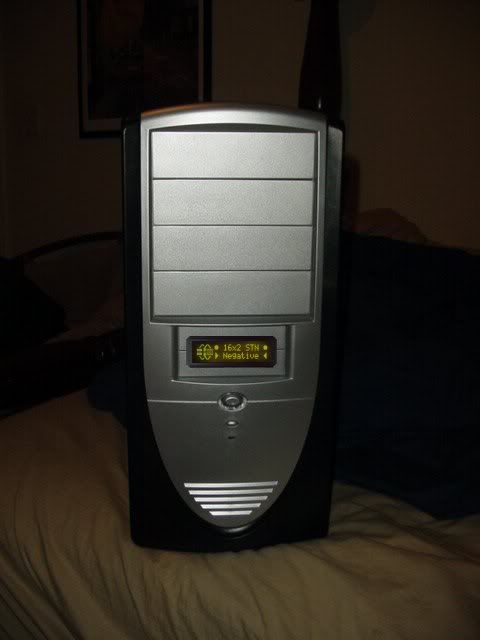
serial lcd that will be added to the front eventually. (obviously photo edited to get an idea).
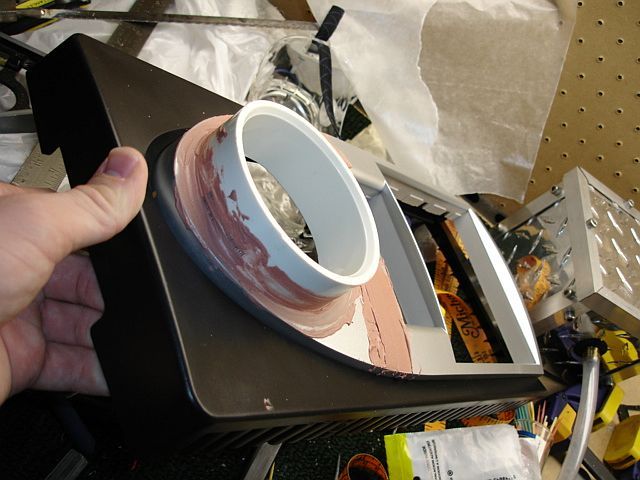
this is an intake. since the idea of the case is rust, and ive really taken to the industrial look, im going to try and make this look like a drain pipe with some slime lookin stuff coming out of it. it will actually be the vent hole for rad number one.
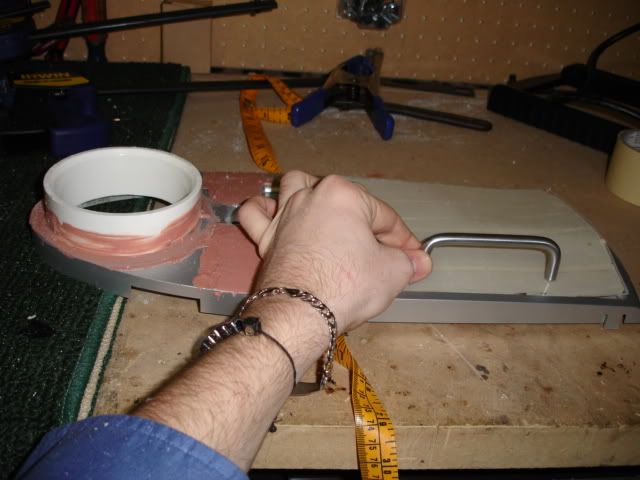
finally the drive cover. i dont know if im going to go with the plex pictured here, or some leftover diamond plate.
like i said, ill get some pics up of wetbox later, but for now ive been having fun with this upcoming project.
-haloloser-
-
Title: Project Wetbox Wip
Post by: paulharris2005 on December 08, 2005, 01:19:00 PM
-
nice i really like your xbox and i like the sound of this new project your startin, keep up the good work.
o yea and bump for a great project
-
Title: Project Wetbox Wip
Post by: quickdeath000 on December 08, 2005, 05:37:00 PM
-
Looks good.
-
Title: Project Wetbox Wip
Post by: novakpower on December 08, 2005, 06:39:00 PM
-
I would bondo between the 3 1/2 drive bays to give it a solid one piece look when the lcd is installed.
-
Title: Project Wetbox Wip
Post by: stevewal on December 09, 2005, 10:47:00 AM
-
still looking good,
keep the good work coming.
on the ide connector front: you can buy any long 3 connector ide cable and push a new connector onto it at the position you want. you can pm me if you : have any difficulties with 2hdd modding.
Good luck
-
Title: Project Wetbox Wip
Post by: Chewonit64 on December 11, 2005, 11:33:00 AM
-
Bump for a sweet project.
-
Title: Project Wetbox Wip
Post by: snow rider221 on December 11, 2005, 11:44:00 AM
-
wow its all starting to come together!
oh and the guy above me may want to make a smaller sig...
-
Title: Project Wetbox Wip
Post by: SilverStone641 on December 11, 2005, 12:21:00 PM
-
yeah chewo, you have the biggest sig by far.
anyways, the front of the pc at the top of the previous page looked far cleaner then the one with the intake. what happened?
-
Title: Project Wetbox Wip
Post by: 2600 on December 11, 2005, 05:20:00 PM
-
what kind of pump are you using for the water cooling?
-
Title: Project Wetbox Wip
Post by: haloloser on December 11, 2005, 08:58:00 PM
-
dude, i had no idea. i feel kinda stupid not being able to put two and two together, but i definately know now thanks so much for the info. im definately going to try that out. also, i have one last question regarding the switch. is it supposed to be on/off/on, or on/on/on? im not completely certain, but i think its on/on/on. if you dont catch this before i can pm you just disregard.
i would definately have to agree that the pc at the top looks far better then the pc front with the intake. i havnt actually gotten around to sanding the bondo smooth on the front of the case with the intake. also, the theme of that case is going to be that of a rusty factory. the intake is actually going to to look like a sewege pipe with a graten on the front, and some slime running from it (havnt figured that part out yet, but im getting there). ill email a admin later, and see if they wont mind me posting the log of that computer when i officially start. after all, its all modding, and im sure that ideas could be gathered from it.
im going to be using a submersable pump used for small water gardens. i cant remember the exact specs of it, but they are posted in this thread a few pages back. i think its like 200 gph with like 5-6 feet of head pressure. if actually made it hard on myself doing it this way because ive had to spend alot of time designing and constructing something to hide the res that the pump will be submersed in. ive been kinda busy this week, but i should get some serious work done tomorrow. ill have some pics up soon.
-haloloser-
-
Title: Project Wetbox Wip
Post by: eminvil_12 on December 12, 2005, 05:43:00 PM
-
Hey,
This mod is looking great.
Would you be able to get any pictures of it half assembled so we kind of get an idea of what it will look like
thanks
-
Title: Project Wetbox Wip
Post by: Irish-X on December 13, 2005, 12:03:00 AM
-
Damn. Just Damn. I leave for a few months and come back only to spend an hour reading a single thread on one project. It was soo worth it though. Awesome job and good luck with the contest!
-
Title: Project Wetbox Wip
Post by: ClintiePoo on December 13, 2005, 11:45:00 AM
-
The whole thing looks good. However, I would put some trim around the fan. It looks sloppy without it.
-
Title: Project Wetbox Wip
Post by: haloloser on December 13, 2005, 06:09:00 PM
-
sloppy!?... i might have to agree with you that the edges are a bit rough, but they have yet to be filled and sanded. other then that, there is pretty much not a good way to get trim around it. the idea is that the plex spacer gives it a nice glowing crontrast from the case, instead of this hunk of metal bolted onto it. i think it looks good, but maybe you can explain your reasoning a little better. i might be confused.
as always, thanks for all the comments and support. its been a busy week with exams, and all that. by the end of this weekend i should be able to get to the final stage before reconstruction. until then... fair well.
-haloloser-
-
Title: Project Wetbox Wip
Post by: Chewonit64 on December 14, 2005, 06:40:00 PM
-
Ahaha, sorry bout the sig guys. Came out a little bit bigger than I had planned. My new one should be fine though. Need some pics of the progress on the X-box man.
-
Title: Project Wetbox Wip
Post by: stinger4life on December 20, 2005, 01:41:00 PM
-
bumpity bump bump
Great work so far man I have been watching this thread since the first post you made and only now am i posting, but this beauty has to be bumped and hope to see some more pics soon!!!
Good luck with the contest!
-
Title: Project Wetbox Wip
Post by: haloloser on December 21, 2005, 09:17:00 PM
-
ok guys i promise i havnt forsaken you. the work on the project has slowed to a complete stop with christmas shopping, and moving my girlfriend back home. its been a busy couple of weeks, but i guess we've all come to expect that by now. tonight i mounted the door for the usb cover, and i also extended the dvd drive power cable. in light of recent events and time constraints ive decided to go with one hdd (that leaves room for wetbox rev. II for all of you who have followed this mod). eminevil, i really would like to post some pics of it together, but im probably going to get it painted before i put it back together (chances are that will be the final build, so... keep your fingers crossed). i know someone who will be able to spray it now, so i should have that done sometime after the holidays. ill put up some pics tomorrow. thanks for staying tuned.
-haloloser-
-
Title: Project Wetbox Wip
Post by: SilverStone641 on December 21, 2005, 09:27:00 PM
-
its a nice change to see someone actually trying to finish their projects. we can't wait!
good luck!
-
Title: Project Wetbox Wip
Post by: neb15 on December 22, 2005, 10:33:00 PM
-
will there be annything over the x-mas holiday, or do we wait till the new year?
looking good so far.
-
Title: Project Wetbox Wip
Post by: Capon-E on December 23, 2005, 01:12:00 AM
-
THIS TOPIC ROCKS MAN. MAD PROPS AND WISH YOU A HAPPY HOLIDAYS
-
Title: Project Wetbox Wip
Post by: haloloser on December 23, 2005, 12:39:00 PM
-
neb, yes you can expect some pics before the new year. i was going to work on it some last night, but i helped my mom bake christmas goodies instead .
Capon, thanks man, and i really appreciate it. i rock the merry christmas in this thread, so boo to the people who are trying to get rid of it.
-
Title: Project Wetbox Wip
Post by: haloloser on December 25, 2005, 01:42:00 AM
-
ive been working at a groolingly slow pace, but its almost finished. THATS BESIDE THE POINT. IDE JUST LIKE TO SEND YOU ALL SOME HOLIDAY CHEER.

i know that merry is spelled incorrectly, it was a typo that im too lazy to fix.
-
Title: Project Wetbox Wip
Post by: capboy210 on December 26, 2005, 12:43:00 AM
-
Fantastic job, i just read all 21 pages, i need a eyebreak lol.
-
Title: Project Wetbox Wip
Post by: jagermike on December 26, 2005, 09:10:00 PM
-
yeah finsh it so we can see the final product
been waiting too long
-
Title: Project Wetbox Wip
Post by: haloloser on December 27, 2005, 07:35:00 AM
-
im so sorry for the lack of picture updates guys. ive gotten alot done, including the final say on how the front will look (a major concern as it need to be painted very soon). im about to go on a trip for a few days, and when i return i will flood the thread with all the most recent information and photos.
in other news, i got my capture card hooked up. i have to say that is one really neat piece of technology. if you dont know much about them, and you watch alot of tv (or just want to make a montage) id have to say that its worth doing a little bit of research on.
-haloloser-
-
Title: Project Wetbox Wip
Post by: sokignano on December 27, 2005, 04:21:00 PM
-
What kind of doggy is that? He/She's cute
-
Title: Project Wetbox Wip
Post by: nightmare84j28 on December 27, 2005, 04:46:00 PM
-
sokignano, dont be fooled by the cuteness, there PURE EVIL INSIDE
My nan once had one.. it was satan on four legs, so snappy and moody!
-
Title: Project Wetbox Wip
Post by: vr4z06gt on December 30, 2005, 07:40:00 PM
-
NOOOOOOOOO....post more! I found this thread have been mezmorized reading it for the last hour or so. I need closure! Its like alias whatever ever happened to Rembaldi???(halfway through season 4, if anyone reading this actually watches the show don't say what happens its a great show though).
-
Title: Project Wetbox Wip
Post by: c0d3_z3r0 on December 31, 2005, 01:28:00 PM
-
Can't wait to see the final product!
-
Title: Project Wetbox Wip
Post by: haloloser on January 01, 2006, 09:33:00 PM
-
THE LONG AWAITED UPDATE!!!!!!!!
ive been pretty busy over the holidays, as i expect most of you have. ive been workin on it here and there, but hopefully tuesday will be paint day. then all ill have to do is put it together, and wire it up. ive learned alot from this mod, and probably the thing that ive gotten most from it is simplicity is the key. you can still have a very elegant (spelling?) design, and keep the construction very simple.
a pic of my christmas present. the sooner the xbox is finished the sooner ill be able to start on this.
specs:
msi k8n sli w/ nforce for chipset
amd 3700+
2 x 512mb corsair xms
evga 7800gt
danger den tdx, and maze 4 cpu and gpu waterblocks
obviously a tuner card
34gb raptor
soon to be 2 x 80gb WD caviar in RAID 0
this is my first build, and im super excited to begin.
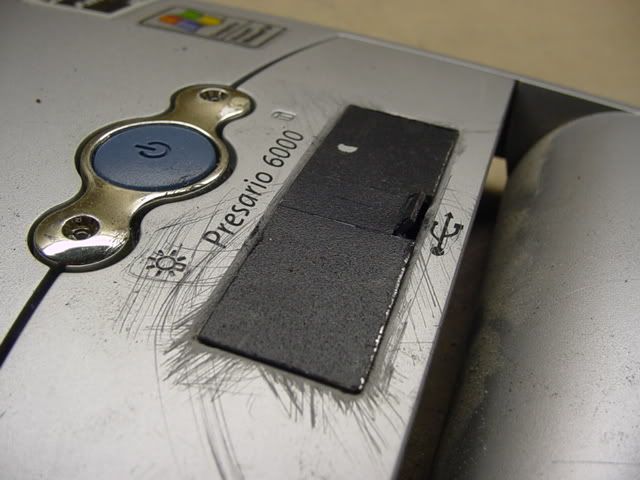
i dont know if you guys remember the front of the case, but the traped door was on a seperate piece. there was also an unsightly power assembly that i had to deal with. it took me a while to come up with such a simple solution, but you can thank this for the time inbetween the updates.
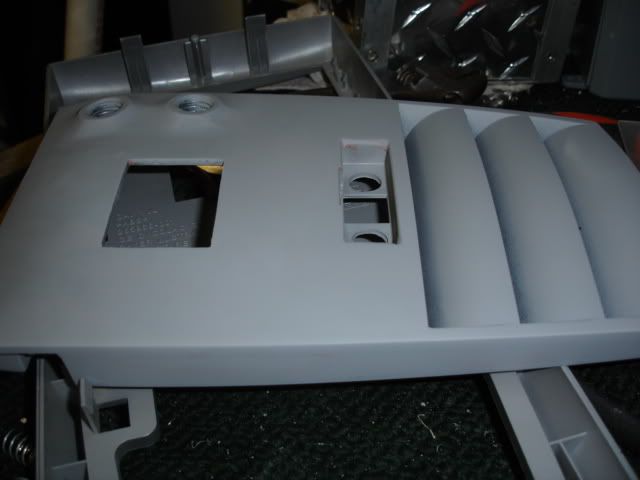
as you can see i glued, and bondoed the pieces together for a much smoother look, and also got rid of the nasty buttons. in the top right you may see some discoleration of the primer, but i assure you that its smooth.
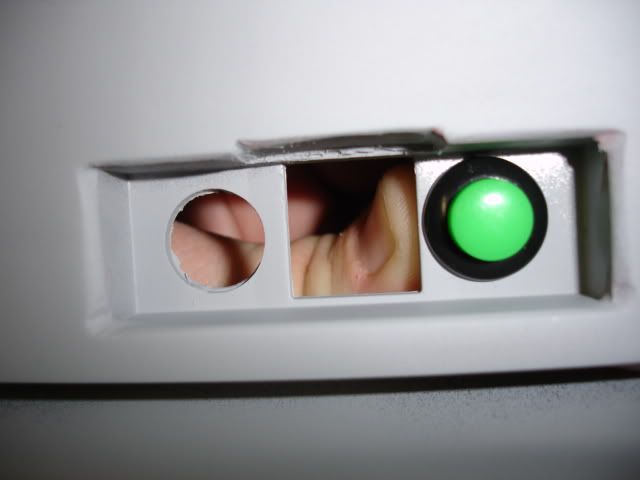
the power and eject buttons will go under the trapped door. test fit of the power or eject, dunno which.
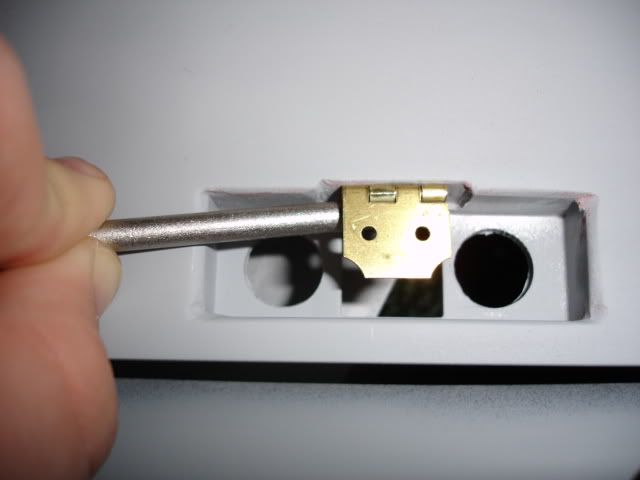
i routed out a channel for the hinge to fit in. here is a pic showing how it will work.
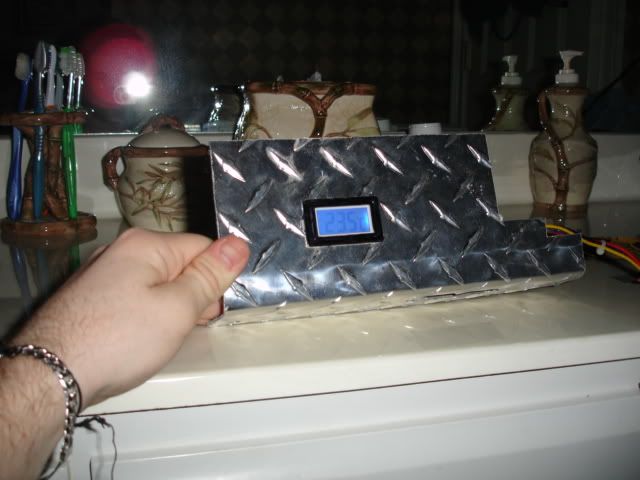
finally psu shield w/ temp lcd mounted.

ive used quite a few of these little lcds. i really like them.

i was taking some screen shots of halo 2 to try and get some ideas for signs to use on the upcoming pc project. i stumbled accross this, and i thought that you guys might be able to appreciate this. this is the messege you get when you open the gate on zanzebar.
ps. the dog is a shi tzu
-
Title: Project Wetbox Wip
Post by: stinger4life on January 03, 2006, 03:23:00 PM
-
Finally were getting to the final touches...thanks for the update and awesome work man you will have me dreaming of the final product tonight
p.s.,
All those computer parts make me tingle inside...reminds me of when i built my pc
-
Title: Project Wetbox Wip
Post by: beastiekid2 on January 03, 2006, 04:30:00 PM
-
god sends his blessings to you for all the shit you have done
-
Title: Project Wetbox Wip
Post by: haloloser on January 03, 2006, 08:32:00 PM
-
ok today i spent about an hour and a half at premeir auto body picking out a color for the case. my dad has the owner insured, so he was able to really help me in the right direction. the funny thing is that every bit of body work ive done so far has to be completely resanded. all the primer has to be removed, as well as the paint. next we will put a final coat of some finish stuff on the components. after it dries ill give it a final rub before primer goes on. in about two to three hours i will give the primer a wetsand, and he will add the final color coats. finally, ill give the clear a wetrub, and then we will buff it to a glass like finish. i decided to go with a black color that has a really nice metal flake in it. i think its a viper color (its pretty amazing, and i cant wait). anyways, the reason why i act like i have such a role to play in the painting process is because he is letting me do all the prep work. for one, its saving me money, and two, im getting a first hand lesson from a professional. paint labor and all is only going to run me 60 dollars. it wouldnt even be that much, but i got such a nice color. its ok, its going to make the case look amazing. the case should be completely finished by the end of next week, and ill be able to post some pictures of the final construction.
-
Title: Project Wetbox Wip
Post by: henmill on January 03, 2006, 08:41:00 PM
-
Sweet deal man. Can't wait to see that awesome paint!
-
Title: Project Wetbox Wip
Post by: haloloser on January 09, 2006, 09:51:00 PM
-
i have alot of bolts in this project games, dont worry. there will be plenty by the time its all over with. ive run into some setbacks with paint, but if all goes as planned, the case should be primed and ready for paint by wed. i think by friday you will begin to see the case make is turn from varius scattered pieces, to running xbox. for now i have alittle teaser of my pc mod. keep in mind, i havnt forgotten about wetbox, its just all riding on the paintjob now, and i can only get that done when the guy has time.
i pretty much started testing my rusting agent on the top of the case.
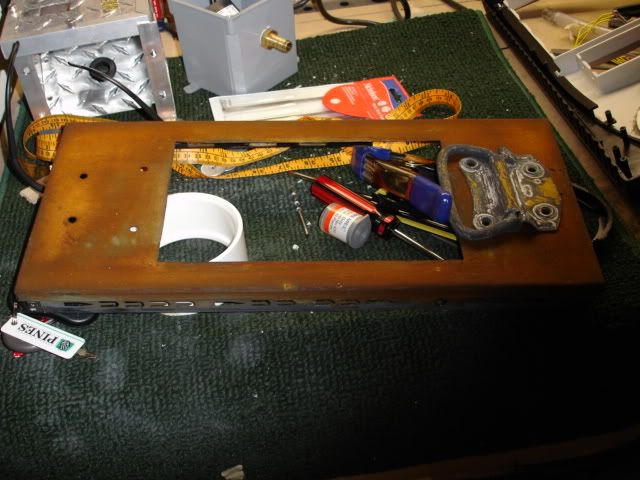
i think its turning out really nice. i think its a little bit more of a believeable rust then the more orange colors you usually see this stuff make.
you can also see the handle in the picture. ive been having problems with it. first i just painted and then added the oxidizer the next day. turns out the zink coating on the handle itself stoped the whole process from working. at this point i tried to grind the coating off, and started over. its working a little bit. tomorrow we will see how it looks after two coats of the oxidizer.
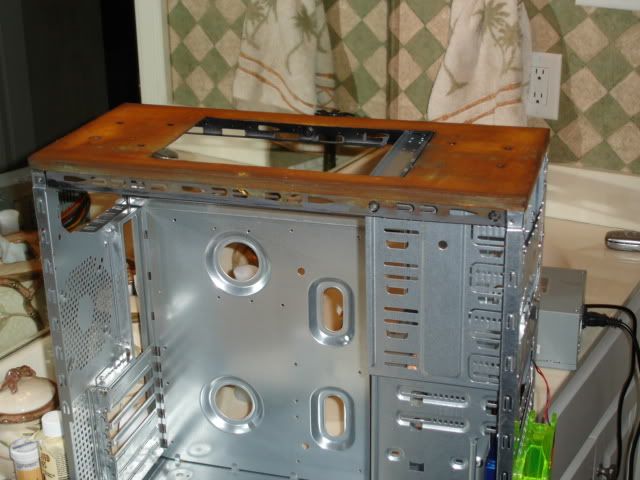
a picture with it next to the very bright silver chassi. looks pretty nice i think.
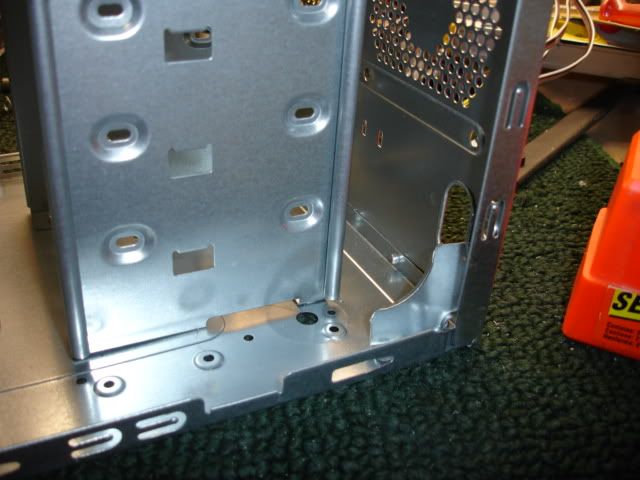
this is an obscure view of the hdd cage. you can see that this along with this L shaped support bracket made it impossible to fit rad #1 in without its temporary removal.
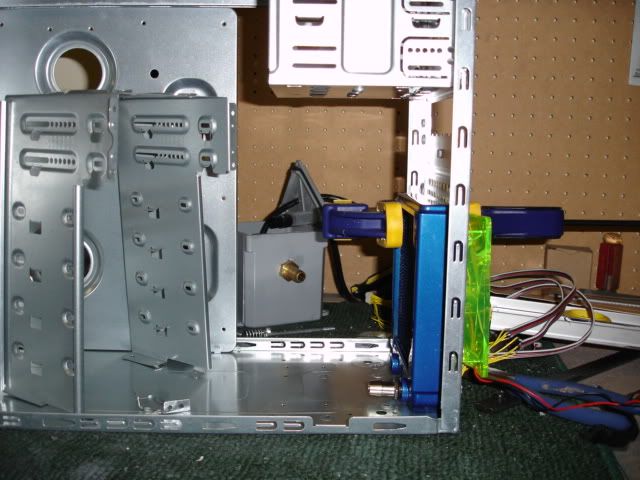
mainly today i worked on mounting rad one of the two single 120mm rad setup. this is where it will go.
first situation i ran into was the mounting hardware for the rad/fan. i soon noticed that the fan screws were self tapping, so i drilled out the rad holes and made some threads. problem one solved.
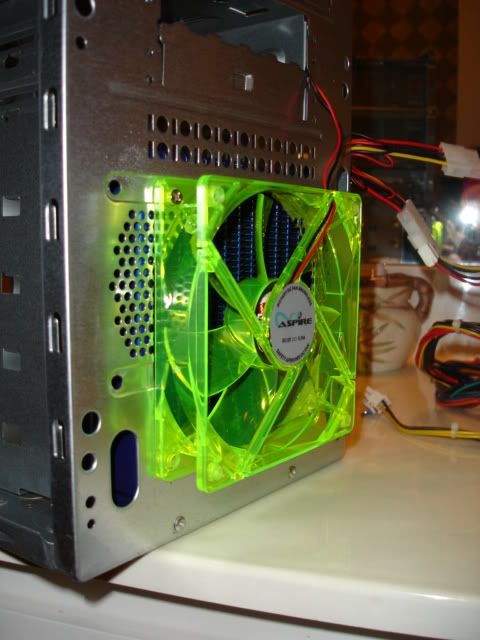
shot of the fan placement.

tight squeeze hugh?
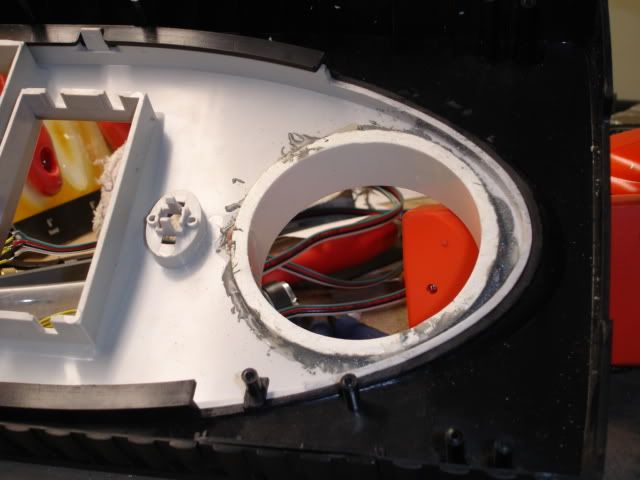
problem nuber two was the front plastic portion of the case not giving the fan enough clearence. you can see from upper right hand corner how much material i had to remove. its stretched from that corner to the other corner.
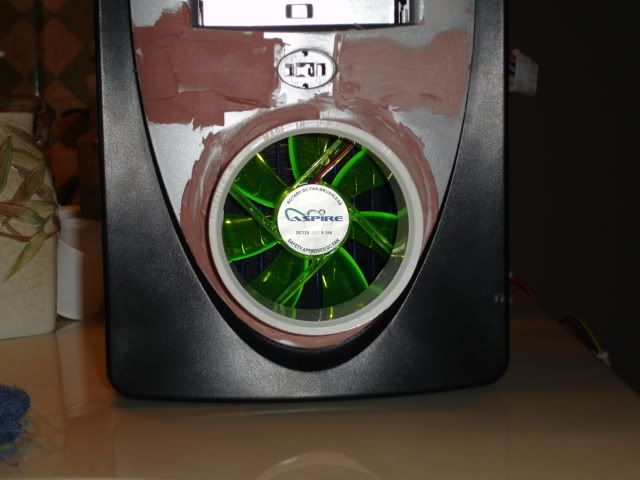
a pic with the front mounted. thats all i got complete for today.
-
Title: Project Wetbox Wip
Post by: llwahooll on January 09, 2006, 10:01:00 PM
-
kinda reminds me of a jet engine nice job man!!!!
-
Title: Project Wetbox Wip
Post by: modthebox.tk on January 12, 2006, 06:22:00 PM
-
Damn. I really admire the creativitiy and time you took to make this box. It is coming our extremely nicely.
I can't wait to see this thing finished.
-
Title: Project Wetbox Wip
Post by: games1216 on January 12, 2006, 06:25:00 PM
-
-
Title: Project Wetbox Wip
Post by: revengeismyfury on January 12, 2006, 07:29:00 PM
-
shweet box cant wait to see finished project.
-
Title: Project Wetbox Wip
Post by: haloloser on January 12, 2006, 09:18:00 PM
-
guys thanks so much for the compliments. believe me, im very ready to be finished with this. i have quite a few pc related projects that i want to start, but cant because my current computer isnt powerful enough.
tuesday evening i went to the paint shop, and i did my final prep work before primer. it doesnt matter how perfect your work looks, i have learned that its not quite good enough for car paint. my primer looked incredible, but as soon as the painter, ashley, added this dust stuff to the case to make your imperfections pop out, i had to almost completely rework the bondo with some that he provided (it was some kind of finishing filler, but it worked amazing). tomorrow we should get the primer on, and hopefully by the end of next week i can have the case completed. you never know though because they stay really busy. anyways, until next time.
helarious video clip. give it a sec, and the dark screen will go away.
-
Title: Project Wetbox Wip
Post by: bosstitan187 on January 13, 2006, 08:21:00 AM
-
god this thing is so bad ass hurry up and finish though!
-
Title: Project Wetbox Wip
Post by: mungie3 on January 13, 2006, 05:47:00 PM
-
looks like it could fly lol
-
Title: Project Wetbox Wip
Post by: nightmare84j28 on January 13, 2006, 06:05:00 PM
-
mungie, shrink your damn signature wtf?
Badass mod, looking forward to the finished product!!
-
Title: Project Wetbox Wip
Post by: SilverStone641 on January 13, 2006, 09:15:00 PM
-
wow, i take back what i said about the front panel. thats looking sharp! i really like the rusting agent. BTW, i was wondering, are you going to have a window in the side of the box? cause if you are, are you going to rust the inside of the box also? looking good! keep it up!
-
Title: Project Wetbox Wip
Post by: haloloser on January 14, 2006, 02:14:00 PM
-
im glad to see that your faith in my has been restored. give me a little bit of credit. ive pretty much handled my loose ends. i wont let something look like garbage for long. as for the window, yes there will be a window. the chassi will be painted a yellow and black caution tape patter, and then it will have rust spots, but wont be completely rusted itself.
on a lighter note, ive been putting clips together and messing with some transitions for my montage. its by no means finished, and i havnt even finished getting all my clips together. check this link, and tell me if it works. if so, tell me what you think. thanks alot guys.
as always, thanks so much for the nice comments, and support. look forward for to this being finished sometime in 2006, hahaha. until next time.
http://media.putfile...montage-preview
-
Title: Project Wetbox Wip
Post by: haloloser on January 19, 2006, 12:49:00 AM
-
i wouldnt say that were rich. we have definately been blessed as far as income is concerned. plus, you have to look at it this way. all the parts for this mod have been bought it 30-50 dollar incraments. then the computer had been promised months in advance, but i waited because i wanted to be sure of the components i ordered. i appreciate you actually reading through the thread. i know it gets kinda lengthy after so many pages, but stay tuned for the paint will be completed one day.
-
Title: Project Wetbox Wip
Post by: haloloser on January 23, 2006, 09:25:00 PM
-
ran into some problems with the body filler at the paint shop. my buddy promised me that it would be painted by thursday, so i should have some good pics up by then.
if you guys want some pics to look at, this link will take you to the pc ive been working on. its really coming along alot faster then this project did. cheers!
-
Title: Project Wetbox Wip
Post by: SymphonyTomorrow on January 24, 2006, 06:44:00 AM
-
Dude, that montage... look, don't get me wrong, I've played with you, you're good. But damn I don't remember you being THAT good! That was insane man!
-
Title: Project Wetbox Wip
Post by: haloloser on January 30, 2006, 12:11:00 PM
-
thanks so much. i really dont make those plays all game every game. they are just the best of the best after about two weeks.
i have some bad news fellas. it seems i made a grave mistake when trusting the completion of the project by deadline time to the painter. the project will not be able to be completed by the 31st. everything is ready for primer, but it just hasnt gotten done (despite my efforts). the sheer amount of time that the primer/paint will take to dry will not allow the completion of the project by deadline. its a really big letdown for me, and i appologize to all of you who have supported me 100% thorugh this. i am by no means saying that the project will not be finished, but it just wont be finished by the contest deadline. stay tuned for the next update, that could be two days from now, or another week. i never know with the paint situation. thanks again.
-haloloser-
-
Title: Project Wetbox Wip
Post by: EverestX on January 30, 2006, 12:27:00 PM
-
Man terribly sorry to hear about this. You must be pretty bummed? Eh, either way you have an Amazing Work log and also an amazing product. I wish the best of luck man, and I cant wait to see it painted.
-EvX
-
Title: Project Wetbox Wip
Post by: vr4z06gt on February 13, 2006, 06:27:00 AM
-
SOOO when can we expect a finish date for this bad boy?
-
Title: Project Wetbox Wip
Post by: haloloser on February 13, 2006, 10:45:00 AM
-
well we finally got it primed and wetsanded. today im going back up there, and hopefully he will paint it. then all thats left is wetsand and buff. so if the paint is finished today, probably wed. will be wetsand andbuff day. hopefully, i can take it home wed. night, and start of the final construction of this project. i was going to hide alot of wires behid the motherboard panel, but ive just decided since the outside cover is top, backside, and bottum im probably just going to work in some wire management schemes ive been kicking around. too much time and money have gone into this project for it to not be finished, i just have to wait on some things. thanks for the interest.
-haloloser-
-
Title: Project Wetbox Wip
Post by: vr4z06gt on March 07, 2006, 11:24:00 AM
-
Its been almost a month since your last post....any new progress??
-
Title: Project Wetbox Wip
Post by: haloloser on March 12, 2006, 10:15:00 PM
-
well guys, i havnt been to the paint shop in forever. im hoping he hasnt thrown my stuff away at this point. i just got frustrated when i was visiting almost every day, and nothing was ever getting done. ive been working on the pc non stop, and its finished now. now i can come back to this project and finish it... anyways, here is a shot of the pc at about 90%. ive started back school as well, so that is one more thing to add to the list. anyways, i will post pics when i get it, but thats the main thing.
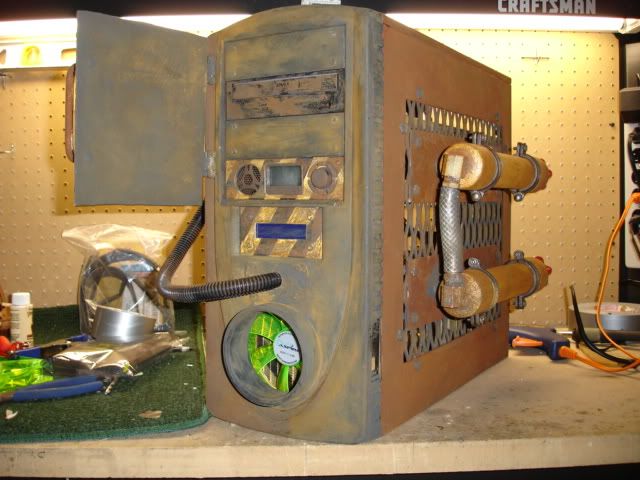
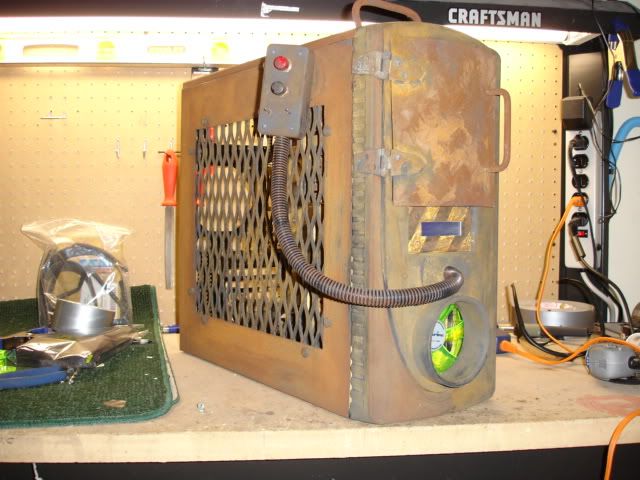
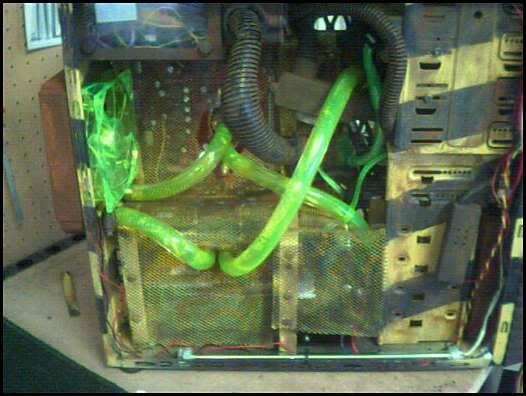

the last two are camera phone pics, but they get the idea across. untill next time, God bless!!!
-
Title: Project Wetbox Wip
Post by: Slacker Master on March 16, 2006, 12:30:00 AM
-
WOW
 , you are freakin amazing! That's the most awesome Xbox mod I have ever seen (and I gotta give myself a pat on the back for actually sitting here and reading all 23 pages of this post in the past 2 nights, haha), how's it coming? Keep us informed as I know we all are dieing to see it! Kick that painter in the shins if that's what it takes!
Incredible job, on both projects (although, personally, I like the Xbox one more; I'm just a more modern kinda guy), keep up the good work.
~Slacker
-
Title: Project Wetbox Wip
Post by: clickerX on March 16, 2006, 02:29:00 AM
-
looks awsome mate
-
Title: Project Wetbox Wip
Post by: cerealkillajme on March 16, 2006, 08:50:00 PM
-
WOW. I would have to say that is the longest thread I've ever read. It probably took about 1.5-2 hours, but it was worth it.
Really awesome job on both the XBOX and the PC. Can't wait to see that awesome XBOX when it's done. You have some awesome talent.
-
Title: Project Wetbox Wip
Post by: fireviper024 on March 17, 2006, 03:57:00 AM
-
You have talet dude. Looking forward to the finished product.
-
Title: Project Wetbox Wip
Post by: Chewonit64 on April 08, 2006, 06:17:00 PM
-
Bump, any progress at all yet?
-
Title: Project Wetbox Wip
Post by: haloloser on April 08, 2006, 09:30:00 PM
-
wow, i cant believe this got a bump. i really appreciate the interest. its so rediculous, but with school, computers, and starting back riding bmx, i just decided to take a little break from modding. im probably going to call the painter tomorrow to see if he even still has my things. if he hasnt trashed them, ill try and go pick them up. again, thanks for the support. ill try and get some progress pics up as soon as i get them.
-
Title: Project Wetbox Wip
Post by: 555ETHEN on April 08, 2006, 11:49:00 PM
-
Shhwweet, nice job, on the computer and the xbox
-
Title: Project Wetbox Wip
Post by: rush340 on April 09, 2006, 12:01:00 AM
-
I love the rusty box. Tons of creativity, and I love how the inside is shielded by that mesh. Props to you!
-
Title: Project Wetbox Wip
Post by: spillage on April 09, 2006, 10:09:00 AM
-
I'm not a fan of the case, but I am of your work. You got skills dude, good skills!!
-
Title: Project Wetbox Wip
Post by: Chewonit64 on April 26, 2006, 06:01:00 PM
-
Ahaha, I'm still waiting to see what the finished product is.
-
Title: Project Wetbox Wip
Post by: FreakSho on April 26, 2006, 08:04:00 PM
-
bump waiting for progress still lol....this is truely amazing it better not get trashed lol...ill buy it haha
-
Title: Project Wetbox Wip
Post by: Chewonit64 on May 22, 2006, 11:46:00 AM
-
I think haloloser died. Or at least this project anyways...
-
Title: Project Wetbox Wip
Post by: FearX351 on May 22, 2006, 09:23:00 PM
-
I miss reading the updates everyday for this wip ....
as most W.i.p's end up.... Incomplete and Dead
R.I.P Wetbox.... you were a great friend to X-S and you will be missed
-
Title: Project Wetbox Wip
Post by: X3rules on May 22, 2006, 10:10:00 PM
-
Crazy and amazing. Congrats and thanks for sharing. Reminds me of something you'd see on HL2.
-
Title: Project Wetbox Wip
Post by: FreakSho on May 23, 2006, 11:44:00 AM
-
sucks to see this dead
 it was an amazing project
-
Title: Project Wetbox Wip
Post by: LightningStruckMyXbox on June 12, 2006, 06:49:00 AM
-
I DEMAND to see the final product. You owe it to me. I had to read through SO many posts.
I demand satisfaction!

I'll give you popcorn....
-
Title: Project Wetbox Wip
Post by: blame canada on June 12, 2006, 07:35:00 AM
-
Ill give you popcorn AND a present
+ 
-
Title: Project Wetbox Wip
Post by: henmill on June 12, 2006, 08:31:00 AM
-
i'll burn your popcorn, then give you a present, then lazer you if you don't show us the precioussssss.......


-
Title: Project Wetbox Wip
Post by: blame canada on June 12, 2006, 09:59:00 AM
-
yea well first, ill take your popcorn and present and burn them both

then ill have a party without you
then ill get wasted without you
then ill go on xbox-scene without you
then ill start a fire without you
then ill protest agains noobs without you
then ill become a clown without you
then ill fall in love without you
then ill shoot your ass if you come near me
then ill laugh really hard without you
then ill fall asleep because there arent any updates from you
then ill sell your soul to the devil
and lastly ill pay a ninja to "visit" your house ONLY IF you do not give us any updates
-
Title: Project Wetbox Wip
Post by: nightmare84j28 on June 12, 2006, 10:42:00 AM
-
Wow.
-
Title: Project Wetbox Wip
Post by: blame canada on June 12, 2006, 11:26:00 AM
-
LOL

-
Title: Project Wetbox Wip
Post by: FearX351 on June 12, 2006, 11:28:00 AM
-
How Long did it take you to think that up Lmfao!
-
Title: Project Wetbox Wip
Post by: Staple on June 12, 2006, 12:07:00 PM
-
that pc case is cool man reminds me of something that would come from halflife 2 the remotley mounted buttons and the door in front and grill on the side are awesome man i dont have the guts to make something new look old but u did it awesome keep up good work
-
Title: Project Wetbox Wip
Post by: killanarmstrong on June 12, 2006, 12:28:00 PM
-
yea well first, ill take your popcorn and present and burn them both
then ill have a party without you
then ill get wasted without you
then ill go on xbox-scene without you
then ill start a fire without you
then ill protest agains noobs without you
then ill become a clown without you
then ill fall in love without you
then ill shoot your ass if you come near me
then ill laugh really hard without you
then ill fall asleep because there arent any updates from you
then ill sell your soul to the devil
and lastly ill pay a ninja to "visit" your house ONLY IF you do not give us any updates
i wish it would fit in my sig! i just about shit my pants
-
Title: Project Wetbox Wip
Post by: blame canada on June 12, 2006, 08:32:00 PM
-
i dont want to steer attention away from halousers AMAZING project, but it only took me about 5 mins even while talking on the phone
-
Title: Project Wetbox Wip
Post by: nightmare84j28 on June 13, 2006, 09:10:00 AM
-
Sigged for the next 2 mins
-
Title: Project Wetbox Wip
Post by: LightningStruckMyXbox on August 27, 2006, 10:58:00 AM
-
And here comes the almost 3 month bump.
Has haloloser forgotten that he got me hooked on this damn thing and that he hasn't shown the completed project! SHEESH!
-
Title: Project Wetbox Wip
Post by: DeadPrez on August 28, 2006, 06:47:00 AM
-
yea well first, ill take your popcorn and present and burn them both
then ill hav.........
You really deserve to see this finished product lol...
Post by: jameschatz on October 18, 2005, 09:18:00 AM
And even if a camcorder doesnt make the uv leds blue its picture quality is horrible and i wud much rather hav a cleaner pic wivblue leds than that picture
Anyways back on topic haloloser ur box is looki wicked cant wait to see it finished
Post by: Granulated on October 18, 2005, 09:55:00 AM
Post by: Apprentice modder on October 18, 2005, 10:36:00 AM
Post by: thedominor on October 18, 2005, 11:53:00 AM
Post by: ninjax on October 18, 2005, 04:24:00 PM
Post by: V1GiLaNtE on November 13, 2005, 07:32:00 PM
Post by: haloloser on November 14, 2005, 02:20:00 AM
i just got back from athens, so tomorrow im going to work on the xbox again. ill answere a few questions for the time being.
it does actually look like a lot of extra room, but once the pump/res house is completed most of it will be gone. soooo, i just going to leave it simple. there will be some of the metal conduit used for wire management and astetics (spelliing), but that will pretty much complete the inside of the case.
the lighting will be a combination of uv and white leds. im probably going to add a uv cathode too, but i cant put it on the bottum because of the pump house. it might fit on the top, im just going to have to measure. expect an update tomorrow. thanks for the interest and support guys, i really appreciate it!
until next time.
-haloloser-
Post by: haloloser on November 14, 2005, 08:36:00 PM
spectacular!!
i didnt really do anything else. i was trying to work out a way to mount the psu cover. i finally deicded to bite the bullet, and test to see if ti would work. here is the result.
its a really terrible picture, but you get the idea. its all mounted. all i have next is to finish the pump/res house, and attach the drive bay cover. should be completely finished with the internal fabrication ver soon.
i used countersinking machine screws to attach the cover to the previous pc psu support. this way there will be no screw head to be poking the psu under the cover. number two, i used accorn head nuts to keep with the theme.
tomorrow im going to get some allen head machine screws to replace all the hex heads i have on the case. im gonna pic up a tap too, so i can complete the little house. until next time.
-haloloser-
Post by: llwahooll on November 14, 2005, 09:55:00 PM
Post by: haloloser on November 15, 2005, 12:05:00 AM
-haloloser-
Post by: llwahooll on November 15, 2005, 12:39:00 AM
Post by: haloloser on November 15, 2005, 10:17:00 PM
i started to attach the bay cover to the the bay holder, but the bolt stuck out too far so i have to go with another method.
an idea of what it should look like.
i also started on the pump/res house. i got the two side pieces on. tomorrow ill add the front and back pieces, and fabricate the top.
another view with the bolts. i think its looking good. ill get some more pics up tomorrow.
Post by: snow rider221 on November 15, 2005, 11:18:00 PM
Post by: eminvil_12 on November 16, 2005, 12:53:00 AM
painting that diamond plate a dark blue or something or the plexi with a translucent paint would look great.
keep up the good work
Post by: Chewonit64 on November 18, 2005, 11:35:00 PM
Post by: paulharris2005 on November 19, 2005, 03:57:00 AM
feel free to flame if ive got it wrong
lol
Post by: Chewonit64 on November 20, 2005, 01:40:00 AM
Post by: --DANNY-- on November 20, 2005, 05:03:00 AM
Keep up the superb work man!
-Danny
Post by: haloloser on November 21, 2005, 11:21:00 AM
-haloloser-
Post by: haloloser on November 21, 2005, 10:13:00 PM
QUOTE
ill get some more pics up tomorrow.
what a hoot, that was what, five days ago. im sorry ive been out of town and stuff, but its back to the grind.
i got tired of workin on the pump house, so i had and idea. i think its going to look great in the end.
i used a small piece as a spacer that will be lit.
kinda what it will look like from the top. the fan will be mounted inside the case, while the diamond plate and plex will be mounted on top as pictured before.
a pic in the dark.
see how sick thats gonna look when its mounted. im gonna put it together tomorrow, and hopefully it will look as good as this picture does.
things i still have to do before the blowhole will be completed:
grind and polish the edges of the diamondplate and plex.
cut the hole in the case top
mount
ill post more pics tomorrow.
Post by: sully2010 on November 21, 2005, 10:54:00 PM
Post by: snow rider221 on November 22, 2005, 08:19:00 PM
Post by: haloloser on November 24, 2005, 02:07:00 AM
yay, ugly pic of the idea
here she is mounted. keep in mind alot of the metal work still needs to be filed down on the edges.
this is the good stuff. skeet.
i started to grow a beard. i look like o have a double chin in the picuture, but my gf looks cute. she is the mastermind behind the project.
Post by: twinski9909 on November 24, 2005, 02:13:00 AM
Post by: thesamarchy on November 24, 2005, 02:56:00 AM
Deal?
I'm serious.
Post by: snow rider221 on November 24, 2005, 11:17:00 AM
Post by: haloloser on November 26, 2005, 01:30:00 PM
here is the top. im going to have to finish two weeks early just so i can get everything grinded and polished smooth!!!!
here we are with the pump/res house. its about 90% complete. the holes for the fan, output, and return hoses have to be cut.
instead of using the compunurse im going to get a more simple digital display that will be mounted inside the case. i just couldnt get the display to fit correctly on the curve of the front panel so i did the responsible thing and just made a compramise. i bent a piece of plex over the hole that was there. glued it in place, and finally bondoed the hole.
ill be mounting this thermometer on the far left corner of the psu cover. i think its going to look pretty sweet. i wont actually mount the whole bay device obviously, but one of the lcds will be inserted.
i think that this is the first mod that ive actually completed. me and my girlfriend constructed it last niight.
happy holidays!
Post by: b15ginz on November 27, 2005, 06:51:00 PM
happy holidays!
[/quote]
dude i havent made a ginger bread house since like 5th grade. im a college grad now...22. brings back the memories!!!!!!
Post by: blubberpud on November 28, 2005, 10:43:00 AM
Post by: snow rider221 on November 28, 2005, 11:48:00 AM
Post by: diablomastabarb on November 28, 2005, 05:55:00 PM
Post by: haloloser on November 28, 2005, 06:19:00 PM
QUOTE
dude i havent made a ginger bread house since like 5th grade. im a college grad now...22. brings back the memories!!!!!!
thats so funny. im twenty years old now, and this is the first time ive ever built a gingerbread house. me and my girlfriend built it, and i had a blast.
i know what you guys are thinking, and here is a pic.
the worklog can be found here http://www.envador.c.../GingerbreadPC/
QUOTE
about what % do you think you have completed???
well, since ive worked out the problems with the temp lcd position ive actually cut out alot of work. now that the front doesnt crack every time i try and fix it i have alot less to do. also, getting the paint finalized should be a breaze now because tomorrow im going to see a man about a powder coat. after thats finished i should be getting donw to the nitty gritty. pretty much all that will be left is to file the edges of the diamond plate. im also going to have to polish all the smudges and fingerprints off of it. i have to find some simple handles that i want to add to the top, and finally wire everything up. thats going to be a job in and of itself. i should have a dual hdd mod, so any kinks i have with that will have to be worked out as well. if anyone on this forum can get me a ide cable with four connectors at a custom length i would be forever grateful ive sent out a couple of emails, and llamma said he would help, but i havnt been able to contact him since the initial email.
diablo and xgamer, you guys really make me feel good about it. i didnt really realize how long this thing was getting until now, and hopefully ill be able to draw it to a conclusion before too long. ive already started planning for my upcoming pc project, and im super excited about it. i know if i start on that this will never get finished, so the sooner the better.
Post by: haloloser on November 29, 2005, 08:41:00 PM
yeah, i was never really happy with it. ive been waiting to come up with something to replace that janky job, and this is was i came up with.
alot of freaking soldering and heatshrinking. i took 16 black wires, got rid of the unsightly colored ones, and finally made some plex seperators.
here you can see how they work.
from farther away.
this is the mounting scheme with some lights.
im a sucker for frosted plex. i just love the way it captures the light.
one more for good measure.
ok, now for the second portion of the update. ive spent alot of time putting the finishing touches on the front because tomorrow im seriously going to talk to someone about getting it powdercoated. i put some primer on it so i could see what imperfections i needed to make up. i did a pretty good job, there are a few touch ups, but thats to be expected.
can you tell there was ever a floppy drive slot.
can you see the hole in the lower left corner?
hopefully tomorrow i can get something productive done!
-haloloser-
Post by: Arjun on November 29, 2005, 09:22:00 PM
Post by: haloloser on November 29, 2005, 09:30:00 PM
Post by: haloloser on December 01, 2005, 10:49:00 PM
fits much better inside the case now.
also started cutting the holes for the inlets and outlets.
i still have to cut a hole in the top.
Post by: haloloser on December 04, 2005, 12:12:00 PM
i made another wire holder bracket deal like i did on the 20pin connector to keep the two molex seperate.
nice and compact. shouldnt cause any trouble in its little storage shed.
close up view of the rca style power connectors.
ill get some new stuff posted soon hopefully.
-haloloser
Post by: snow rider221 on December 04, 2005, 12:30:00 PM
Post by: haloloser on December 06, 2005, 07:57:00 PM
specs:
motherboard-dfi lanparty ut nf4
processor-amd athalon 64 3700+
memory-corsair xms 2x512
video card-evga 7800gt
hdd-western digital raptor 36.5gig
hdd-western digital caviar 80gig
dvd drive-Pioneer 110D
monitor-SAMSUNG 740N
keyboard-Saitek PZ30AU Black
mouse-logitech mx510
psu-antec trupower
water:
rads-2 x black ice pro
processor-tdx waterblock
gpu-acetel maze 4
pump-mcp 350
any of you remember the rust mod that was posted here a month or so ago. ill be using the same technique on this pc, but there will be quite a few add ons.
a few pics of the beginning stages.
serial lcd that will be added to the front eventually. (obviously photo edited to get an idea).
this is an intake. since the idea of the case is rust, and ive really taken to the industrial look, im going to try and make this look like a drain pipe with some slime lookin stuff coming out of it. it will actually be the vent hole for rad number one.
finally the drive cover. i dont know if im going to go with the plex pictured here, or some leftover diamond plate.
like i said, ill get some pics up of wetbox later, but for now ive been having fun with this upcoming project.
-haloloser-
Post by: paulharris2005 on December 08, 2005, 01:19:00 PM
o yea and bump for a great project
Post by: quickdeath000 on December 08, 2005, 05:37:00 PM
Post by: novakpower on December 08, 2005, 06:39:00 PM
Post by: stevewal on December 09, 2005, 10:47:00 AM
keep the good work coming.
on the ide connector front: you can buy any long 3 connector ide cable and push a new connector onto it at the position you want. you can pm me if you : have any difficulties with 2hdd modding.
Good luck
Post by: Chewonit64 on December 11, 2005, 11:33:00 AM
Post by: snow rider221 on December 11, 2005, 11:44:00 AM
oh and the guy above me may want to make a smaller sig...
Post by: SilverStone641 on December 11, 2005, 12:21:00 PM
anyways, the front of the pc at the top of the previous page looked far cleaner then the one with the intake. what happened?
Post by: 2600 on December 11, 2005, 05:20:00 PM
Post by: haloloser on December 11, 2005, 08:58:00 PM
QUOTE
on the ide connector front: you can buy any long 3 connector ide cable and push a new connector onto it at the position you want. you can pm me if you : have any difficulties with 2hdd modding.
dude, i had no idea. i feel kinda stupid not being able to put two and two together, but i definately know now thanks so much for the info. im definately going to try that out. also, i have one last question regarding the switch. is it supposed to be on/off/on, or on/on/on? im not completely certain, but i think its on/on/on. if you dont catch this before i can pm you just disregard.
QUOTE
anyways, the front of the pc at the top of the previous page looked far cleaner then the one with the intake. what happened?
i would definately have to agree that the pc at the top looks far better then the pc front with the intake. i havnt actually gotten around to sanding the bondo smooth on the front of the case with the intake. also, the theme of that case is going to be that of a rusty factory. the intake is actually going to to look like a sewege pipe with a graten on the front, and some slime running from it (havnt figured that part out yet, but im getting there). ill email a admin later, and see if they wont mind me posting the log of that computer when i officially start. after all, its all modding, and im sure that ideas could be gathered from it.
QUOTE
what kind of pump are you using for the water cooling?
im going to be using a submersable pump used for small water gardens. i cant remember the exact specs of it, but they are posted in this thread a few pages back. i think its like 200 gph with like 5-6 feet of head pressure. if actually made it hard on myself doing it this way because ive had to spend alot of time designing and constructing something to hide the res that the pump will be submersed in. ive been kinda busy this week, but i should get some serious work done tomorrow. ill have some pics up soon.
-haloloser-
Post by: eminvil_12 on December 12, 2005, 05:43:00 PM
This mod is looking great.
Would you be able to get any pictures of it half assembled so we kind of get an idea of what it will look like
thanks
Post by: Irish-X on December 13, 2005, 12:03:00 AM
Post by: ClintiePoo on December 13, 2005, 11:45:00 AM
Post by: haloloser on December 13, 2005, 06:09:00 PM
QUOTE
here she is mounted. keep in mind alot of the metal work still needs to be filed down on the edges
sloppy!?... i might have to agree with you that the edges are a bit rough, but they have yet to be filled and sanded. other then that, there is pretty much not a good way to get trim around it. the idea is that the plex spacer gives it a nice glowing crontrast from the case, instead of this hunk of metal bolted onto it. i think it looks good, but maybe you can explain your reasoning a little better. i might be confused.
as always, thanks for all the comments and support. its been a busy week with exams, and all that. by the end of this weekend i should be able to get to the final stage before reconstruction. until then... fair well.
-haloloser-
Post by: Chewonit64 on December 14, 2005, 06:40:00 PM
Post by: stinger4life on December 20, 2005, 01:41:00 PM
Great work so far man I have been watching this thread since the first post you made and only now am i posting, but this beauty has to be bumped and hope to see some more pics soon!!!
Good luck with the contest!
Post by: haloloser on December 21, 2005, 09:17:00 PM
-haloloser-
Post by: SilverStone641 on December 21, 2005, 09:27:00 PM
good luck!
Post by: neb15 on December 22, 2005, 10:33:00 PM
looking good so far.
Post by: Capon-E on December 23, 2005, 01:12:00 AM
Post by: haloloser on December 23, 2005, 12:39:00 PM
.Capon, thanks man, and i really appreciate it. i rock the merry christmas in this thread, so boo to the people who are trying to get rid of it.
Post by: haloloser on December 25, 2005, 01:42:00 AM
i know that merry is spelled incorrectly, it was a typo that im too lazy to fix.
Post by: capboy210 on December 26, 2005, 12:43:00 AM
Post by: jagermike on December 26, 2005, 09:10:00 PM
been waiting too long
Post by: haloloser on December 27, 2005, 07:35:00 AM
in other news, i got my capture card hooked up. i have to say that is one really neat piece of technology. if you dont know much about them, and you watch alot of tv (or just want to make a montage) id have to say that its worth doing a little bit of research on.
-haloloser-
Post by: sokignano on December 27, 2005, 04:21:00 PM
Post by: nightmare84j28 on December 27, 2005, 04:46:00 PM
My nan once had one.. it was satan on four legs, so snappy and moody!
Post by: vr4z06gt on December 30, 2005, 07:40:00 PM
Post by: c0d3_z3r0 on December 31, 2005, 01:28:00 PM
Post by: haloloser on January 01, 2006, 09:33:00 PM
ive been pretty busy over the holidays, as i expect most of you have. ive been workin on it here and there, but hopefully tuesday will be paint day. then all ill have to do is put it together, and wire it up. ive learned alot from this mod, and probably the thing that ive gotten most from it is simplicity is the key. you can still have a very elegant (spelling?) design, and keep the construction very simple.
a pic of my christmas present. the sooner the xbox is finished the sooner ill be able to start on this.
specs:
msi k8n sli w/ nforce for chipset
amd 3700+
2 x 512mb corsair xms
evga 7800gt
danger den tdx, and maze 4 cpu and gpu waterblocks
obviously a tuner card
34gb raptor
soon to be 2 x 80gb WD caviar in RAID 0
this is my first build, and im super excited to begin.
i dont know if you guys remember the front of the case, but the traped door was on a seperate piece. there was also an unsightly power assembly that i had to deal with. it took me a while to come up with such a simple solution, but you can thank this for the time inbetween the updates.
as you can see i glued, and bondoed the pieces together for a much smoother look, and also got rid of the nasty buttons. in the top right you may see some discoleration of the primer, but i assure you that its smooth.
the power and eject buttons will go under the trapped door. test fit of the power or eject, dunno which.
i routed out a channel for the hinge to fit in. here is a pic showing how it will work.
finally psu shield w/ temp lcd mounted.
ive used quite a few of these little lcds. i really like them.
i was taking some screen shots of halo 2 to try and get some ideas for signs to use on the upcoming pc project. i stumbled accross this, and i thought that you guys might be able to appreciate this. this is the messege you get when you open the gate on zanzebar.
ps. the dog is a shi tzu
Post by: stinger4life on January 03, 2006, 03:23:00 PM
p.s.,
All those computer parts make me tingle inside...reminds me of when i built my pc
Post by: beastiekid2 on January 03, 2006, 04:30:00 PM
Post by: haloloser on January 03, 2006, 08:32:00 PM
Post by: henmill on January 03, 2006, 08:41:00 PM
Post by: haloloser on January 09, 2006, 09:51:00 PM
i pretty much started testing my rusting agent on the top of the case.
i think its turning out really nice. i think its a little bit more of a believeable rust then the more orange colors you usually see this stuff make.
you can also see the handle in the picture. ive been having problems with it. first i just painted and then added the oxidizer the next day. turns out the zink coating on the handle itself stoped the whole process from working. at this point i tried to grind the coating off, and started over. its working a little bit. tomorrow we will see how it looks after two coats of the oxidizer.
a picture with it next to the very bright silver chassi. looks pretty nice i think.
this is an obscure view of the hdd cage. you can see that this along with this L shaped support bracket made it impossible to fit rad #1 in without its temporary removal.
mainly today i worked on mounting rad one of the two single 120mm rad setup. this is where it will go.
first situation i ran into was the mounting hardware for the rad/fan. i soon noticed that the fan screws were self tapping, so i drilled out the rad holes and made some threads. problem one solved.
shot of the fan placement.
tight squeeze hugh?
problem nuber two was the front plastic portion of the case not giving the fan enough clearence. you can see from upper right hand corner how much material i had to remove. its stretched from that corner to the other corner.
a pic with the front mounted. thats all i got complete for today.
Post by: llwahooll on January 09, 2006, 10:01:00 PM
Post by: modthebox.tk on January 12, 2006, 06:22:00 PM
I can't wait to see this thing finished.
Post by: games1216 on January 12, 2006, 06:25:00 PM
QUOTE
first situation i ran into was the mounting hardware for the rad/fan
You love those clamps don't you?
Post by: revengeismyfury on January 12, 2006, 07:29:00 PM
Post by: haloloser on January 12, 2006, 09:18:00 PM
tuesday evening i went to the paint shop, and i did my final prep work before primer. it doesnt matter how perfect your work looks, i have learned that its not quite good enough for car paint. my primer looked incredible, but as soon as the painter, ashley, added this dust stuff to the case to make your imperfections pop out, i had to almost completely rework the bondo with some that he provided (it was some kind of finishing filler, but it worked amazing). tomorrow we should get the primer on, and hopefully by the end of next week i can have the case completed. you never know though because they stay really busy. anyways, until next time.
helarious video clip. give it a sec, and the dark screen will go away.
Post by: bosstitan187 on January 13, 2006, 08:21:00 AM
Post by: mungie3 on January 13, 2006, 05:47:00 PM
Post by: nightmare84j28 on January 13, 2006, 06:05:00 PM
Badass mod, looking forward to the finished product!!
Post by: SilverStone641 on January 13, 2006, 09:15:00 PM
Post by: haloloser on January 14, 2006, 02:14:00 PM
QUOTE
wow, i take back what i said about the front panel. thats looking sharp! i really like the rusting agent. BTW, i was wondering, are you going to have a window in the side of the box? cause if you are, are you going to rust the inside of the box also? looking good! keep it up!
im glad to see that your faith in my has been restored. give me a little bit of credit. ive pretty much handled my loose ends. i wont let something look like garbage for long. as for the window, yes there will be a window. the chassi will be painted a yellow and black caution tape patter, and then it will have rust spots, but wont be completely rusted itself.
on a lighter note, ive been putting clips together and messing with some transitions for my montage. its by no means finished, and i havnt even finished getting all my clips together. check this link, and tell me if it works. if so, tell me what you think. thanks alot guys.
as always, thanks so much for the nice comments, and support. look forward for to this being finished sometime in 2006, hahaha
. until next time.http://media.putfile...montage-preview
Post by: haloloser on January 19, 2006, 12:49:00 AM
Post by: haloloser on January 23, 2006, 09:25:00 PM
if you guys want some pics to look at, this link will take you to the pc ive been working on. its really coming along alot faster then this project did. cheers!
Post by: SymphonyTomorrow on January 24, 2006, 06:44:00 AM
Post by: haloloser on January 30, 2006, 12:11:00 PM
QUOTE
Dude, that montage... look, don't get me wrong, I've played with you, you're good. But damn I don't remember you being THAT good! That was insane man!
thanks so much. i really dont make those plays all game every game. they are just the best of the best after about two weeks.
i have some bad news fellas. it seems i made a grave mistake when trusting the completion of the project by deadline time to the painter. the project will not be able to be completed by the 31st. everything is ready for primer, but it just hasnt gotten done (despite my efforts). the sheer amount of time that the primer/paint will take to dry will not allow the completion of the project by deadline. its a really big letdown for me, and i appologize to all of you who have supported me 100% thorugh this. i am by no means saying that the project will not be finished, but it just wont be finished by the contest deadline. stay tuned for the next update, that could be two days from now, or another week. i never know with the paint situation. thanks again.
-haloloser-
Post by: EverestX on January 30, 2006, 12:27:00 PM
-EvX
Post by: vr4z06gt on February 13, 2006, 06:27:00 AM
Post by: haloloser on February 13, 2006, 10:45:00 AM
-haloloser-
Post by: vr4z06gt on March 07, 2006, 11:24:00 AM
Post by: haloloser on March 12, 2006, 10:15:00 PM
the last two are camera phone pics, but they get the idea across. untill next time, God bless!!!
Post by: Slacker Master on March 16, 2006, 12:30:00 AM
, you are freakin amazing! That's the most awesome Xbox mod I have ever seen (and I gotta give myself a pat on the back for actually sitting here and reading all 23 pages of this post in the past 2 nights, haha), how's it coming? Keep us informed as I know we all are dieing to see it! Kick that painter in the shins if that's what it takes! Incredible job, on both projects (although, personally, I like the Xbox one more; I'm just a more modern kinda guy), keep up the good work.
~Slacker
Post by: clickerX on March 16, 2006, 02:29:00 AM
Post by: cerealkillajme on March 16, 2006, 08:50:00 PM
Really awesome job on both the XBOX and the PC. Can't wait to see that awesome XBOX when it's done. You have some awesome talent.
Post by: fireviper024 on March 17, 2006, 03:57:00 AM
Post by: Chewonit64 on April 08, 2006, 06:17:00 PM
Post by: haloloser on April 08, 2006, 09:30:00 PM
Post by: 555ETHEN on April 08, 2006, 11:49:00 PM
Post by: rush340 on April 09, 2006, 12:01:00 AM
QUOTE(haloloser @ Mar 12 2006, 10:22 PM) 
I love the rusty box. Tons of creativity, and I love how the inside is shielded by that mesh. Props to you!
Post by: spillage on April 09, 2006, 10:09:00 AM
Post by: Chewonit64 on April 26, 2006, 06:01:00 PM
Post by: FreakSho on April 26, 2006, 08:04:00 PM
Post by: Chewonit64 on May 22, 2006, 11:46:00 AM
Post by: FearX351 on May 22, 2006, 09:23:00 PM
as most W.i.p's end up.... Incomplete and Dead
R.I.P Wetbox.... you were a great friend to X-S and you will be missed
Post by: X3rules on May 22, 2006, 10:10:00 PM
Post by: FreakSho on May 23, 2006, 11:44:00 AM
it was an amazing project
Post by: LightningStruckMyXbox on June 12, 2006, 06:49:00 AM
I demand satisfaction!
I'll give you popcorn....
Post by: blame canada on June 12, 2006, 07:35:00 AM
+
Post by: henmill on June 12, 2006, 08:31:00 AM
Post by: blame canada on June 12, 2006, 09:59:00 AM
then ill have a party without you
then ill get wasted without you
then ill go on xbox-scene without you
then ill start a fire without you
then ill protest agains noobs without you
then ill become a clown without you
then ill fall in love without you
then ill shoot your ass if you come near me
then ill laugh really hard without you
then ill fall asleep because there arent any updates from you
then ill sell your soul to the devil
and lastly ill pay a ninja to "visit" your house
ONLY IF you do not give us any updates
Post by: nightmare84j28 on June 12, 2006, 10:42:00 AM
Post by: blame canada on June 12, 2006, 11:26:00 AM
Post by: FearX351 on June 12, 2006, 11:28:00 AM
Post by: Staple on June 12, 2006, 12:07:00 PM
Post by: killanarmstrong on June 12, 2006, 12:28:00 PM
QUOTE(blame canada @ Jun 12 2006, 05:06 PM)
yea well first, ill take your popcorn and present and burn them both
then ill have a party without you
then ill get wasted without you
then ill go on xbox-scene without you
then ill start a fire without you
then ill protest agains noobs without you
then ill become a clown without you
then ill fall in love without you
then ill shoot your ass if you come near me
then ill laugh really hard without you
then ill fall asleep because there arent any updates from you
then ill sell your soul to the devil
and lastly ill pay a ninja to "visit" your house
ONLY IF you do not give us any updates i wish it would fit in my sig!
i just about shit my pants
Post by: blame canada on June 12, 2006, 08:32:00 PM
Post by: nightmare84j28 on June 13, 2006, 09:10:00 AM
Post by: LightningStruckMyXbox on August 27, 2006, 10:58:00 AM
Has haloloser forgotten that he got me hooked on this damn thing and that he hasn't shown the completed project! SHEESH!
Post by: DeadPrez on August 28, 2006, 06:47:00 AM
QUOTE(blame canada @ Jun 12 2006, 12:06 PM)
yea well first, ill take your popcorn and present and burn them both
then ill hav.........
You really deserve to see this finished product lol...