Post by: grim_d on April 21, 2007, 06:27:00 AM
Please use this thread to discuss RBJtech's X-Clamp Replacement Tutorial. There are 2 versions of this, the MKI and the MKIII, the MKIII is easier than the MKI
The MKIII is available Here
If that fails, then the MKI is available Here
you may discuss things like, alternate parts, troubleshooting etc.
The original X-clamp replacement thread is available Here, it contains much valuable information.
I do not want to see ANY posts which say "Which method is better" or similar, both method's are proven to work, other may find one mthod easier than the other etc.
Once you have performed and X-Clamp replacement, It would be appreciated if you could report your success in This thread.
If you have used lawdawg0931's tutorial and wish to discuss it, please use the specified thread Here
This post has been edited by grim_d: Jul 15 2007, 09:48 PM
Post by: benfinkel on April 21, 2007, 07:23:00 AM
Well,
I'll share my experiences with RBJTech's method:
I turned on my console one morning and got the 3 red lights. I hadn't been playing, it wasn't in the middle of a movie or anything, just turned it on a dead. MS wouldn't repair it for free, even though it was a 11/2005 mfg date. I decided to give this method a whirl.
Everything went mostly as planned. I only need two washers between the motherboard and heatsink, with three washers I didn't get good contact between chip and heatsink.
Modifying the GPU heatsink to accommodate the nuts was a pain in my rear end. I didn't have proper tools like a vice and workbench, so it was difficult. If I were doing it again, I would use a small saw file to cut the fins off and make the room I needed.
I've only played for about an hour with the console since I did the fix, but so far, so good. (IMG:style_emoticons/default/smile.gif)
Question: There were only eight nuts listed on the parts list at the beginning, so I have nothing between the case and motherboard, correct? You have a picture in the tutorial of putting a nut to hold the bolt to the case, but then in the parts list those nuts don't show up.
Thanks,
This post has been edited by benfinkel: Apr 21 2007, 02:28 PM
Post by: RBJTech on April 21, 2007, 09:12:00 AM
QUOTE(benfinkel @ Apr 21 2007, 02:30 PM) 
(IMG:style_emoticons/default/ph34r.gif)
Well,
I'll share my experiences with RBJTech's method:
I turned on my console one morning and got the 3 red lights. I hadn't been playing, it wasn't in the middle of a movie or anything, just turned it on a dead. MS wouldn't repair it for free, even though it was a 11/2005 mfg date. I decided to give this method a whirl.
Everything went mostly as planned. I only need two washers between the motherboard and heatsink, with three washers I didn't get good contact between chip and heatsink.
Modifying the GPU heatsink to accommodate the nuts was a pain in my rear end. I didn't have proper tools like a vice and workbench, so it was difficult. If I were doing it again, I would use a small saw file to cut the fins off and make the room I needed.
I've only played for about an hour with the console since I did the fix, but so far, so good. (IMG:style_emoticons/default/smile.gif)
Question: There were only eight nuts listed on the parts list at the beginning, so I have nothing between the case and motherboard, correct? You have a picture in the tutorial of putting a nut to hold the bolt to the case, but then in the parts list those nuts don't show up.
Thanks,
Ten 3mm deep nuts come with the Ten bolts (IMG:style_emoticons/default/wink.gif) So there should be a nut and a single washer inbetween the metal case and the board ... The nylon lock nuts are the only nuts 'above' the board...
Post by: ydgmms on April 21, 2007, 03:15:00 PM
Tested it when it got here - straight to 3RLOD.
Took it apart - tightened the black screws on the heatsinks - tested it - straight to 3RLOD.
Mods:
RBJTechs method.
AS5
heatsinks on RAM/SouthBridge
thermal gap filler on all other RAM
I place pieces of felt stopper things around the edge of the CPU/GPU to help keep pressure even around the entire surface area not just the die.
Tested - Works.
Closed it all up - ran Madden 06. Great.
Got lucky too - dash is 4532 with Samsung MS25. If I'm not mistaken thats great for the Linux mods, right?
QUOTE(RBJTech @ Apr 21 2007, 09:43 AM)
Ten 3mm deep nuts come with the Ten bolts (IMG:style_emoticons/default/wink.gif) So there should be a nut and a single washer inbetween the metal case and the board ... The nylon lock nuts are the only nuts 'above' the board...
Actually according to Lawdawgs parts list at Lowes. 2 screws come in a package. And there is no nuts.
I dunno, if your talking about your parts list or what. But if hes in the US and goin to Lowes the parts number is fine - it just doesn't come with nuts. Only 2 screws per package... the Nuts are right by the screws if I remember right. And they are 3mm. So its all good. I've done it twice so far.
Post by: benitez1 on April 21, 2007, 04:54:00 PM

Post by: booker on April 22, 2007, 12:35:00 AM
My only problem is, that since i´m in other country i don´t really understand what parts i need to buy.
first what is a spring washers and flat washers.. what are the difference between them? I know what htey are but i don´t really understand the difference.
Second, could someone explain me what is the whole idea... of this? i know the concept but... it REALLY IMPORTANT to me to get the idea so i can buy the parts and need withouth "necesary" buying the same parts recommend it on the tutorial. Again because since i´m in other country i may not find the same items as the tutorial ask.
Thanks.
Post by: sinister slipknot on April 22, 2007, 01:54:00 AM
QUOTE(booker @ Apr 22 2007, 07:42 AM)
Ok, i´m going to try this mod fix,because i start getting some freezeing on my 360 with a 3rl afterwards.
My only problem is, that since i´m in other country i don´t really understand what parts i need to buy.
first what is a spring washers and flat washers.. what are the difference between them? I know what htey are but i don´t really understand the difference.
Second, could someone explain me what is the whole idea... of this? i know the concept but... it REALLY IMPORTANT to me to get the idea so i can buy the parts and need withouth "necesary" buying the same parts recommend it on the tutorial. Again because since i´m in other country i may not find the same items as the tutorial ask.
Thanks.
The idea of this is to eliminate the X-clamps as they force pressure on the board so that after heat/time the chips become loose, supposedly giving the 0102/0020 error.
Flat washers:
(IMG:http://www2.gpmd.com/image/d/dubq3308.jpg)
Spring washers:
(IMG:http://img.alibaba.com/photo/51061182/Spring_Washer.summ.jpg)
Post by: RBJTech on April 22, 2007, 05:35:00 AM
1. Fixing to the case.
My method secures the heatsinks, board and cpu/gpu to outer metal case - partially the same as the X clamps. This is done to support the components in the centre of the board - because nothing else does ! Especially important if you have the 360 on it's end ..
2. The compression method.
Whilst lawdawg's simply uses the compression force of the thread on the bolts, mine uses a spring to keep the h/s pressed onto the die. Depending on the severity of the BGU break (the 'problem') then the spring washer may be irrelevent if you do it up very tighly (as it just turns into a normal washer). The idea here is to allow thermal movement (expansion) as the h/s heats up/cools down - with a fixed setup, no movement is allowed which could stress the components further.
Picture from the big thread here - showing the setup ..
(IMG:http://rbjtech.bulldoghome.com/photos/BDRES/rbjtech_bulldoghome_com/360heatsink_redesign.gif)
In summary, either method works - lawdawg's is much simplier to implement - mine provides the above advantages but is more complicated to implement ...
Take your pick (IMG:style_emoticons/default/wink.gif)
QUOTE(sinister slipknot @ Apr 22 2007, 08:25 AM)
The idea of this is to eliminate the X-clamps as they force pressure on the board so that after heat/time the chips become loose, supposedly giving the 0102/0020 error.
Flat washers:
(IMG:http://www2.gpmd.com/image/d/dubq3308.jpg)
Spring washers:
(IMG:http://img.alibaba.com/photo/51061182/Spring_Washer.summ.jpg)
Thanks slipknot (IMG:style_emoticons/default/smile.gif)
Post by: booker on April 22, 2007, 11:07:00 AM
QUOTE(RBJTech @ Apr 22 2007, 12:06 PM)
I´m going to follow your method because i find your tutorial much simpler... this one:
http://rbjtech.bulldoghome.com/pages/rbjte..._com/XClamp.htm
But i have more questions.. on the picture you posted... why 1 "leg" is different to the other" i though all Legs should be the same.. with the same amoung ot Spring Washers, flat washers, etc?.
Another question i have a very early Xbox version, i´m not sure if it have the thermal pads on the RAM yet, if that is not the case, do you recommend me to use the "robber" fix so at least i can add some pressure to the rams so they don´t disconnect from the motherboard?
One last question... everyone talk about the X clamp, but all design etc, are from the CPU heatsink. I should do the same proceess with the GPU as the tutorial above explains? or witht he CPU X clamp removal should be enough?
This post has been edited by booker: Apr 22 2007, 06:09 PM
Post by: benfinkel on April 22, 2007, 11:19:00 AM
QUOTE(booker @ Apr 22 2007, 05:38 PM)
I´m going to follow your method because i find your tutorial much simpler... this one:
http://rbjtech.bulldoghome.com/pages/rbjte..._com/XClamp.htm
But i have more questions.. on the picture you posted... why 1 "leg" is different to the other" i though all Legs should be the same.. with the same amoung ot Spring Washers, flat washers, etc?.
Another question i have a very early Xbox version, i´m not sure if it have the thermal pads on the RAM yet, if that is not the case, do you recommend me to use the "robber" fix so at least i can add some pressure to the rams so they don´t disconnect from the motherboard?
One last question... everyone talk about the X clamp, but all design etc, are from the CPU heatsink. I should do the same proceess with the GPU as the tutorial above explains? or witht he CPU X clamp removal should be enough?
You'll want to do both the CPU and GPU heat sink. Both heat sinks are covered in the tutorial.
The reason the picture above shows one leg different than the other is because he's comparing the factory implementation (right) with his fixed version (left).
QUOTE(ydgmms @ Apr 21 2007, 09:46 PM)
Actually according to Lawdawgs parts list at Lowes. 2 screws come in a package. And there is no nuts.
I dunno, if your talking about your parts list or what. But if hes in the US and goin to Lowes the parts number is fine - it just doesn't come with nuts. Only 2 screws per package... the Nuts are right by the screws if I remember right. And they are 3mm. So its all good. I've done it twice so far.
Yea, that's a big difference there. I also got the parts at Lowe's but the nuts are sold separately.
QUOTE(sinister slipknot @ Apr 22 2007, 08:25 AM)
The spring washers I used looked like this:
(IMG:http://www.mgcycle.com/95129130.JPG)
Post by: booker on April 22, 2007, 11:21:00 AM
QUOTE(benfinkel @ Apr 22 2007, 05:50 PM)
You'll want to do both the CPU and GPU heat sink. Both heat sinks are covered in the tutorial.
The reason the picture above shows one leg different than the other is because he's comparing the factory implementation (right) with his fixed version (left).
Yea, that's a big difference there. I also got the parts at Lowe's but the nuts are sold separately.
The spring washers I used looked like this:
(IMG:http://www.mgcycle.com/95129130.JPG)
Ohhh.. i feel like this now... (IMG:style_emoticons/default/rolleyes.gif)
THanks for the explanation...
I have a few more questions, sorry but i want to know this proccess 100% before starting..
how is that the "factory" settings apply pressure to the motherboard forcing this to "bend"?
From the picture of comparison i don´t really see why that is happening? is too tight? or what?
Also how tight i should set this setup? i meant the "Lock Nuts" do i should leave some space for movement or i should lock it?
The Washers you guys are using.. the Spring washer... is make of "robber" or what material, i know what they are but i can´t tel what material is from the picture. Same with the Flat washers..
On the picture the S is for the Spring Washer and the w from the Flat washers?
This post has been edited by booker: Apr 22 2007, 06:25 PM
Post by: SnufftheCrimeDog on April 22, 2007, 12:12:00 PM
Post by: RBJTech on April 22, 2007, 04:41:00 PM
QUOTE(SnufftheCrimeDog @ Apr 22 2007, 07:19 PM)
Gah, I misplaced my metric drill bits, this was extremely convenient for me because well I could just reach for the 4mm drill bit. But sense when it comes to math and conversions I tend to go brain dead, can anyone tell me what size drill bit would be equivalent to a 4mm bit? In inches of course. I greatly appreciate it.
well 4mm is 0.157 inches or 1/16 of an inch - not sure if that's a common imperial drill size or not ?
Post by: benfinkel on April 22, 2007, 08:47:00 PM
QUOTE(SnufftheCrimeDog @ Apr 22 2007, 07:19 PM)
Gah, I misplaced my metric drill bits, this was extremely convenient for me because well I could just reach for the 4mm drill bit. But sense when it comes to math and conversions I tend to go brain dead, can anyone tell me what size drill bit would be equivalent to a 4mm bit? In inches of course. I greatly appreciate it.
The drill bits I purchased at Lowes were titanium and inly about $4 a piece. They listed both the "imperial" size and metric on the package.
QUOTE(booker @ Apr 22 2007, 05:52 PM)
how is that the "factory" settings apply pressure to the motherboard forcing this to "bend"?
From the picture of comparison i don´t really see why that is happening? is too tight? or what?
Also how tight i should set this setup? i meant the "Lock Nuts" do i should leave some space for movement or i should lock it?
The Washers you guys are using.. the Spring washer... is make of "robber" or what material, i know what they are but i can´t tel what material is from the picture. Same with the Flat washers..
On the picture the S is for the Spring Washer and the w from the Flat washers?
Answers:
1) When you have the console apart it's pretty easy to see why the board is being bent. There is an "x-clamp" on the underside of the motherboard that is pulling the corners of each heat sink down. Removing those x-clamps and replacing with this solution forces even pressure across the entire heat sink which helps to avoid buckling.
2) The spring washers are metal also. All of the washers are metal. You have the S/W code correct also. S is spring washer (wave lock washer it's called in America) and w is plain washer.
3) This setup should be "not very tight" but there should still be ZERO movement.
Here is how I determined tightness: I got the lock nut onto each bolt finger tight. From there, I would turn the nut 1/2 turn on, and then check to see if it "wiggled" at all. If it did I turned another 1/2 turn. If it didn't, I moved onto a new nut. A nut that I had tightened already might become a little loose as I tightened the other three nuts, so I went around the heat sink much like putting lug nuts on your tire. Eventually, they were all turned in enough that none of them wiggled at all. The heat sink was held firmly onto the board and did not move at all either.
YOU CAN OVERTIGHTEN, so really once the whole setup is held firmly on and nothing moves or wiggles at all, you should be good to go. Those spring washers add any additional pressure that is needed as the system expands and contracts with heat.
Post by: booker on April 22, 2007, 09:10:00 PM
QUOTE(benfinkel @ Apr 23 2007, 03:18 AM)
The drill bits I purchased at Lowes were titanium and inly about $4 a piece. They listed both the "imperial" size and metric on the package.
Answers:
1) When you have the console apart it's pretty easy to see why the board is being bent. There is an "x-clamp" on the underside of the motherboard that is pulling the corners of each heat sink down. Removing those x-clamps and replacing with this solution forces even pressure across the entire heat sink which helps to avoid buckling.
2) The spring washers are metal also. All of the washers are metal. You have the S/W code correct also. S is spring washer (wave lock washer it's called in America) and w is plain washer.
3) This setup should be "not very tight" but there should still be ZERO movement.
Here is how I determined tightness: I got the lock nut onto each bolt finger tight. From there, I would turn the nut 1/2 turn on, and then check to see if it "wiggled" at all. If it did I turned another 1/2 turn. If it didn't, I moved onto a new nut. A nut that I had tightened already might become a little loose as I tightened the other three nuts, so I went around the heat sink much like putting lug nuts on your tire. Eventually, they were all turned in enough that none of them wiggled at all. The heat sink was held firmly onto the board and did not move at all either.
YOU CAN OVERTIGHTEN, so really once the whole setup is held firmly on and nothing moves or wiggles at all, you should be good to go. Those spring washers add any additional pressure that is needed as the system expands and contracts with heat.
Oh god.. i´m so confuse about the spring washers and flat washers.. i though the Sprign washers were rubber... and the falt washers were metal..
So basically all washers are metal?.. what are the difference between them?
Sorry i ask this commong thing, but here in muy country they are called different and i need to know this before purchasing.
Post by: RBJTech on April 23, 2007, 02:44:00 AM
QUOTE(booker @ Apr 23 2007, 03:41 AM) 
Oh god.. i´m so confuse about the spring washers and flat washers.. i though the Sprign washers were rubber... and the falt washers were metal..
So basically all washers are metal?.. what are the difference between them?
Sorry i ask this commong thing, but here in muy country they are called different and i need to know this before purchasing.
Use a rubber washer in place of the spring washer / wave washer if you wish - it will provide a similiar result but try and use a spring washer if you can.
We need to allow a small amount of thermal movement (when the chip and h/s get hot - they expand - only a fraction of a mm, but nevertheless, we need to allow for this expansion). A rubber washer will allow this movement (as does a spring washer) but in addation, the spring washer always keeps constant pressure pressed down on the h/s - a rubber washer will do this to some extent but it will not be as good as a spring washer.
I hope this helps..
Post by: booker on April 23, 2007, 07:15:00 AM
QUOTE(RBJTech @ Apr 23 2007, 09:51 AM)
Use a rubber washer in place of the spring washer / wave washer if you wish - it will provide a similiar result but try and use a spring washer if you can.
We need to allow a small amount of thermal movement (when the chip and h/s get hot - they expand - only a fraction of a mm, but nevertheless, we need to allow for this expansion). A rubber washer will allow this movement (as does a spring washer) but in addation, the spring washer always keeps constant pressure pressed down on the h/s - a rubber washer will do this to some extent but it will not be as good as a spring washer.
I hope this helps..
could you describe the spring washer?
Post by: benfinkel on April 23, 2007, 07:17:00 AM
QUOTE(RBJTech @ Apr 23 2007, 09:51 AM) 
Use a rubber washer in place of the spring washer / wave washer if you wish - it will provide a similiar result but try and use a spring washer if you can.
We need to allow a small amount of thermal movement (when the chip and h/s get hot - they expand - only a fraction of a mm, but nevertheless, we need to allow for this expansion). A rubber washer will allow this movement (as does a spring washer) but in addation, the spring washer always keeps constant pressure pressed down on the h/s - a rubber washer will do this to some extent but it will not be as good as a spring washer.
I hope this helps..
The spring washer or wave lock washer (American name) is metal but it's sort of "warped" so that it applies constant pressure. When you get to the parts store and start looking through what they have you'll seem them and understand.
If you screw down the nuts you'll flatten the wave lock washer and it will be no different than a normal washer, but with only half-pressure from the nut it's an effective way to get force onto the heat sink with over tightening the nut.
From my earlier post...
QUOTE(benfinkel @ Apr 22 2007, 05:50 PM)
Post by: nettwerk on April 23, 2007, 08:47:00 PM
Post by: intention on April 23, 2007, 09:48:00 PM
i was a bit disappointed after that. turned it on and off a couple times, no good.
i remembered reading that i should leave it on without the fans connected for a min or two.
i did this... still no good
i figured i was screwed at this point so i started to put things back together to clean up my mess. i put the fans back in, connected the dvd drive, and cleaned up the rest of my mess.
decided to give it one more try with everything connected.
IT WORKED!
- so if at first your still receiving red lights, try connecting everything and give it another try.
worked for me.
Thanks RBJtech, you saved me a few hundred bucks!
Post by: SnufftheCrimeDog on April 24, 2007, 04:47:00 AM
So I got it all together tested it...2 red lights. I never got that before, but I noticed this is an overheating error, which cause your xbox 360 not to function at all, so the chips dont heat up. So I took one washer out under each heatsink, I noticed that when I took each heatsink off the new thermal pasted that I had put on the chips did not make much contact with the 'sinks, that made me ponder a little. So I tried 2 flat washers underneath the heatsinks. Still 2 red light error. Examined the heatsinks again no paste on the 'sinks. So I went down to one flat washer underneath the 'sinks. Bam, 3rols heatsinks started to warm up beautifully. So I'm thinking Im a genius. Let it go from 3rols to 2rols, showing that it overheating and I should turn it off. I do so, and prepare to see the look on my friend face when I show him his 360 is fixed....Not that case. Now I'm getting Error Code 0020. The heatsinks warm up like they should now, what can I do to get rid of this error. Mind you I have really tightened down those bolts pretty good, so I don't think it that I need some advice, thanks guys.
Post by: RBJTech on April 24, 2007, 05:54:00 AM
QUOTE(SnufftheCrimeDog @ Apr 24 2007, 11:54 AM)
.... so I don't think it that I need some advice, thanks guys.
..with only 1 washer inbetween the h/s and board, then you may be bending things too much if you are doing it up tight
 The sweet spot seems to be 1.5mm (2 x 0.7mm washers)
 It's weird that you said with 2 washers you couldn't get the die to touch the h/s - how thick are the washers you are using ?
Did you check the thickness of the nut&washer UNDER the board - is it level with the main chassis standoffs ? ie do all the ports (AV connector etc) line up nicely without having to screw it down ?
Post by: sharnock on April 24, 2007, 06:44:00 AM
Thank you so much again!
Post by: cienmey on April 24, 2007, 08:42:00 AM
but only 3 second it become 2ROL. I shut down thightened the lock nut, i power it back but only last 3 seconds and come back to 2ROL.... 
Any suggestion??
Thanks in advance.....
Post by: nettwerk on April 24, 2007, 09:08:00 AM
Hardest part was finding the parts at lowes.. seems like everyone is trying this fix in my area because they have everything but these parts lol.. I found enuff metric supplies to get started (washers, spring washers) but went with the 8-32x1 bolts (they are in a green bag and come with the 11/32 nutts - Maquina brand - 8 bolts) 8-32 lock washers and #10 washers work fine too. (this is at lowes again)
My GPU and CPU only took 2 washers underneath, 3 washers was too high and it didnt let the heatsinks touch the chip die.
RBJ's way of cutting the gpu heatsink works the best. you need to cut a line behind the bolt area and then you can wiggle the short fins off with a pair of needle nose pliers. I was trying to cut them with wire cutters but just kept making a mess lol.
At first startup I had 3 ROL and a blinking green light. apparently you need to dvd drive hooked up or it will do this. When I finished cussing and figured that out it started right up but I let it overheat for about a 1min then while it cooled off I carefully gave the lock nutts one more quarter turn for good luck and reassembled the fan and fan duct and its all gravy now

Games work fine so far and now can feel better knowing that I might never see 3 ROD on this console for a long time. Now too retry on the other box that failed

Post by: RBJTech on April 24, 2007, 09:37:00 AM
** ONCE DONE UP SEMI TIGHT - UNDO IT AGAIN AND LOOK AT THE H/S - IF IT HAS A FRESH IMPRINT OF THERMAL PASTE (assuming you cleaned off the old stuff..
 ) THEN YOU'RE GOOD - IF IT DOESN'T THEN YOU NEED TO REMOVE SOME WASHERS .. **
Post by: nettwerk on April 24, 2007, 01:19:00 PM
it semi worked with lawdawgs method last weekend but kept freezing up in games. NOBODY had spring washers though and lowes was out of course, so I substituted a lock washer smashed in between 2 flat washers on this one. Seems to work ok and they can be changed later on if need be.
Another big thanks!
I now invite my other non modded xbox to break

Post by: SnufftheCrimeDog on April 24, 2007, 02:11:00 PM
QUOTE(RBJTech @ Apr 24 2007, 08:01 AM)
..with only 1 washer inbetween the h/s and board, then you may be bending things too much if you are doing it up tight (IMG:style_emoticons/default/blink.gif) The sweet spot seems to be 1.5mm (2 x 0.7mm washers)
It's weird that you said with 2 washers you couldn't get the die to touch the h/s - how thick are the washers you are using ?
Did you check the thickness of the nut&washer UNDER the board - is it level with the main chassis standoffs ? ie do all the ports (AV connector etc) line up nicely without having to screw it down ?
Lol, I need to check my grammar...I meant I DO need advice I'm going into to play with some more, but on top of the sink, if I take out a flat washer, should it be GPU heatsink, flat washer spring washer,and lock nut or GPU sink, spring washer, flat washer, lock nut?
Thanks for the help everyone.
Post by: SnufftheCrimeDog on April 24, 2007, 06:22:00 PM
) Since I kept getting the 2rols I decided to hell with it and got rid of all the washer under the heatsinks, I looked at RBJtechs tut, and determined that I didnt have enough room to put a washer, spring washer, another washer, and a lock nut on top of the gpu heatsink. So I ended up just putting on a washer and lock nut on top of the gpu. Did the same for the the cpu. Tightened up all the nuts. Fired it up expecting the thing to blow up, and next thing you know I watching four green lights fire up. Now I really like to hear peoples ideas about this I'm pretty baffled. I mean I look at this as being a combination of RBJtechs and Lawdawgs tutorials.
Post by: lawdawg0931 on April 24, 2007, 08:37:00 PM
QUOTE(SnufftheCrimeDog @ Apr 24 2007, 07:29 PM)
I decided to hell with it and got rid of all the washer under the heatsinks
I'd be real careful in doing this, as the two washers under the heatsinks usually provide two functions:
1. allows a little play (rocking back & forth) of the heatsink - ensuring that the h/s is on the CPU/GPU & not the washers, but more importantly
2. It gives you something to catch you from overtightening the lock nuts. If you tighten down (without any washers) you can do severe damage. Just be very careful.
Post by: SnufftheCrimeDog on April 24, 2007, 09:09:00 PM
QUOTE(lawdawg0931 @ Apr 24 2007, 10:44 PM)
I'd be real careful in doing this, as the two washers under the heatsinks usually provide two functions:
1. allows a little play (rocking back & forth) of the heatsink - ensuring that the h/s is on the CPU/GPU & not the washers, but more importantly
2. It gives you something to catch you from overtightening the lock nuts. If you tighten down (without any washers) you can do severe damage. Just be very careful.
Thats a good point Lawdawg, and I understand the function of the washer completely seeing as my fixed xbox 360 is verbatim to RBJTechs tutorial. I was very careful, as soon as I felt the nut become snug I stopped, and that when the green lights came on. (IMG:style_emoticons/default/biggrin.gif) . Now, my question is, I know this is risky seeing as your tightening the heatsink to the MB, and it can be snapped, but in worse case scenario, oh say when hardware store owners throw a few random sized washer in a zip-lock bag, would this be an o.k. method to repeat if you did not have the parts required. By "o.K" i mean lasting fix.
Post by: svincent on April 24, 2007, 10:31:00 PM
I'm yet to put it thru a serious workout, but i'm happy just to get to the dashboard

Big up - SV

Post by: lukebe on April 25, 2007, 12:01:00 AM
Problem is I've just started experiencing locks up today. I've had about 5 where the image on screen is just stationary and nothing responds.
To get the full picture, I started experiencing locks up for months before the 3 red rings. When I first finished RBJ's I had only the mother board sitting in the housing and put the RF plate on. Plugged it in and still had the 3 rings.
I proceeded to bolt the board in properly and it was pulling down on the corners as I screwed it firmly. I didn't like it but when I fired it up it all worked and has been until today. So I didn't overheat the system after the mod.
For the record I applied fresh thermal paste, did the shroud mod along, put in whisper fans, and whacked a heat sink on the southbridge and 2 RAM chips (did nothing to the ones under the GPU heat sink).
Today is not winter but it is abnormally cold.
As I see it I have a few options:
1. Tighten the GPU heat sink. The box does not give the 2 rings when locking up but I understand the heat senesor is only on the CPU heat sink. As RBJ said, the GPU heat sink fins get in the way a bit when tightening so POSSIBLY dodgy but I'm sure the CPU is good. Will this achieve anything in my case? I got a lock up when the system was cold so dont think this will do anything to help.
2. Let the xbox overheat by disconnecting the fans to let the board flex. But I dont want to stress or do anything I dont have to incase it makes it worse.
3. Put thermal pads under the GPU on the other RAM chips. But I've dont a fair bit to make the system run pretty cool and I'm sure it's heaps better now.
I think 2 would be my best bet. Any comments on what would be useful to do or is pointless to try?
Post by: RBJTech on April 25, 2007, 04:27:00 AM
QUOTE(lukebe @ Apr 25 2007, 07:08 AM)
...I think 2 would be my best bet. Any comments on what would be useful to do or is pointless to try?
Take out the DVD drive and swing it 90 degrees - support it properly, then get a normal 80mm fan (or whatever you can find) and rig it up to a supply and direcly cool the GPU.
If locking up stops when playing a game, then the thermal expansion on the GPU is still breaking the BGU solder joint, causing the lock up. (it's ok when it's cold - thus no 3ROL)
2 solutions are to re-do the X-clamp replacement - changing the number of washers which may work, or increase the GPU cooling somehow - sounds like the only method you have left if to increase the fan speed on the GPU.
RAM heat may be the problem but try the above first to eliminate it ...
Post by: chucksd on April 25, 2007, 01:59:00 PM

Well,
After quite a bit of time with no probs the #$%# 3ROL is back. I checked it out and tightened up the H/S's and the console came back up but went green on me and back to the 3 rol. Not sure what to think as it had been working fine for quite awhile.
Chucksd
Post by: SnufftheCrimeDog on April 25, 2007, 02:17:00 PM
Well Im thoroughly confused. I've posted what has happened with this xbox 360 for the last few days. So heres what I've done from start to right now, as of right now we have a working xbox 360, but it been tempermental. Once I finally opened the xbox and got everything squared away, I did every step placed 3 washer on each leg like RBJtechs tut says, could only fit washer, spring washer, and lock nut. After starting it up 2 blinking lights(bad contact between GPU or CPU and there respective heatsinks. Moved down to two washer one each screw, put it all back together 2 blinking lights again...confused, I move down to 1 washer on each screw. 3rols...let it overheat. Start it back up, 3rols, error code 0020=No thermal pads on Gpu memories then. Hit the hay for that night, next day redid everything, went back to three washer, kept getting 2rols, 2 washer 2rols, then I got fed up and went to no washer yesterday. Worked for a little while. Went back to play it later that night 2rols. A this point I was pretty fed up. I went back to 1 washer on each screw, thermal pads, on gpu memory, and lose screws test...boots up into 2rols. Let it sit overnight woke up this morning and it worked. Happy, with that I went to my classes, when I came back the xbox was still working but I was baffled by why it didnt work last night but worked this morning. Id love and answer for that if anyone got one. So I screwed around with the screws tightening and and loosening them. I was able to to get the xbox 360 to overheat and boot perfectly at will, then I got stuck with the 2rols at boot again...looked at the heatsinks noticed one leg of the CPU not resting on the washer tightened it down, boots up beautifully. Turn on t.v. boot up system blocky picture 3rols, error code 0102...back to the drawing board overheated it tightened down the sinks, bingo boot, picture. Now here are the conclusions I made. 1.) The "hardware experts" at the store I went to probably gave me every sized washer except .70 ones 2.) When I initially got the 0020 error putting on the thermal pads over the Ram near the GPU probably would have resolved that should have done that from the get go. Finally 3.) Never travel without your dremel (IMG:style_emoticons/default/biggrin.gif) . The one thing I would like an answer to is why did the 360 not work last night after placing the washers on, but it worked today when I woke up? and hopefully you guys can decipher my garble (IMG:style_emoticons/default/tongue.gif)
This post has been edited by SnufftheCrimeDog: Apr 25 2007, 09:22 PM
Post by: jaychand77 on April 25, 2007, 02:33:00 PM
Post by: booker on April 25, 2007, 03:47:00 PM
QUOTE(RBJTech @ Apr 25 2007, 11:34 AM)
Take out the DVD drive and swing it 90 degrees - support it properly, then get a normal 80mm fan (or whatever you can find) and rig it up to a supply and direcly cool the GPU.
If locking up stops when playing a game, then the thermal expansion on the GPU is still breaking the BGU solder joint, causing the lock up. (it's ok when it's cold - thus no 3ROL)
2 solutions are to re-do the X-clamp replacement - changing the number of washers which may work, or increase the GPU cooling somehow - sounds like the only method you have left if to increase the fan speed on the GPU.
RAM heat may be the problem but try the above first to eliminate it ...
maybe this is not a permanent fix after all ?...
Post by: RBJTech on April 25, 2007, 04:53:00 PM
At the end of the day - all we are doing is pressing a cold solder joint(s) together - this may be by pressing the chip onto the board (by tightening the h/s down) or loosening the board (by removing the X clamps).
The solder joint is about 0.5mm across - ie VERY susceptible to thermal movement, the only proper fix is a reball and then reflow. However, depending on the severity of the original failure and your perseverence, it looks like the vast majority of the fix's are positive.
Post by: waxx9299 on April 25, 2007, 09:28:00 PM
ive been trying to figure out the best fix... so far the longest i did was 4 months before it re 3RLed..(but not with their method)
the board flexing theory is the most logical theory, and although here in my side of the planet, we dont have a lowes or a home depot. i get my parts from a local hardware store..so the best way to get the proper parts for me is either have a friend in the USA send me samples of flat and nylon washers.. the bolts i have no problem... actually i can post pictures of the type of bolts im using and they fit just right with the thread of the cpu and the gpu...
now my only problem is computing the actual height of the mobo and the cpu/gpu die where the heatsink make contact... anybody of you have an idea?
(IMG:http://farm1.static.flickr.com/225/473151525_338a418aea_o.gif)
and here's a photo of the bolts and spring washer that i have.. i get them cheap..very cheap
(IMG:http://farm1.static.flickr.com/220/473151529_7972416e52.jpg)
This post has been edited by waxx9299: Apr 26 2007, 04:29 AM
Post by: RBJTech on April 26, 2007, 04:23:00 AM

case to board = (3mm nut height + 1 washer) = ~3.7mm
board to CPU/GPU case = 2 x 0.7mm = ~1.4mm
Post by: langnao on April 26, 2007, 08:30:00 AM
mobo to GPU = ~ 2mm (slightly more, say 2.1-2.2mm)
Post by: Wince on April 26, 2007, 10:13:00 AM
Post by: sirsmooth on April 26, 2007, 12:45:00 PM
Im pretty gutted hearing of all these failuers
Post by: SnufftheCrimeDog on April 26, 2007, 03:38:00 PM
QUOTE(sirsmooth @ Apr 26 2007, 02:52 PM)
I think its best to do this mod before your xbox goes wrong, dont give it chance to get the 3 red lights.
Im pretty gutted hearing of all these failuers
It's all a matter of what error you have and how to take care of it, this fix works. I'm 3 for 3 as of now. I actually had to feel my way through one xbox that was giving me a real hassle, and I had incorrect sized washers, now it working flawlessly or so I hear. I not totally disagreeing with you I would be interested in seeing how long a system that the x-clamps were removed prior to first use would last.
Post by: scotttheman on April 26, 2007, 04:06:00 PM
Post by: SnufftheCrimeDog on April 26, 2007, 04:34:00 PM
Post by: compuguy01 on April 26, 2007, 08:20:00 PM
I had the 3RLOD 2 days ago, Ive been following RBJ's tut for some time now. So I went ahead and did the xclamp replacement today, followed the directions to a T except for between the MOBO and Heat sinks I used 2 washers not 3, 3 washers did not give the heat sink any contact at all w/ the GPU. Anyway she LIVES.. well until now, I was playin Oblivion played for about 20 min and freezes. Shut the system off, powered back on, I get green lines on the screen. Shut it off again, powered on, now I get the 3 lights again. Could I have made the GPU heat sink too tight??
Post by: RBJTech on April 27, 2007, 03:26:00 AM
In summary, bending the board the 'other way' is just as bad as bending it with the X clamps - the ideal is to keep the board as flat as possible, whilst maintaining pressure on the die for the h/s.
In short, experiment ..
Post by: grim_d on April 27, 2007, 09:54:00 AM
edit: to confirm i'm not weird, i'm buying a 3RLOD box (IMG:style_emoticons/default/laugh.gif)
This post has been edited by grim_d: Apr 27 2007, 04:55 PM
Post by: nekkron99 on April 27, 2007, 10:20:00 AM
QUOTE(grim_d @ Apr 27 2007, 08:25 AM)
hopefuly going to be getting down and dirty next week with your tut man, cant wait (IMG:style_emoticons/default/biggrin.gif)
edit: to confirm i'm not weird, i'm buying a 3RLOD box (IMG:style_emoticons/default/laugh.gif)
Yeah, getting down and dirty with a tut is a bit wierd without the 3RLOD. And I bet the tut is relieved as well. (IMG:style_emoticons/default/blink.gif)
This post has been edited by nekkron99: Apr 27 2007, 05:20 PM
Post by: grim_d on April 27, 2007, 12:33:00 PM
QUOTE(nekkron99 @ Apr 27 2007, 04:51 PM)
Yeah, getting down and dirty with a tut is a bit wierd without the 3RLOD. And I bet the tut is relieved as well. (IMG:style_emoticons/default/blink.gif)
sexy tutorial..mmmhmm.
Post by: SnufftheCrimeDog on April 27, 2007, 01:58:00 PM
QUOTE(compuguy01 @ Apr 26 2007, 10:27 PM)
Well my day was going great today (IMG:style_emoticons/default/sad.gif) I had the 3RLOD 2 days ago, Ive been following RBJ's tut for some time now. So I went ahead and did the xclamp replacement today, followed the directions to a T except for between the MOBO and Heat sinks I used 2 washers not 3, 3 washers did not give the heat sink any contact at all w/ the GPU. Anyway she LIVES.. well until now, I was playin Oblivion played for about 20 min and freezes. Shut the system off, powered back on, I get green lines on the screen. Shut it off again, powered on, now I get the 3 lights again. Could I have made the GPU heat sink too tight??
This thing was happening to my friend xbox that we just fixed. It dont think that it was a coincidence that I was playing around with the tightness and looseness of the screws when it came back, but here what I did, I went back in, overheated the 360 and then screwed down the heatsinks tightly. Not extremely tight mind you, but there definitely a little more then snug. This took care of it as far as I know, I played a little bit this morning, but I will be checking up with my friend to see if there has been anymore problems. I think what RBJTech said is correct you do need to experiment to get it right, although loosening it seemed to cause more problems for me then tightening them. So try both in my opinion, but be careful, Like RBJTech said the whole point of this mod is to stop the board from flexing, so if you do try tightening them up, be careful, you don't want to flex the board downwards or worse snap the MB, but i think as long as you dont over do it, and use the washer to gauge how tight the heatsink is down on the chip you should be fine. I definitely try both loosening the lock nuts and tightening them.
Post by: ptr.exe on April 27, 2007, 03:49:00 PM
The towel trick only made it work for a week, so I started reading up on X clamp replacement, I decided on this method as it will stop the board flexing as it is secured to the case.
I'd like to point out that you need to reball the solder, by allowing the 360 to overheat and then waiting 2 minutes. As described in lawdawg0931s tutorial.
Thanks RBJtech and lawdawg0931.
Post by: grim_d on April 27, 2007, 05:45:00 PM
QUOTE(ptr.exe @ Apr 27 2007, 10:56 PM)
I'd like to point out that you need to reball the solder, by allowing the 360 to overheat and then waiting 2 minutes. As described in lawdawg0931s tutorial.
I dont think that's necessary, plus overheating the machine does not reball the joints, most solder melts at around 190C, by this point you have far more problems than your overheating xbox, the thing is probably on fire.
RBJtech, could you confirm, is it necessary to do the towel/heatgun trick before attempting this.
Post by: booker on April 27, 2007, 06:33:00 PM
QUOTE(grim_d @ Apr 28 2007, 12:16 AM)
I dont think that's necessary, plus overheating the machine does not reball the joints, most solder melts at around 190C, by this point you have far more problems than your overheating xbox, the thing is probably on fire.
RBJtech, could you confirm, is it necessary to do the towel/heatgun trick before attempting this.
i think it may varay from system to system. On my case it was necesary. Actaually the 2 min wasnt enough. So i did the towek trick for 20 min.
And i tight the screews really tight..
Since i did both things at the same time (well not the same time but you get the idea) i don´t know what did the trick.. but the story is..
before doing this i got video freezeing after 5 to 10 min...
after doing this (overheat + really tight the bolts), i can play the system without a freeze (so far).
(Touch wood)
Post by: JakeDunn on April 27, 2007, 06:33:00 PM

Btw booker, I believe the correct term is "knock on wood". Touching wood seems to imply something else...

Post by: booker on April 27, 2007, 08:21:00 PM
QUOTE(JakeDunn @ Apr 28 2007, 01:40 AM)
When you guys did the towel method, did you put the case back together or was the system naked then toweled. Though I highly doubt its the latter because thats just asking for trouble right there (IMG:style_emoticons/default/flamethrower.gif)
Btw booker, I believe the correct term is "knock on wood". Touching wood seems to imply something else... (IMG:style_emoticons/default/ph34r.gif)
LOL.. you are right.. (IMG:style_emoticons/default/smile.gif) I´m not from the us as you can see (IMG:style_emoticons/default/smile.gif)
And yeah... i did put the case back together before doing this.
Edit:
"Touch wood" or "knock on wood" is a popular saying to reverse any bad luck that might come your way, due to a recent action you have taken or comment you have made.
Not so mistaken after all... But what does touching wood means? :/
This post has been edited by booker: Apr 28 2007, 03:22 AM
Post by: lawdawg0931 on April 28, 2007, 06:15:00 PM
QUOTE(booker @ Apr 27 2007, 09:21 PM)
Not so mistaken after all... But what does touching wood means? :/
http://www.answers.com/topic/woody-1
(IMG:style_emoticons/default/laugh.gif)
This post has been edited by lawdawg0931: Apr 29 2007, 01:20 AM
Post by: RBJTech on April 29, 2007, 04:08:00 AM
QUOTE(grim_d @ Apr 28 2007, 12:45 AM)
I dont think that's necessary, plus overheating the machine does not reball the joints, most solder melts at around 190C, by this point you have far more problems than your overheating xbox, the thing is probably on fire.
RBJtech, could you confirm, is it necessary to do the towel/heatgun trick before attempting this.
Shouldn't be necessary - if the fix needs any type of heating, then it's the board flexing that's making the fix, not the X clamp replacement (= bad, as it will fail again).
As I think somebody has already said - you are actually masking the results by heating things - if you get the 3ROL initially after doing the clamp replacement - then you aint fixed it ! (IMG:style_emoticons/default/wink.gif)
Post by: CB Onyx on April 29, 2007, 04:32:00 AM
I did the x-clamp replacement and the 360 powered up fine.
only one problem...when i touch the video connector..the 360 reboots..sometime giving no screen but only sound.
Does this mean i have to let it overheat first (towel trick) ?..i did not do this after the x-clamp replacement...just replaced the x-clamps, put everything back together and powered up the the 360..
and 1 more question...is the replacement just a temporary fix...or can i expect it to last ?
Post by: grim_d on April 29, 2007, 04:59:00 AM
QUOTE(RBJTech @ Apr 29 2007, 11:08 AM)
Shouldn't be necessary - if the fix needs any type of heating, then it's the board flexing that's making the fix, not the X clamp replacement (= bad, as it will fail again).
As I think somebody has already said - you are actually masking the results by heating things - if you get the 3ROL initially after doing the clamp replacement - then you aint fixed it !
well i will be trying it as soon as i get my 3rlod box through from fleabay. No doubt i'll screw up and post here

Post by: mzone on April 29, 2007, 07:18:00 AM
i have 2 360s that i used RBJtech's Method strange they seem to run for like 30 mins theren freeze then go to 3 rol?
if i leave them off for about 15 mins to cool down they boot back up again.
i have even done the 12v 360 fan mod so they run faster on both 360,s .
This post has been edited by mzone: Apr 29 2007, 02:19 PM
Post by: RBJTech on April 29, 2007, 07:47:00 AM
QUOTE(mzone @ Apr 29 2007, 02:18 PM)
hows everyone getting on since they used this method\?
i have 2 360s that i used RBJtech's Method strange they seem to run for like 30 mins theren freeze then go to 3 rol?
if i leave them off for about 15 mins to cool down they boot back up again.
i have even done the 12v 360 fan mod so they run faster on both 360,s .
I've heard of freezing after a set peroid of time, but never the 3ROL come up again during play - As you say with the fans running @ 12v I doubt you're problem is heat - although have you done any other mods - the most important is the airflow divider ? Also have a tweek with the nut torque - you just need to spring washers lightly tightened - not tight as this defeats the object of having the spring washer in the first place ..
I hope this helps ..
PS - Divider tut in the FAQ and on my home page ...
Post by: booker on April 29, 2007, 01:19:00 PM
QUOTE(mzone @ Apr 29 2007, 02:18 PM)
hows everyone getting on since they used this method\?
i have 2 360s that i used RBJtech's Method strange they seem to run for like 30 mins theren freeze then go to 3 rol?
if i leave them off for about 15 mins to cool down they boot back up again.
i have even done the 12v 360 fan mod so they run faster on both 360,s .
you may need to tight those nuts a bit more. Had this problem.. before i tight the bolts, after that... is working perfeclty.
the other thing you could be experienceing, could be some loose solderings, if that the case you should overheat the system for a while to get thos loose solderings solder by themself.
Toweltrick will do...
Post by: RBJTech on April 29, 2007, 02:10:00 PM
Friend of a friend console (yea I know, word is getting around..) 3ROL, so I try my X-Clamp fix (standard), doesn't boot.
3 washers - boots but locks within seconds - checkboard.
2 washers - doesn't boot.
1 washer - doesn't boot.
GPU loose - doesn't boot.
CPU loose - doesn't boot.
NO washers - pressing hard on the centre of the GPU - boots ... wtf
3 washers - pressing hard on the centre of the GPU - boots ...
So with the board 'flat' it doesn't want to know with corner pressure - so how do I apply pressure to the die from the centre (and don't say X clamp
 ) as I wanted it to press down / not up...
My solution was to cut a 1mm thick piece of aluminium to cover the two dies (1cm x 2cm ish), heatpaste both sides + the normal heatsink and then bolt it tight with 3 washers per bolt.
3 washers = height of GPU case & die - so my theory is by putting a 1mm 'shim' on the die, I am forcing the board to flex 'down' (it's held 'level' on all the corners by the bolts attached to the case remember).
Worked a charm - I've given it a workout in COD2 for the last few hours - zero lockups of problems. I'm going to give it a few more days before posting another success in the polls - but it's looking promising ...
I'll update my tutorial with another option if she turns out good ..
Post by: kidman64 on April 29, 2007, 03:33:00 PM
i'll try to bring my console from the dead in a few days and i'd like to have as much information as possible.
thanks in advance
Post by: mzone on April 29, 2007, 07:05:00 PM
Post by: ydgmms on April 29, 2007, 11:29:00 PM
QUOTE(RBJTech @ Apr 29 2007, 03:46 PM)
Update on a console from hell - fixed on Sunday 29Apr - (I hope).
Friend of a friend console (yea I know, word is getting around..) 3ROL, so I try my X-Clamp fix (standard), doesn't boot.
3 washers - boots but locks within seconds - checkboard.
2 washers - doesn't boot.
1 washer - doesn't boot.
GPU loose - doesn't boot.
CPU loose - doesn't boot.
NO washers - pressing hard on the centre of the GPU - boots ... wtf
3 washers - pressing hard on the centre of the GPU - boots ...
So with the board 'flat' it doesn't want to know with corner pressure - so how do I apply pressure to the die from the centre (and don't say X clamp
) as I wanted it to press down / not up...My solution was to cut a 1mm thick piece of aluminium to cover the two dies (1cm x 2cm ish), heatpaste both sides + the normal heatsink and then bolt it tight with 3 washers per bolt.
3 washers = height of GPU case & die - so my theory is by putting a 1mm 'shim' on the die, I am forcing the board to flex 'down' (it's held 'level' on all the corners by the bolts attached to the case remember).
Worked a charm - I've given it a workout in COD2 for the last few hours - zero lockups of problems. I'm going to give it a few more days before posting another success in the polls - but it's looking promising ...
I'll update my tutorial with another option if she turns out good ..
Did you notice if maybe the GPU heatsink was bent? I read someone else had a GPU heatsink that was extremely bent (due to the xclamps) and he shaved it down so it was flat again.
Maybe it was just bent and didn't provide uniform pressure?
Also, what I've been doing is adding small pieces of like sticky backed felt to the corners of the gpu and cpu for so the heatsink provides pressure uniformly around the entire surface of the GPU/CPU. Good/bad idea?

like that..
Post by: grim_d on April 30, 2007, 03:02:00 AM
QUOTE(ydgmms @ Apr 30 2007, 07:05 AM)
Also, what I've been doing is adding small pieces of like sticky backed felt to the corners of the gpu and cpu for so the heatsink provides pressure uniformly around the entire surface of the GPU/CPU. Good/bad idea?
like that..
cant be a bad idea i would think, maybe ill pick some up when i go to get my parts today.
Post by: grim_d on April 30, 2007, 09:02:00 AM
Post by: Carkus on April 30, 2007, 09:55:00 AM
I read both, and performed the mod over the weekend. (mounting method as per Lawdawg0931's guide).
So far its all working well.
I've taken pic's of the whole process, but dont have anywhere to upload my guide/pictures to. Anyone got any webspace I can post it to? PM me.
http://www.megaupload.com/?d=MPSX8P2H
May have exceeded download limit already, as im not a member...
Thanks again.
RBJtech: in regards to you needing to apply presure the the centre of the GPU from above, you could lap the heatsink, with a very small increase in height in the middle of the heatsink, in turn applying most of the pressure there. (probably harder to do with the GPU heatsink than the CPU heatsink...)
Post by: ptr.exe on April 30, 2007, 10:44:00 AM
QUOTE(RBJTech @ Apr 29 2007, 11:08 AM)
Shouldn't be necessary - if the fix needs any type of heating, then it's the board flexing that's making the fix, not the X clamp replacement (= bad, as it will fail again).
As I think somebody has already said - you are actually masking the results by heating things - if you get the 3ROL initially after doing the clamp replacement - then you aint fixed it !
In that case mine is not fixed. After X-clamp replacement, it still gave 3ROL, so I let it overheat, waited for two minutes and turned it off letting it cool.
It's been running fine for a week now though

I'll update if it dies in the next week.
Post by: compuguy01 on April 30, 2007, 01:04:00 PM
This post has been edited by compuguy01: Apr 30 2007, 08:06 PM
Post by: ptr.exe on April 30, 2007, 02:44:00 PM
QUOTE(compuguy01 @ Apr 30 2007, 08:04 PM)
Oh also the Thermal compound I used was Antec Silver no Arctic should that matter?
Doesnt matter.
The difference between most thermal pastes of decent quality is a few degrees, if that.
Post by: scaremy on April 30, 2007, 05:46:00 PM
i haven't gotten the 3RLOD but i cant play for 5 min without the screen freezing and looking all weird
so should i give this a shot?
also why not also put a small block "shim" under the GPU as was mentioned before as standard practice? surely that would keep it from bowing in either direction and make it nice and flat?
one last thing im confused on witch is more important?
the GPU side or the CPU side or both? can i get away with just one for now?
also is the GPU hs the short silver one?
and if so why is there 2 processors on the copper hs side? a big one and a little one?
im so sorry at my n00bieness LOL
Post by: compuguy01 on April 30, 2007, 06:57:00 PM
witch is more important?
the GPU side or the CPU side or both? can i get away with just one for now?
also is the GPU hs the short silver one?
[/quote]
Both have to be perfectly flat, Ive been having great success following RBJ's tut not perfect yet but im well on my way its all in the adjustments. The GPU is under your DVD Drive "the short one" (IMG:style_emoticons/default/smile.gif) .
This post has been edited by compuguy01: May 1 2007, 01:58 AM
Post by: Boddah on May 01, 2007, 06:06:00 PM
I'll post in the success thread after a few more days.
PS, thanks for the tut RBJtech!
Post by: SnufftheCrimeDog on May 01, 2007, 06:58:00 PM
Post by: booker on May 01, 2007, 10:03:00 PM
QUOTE(SnufftheCrimeDog @ May 2 2007, 01:58 AM)
Well this seems to be successful fix. I know, my xbox has been working for about a month now no problems. My friends xbox who i had a bear of a time with is also working great now. On the other hand the first xbox 360 we fixed, using Lawdawgs method failed a few weeks ago. Of course we got it back up and running with RBJTechs. So kudos to you RBJTech. Not to totally bash Lawdawgs method in theory there the same fix, but I think that because of the lack of the lock-nut the screws actually loosen up overtime and cause graphical freezing, because of it. I would really be interested in starting a poll, I know there is already one for successful fixes, but a poll to see how long people have been running with this fix, and too see if there still running.
Excelent idea...
Post by: RBJTech on May 02, 2007, 04:03:00 AM
QUOTE(SnufftheCrimeDog @ May 2 2007, 01:58 AM)
Well this seems to be successful fix. I know, my xbox has been working for about a month now no problems. My friends xbox who i had a bear of a time with is also working great now. On the other hand the first xbox 360 we fixed, using Lawdawgs method failed a few weeks ago. Of course we got it back up and running with RBJTechs. So kudos to you RBJTech. Not to totally bash Lawdawgs method in theory there the same fix, but I think that because of the lack of the lock-nut the screws actually loosen up overtime and cause graphical freezing, because of it. I would really be interested in starting a poll, I know there is already one for successful fixes, but a poll to see how long people have been running with this fix, and too see if there still running.
Have to agree. A LOT of people seem to think you need to do the overheat first - you do not. If you do any form of overheat, then you are likely fixing the problem with a warped board and it will fail again in time.
You should not get the 3ROL after doing the X-Clamp fix - if you do, then you have not fixed the problem - simple as that.
If you do then the options are : 1) Less washers 2) More torque 3) Less torque or 4) Shim
PS - The X-Clamp+Shim mod I posted a while back is going strong, no issues so far but I'll give it a bit longer b4 I add to the poll ..
Post by: RBJTech on May 02, 2007, 05:25:00 AM

The diagram is obviously over emphasised, as the board flexing no where near that amount graphically (
) but you get the idea.You can clearly see WHY it works - pressure is put on the outer BGU connections. The less washers you have, the more pressure you put on it. Remember the X clamp did the opposite, it put pressure on the inner pins leaving the outer pins to come away from the flexing board (which was not held firm).
I'm just trying to figure out why the 'shim' method worked (3 washers+shim) when the 2 washer method didn't - looking at it now, putting a 1mm thick shim on the die, according to the above diagrams would just make the board flex into a 2 washer design.. Hmm
Post by: brywalker on May 02, 2007, 07:28:00 AM
The amount of flex that the board gets with less washers is insignificant. The pressure is now equal on all four corners, so you are acutally not bending the board - moreso just pulling it foward. If there was any flex on the board it would be outside the BGU package. The heatsink flexes far before the board, actually. I don't have pics - but I put a GPU heatsink on a throw-away board just to see how far I could torque down before I cracked the die.
I was able to screw it down all the way. The corners of the heatsink touched the board - and the entire bowing was at the heatsink! I don't recommend doing this - but it shows that the aluminum will bend far before the board bends out of spec. The CPU heatsink probably won't flex as much, you would crack the die before you got that far down because it is thicker - even though copper is super soft.
This post has been edited by brywalker: May 2 2007, 02:30 PM
Post by: Bravoexo on May 02, 2007, 07:51:00 AM
(IMG:http://img256.imageshack.us/img256/3351/xbox1uz5.jpg)
I ofcourse decided to move away a bit to the designed method and think about using that washer instead. In this configuration.
(IMG:http://img186.imageshack.us/img186/3135/mg6703jm3.jpg)
This way, I didn't have to drill through the HS's or use locking nuts. Just tightened it in a crosswise manner (since were' talking screws here, tightening one post first all way would tilt the HS to that corner disapparingly)
What do you guys think? The nylon washer seems to be the right height of the original portion of the oem HS leg that was underneath the mobo (held by the x-clamps)
Post by: RBJTech on May 02, 2007, 07:34:00 AM
QUOTE(brywalker @ May 2 2007, 02:28 PM)
I really hate to disagree with you, but I have to.
The amount of flex that the board gets with less washers is insignificant. The pressure is now equal on all four corners, so you are acutally not bending the board - moreso just pulling it foward. If there was any flex on the board it would be outside the BGU package. The heatsink flexes far before the board, actually. I don't have pics - but I put a GPU heatsink on a throw-away board just to see how far I could torque down before I cracked the die.
I was able to screw it down all the way. The corners of the heatsink touched the board - and the entire bowing was at the heatsink! I don't recommend doing this - but it shows that the aluminum will bend far before the board bends out of spec. The CPU heatsink probably won't flex as much, you would crack the die before you got that far down because it is thicker - even though copper is super soft.
I'm not with you on the heatsink bending I'm afraid .. Are you saying a 14mm thick vaned aluminium bends more than a 2mm thick piece of fibreglass ? The heatsink will obviously be 'weaker' going against the vanes, but that is still a 2-3mm thick piece of ali, that will take some force to bend over the short distance (60mm) we are playing with ... ?
Yes the bending is outside the BGU package, (that's the whole idea) - to press the outer pads back onto the BGU package. If we had enough pressure to bend the package, it would snap (it's ceramic)..
We are probably applying negative (pulling) pressure on the centre pins now by doing this, which is why if possible, I recommend 3 washers to keep everything level as possible.
QUOTE(Bravoexo @ May 2 2007, 02:51 PM)
Hey, I didn't realize I was following RBJtech's method instead of lawdawg...
I ofcourse decided to move away a bit to the designed method and think about using that washer instead. In this configuration.
This way, I didn't have to drill through the HS's or use locking nuts. Just tightened it in a crosswise manner (since were' talking screws here, tightening one post first all way would tilt the HS to that corner disapparingly)
What do you guys think? The nylon washer seems to be the right height of the original portion of the oem HS leg that was underneath the mobo (held by the x-clamps)
It's a hybrid of the two
Yes using M5's means you don't have to muck about with the heatsinks but it also means that you apply all the force by using the thread on the bolt, not uniform and flexible pressure from the spring washer - but it works ..
The nylon washers look fine, I assume you are adding extra washers onto the bolts when the board is in prior to attaching the heatsinks ? (ps - I bet that's fun and games as the bolts arn't secured to the case !)
Post by: Bravoexo on May 02, 2007, 08:28:00 AM
At first I added the same washer on top of the mobo... but no go, no thermal grease actually touched both HS... he he, instant kill switch (+ 2 L overheat signal) from my box. (I actually see why now that I look at your pic...)
Removed any washers and it's just a direct bolt on. Screwed in the HS in a crosswise manner... and everything is working fine for about 3 days now. Did even a marathon of 25 games in one sitting (playing the intro, a few minutes in, or downloading updates) and worked a-ok.
I think my washers actually would work with the original HS legs...too. But can't try it anymore coz I already drilled through my metal case. Oh well.
This post has been edited by Bravoexo: May 2 2007, 03:30 PM
Post by: ptr.exe on May 02, 2007, 08:31:00 AM
The first one I used two washers, as three was too high. This left a small amount of room, I tightened the bolts as far as possible by hand (normal ones, as I had no lock nuts at the time) and then did a half turn using pliers.
The second one I ran out of washers and so couldnt put any. I was careful how much I tightened the lock nuts, so that the GPU heatsink ran parallel to the board, so no flexing occured. And there was very little pressure on the CPU heatsink, letting the spring washers do the work - again so there would be no flexing of the board.
The first time, it fixed the 360s red lights, which I know were caused by a bent board.
The second time it did not fix the red lights (intermitent 0020) as I knew this was because of the board being warped near the AV area, I did the mod just as a precaution against future flexing. However once I put it all back together the 3 ROL never happened again...
I can only guess that the heatsink bolts are now holding the board straight in line with the stanard 360 case bolts that screw into the AV connector. Quite random that this should help such a problem, but thanks all the same

Post by: booker on May 02, 2007, 08:44:00 AM
QUOTE(RBJTech @ May 2 2007, 01:01 PM)
I've added this diagram to the tutorial which shows you what difference the number of washers makes to the overall result :-
The diagram is obviously over emphasised, as the board flexing no where near that amount graphically (
) but you get the idea.You can clearly see WHY it works - pressure is put on the outer BGU connections. The less washers you have, the more pressure you put on it. Remember the X clamp did the opposite, it put pressure on the inner pins leaving the outer pins to come away from the flexing board (which was not held firm).
I'm just trying to figure out why the 'shim' method worked (3 washers+shim) when the 2 washer method didn't - looking at it now, putting a 1mm thick shim on the die, according to the above diagrams would just make the board flex into a 2 washer design.. Hmm
What is the more efficient method?
more flexing, less flexing, perfectly flat?..
thanks
Post by: RBJTech on May 02, 2007, 12:21:00 PM
QUOTE(booker @ May 2 2007, 04:20 PM)
What is the more efficient method?
more flexing, less flexing, perfectly flat?..
thanks
Ideally as flat as the 'original' - but this won't always fix the problem - so start with 3 and work down to 1...
Post by: booker on May 02, 2007, 12:57:00 PM
QUOTE(RBJTech @ May 2 2007, 07:57 PM)
Ideally as flat as the 'original' - but this won't always fix the problem - so start with 3 and work down to 1...
I´m not using this method, but stil the concept is the same, so i´ll ask you what you think about it.
Right now i have 2washers, each washer have 1mm each.
So the space between the Mobo and the HS is 2mm (obviously).
The question is... i had the system working flawless for 1 week, but then it started freezing after 2 or 4 min into the game (dashwork was fine though)
You think that maybe 2mm is too much and i should try 1 washer only?
I believe this looks a bit agressive, since it could damage de DIE.. i believe the space between the Mobo and the HS original is around 2mm.. but you are the expert here.
What do you think?
Using 1 washer, you don´t have a chance of breaking the cpu?... it looks a very thin space there.
Post by: SnufftheCrimeDog on May 02, 2007, 02:17:00 PM
Post by: booker on May 02, 2007, 01:50:00 PM
QUOTE(SnufftheCrimeDog @ May 2 2007, 09:17 PM)
This my belief, and I realize there are some clashing ideas here, and I could possibly way off, but as I said here what i think in regards to the washer. With the washer use as many as you can till the the GPU and CPU can make the connection with the die. I've never been able to use 3 washers it my xbox just wasnt have none of that. So my xbox is using 2 washers, my friends who we had to re-do from Lawdawgs, is also using two washers. Finally the third one I fixed only has one washer. There all working now, so I think you should use as many as your system allows. BUT, and a big but here you should always have at least one washer. This can help you gauge tightness and stability of the sinks' on the die. My question for anyone who can answer this as I said the third one I fixed would not take 2 washers, it just wouldn't. Incorrect thickness in washer I believe. So my question is because its obviously the wrong thickness and it is only possible to use one washer, is this washer equivelent to 2 or 3 washers?
SnufftheCrimeDog,
I don´t understand how you were able to use only 1 washer on 1 system and 2 washer on 2 other system.. does the space between the mobo and the HS were different or you just used more preassure on 360 u used 1 washer?
Honeslty i may try 1 washer because i´m out of ideas if my system keep freezing (wich is highly probably) But again.. 1 washer.. is too thin for the space between the mobo and the HS.
Post by: blankaz on May 02, 2007, 02:34:00 PM
Post by: RBJTech on May 02, 2007, 02:30:00 PM
QUOTE(booker @ May 2 2007, 09:26 PM)
SnufftheCrimeDog,
I don´t understand how you were able to use only 1 washer on 1 system and 2 washer on 2 other system.. does the space between the mobo and the HS were different or you just used more preassure on 360 u used 1 washer?
Honeslty i may try 1 washer because i´m out of ideas if my system keep freezing (wich is highly probably) But again.. 1 washer.. is too thin for the space between the mobo and the HS.
I guess it all depends on the thickness of the washers ..

Mine are 0.71mm thick (measured with a digital calipar) so 3 of mine make just over 2mm, whilst three of yours makes 3mm. That's the difference.
If you are getting lock up 5-10 mins in, then it's heat related meaning you are only 'just' pressing the contact (when cold). When the chip expands, it breaks the contact and bang you get a freeze. Either improve the cooling so it doesn't get as hot, or increase the pressure on the bolts and/or decrease the number of 'safety' washers. You don't even need to do it across all 4 corners - you may find that by just cranking up one corner, you solve the problem.
I hope this helps ..
QUOTE(blankaz @ May 2 2007, 09:34 PM)
As far as i know the root of the 3RLOD is in the GPU , so is it enough to replace only the GPU xclamp and leave the CPU's the way it is ?
That's correct - but if it's all apart, why not do both to be sure ?
Post by: SnufftheCrimeDog on May 02, 2007, 03:21:00 PM
QUOTE(RBJTech @ May 2 2007, 05:06 PM)
I guess it all depends on the thickness of the washers .. (IMG:style_emoticons/default/huh.gif)
Mine are 0.71mm thick (measured with a digital calipar) so 3 of mine make just over 2mm, whilst three of yours makes 3mm. That's the difference.
If you are getting lock up 5-10 mins in, then it's heat related meaning you are only 'just' pressing the contact (when cold). When the chip expands, it breaks the contact and bang you get a freeze. Either improve the cooling so it doesn't get as hot, or increase the pressure on the bolts and/or decrease the number of 'safety' washers. You don't even need to do it across all 4 corners - you may find that by just cranking up one corner, you solve the problem.
I hope this helps ..
That's correct - but if it's all apart, why not do both to be sure ?
....Not to sound like and idiot...but RBJTech...did you go to xbox 360 school (IMG:style_emoticons/default/biggrin.gif) That makes a alot of sense. So if the heatsink wasnt firmly on the die then that why you get those lock ups. Now would this cause your xbox to get the 3rols again. Because I know when one or two of the lock nuts were loose on the GPU the 360 froze like 3 minutes into NCAA 07, after screwing them down tight, the problem went away. But what happened was after freezing it went back to the 3rol, but then when I kicked it back on after turning it off(when it had the 3rol) it booted back up into green, and i was able to play the game, but if what your saying is true then it because the xbox had been on for a few minutes and it wasnt "cold" still is it logical that the 3rols came back? Even if for a second.
Post by: booker on May 02, 2007, 03:37:00 PM
QUOTE(RBJTech @ May 2 2007, 10:06 PM)
If you are getting lock up 5-10 mins in, then it's heat related meaning you are only 'just' pressing the contact (when cold). When the chip expands, it breaks the contact and bang you get a freeze. Either improve the cooling so it doesn't get as hot, or increase the pressure on the bolts and/or decrease the number of 'safety' washers. You don't even need to do it across all 4 corners - you may find that by just cranking up one corner, you solve the problem.
Exactly This is why i´m really thinking of taking 1 Washer from the equation.. but then i´m afraid if 1 wash is too thin or too risky of breaking the motherboard/cpu/gpu ?
This is why i want to ask you..
My washers are 1mm thin.. right now i have 2washers. (1 nylon and the other flat metal). Should i leave the Nylon only?
a bit more information, maybe it will help you to help me
... this happened after a few long days of gaming.. as i said before, it last for 1 week without problems, but , after 1 week i got the freezing after 2 or 4 min into the game. If i can play 10 or 20 min without freezing then i´m able to play all day long... but those first 4-10 minutes are key.What do you think i should do?
Post by: SnufftheCrimeDog on May 02, 2007, 07:59:00 PM
QUOTE(booker @ May 2 2007, 06:13 PM)
Exactly This is why i´m really thinking of taking 1 Washer from the equation.. but then i´m afraid if 1 wash is too thin or too risky of breaking the motherboard/cpu/gpu ?
This is why i want to ask you..
My washers are 1mm thin.. right now i have 2washers. (1 nylon and the other flat metal). Should i leave the Nylon only?
a bit more information, maybe it will help you to help me (IMG:style_emoticons/default/smile.gif)... this happened after a few long days of gaming.. as i said before, it last for 1 week without problems, but , after 1 week i got the freezing after 2 or 4 min into the game. If i can play 10 or 20 min without freezing then i´m able to play all day long... but those first 4-10 minutes are key.
What do you think i should do?
Booker, I really dont think your problem is washer related. Keep as many washer under there that your system allows, they shouldnt be causing your problem with the freezing, in fact the only problem they would cause is preventing it from making contact with the GPU/CPU. So my opinion for you my friend is try this fix out, because as I said when I was trying to help you PM, Lawdawgs fix is the same principal as RBJTechs, but we are essentially clamping the bolts using a lock nut. Your is only secured by the threads of the existing M5 screws, and this system vibrates a good amount so it possible those screws are loosening ever so slightly, and loosing a good connection with the GPU probably hence your freezing. Im not trashing Lawdawgs fix in anyway, but RBJTech involves clamping via the metal case which is much more stable then Lawdawgs. RBJTech makes alot of sense...any small flaw in how the heatsink is sitting can cause a freeze.
Post by: booker on May 02, 2007, 07:28:00 PM
QUOTE(SnufftheCrimeDog @ May 3 2007, 02:59 AM)
Booker, I really dont think your problem is washer related. Keep as many washer under there that your system allows, they shouldnt be causing your problem with the freezing, in fact the only problem they would cause is preventing it from making contact with the GPU/CPU. So my opinion for you my friend is try this fix out, because as I said when I was trying to help you PM, Lawdawgs fix is the same principal as RBJTechs, but we are essentially clamping the bolts using a lock nut. Your is only secured by the threads of the existing M5 screws, and this system vibrates a good amount so it possible those screws are loosening ever so slightly, and loosing a good connection with the GPU probably hence your freezing. Im not trashing Lawdawgs fix in anyway, but RBJTech involves clamping via the metal case which is much more stable then Lawdawgs. RBJTech makes alot of sense...any small flaw in how the heatsink is sitting can cause a freeze.
Ok... what i´ll do is, the next time it freeze i´ll just re tight the screws and i´ll try that...If that fix it, i may switch to the rbjtech. But i think.. i may be wrong though, but the first time it froze after a week of playing the system, i think... again i may be wrong, but i don´t think the screws were that "loose" when i opened the 360.
It make sense, because it last for 1 week more or less and then it start freezing again, no 3rl, just freezing..
Any other "theory" if the thightening don´t work?
Again i´ll keep an eye on that the next time it freeze.
Thanks for the help.
Post by: SnufftheCrimeDog on May 02, 2007, 08:55:00 PM
Post by: booker on May 02, 2007, 09:20:00 PM
QUOTE(SnufftheCrimeDog @ May 3 2007, 03:55 AM)
The looseness may not even be noticeable, but it may be enough to cause a bad connection, a way you could test it is if every time it freezes going back in tightening them, and seeing if it make s difference. I would be positive. You got it working which means it fixable it just isolating the problem and fixing it. I would focus more on the GPU then the CPU seeing as it graphical errors.
SnufftheCrimeDog,
First, thanks for all your feedback and advice, i really appreciate
I´ll do that... when the system freeze again, i´ll re tight the bolts and i´ll check if that fix it.. if it fix, i´m defniatly trying the Rbjtech method. It would be great to isolate the problem , i think that is the hardest part... once i know what the problem is, fixing it, will be a LOT EASIER.
Post by: SnufftheCrimeDog on May 02, 2007, 10:14:00 PM
QUOTE(booker @ May 2 2007, 11:56 PM)
SnufftheCrimeDog,
First, thanks for all your feedback and advice, i really appreciate (IMG:style_emoticons/default/smile.gif)
I´ll do that... when the system freeze again, i´ll re tight the bolts and i´ll check if that fix it.. if it fix, i´m defniatly trying the Rbjtech method. It would be great to isolate the problem , i think that is the hardest part... once i know what the problem is, fixing it, will be a LOT EASIER.
I commented on you post on one of the other threads. Im happy to help booker, I think you should deffinetly give RBJTechs tut a whirl....and for the record, no RBJTech and I are not close personal buddies. I am simply pointing out what has worked for me, and expressing my ideas.
Post by: booker on May 02, 2007, 09:52:00 PM
QUOTE(SnufftheCrimeDog @ May 3 2007, 05:14 AM)
I commented on you post on one of the other threads. Im happy to help booker, I think you should deffinetly give RBJTechs tut a whirl....and for the record, no RBJTech and I are not close personal buddies. I am simply pointing out what has worked for me, and expressing my ideas.
THanks i just read your post.. and i´m definatly trying this method.. since matt method gave me good results but after a week of gaming my system start freezing after 2 to 5 min into the game..
Now i need some help, Im not from the US so buying the "parts" will be a bit harder.. This are the common Washers in my country.. of course they have different names...
But... maybe you or someone can help me to find the
Flat Washer ( i guess any metal washer will do).
Nylon washer ( is called the same in my country)
Spring washer (this is the problem
... could somone point me in the link below what washer is the sping washer? I guess we are looking the "Grower" type... but wich one?http://www.gatatorni.../arandelas.html
The rest i think i´ll be able to find it by myself...
Thanks again..i know i could be a pain in the ass... but again it would be too good to be true to fix my 360...
Thanks again for the help!
Post by: rabbitstroker on May 03, 2007, 09:04:00 AM
THANKS GUYS!!
Post by: booker on May 03, 2007, 11:06:00 AM
I have a few questions.. again, some of you will think my question don´t make sense but remember i´m not from US/UK so we have different names for each part.
Machine Screws (4mm x 20mm) + Nuts (3mm thick)
these are 2cm long?
Spring Washer (4mm)
how thick they should be?
Flat Washer (4mm) 0.71mm thick
what material?
Nylon Lock Nut (4mm)
What is the difference between Nylon lock nut and Lock nut? I used google but it didn´t help.. it just show me lock nuts...
what is the point of the sprin washer over the HS.. i though the idea was to use it between the mobo and the heatsink so the HSwill have more movement...
One more thing.. i don´t want to drill the GPU HS, because if this don´t work i can go back to the Matt´s method. Can i use a "smaller Screw ?
Thanks
Post by: blankaz on May 03, 2007, 12:14:00 PM
Post by: SnufftheCrimeDog on May 03, 2007, 01:11:00 PM
Post by: Bravoexo on May 03, 2007, 03:55:00 PM
QUOTE(SnufftheCrimeDog @ May 3 2007, 08:47 PM)
OK lets clear something up shall we. If your system boots into green lights, and then after about 3 minutes goes into 2 red lights or overheating then THAT is overheating. If your system boots into 2 red lights or cant get past the dashboard without getting 2 red lights THIS IS NOT OVERHEATING, this is a bad connection with either the CPU or GPU heatsink and the CPU or GPU die.
That's also overheating, right? It just happens near instantaneously. (Good thing the xbox doesn't die from loss of contact with the hs, both even.)
Post by: Bravoexo on May 03, 2007, 04:06:00 PM
QUOTE(blankaz @ May 3 2007, 07:14 PM)
Hey guys i just did the tutorial .. reached to the final step, turned on the 360 and boom 2 lights of overheating appear right after i turn on the console , any ideas ?
pull out the HS again, and see how much coverage are you getting with them.
Post by: mann75 on May 03, 2007, 08:29:00 PM
Post by: r-o-d repairman on May 03, 2007, 08:32:00 PM
second, I'm terrible at following directions, I messed up the washer installation and washer count on the heatsink re-install, measure once cut twice - scratch head. I then, completely ignored TIM, hey - just scrape it off the top and re-use, uuuuuhhhh - sorry pal try again, 2 red=used heat sink paste. last but not least, polish them till you can see your caffeine stained teeth and polish a alittle more. If I ever see RBJ, I'm the guy with all the teeth.
Now don't yell at me, I only bolted up the main GPU, after reading the thread, I did a teardown, exposed the inside, and booted with pressure on the tall HS, I hadn't seen my dashboard in like 9 month's, I just about pissed, I decided to do the mod to just the one side, I've been running for 2 days, played GOW for the first time on LIVE with my Dad in FL. Thanks again RBJ
Post by: coldasice on May 03, 2007, 10:19:00 PM
EDIT: I have it running GOW right now. I will post the ammount of time taken before it freezes.
Post by: coldasice on May 04, 2007, 02:10:00 AM
EDIT: Grammar
Post by: booker on May 04, 2007, 02:04:00 PM
Post by: SnufftheCrimeDog on May 04, 2007, 03:10:00 PM
QUOTE(booker @ May 4 2007, 04:40 PM) 
Dumb question, when you tight the screws do you use some tool or just doing it by hand ? i´m wondering if is enough...
Use a correct sized socket wrench to get them tight, I used a screwdriver socket type-thing so I got them nice and tight so they wont move, been playing for almost a month and a half now
Post by: booker on May 04, 2007, 04:15:00 PM
QUOTE(SnufftheCrimeDog @ May 4 2007, 10:46 PM)
Use a correct sized socket wrench to get them tight, I used a screwdriver socket type-thing so I got them nice and tight so they wont move, been playing for almost a month and a half now
Thanks SnufftheCrimeDog, helping me.. as usual
1.5 month.. wow...

Post by: langnao on May 05, 2007, 12:42:00 AM
QUOTE(booker @ May 5 2007, 06:51 AM)
Thanks SnufftheCrimeDog, helping me.. as usual
1.5 month.. wow...
just doing the x-clamp is not enough. do a fan mod. as well to install additional fan to cool down the "monster" ...
Post by: ydgmms on May 05, 2007, 01:17:00 AM
QUOTE(blankaz @ May 3 2007, 01:14 PM)
Hey guys i just did the tutorial .. reached to the final step, turned on the 360 and boom 2 lights of overheating appear right after i turn on the console , any ideas ?
one of yoru heatsinks isn't making good contact.
Underneath the heatsink, did you put 2 or 3 washers? The tutorial calls for 3. But a number of people have noticed that 3 is too many and causes the heatsink to rest on the washers and not the die. Remove one washer on all corners. So theres 2 washers between the motherboard and heatsink on each bolt.
Post by: jimbobjim on May 05, 2007, 02:00:00 AM
I know it said this might be the case in the tutorial but i want to know why. Surely all 360 mobos are the EXACT same size. This only leaves the washers as the possible culprit, but then again i'd imagine these too are all the same size. Anyone know?
Post by: grim_d on May 05, 2007, 02:34:00 AM
EDIT
ok guys, any ideas.
3 washers, no cantact with die, so havnt tried it.
2 washers, 3rlod, 0102
1 washer, 3rlod, 0020
back to 2 washers and 0102
have tried various tightening and loosening combinations with no luck, with the 1 washer the bolts were so tight i feared for the mobo/die
2nd edit: i let her heat up with no fans/fanshroud for a few minutes until the heatsinks were HOT (and i mean burning) then i shut her off and tightened the screws a half turn. after that she booted fine. I fear this has only temporarily fixed it so i will report back after some testing.
Post by: mzone on May 05, 2007, 07:42:00 AM
i origanally done RBJtech's Method .
360 worked ok for about 3 days then back to 3 rings of death however it dont go to 3 rings straight away like 4 seconds normal?
when i first switch it on the green light comes on in middle and says on for 20 seconds just the single middle middle green led no others,
then after 20 seconds goes to 3 rings of death.

i have applyed new arctic silver too?
weired how it hangs on single green led for like 20 seconds untill 3 rol?
Post by: SnufftheCrimeDog on May 05, 2007, 11:40:00 AM
QUOTE(grim_d @ May 5 2007, 05:10 AM)
have tried various tightening and loosening combinations with no luck, with the 1 washer the bolts were so tight i feared for the mobo/die
That was the only way I could get my friends to work. Now keep in mind I always lock down the bolts as tight as they can go no problems so far with them, but I'm biting my tongue so nothing bad does happen. RBJTech provided a nice diagram for us that showed the comparison of washer to downward flex. Now this is a good diagram, but the way he set it up it was a little over-exaggerated(he did mention this though), it makes it look with one washer the boards about to cave in, while the board is actually flexing one washer will make a difference and will prevent the board from having any problems. Anyway I see alot of people scared to go really tight when tightening the bolts, which is good because u can actually over-tighten it and break the board, but to put this into perspective....you would really have to try to do that. As for the fact that you got 0020 with one washer that could be possibly lack of thermal paster or thermals pads on the 4 RAM chips on the bottom of the board. I cant promise you the red lights will not come back, but I would be optimistic.
Post by: grim_d on May 05, 2007, 11:55:00 AM
QUOTE(SnufftheCrimeDog @ May 5 2007, 07:16 PM)
That was the only way I could get my friends to work. Now keep in mind I always lock down the bolts as tight as they can go no problems so far with them, but I'm biting my tongue so nothing bad does happen. RBJTech provided a nice diagram for us that showed the comparison of washer to downward flex. Now this is a good diagram, but the way he set it up it was a little over-exaggerated(he did mention this though), it makes it look with one washer the boards about to cave in, while the board is actually flexing one washer will make a difference and will prevent the board from having any problems. Anyway I see alot of people scared to go really tight when tightening the bolts, which is good because u can actually over-tighten it and break the board, but to put this into perspective....you would really have to try to do that. As for the fact that you got 0020 with one washer that could be possibly lack of thermal paster or thermals pads on the 4 RAM chips on the bottom of the board. I cant promise you the red lights will not come back, but I would be optimistic.
well with the one washer i had it tightened as much as i could, so yeah breaking anything would be quite a challenge.
in regards to the 0020, it only appeared with the one washer try so i could say for certain it wasnt ram related.
one thing i did notice with one washer was that when tightening down the heatsink was really pushing against a transistor on the board, which i cant imagine was very good.
ill thermally cycle it as much as i can over the next few days, i'm selling it to a buddy anyway so i mean if it fails again he can just bring it back to me, which was the plan.
Post by: SnufftheCrimeDog on May 05, 2007, 12:03:00 PM
QUOTE(grim_d @ May 5 2007, 02:31 PM)
well with the one washer i had it tightened as much as i could, so yeah breaking anything would be quite a challenge.
in regards to the 0020, it only appeared with the one washer try so i could say for certain it wasnt ram related.
one thing i did notice with one washer was that when tightening down the heatsink was really pushing against a transistor on the board, which i cant imagine was very good.
ill thermally cycle it as much as i can over the next few days, i'm selling it to a buddy anyway so i mean if it fails again he can just bring it back to me, which was the plan.
Well yea then your right, I would assume at least, I know mine did the same thing after putting one washer on, after throwing on some thermal paste on the 4 RAM chips it booted, but I dont know. The whole problem with the last one I fixed was my washer were the incorrect size, so every-time I tried to use 2 washer...well it wouldn't connect with the die, so it had to be one. Another thing with that one was that I didnt have enough rooms on the GPU for a spring washer and a flat washer so I just used a flat washer, so essentially my GPU heatsink and CPU heatsink are locked down and cant really move because that spring washer isnt there, this may prove to be a positive, again I dont really know.
Post by: grim_d on May 05, 2007, 01:22:00 PM
QUOTE(SnufftheCrimeDog @ May 5 2007, 07:39 PM)
Well yea then your right, I would assume at least, I know mine did the same thing after putting one washer on, after throwing on some thermal paste on the 4 RAM chips it booted, but I dont know. The whole problem with the last one I fixed was my washer were the incorrect size, so every-time I tried to use 2 washer...well it wouldn't connect with the die, so it had to be one. Another thing with that one was that I didnt have enough rooms on the GPU for a spring washer and a flat washer so I just used a flat washer, so essentially my GPU heatsink and CPU heatsink are locked down and cant really move because that spring washer isnt there, this may prove to be a positive, again I dont really know.
i cant imagine putting nothing but thermal paste on the chips would benifit any, makes it more of a thermal insulator, it's transferring the heat to nowhere, but if it works lol.
Post by: SnufftheCrimeDog on May 05, 2007, 01:53:00 PM
QUOTE(grim_d @ May 5 2007, 03:58 PM)
i cant imagine putting nothing but thermal paste on the chips would benifit any, makes it more of a thermal insulator, it's transferring the heat to nowhere, but if it works lol.
Unless I've got the wrong idea, the RAM chips on the bottom of the motherboard do make contact with the case(so the thermal paste in this case would transfer heat)...I mean if they didnt in anyway then I dont see what the point of the new models putting thermals pads as stock on those bottom RAM chips would do. I think in my opinion that thermal paste transfers heat better. Like I said I could be wrong, I know I've told a few other people with this problem to give it a whirl and they reported it working but I dont know, i actually havent looked at case under those chips to see if there an imprint paste.
Post by: TheIrishLad on May 05, 2007, 04:36:00 PM
Post by: RBJTech on May 05, 2007, 05:26:00 PM
QUOTE(grim_d @ May 5 2007, 07:31 PM)
well with the one washer i had it tightened as much as i could, so yeah breaking anything would be quite a challenge.
in regards to the 0020, it only appeared with the one washer try so i could say for certain it wasnt ram related.
one thing i did notice with one washer was that when tightening down the heatsink was really pushing against a transistor on the board, which i cant imagine was very good.
ill thermally cycle it as much as i can over the next few days, i'm selling it to a buddy anyway so i mean if it fails again he can just bring it back to me, which was the plan.
Hi Grim - glad to see you're ebay toy turned up ...
Yea - 1 washer is not recommended - the way to press harder without using less washers is to use a shim on the die as I mentioned earlier (large thread so you're excused if you didn't read it ...
)Basically, this allows you to maintain the heatsink height, but pushes down directly on the die. I used a piece of 1mm thick Ali 1cm x 1.5cm (covering both the main & memory die). A bit of copper would be even better. Obviously coat both sides in AS5 before you put it on - the compression of the bolts holds it on tight ..
To date, the box has been fine, I've now given it back and he said it's played daily without a hitch
Also just reached 11,000 hits on my website lol ... no doubt I'll be getting a call from my ISP soon ...
I'll add a FAQ to the tutorial in the next few days highlighting some of the important points on this thread ...
All the best,
Richard.
Post by: grim_d on May 05, 2007, 06:16:00 PM
QUOTE(RBJTech @ May 6 2007, 01:02 AM)
Yea - 1 washer is not recommended - the way to press harder without using less washers is to use a shim on the die as I mentioned earlier (large thread so you're excused if you didn't read it ...
)no worries, it's working with 2 washers although i am concerned about how long since i more or less overheated it before it decided to boot, i thought about the shim (i did read about it) but 1mm aluminum sheet it not something i have lying around
The only theory i had about this is that i tightened the bolts a little more whilst the heatsinks where still hot, which is flawed in itself since metal expands when heated.
i've done a few thermal cycles on it and it's still ok but i'll pass it on to my buddy and see how he gets on, worse case scenario is having to refund his money and sell the parts, no biggie.
Post by: DJ_L3ThAL on May 05, 2007, 06:46:00 PM
Question for RBTech, do you think it would be wise if one console was still freezing a bit to let it overheat as in lawdawg's method with no fans etc and then tighten her up after that in an attempt to fix a broken connected (if that's the problem)? As one of the consoles the owner screwed with it a bit and its still freezing a bit, whether it is due to a bad connection underneath or something he did i am not sure, but originally when i completed your method it worked 100% i put a ghost recon in and loaded into the game then sat a weight on a joystick so the player would spin randomly around, i then left it for like an hour (i was around it for the first 10mins with no freeze), but when i came back it had locked up, perhaps i pushed the GPU too much initially also?
Any thoughts greatly appreciated, and RBTech your a legend!
Post by: blackhawk444 on May 05, 2007, 10:13:00 PM
Post by: RBJTech on May 06, 2007, 04:56:00 AM
QUOTE(DJ_L3ThAL @ May 6 2007, 02:22 AM)
Just thought i would add something for sceptical aussies out there. I could not find 0.71mm thick washers anywhere actually got kind of a strange look from the sales rep at coventry hahaha, so i settled with the 0.8mm ones and i have been using 2 of them on the motherboard and all has been sweet for the 2 consoles i have repaired with this method (the other one was lawdawg's method). The funny thing was the two i fixed with RBTech's method originall i did with lawdawg and they were intermittently (spelling?) giving me error 0102 and 0020... i have basically drawn my own conclusing to 0020 being something to do with the GPU and its pressure from the heatsink and/or thermal transfer capacity (whether this can be gauged by the system or not im not sure), but over tightening it was giving me 0020 everytime where as loosening/snug fit was giving me 0102.
Question for RBTech, do you think it would be wise if one console was still freezing a bit to let it overheat as in lawdawg's method with no fans etc and then tighten her up after that in an attempt to fix a broken connected (if that's the problem)? As one of the consoles the owner screwed with it a bit and its still freezing a bit, whether it is due to a bad connection underneath or something he did i am not sure, but originally when i completed your method it worked 100% i put a ghost recon in and loaded into the game then sat a weight on a joystick so the player would spin randomly around, i then left it for like an hour (i was around it for the first 10mins with no freeze), but when i came back it had locked up, perhaps i pushed the GPU too much initially also?
Any thoughts greatly appreciated, and RBTech your a legend!
Hi - I believe 'IN GAME' freezing or checkerboard is caused by the GPU heating up and with thermal expansion of 'something' (could be the board moving, BGA joint moving a fraction etc) a joint breaks and bang it freezes.
A possible solution is to cool the GPU more than normal - I suggest that everybody does the divider cooling mod in conjunction with the X clamp removal, GPU flap is optional but will helps things too. The 12v mod will cool the GPU obviously, the 7v mod being a good compromise on cooling/noise, do this on the GPU side only (assuming you have the divider).
PS - Tightening when hot will get it tighter, BUT remember that components contract when cooling, so you may over tighten something when it cools off .. just something to be aware of ...
I hope this helps ...
Post by: grim_d on May 06, 2007, 05:06:00 AM
QUOTE(RBJTech @ May 6 2007, 12:32 PM)
PS - Tightening when hot will get it tighter, BUT remember that components contract when cooling, so you may over tighten something when it cools off .. just something to be aware of ...
yeah that is true but i think with the quarter turn it should be ok, ive cycled it a few times now and played a few games with no issues so i think were ok, and this is before i've done any extra cooling mods.
Post by: mzone on May 06, 2007, 07:36:00 AM
as i just get 3 red lights, i tryed the hot air gun once again but it never worked
also tryed just leaving the fans off untill it over heated and let it cool down still 3 red lights
i really hope i can get it working again as it had a good dvd drive
but i think it might of just died. but im hopeing its not.
Post by: blackhawk444 on May 06, 2007, 09:48:00 AM
Post by: GTi-6 on May 06, 2007, 10:23:00 AM
I have a launch time Xbox 360 and I have 3RLOD.
Today, I bought the parts for the RBJtech's method. I bought M4 * 20 mm machine screws. But the wierd thing is, holes of the mainboards are bigger than M4 screws and they can easily straight through. Same goes for heatsinks too. Did I bought the wrong parts? Or that's the way it should be?
Thanks...,
PS: I am sorry for my english.
Post by: RBJTech on May 06, 2007, 10:37:00 AM
QUOTE(GTi-6 @ May 6 2007, 05:59 PM)
Hİ guys, I am new to this forum and I'm glad to be registered.
I have a launch time Xbox 360 and I have 3RLOD.
Today, I bought the parts for the RBJtech's method. I bought M4 * 20 mm machine screws. But the wierd thing is, holes of the mainboards are bigger than M4 screws and they can easily straight through. Same goes for heatsinks too. Did I bought the wrong parts? Or that's the way it should be?
Thanks...,
PS: I am sorry for my english.
Yep that's the whole idea - read through the tut from the start to the end before you do anything else to fully understand what you are doing before getting started ...
Post by: GTi-6 on May 06, 2007, 10:42:00 AM
QUOTE(RBJTech @ May 6 2007, 08:13 PM)
Yep that's the whole idea - read through the tut from the start to the end before you do anything else to fully understand what you are doing before getting started ...
Thanks for the quick reply. I read the tut form start to end. So I don't need to drill my heatsinks with 5mm drill. Because my M4 screws can easily go through, right?
Post by: grim_d on May 06, 2007, 10:59:00 AM
QUOTE(GTi-6 @ May 6 2007, 06:18 PM)
Thanks for the quick reply. I read the tut form start to end. So I don't need to drill my heatsinks with 5mm drill. Because my M4 screws can easily go through, right?
yeah they easily fit through until you try and put the heatsink on the board, then unless the bolts are perfectly straight they will get caught on the threads etc, much easier just to drill out the holes.
Post by: lmcduck on May 06, 2007, 05:47:00 PM
Post by: TheIrishLad on May 06, 2007, 07:53:00 PM
QUOTE(lmcduck @ May 6 2007, 07:23 PM)
Hi All I have my 360 apart ready for the mod tomorrow when I Can get the parts! One problem already though. My board does not have any thermal pads on the RAM and no they havent dropped off I have looked all over. Is this normal for them not to be their or is this causing a problem for my 360?
Mine never had any either, go figure.
Post by: ydgmms on May 06, 2007, 10:28:00 PM
Post by: kidman64 on May 07, 2007, 02:49:00 AM
First of all thank You RBJ for helping people with 3lod:)
My 360 died recently and i wanted to try your method and so i did. I did everything using the exact parts and i still have 3lod:/ I tried 3 and 2 washers (both on cpu and gpu, even mixing like 3 washers on cpu and 2 on gpu) and none of this worked. I may try 1 washer but i don't think it'll make any difference since both heatsinks are getting warm after some time, and thermal paste leaves a good "trace" on the heatsinks. So what can i do now? Should i try overheating?
On a side note, i've never had 2 lights and my error code is always 0102.
thanks in advance for any help
Post by: grim_d on May 07, 2007, 02:54:00 AM
QUOTE(kidman64 @ May 7 2007, 10:25 AM)
Hello.
First of all thank You RBJ for helping people with 3lod:)
My 360 died recently and i wanted to try your method and so i did. I did everything using the exact parts and i still have 3lod:/ I tried 3 and 2 washers (both on cpu and gpu, even mixing like 3 washers on cpu and 2 on gpu) and none of this worked. I may try 1 washer but i don't think it'll make any difference since both heatsinks are getting warm after some time, and thermal paste leaves a good "trace" on the heatsinks. So what can i do now? Should i try overheating?
On a side note, i've never had 2 lights and my error code is always 0102.
thanks in advance for any help
Some people and myself have had success by heating the console for a while with no fans running, until the heatsink are HOT, then whilst they are still hot, tighten the bolts another QUARTER turn (if they are already tight). Your console should boot after this.
I dont think RBJtech recommends this and I'm skeptical about it at best, but only time will tell.
Post by: kidman64 on May 07, 2007, 03:47:00 AM
i haven't tried overheating just yet, i'll try one washer later on, but now i'm getting 0020 code (used to be 0102) is it "better" ? should i concentrate more on gpu or cpu?
Post by: grim_d on May 07, 2007, 03:59:00 AM
QUOTE(kidman64 @ May 7 2007, 11:23 AM)
grim_d: i'll try that if everything else fails, thx
i haven't tried overheating just yet, i'll try one washer later on, but now i'm getting 0020 code (used to be 0102) is it "better" ? should i concentrate more on gpu or cpu?
0020 and 0102 go hand in hand, i started with 0102 and when i over tightened i got 0020. Try as hard as you can to get 2 washers working, 1 washer is not recommended and is really only a last resort.
The GPU is 99/100 times the culprit but concentrate equally on both.
Post by: SnufftheCrimeDog on May 07, 2007, 12:49:00 PM
QUOTE(kidman64 @ May 7 2007, 05:25 AM)
Hello.
First of all thank You RBJ for helping people with 3lod:)
My 360 died recently and i wanted to try your method and so i did. I did everything using the exact parts and i still have 3lod:/ I tried 3 and 2 washers (both on cpu and gpu, even mixing like 3 washers on cpu and 2 on gpu) and none of this worked. I may try 1 washer but i don't think it'll make any difference since both heatsinks are getting warm after some time, and thermal paste leaves a good "trace" on the heatsinks. So what can i do now? Should i try overheating?
On a side note, i've never had 2 lights and my error code is always 0102.
thanks in advance for any help
Ok I had this exact dilemma. Heres what I can advise for you if one washer is your only option, and your receiving error 0020. 1.) Put thermal paste on the 4 RAM chips on the bottom of the motherboard. To be more specific these are the 4 black chips on the bottom of the motherboard, so they would be in the same place as the GPU except on the other side of the motherboard, I always feel like Im confusing people when I tell them that. Anyway if that doesnt take it away try tightening down the bolts as the xbox is running. Be careful, but this will cause the BGA points to be soft and by tightening them down good you smoosh them together. Also make sure you motherboard is sitting correctly on each bolt. These are my suggestions to you, because they worked for me, and also if I remember correctly TomLad( another person with 0020) was having the same problem. I told him the same thing and according to him after placing the paste on the bottom 4 RAM chips it worked for him. Like i said those are my suggestions, these worked for me I cant guarantee theyll work for you, but why not give it a try.
Post by: compuguy01 on May 07, 2007, 02:43:00 PM
Anyways I did notice that overheating was not really nessessary, just loosening or tightening the nuts. Another thing I noticed was that after taking the heatsink off the GPU for the first time since I applied the silver there was nothing imprinted on the heatsink from the RAM chips, I applied thermal paste on the chips as it said to do it on the "Applying thermal paste tut". So Im using 2 washers under the heatsink, but its not making contact w/ the RAM Chips. Not sure if this is a big deal or not, but Ive seen pics of the thermal paste for the RAM chips leaving something on the heasink on other systems. Also the RAM chips on my board didnt have the thermal pads can this be a potential problem?
Post by: kidman64 on May 07, 2007, 03:23:00 PM
After some tightining i figured how what causes 0020 error (at least in my case) - it's that ram chips under the gpu heatsink. When i tightend screws at the left side of hs i got 0020 error. So after some trial and error i finally got a working console. I have 2 washers underneat the gpu hs and 3 under the cpu hs. I got 3 lod after pluggin hdd but now it's all good. Thanks rjb and everyone else who made it possible:)
SnufftheCrimeDog: i have thermal pads on ram chips on the bottom of the mobo so i don't think it's necessary.. or is it?
p.s.
sorry for my english, it's kind of late and i'm tired after the whole day of messing with my 360 (not to mention my drive died on me today just after i fixed my 360 - basicly i played like 4 games and i got green screen and after rebooting console i got e65 and now my drive won't even eject - but that's a different problem)
Post by: SnufftheCrimeDog on May 07, 2007, 03:32:00 PM
Post by: CRACKERMAN on May 08, 2007, 04:46:00 AM
Many thanks for the B&Q parts list being included, great job.
Post by: lmcduck on May 08, 2007, 07:04:00 AM
My system is still locking up about every 1/2 to 1 hour it did used to lock up before it had the 3 lights. So should I try tightening up teh nuts to see if I can cure it? To get the system to work I had to tighten up the GPU. I have only played GRAW 2 so far. Any thoughts?
Post by: dannywhac on May 08, 2007, 08:48:00 AM
Managed to grab a 3lod release Premium console giving a 0020 error (the previous owner had only tried the towel trick, worked for 3 more days then back to the 3 lod).
Opened it up and followed RBJTech's tut to the letter (with the addition of dremeling into me finger....)
Have tried 1,2, and 3 washers on the GPU/CPU, different torques on all and individual/paired nuts. The box still displays 3lod, with a noticable temp difference on the heatsinks - the CPU is hotter than the GPU (is this normal?). Tried pressing heavily on the middle of the GPU 'sink, still 3lods, so I'm not sure the alu strip would help....
Finally tried the overheat and tighten method - not sure the GPU got hot enough but...still 3lod's, still error 0020.
What do you all reckon - is it the knackers yard for this 'box, or do I still stand a chance?
Cheers in advance,
Dan.
Post by: RATSTYLZ on May 08, 2007, 04:14:00 PM
do you have to use new thermal paste???? is this the same as die????
if so were can i get this from,iam from the uk
many thanks..............
Post by: grim_d on May 08, 2007, 04:34:00 PM
QUOTE(RATSTYLZ @ May 8 2007, 11:50 PM)
hi iam going to do this mod as i have 3lights of death....error code 0020
do you have to use new thermal paste???? is this the same as die????
if so were can i get this from,iam from the uk
many thanks..............
ebay, arctic silver 5.
Post by: dannywhac on May 09, 2007, 12:54:00 AM
QUOTE(RATSTYLZ @ May 8 2007, 11:50 PM)
hi iam going to do this mod as i have 3lights of death....error code 0020
do you have to use new thermal paste???? is this the same as die????
if so were can i get this from,iam from the uk
many thanks..............
And PC World.....and yes - thermal paste - the die is (I think otherwise it's humble pie) the top of the gpu/cpu chips.
Post by: grim_d on May 09, 2007, 02:25:00 AM
QUOTE(dannywhac @ May 9 2007, 08:30 AM)
And PC World.....and yes - thermal paste - the die is (I think otherwise it's humble pie) the top of the gpu/cpu chips.
the "die" is the shiny rectangular mound on top of the chips (there are 2 on the GPU)
Post by: RATSTYLZ on May 09, 2007, 02:27:00 AM
sorry to ask but iam a noob.......
Post by: RBJTech on May 09, 2007, 04:27:00 AM
QUOTE(RATSTYLZ @ May 9 2007, 10:03 AM)
Thanks for the help, so i do replace the old thermal paste with new stuff
sorry to ask but iam a noob.......
Have a look in the FAQ in the case modding section - linky here ...
Thermal Paste...
Post by: compuguy01 on May 09, 2007, 07:29:00 AM
 getting frustrated, worked for a few days, turned it on this morning and froze up imediately restarted and Im back to my wonderful 3 lights. Im about too drop kick this thing...and turn it into a christmas tree decoration...lol. Ive loosend, tightend tried different tightness on the corners of the GPU heatsink Im using 2 washers, three washers doesnt seem to even make contact w/ the pad. Havnt really played around w/ 1 washer, I put 1 washer in just to see how it would look but just seemed like there was too much force on the mobo for that so I didnt even try.
Post by: dannywhac on May 09, 2007, 07:45:00 AM
Looks like it's the BST forum for the box
Update on me other post - tried re-doing the mod - even tried the eraser fix on the 'box - still no joy....just odd that the GPU sink doesn't heat up as much as the CPU (even when overheating cooling the CPU sink), which doesn't match RBJTech's datasheet on temps - definitly got a decent contact on the GPU with 1 or 2 washers. Odd.
Looks like it's the BST forum for the box
Post by: RBJTech on May 09, 2007, 08:53:00 AM
QUOTE(compuguy01 @ May 9 2007, 03:05 PM)
getting frustrated, worked for a few days, turned it on this morning and froze up imediately restarted and Im back to my wonderful 3 lights. Im about too drop kick this thing...and turn it into a christmas tree decoration...lol. Ive loosend, tightend tried different tightness on the corners of the GPU heatsink Im using 2 washers, three washers doesnt seem to even make contact w/ the pad. Havnt really played around w/ 1 washer, I put 1 washer in just to see how it would look but just seemed like there was too much force on the mobo for that so I didnt even try... sounds like the fix I had to do the other day. In the end I used a shim with 2 washers - making it more like 0 washers pressure wise on the die ...
I guess some faults are more severe than others..Also - have you checked the tightness of the nuts - if loose, it's worth putting an extra nut on top of the lock nut just to be sure - there should be no need (hence the term lock nut..) but I've found they do loosen a little. The heat from the sink is probably softening the nylon thread, meaning the nut can work loose.
Post by: compuguy01 on May 09, 2007, 09:34:00 AM
QUOTE(RBJTech @ May 9 2007, 04:29 PM)
.. sounds like the fix I had to do the other day. In the end I used a shim with 2 washers - making it more like 0 washers pressure wise on the die ...
I guess some faults are more severe than others..Also - have you checked the tightness of the nuts - if loose, it's worth putting an extra nut on top of the lock nut just to be sure - there should be no need (hence the term lock nut..) but I've found they do loosen a little. The heat from the sink is probably softening the nylon thread, meaning the nut can work loose.
Do you have a pic or diagram of the shim or where to place it? I cant seem to find anything about the shim on your tut's. Yeah, the tightness seemed okay, but I will try doubling up on the nuts just to be sure.
Post by: dannywhac on May 09, 2007, 01:34:00 PM
Just wondered as a last ditch and after googling for a bit if there are any reflow services for the mboard in the UK?
Post by: compuguy01 on May 09, 2007, 06:56:00 PM
I have to fine some thin alum. for the shim right? And the alum. has to be across the to gpu dye's and the RAM chips correct?
Post by: RBJTech on May 10, 2007, 03:35:00 AM
QUOTE(compuguy01 @ May 10 2007, 02:32 AM)
Ok, I take back what I said earlier about not having to heat up the system, overheating is definitely a factor in this process. I spent hours trying different things other than over heating and could not get the lights to go away. So I loosend the GPU heatsink, disconnected the fan, let it overheat until the 2 right lights came on, then the one thing I did differently than what I've read here is I let it cool b4 I tightend the heatsink other than tightening it while its hot, and just snugged the nuts, nothing too tight, and bam system boots and been playing it for hours, I even dl'ed the spring update, and everything seems fine. I've been down this road b4 so Im expecting failure, and then I'll try the shim, but hey if this method gets me by every couple of days I guess that better than being totally out of a system
I have to fine some thin alum. for the shim right? And the alum. has to be across the to gpu dye's and the RAM chips correct?No just the main die and daughter die on the same chip (which is RAM, which may have confused you thinking I meant the main RAM....).
Yea - just a 1mm or so thick piece of Ali or copper - 1cm x 1.5cm - enough to cover the die's (both) but no more. Don't forget to paste both sides...
Post by: ahtze on May 10, 2007, 06:18:00 AM
Post by: egres on May 10, 2007, 07:28:00 AM
. This was 3 days ago. In this time period, I've had it running continuosly for more than 8 hours, turn it off, turn it back on again. So far, no errors. Will post follow up when needed. Many thanks to all the people sharing their experience on Xbox-Scene.
Post by: RBJTech on May 10, 2007, 07:52:00 AM
QUOTE(ahtze @ May 10 2007, 01:54 PM)
RBJTech, I wonder how long is your 360 running fine without reinstall or anything after the x-clamp replacement?
Which one ? My original X-box has never 3ROL and has it's original X clamps - it runs cool so I don't see it having a problem (I hope..). Box 2 has been going fine since the day I did the original X clamp tutorial (the one in the pics) - not sure how long ago - let me look at the date on the thread and I'll update. Box 3 has also been fine since I did the shim - that one is only 2-3 weeks old but zero issues, not even game lockups.
Lucky - maybe ... ?
Post by: frobnitzz on May 10, 2007, 07:58:00 AM
http://forums.xbox-scene.com/index.php?showtopic=581273
My launch 360 started freezing at the weekend so it's about to go methinks...
Post by: RATSTYLZ on May 10, 2007, 11:36:00 AM
1,when taking the 360 apart i noticed there was no thermal pads on the RAM,is this normal??
i dont no the prodution date of this console,but the date on the metal case is /2005
i think i might have read that early consoles do not have these pads.but iam not sure
if i need them then what would any one advise
2,after drilling the holes in the case and re fitting the mother board i noticed that i had slight movement in the motherboard,is this ok??its only at 1 screw at the end
Post by: kidman64 on May 10, 2007, 01:54:00 PM
2. that's normal, since holes in hotherboard are larger than screws (if that's what you're talking about)
Post by: RATSTYLZ on May 10, 2007, 02:20:00 PM
and i think when i tighten everything down this would go?????????
as for the pads could i use as5 stight onto the rams???
Post by: sq24 on May 10, 2007, 07:24:00 PM
So thank you for coming up with this version of the mod.
Post by: CB Onyx on May 11, 2007, 12:17:00 AM
i did the x-clamp replacement on 1 xbox 360 and it worked fine !!..no problems anymore.
I used 2 rings on it.
Then i did the same on a xbox 360 of a friend...it seemed to work fine, until we started up a game.
No problems in the dashboard..but games freeze after 3-4 minutes.
I also used 2 rings between the board and the cooler.
Got a good print of the cooling paste...so the connection seems to be ok.
The only difference is that he's lost the screws to attach the board to the metal case...so the board is not attached firmly and straight to the metal case.
Could this give me the problem ?...or should i let the xbox overheat to resolder the joints ?
any suggestions are welcome !!
Post by: sq24 on May 11, 2007, 05:12:00 AM
QUOTE(CB Onyx @ May 11 2007, 02:53 AM)
Hi,
i did the x-clamp replacement on 1 xbox 360 and it worked fine !!..no problems anymore.
I used 2 rings on it.
Then i did the same on a xbox 360 of a friend...it seemed to work fine, until we started up a game.
No problems in the dashboard..but games freeze after 3-4 minutes.
I also used 2 rings between the board and the cooler.
Got a good print of the cooling paste...so the connection seems to be ok.
The only difference is that he's lost the screws to attach the board to the metal case...so the board is not attached firmly and straight to the metal case.
Could this give me the problem ?...or should i let the xbox overheat to resolder the joints ?
any suggestions are welcome !!
When I did this mod I did what was first shown in the tut. It work fine on the other case I did this morning I started off with three then went to two now that console works fine.
Now those screw would help out on holding the mobo down. SO in other word well more like my view on the matter is you now have done the opp. of the mod. You still have some flexing of the board.
Post by: CB Onyx on May 11, 2007, 05:25:00 AM
QUOTE(sq24 @ May 11 2007, 01:48 PM)
When I did this mod I did what was first shown in the tut. It work fine on the other case I did this morning I started off with three then went to two now that console works fine.
Now those screw would help out on holding the mobo down. SO in other word well more like my view on the matter is you now have done the opp. of the mod. You still have some flexing of the board.
You're probably right...i'll try again but now with the motherboard tightly fastened...keep you posted
Post by: CB Onyx on May 11, 2007, 07:25:00 AM
So far playing all the games without problems !..that was box no 2..looking for box no 3 now
Post by: IamEvil on May 11, 2007, 07:35:00 AM
Post by: kidman64 on May 11, 2007, 07:52:00 AM
Post by: IamEvil on May 11, 2007, 07:59:00 AM
QUOTE(kidman64 @ May 11 2007, 10:28 AM)
http://forums.xbox-scene.com/index.php?showtopic=484726&st=0
Excellent, thanks! I saw the upper portion last night, didn't see the secondary codes. Will check that when I get home. More than likely will be doing one of these fixes this weekend.
Post by: evolved_st8 on May 11, 2007, 08:55:00 AM
Post by: kidman64 on May 11, 2007, 09:24:00 AM
Post by: sully04 on May 11, 2007, 11:33:00 AM
Post by: grim_d on May 11, 2007, 01:29:00 PM
So i pop off the GPU heatsink and this is what i find.

yummy. So remember kids, heatgun = BAD
by the by, the clamp replacement was successful and we now have a fully functioning 360 again, for reference, 3 washer on CPU side and 2 washers on GPU side.
got another customers box coming tomorrow/moday, so were going for 3 for 3.
Post by: sully04 on May 11, 2007, 01:37:00 PM
Post by: grim_d on May 11, 2007, 01:42:00 PM
QUOTE(sully04 @ May 11 2007, 09:13 PM)
Nevermind everybody my error has changed to 0020. So it looks like It's microsoft repair service or nothing. On a side note do you think microsoft would care if i sent it in with the bolts instead of the x clamps because reattaching those things is a pain.
i think microsoft would have nothing to do with it.
a suggestion. take out the fans and the fan shroud and boot the 360, let the heatsinks heat up (they should get really really hot) leave it like that for a couple of minutes (it might overheat).
once you have done that then tighten your bolts a quarter turn (whilst the sinks are still hot) and let it cool down for a few minutes, rememeber to tighten then diagonally accross from each other so its equal.
then try booting again see if you have any luck.
btw, what is your setup, washer wise.
Post by: sully04 on May 11, 2007, 02:06:00 PM
QUOTE(grim_d @ May 11 2007, 03:18 PM)
i think microsoft would have nothing to do with it.
a suggestion. take out the fans and the fan shroud and boot the 360, let the heatsinks heat up (they should get really really hot) leave it like that for a couple of minutes (it might overheat).
once you have done that then tighten your bolts a quarter turn (whilst the sinks are still hot) and let it cool down for a few minutes, rememeber to tighten then diagonally accross from each other so its equal.
then try booting again see if you have any luck.
btw, what is your setup, washer wise.
If you read my first post I actually did the overheating method with no success. As for my washer setup running two on the bottom of the board and only one on the top. I tried two and i get an instant 2 light overheat message when i tried it, so i figured my dies weren't meeting with my heatsink there, so i dropped to 1. After that i did the overheat. After trying that I still had the 3 lights rechecked my error message and received the 0020.
Post by: grim_d on May 11, 2007, 02:13:00 PM
QUOTE(sully04 @ May 11 2007, 09:42 PM)
If you read my first post I actually did the overheating method with no success. As for my washer setup running two on the bottom of the board and only one on the top. I tried two and i get an instant 2 light overheat message when i tried it, so i figured my dies weren't meeting with my heatsink there, so i dropped to 1. After that i did the overheat. After trying that I still had the 3 lights rechecked my error message and received the 0020.
sorry just trying to help, have you tried the shim?
Post by: sully04 on May 11, 2007, 02:21:00 PM
QUOTE(grim_d @ May 11 2007, 03:49 PM)
sorry just trying to help, have you tried the shim?
Im sorry if i sounded angry, I didnt intend to, I appreciate the help. I actually did the shim about 4 or 5 months ago, and it lasted till now. I was hoping it would last, but I thought it might eventually fail. I hadnt heard of these methods when I tried the shims so I figured I'd give em a shot. Swing and a miss I guess.
Post by: ahtze on May 11, 2007, 03:08:00 PM
QUOTE
by the by, the clamp replacement was successful and we now have a fully functioning 360 again, for reference, 3 washer on CPU side and 2 washers on GPU side.
got another customers box coming tomorrow/moday, so were going for 3 for 3.
got another customers box coming tomorrow/moday, so were going for 3 for 3.
For which X-clamp method? RBJTech?
Post by: evan3 on May 11, 2007, 03:09:00 PM
I bought a broken 360 that had the three red lights. They would not come on right away but usually after 15 to 30 minutes of gameplay it would give me the three red lights. However, the codes I got from the screen error as well as the leds pointed to a faulty DVD drive. The codes said DVD drive timeout....ect.
Well, I suspected that poor cooling was leading to DVD drive failure. I wanted to change out the thermal paste as well as due the heatsink divider/air guide mod. I decided to change out the x-clamps well I was at it. After all was done according to the tutorials I was able to play GOW for about 45 minutes with no problem. I will obviously have to test this for longer periods of time.
But anyways, what I wanted to say was that the GPU heat sink gives off a tremendous amount of heat and I think it may have been affecting the performance of my DVD drive(samsung f/w:25). The divider/air guide made a huge difference. The drive stayed so much cooler and there seemed like a lot more air was being sucked by the heatsinks. I highly recomend this mod for anyone with heating problems. Thanks for the tutorials.
Post by: grim_d on May 11, 2007, 03:36:00 PM
QUOTE(ahtze @ May 11 2007, 10:44 PM)
For which X-clamp method? RBJTech?
yes i only use RBJtechs method.
Post by: kidman64 on May 11, 2007, 04:59:00 PM
Post by: RBJTech on May 12, 2007, 06:31:00 AM
QUOTE(grim_d @ May 11 2007, 09:05 PM)
Ok so this morning i receive an 360 from a customer who previously had a 3RLOD, now he explained to me that he had it repaired once about 3 months ago, but now it had started to freeze again, so i think "heatgun" and he opts for an x-clamp replacement before it gets any worse.
So i pop off the GPU heatsink and this is what i find.
yummy. So remember kids, heatgun = BAD
by the by, the clamp replacement was successful and we now have a fully functioning 360 again, for reference, 3 washer on CPU side and 2 washers on GPU side.
got another customers box coming tomorrow/moday, so were going for 3 for 3.
Blimey, that a bit of a mess
I bet that took a while to clean up...Also for the record - WHITE thermal paste is usually in the bottom of the performance league and it should not be used for CPU/GPU applications. It's ok to use on low power components (such as RAM chips etc).
Glad to see the success thread number increasing daily !
Post by: RATSTYLZ on May 12, 2007, 06:40:00 AM
Post by: grim_d on May 12, 2007, 08:13:00 AM
QUOTE(RBJTech @ May 12 2007, 02:07 PM)
Blimey, that a bit of a mess
I bet that took a while to clean up...Also for the record - WHITE thermal paste is usually in the bottom of the performance league and it should not be used for CPU/GPU applications. It's ok to use on low power components (such as RAM chips etc).
Glad to see the success thread number increasing daily !
yep, it sure did, was a pain.
also for the record, artcic silver ceramique (what i used to use) is white, and that's fine for CPU/GPU usage, in some applications it acctually performs better than AS5, although ive been using AS5 on these because i got a good deal on it
Post by: RBJTech on May 12, 2007, 08:22:00 AM
QUOTE(RATSTYLZ @ May 12 2007, 02:16 PM)
hello,used RBJtechs method last night,worked for 1 hour with 3 washers,then the 3 red lights came back,then went to 1 on gpu and 2 on cpu,did the fan shroud mod,cut the metal case out,used AS5.i run the xcm high speed air cooler with digital temp display,after about a 3 hour GOW the gpu used to be about 55.c and the cpu about 50.c.now there gpu 46-48.c and 40-42.c for the cpu,so after using RBJtechs x-clamp mod and cooling mods i am well happy.........thanks very much you saved my 360s life
Good stuff - you did the sensible thing and did the cooling mods in conjunction with the X clamp ...
QUOTE(grim_d @ May 12 2007, 03:49 PM)
yep, it sure did, was a pain.
also for the record, artcic silver ceramique (what i used to use) is white, and that's fine for CPU/GPU usage, in some applications it acctually performs better than AS5, although ive been using AS5 on these because i got a good deal on it (IMG:style_emoticons/default/laugh.gif)
ah ok - I stand corrected. Never used any of that before ... thanks for the info.
Post by: ex old codger on May 12, 2007, 05:36:00 PM
And thanks rbj i wish you could find what the codes mean? but great job, it did come back to life for a short spell!!!!!!!
Post by: dontakeshat on May 12, 2007, 08:20:00 PM
Post by: darkmike57 on May 13, 2007, 12:56:00 AM
Post by: kidman64 on May 13, 2007, 03:43:00 AM
QUOTE(ex old codger @ May 13 2007, 02:12 AM)
ok well i did rbjs way and it now gives error 0020 i have tried all sorts including the tension on the nuts with no joy
try loosening the screws at the left side of gpu (over the ram chips) - it helped me
Post by: DJ_L3ThAL on May 13, 2007, 07:43:00 AM
)... basically 2 of them initially when i had tightened everything (RBTech's method), i was still getting 0102, and i had tightened as good as it could be (without being overtight or undertight... almost fully crushed spring washer has been my rule of thumb)... so i basically unplugged the fans and let the console overheat (took couple minutes), then once was over heated i turned it off and gave the screws on CPU and GPU another 1/8th turn, let it cool down for 30mins, came back and vwalah! 100% boot rate the owners are very happy and have been since... so this is something to try for those who are fiddling with tightening etc, just do it up almost as tight as you want it and then try letting it over heat and then tightening a bit more... hope that helps some peeps cheers guys
PS. Many thanks to RBTech again!!!
Post by: SupraRZ on May 14, 2007, 07:49:00 AM
Last night I did the RBJTech methods. 2 Flat washer on CPU and GPU. When I run the Xbox 360, it boot nice but after a while like 1 minute or less, if freezes but no graphic glitch.
What should I do?
Thanks.
Post by: kidman64 on May 14, 2007, 10:02:00 AM
Post by: SupraRZ on May 14, 2007, 11:36:00 AM
Error code is 0110.
Post by: inspire on May 14, 2007, 03:01:00 PM
Post by: lmcduck on May 14, 2007, 03:18:00 PM
Thanks
Post by: grim_d on May 14, 2007, 03:55:00 PM
QUOTE(lmcduck @ May 14 2007, 10:54 PM)
Did the fix a week ago system had been locking up I did post for suggestions but no help. Any way my system locked up again tonight and I am back to 3 lights. I had the system ruining for 4 hours playing GRAW 2 and no problems then tonight from cold after about 10 minutes of GH II that was it dead. Tightened up the bolts on the GPU I have 2 washers it booted so put it all back together loaded up GH II and bang locks up and back to 3RL again. Do I go down to 1 washer?
Thanks
try a shim, read through teh thread for more info.
Post by: lukebe on May 14, 2007, 07:51:00 PM
QUOTE(DJ_L3ThAL @ May 14 2007, 12:19 AM)
not sure if anyone has reported this but i would like to add what i have found on 2 of the 4 consoles i have attempted these fixes (all 4 are 100% still (IMG:style_emoticons/default/smile.gif))... basically 2 of them initially when i had tightened everything (RBTech's method), i was still getting 0102, and i had tightened as good as it could be (without being overtight or undertight... almost fully crushed spring washer has been my rule of thumb)... so i basically unplugged the fans and let the console overheat (took couple minutes), then once was over heated i turned it off and gave the screws on CPU and GPU another 1/8th turn, let it cool down for 30mins, came back and vwalah! 100% boot rate the owners are very happy and have been since... so this is something to try for those who are fiddling with tightening etc, just do it up almost as tight as you want it and then try letting it over heat and then tightening a bit more... hope that helps some peeps (IMG:style_emoticons/default/smile.gif)
cheers guys
PS. Many thanks to RBTech again!!!
I'll second this technique. Mine was locking up so screwed the washers to half crushed. Let it heat up until the GPU/CPU felt pretty hot and turned them another 1/4 turn.
Better than it every was now.
Post by: inspire on May 15, 2007, 05:25:00 AM
it is very important to me
Post by: sq24 on May 15, 2007, 06:37:00 AM
QUOTE(inspire @ May 15 2007, 08:01 AM)
please help me with this 0002 error code...how can i fix it????
it is very important to me
I don,t know maybe read the the 15 or so post on RBj method or the other 17 pages oh and now the 7 pages of the plexi fix.
I have try all but the plexi glass method but I will stand behind RB method I now up to fixing 4 360 as of this morning my time (eastern) One thing that bother me is how everyone is saying they are having trouble. I will say one thing if you follow his tech to the T. WHICH is not to change any of the washer or nuts on the first attempt just trust Me when I say more than likely it will boot by the second power on. If I can pull an xbox off a store shelf that was ON DISPLAY THAT WENT TO 3rol and started collecting dust because we are tired of fillin out paper work to get it fix.Take that box and bring it back to life after being dead for about 6 months I just your average modder for me to pull this off. For Me this is for the "big boy" modders I hear that I have two washer then get this or I have that problem now. SO if anybody is going try this mod for the first time just don,t short cut it take your time follow the direction. You can,t go wrong apply the thermal paste correct make sure the thermal pad if they are on your mobo make sure they are on stuck on good, and not stuck to the metal case. On all four of mine they some how got stuck to the case. ALSO the most important thing BE CAREFUL when you take the x-clamps off YOU SCRATCH THAT GAME OVER
Post by: dannywhac on May 15, 2007, 06:56:00 AM
I loosened the gpu sink (as suggested in a previous post), and let the console overheat. Then tightened down (a few turns) on the gpu - the results were: if I tighten a lttle too much (ie semi compressing the spring washers) I still get an error 0020. If the sink rests comfortably and not too tight on the gpu, I get an error 0102. Weird....
My setup is 2 washers on the gpu and 3 on the cpu - 3 washers on the gpu doesn't allow for contact.
Anyone got any ideas? Ta again!
edit: forgot to add- when the error 0102 occurs, the box rol remains blank (as if on normal bootup) until by rights the ms logo should come up (then the red lod occur), wheras when the 0020 error occurs it just goes straight to 3lods on power on.
This post has been edited by dannywhac: May 15 2007, 02:00 PM
Post by: RBJTech on May 15, 2007, 07:55:00 AM
QUOTE(dannywhac @ May 15 2007, 02:32 PM)
Bit of an update (if no-one minds), the 'box that had the 0020 error code still after following the tut to the letter now has a 0102 error....sometimes.
I loosened the gpu sink (as suggested in a previous post), and let the console overheat. Then tightened down (a few turns) on the gpu - the results were: if I tighten a lttle too much (ie semi compressing the spring washers) I still get an error 0020. If the sink rests comfortably and not too tight on the gpu, I get an error 0102. Weird....
My setup is 2 washers on the gpu and 3 on the cpu - 3 washers on the gpu doesn't allow for contact.
Anyone got any ideas? Ta again!
edit: forgot to add- when the error 0102 occurs, the box rol remains blank (as if on normal bootup) until by rights the ms logo should come up (then the red lod occur), wheras when the 0020 error occurs it just goes straight to 3lods on power on.
Try to do it up tight with 2 washers (ie remove the spring washer altogether or crush it flat) - if that works then fine. If that still fails, then you'll need to use a shim + 2 washers. Both Grim_d and myself have needed to use this to fix the box when all else failed - it may be the 'inner' BGA pins breaking needed pressure directly over the die... (IMG:style_emoticons/default/huh.gif) Shim is a 1 x 1.5cm x 1-2mm thick piece of Aluminium placed on top of the die (both) on the GPU - paste both sides first ... (IMG:style_emoticons/default/smile.gif)
Post by: dannywhac on May 15, 2007, 07:41:00 AM
- will try out the new suggestions - seems it's the top left nut (as you look at the front of the console) thats causing the 0020 to 0102 error...
Post by: inspire on May 15, 2007, 09:47:00 AM
now my problem is that when i turn on the console it start regular and after two seconds the fan get crazy and i get two red lights...
is there any solution to it???i think that maybe there is bad touch with the memories but not sure...
is there somone here who can help me with this???
Post by: kidman64 on May 15, 2007, 12:03:00 PM
RJBTech: is it good to apply thermal paste on ram chips under the gpu heatsink?
Post by: keithk76 on May 15, 2007, 06:43:00 PM
edit. i also put the eraser pieces on the bottom of the ram chips since there was nothing on mine. dont think that will affect the x clamp job but i thought i would add that.
edit well now its back to 3 red lights same code 0102 im gonna play with the bolts and i will report back
This post has been edited by keithk76: May 16 2007, 01:56 AM
Post by: keithk76 on May 15, 2007, 07:39:00 PM
Post by: wellmodded on May 15, 2007, 08:54:00 PM
Post by: RBJTech on May 16, 2007, 07:40:00 AM
QUOTE(wellmodded @ May 16 2007, 04:30 AM)
hey i am gettign a box with the 0022 error havn't got it fixed yet been trying alot think can some send me a link which can let me more about placing a shim ontop the die of the gpu i not sure wht a shim is i just have a rough idea wht it might be i would like more insight on wht a shim is and how you use it
You're in luck (IMG:style_emoticons/default/smile.gif) - Just literally took one as I'm creating a tutorial for the under board cooling which meant taking the thing to bits again ...
I'll update the X-Clamp tutorial with this 'extreme' fix when I get the chance but here you go.. (crap pic, apologies but you get the idea...)
(IMG:http://rbjtech.bulldoghome.com/photos/BDRES/rbjtech_bulldoghome_com/case/xbox%20002.jpg)
Post by: grim_d on May 16, 2007, 11:14:00 AM
QUOTE(RBJTech @ May 16 2007, 02:40 PM)
You're in luck (IMG:style_emoticons/default/smile.gif) - Just literally took one as I'm creating a tutorial for the under board cooling which meant taking the thing to bits again ...
I'll update the X-Clamp tutorial with this 'extreme' fix when I get the chance but here you go.. (crap pic, apologies but you get the idea...)
next time i do a replacement i'm going to write a guide on preparing the GPU heatsink, would you add it to your guide?
Post by: keithk76 on May 16, 2007, 11:07:00 AM
Post by: grim_d on May 16, 2007, 11:45:00 AM
QUOTE(keithk76 @ May 16 2007, 06:43 PM)
any ideas on my blurry video? is this a completely different problem or is this related to the x clamps?
have you tried it on a different tv or messed around with video setings?
This post has been edited by grim_d: May 16 2007, 06:45 PM
Post by: RBJTech on May 16, 2007, 11:50:00 AM
QUOTE(grim_d @ May 16 2007, 06:14 PM)
next time i do a replacement i'm going to write a guide on preparing the GPU heatsink, would you add it to your guide?
I get the hint ..
are you trying to say my heatsink isn't prepped properly ... Of course mate - I can host if you want or send me the link to include in my tutorial ...
Richard.
Post by: grim_d on May 16, 2007, 01:01:00 PM
QUOTE(RBJTech @ May 16 2007, 07:26 PM)
I get the hint .. (IMG:style_emoticons/default/laugh.gif) are you trying to say my heatsink isn't prepped properly ... (IMG:style_emoticons/default/wink.gif)
not at all, it's just ive seen alot of people saying this method is "too hard" because you need to modify the heatsink, if people have a guide, they find it alot easier.
Post by: sinister slipknot on May 16, 2007, 12:38:00 PM
QUOTE(grim_d @ May 16 2007, 08:01 PM)
not at all, it's just ive seen alot of people saying this method is "too hard" because you need to modify the heatsink, if people have a guide, they find it alot easier.
I didn't need to modify mine. Well i had to cut about 4 fins off around each of the bolts, but i didn't have to drill the holes out to make them bigger though.
QUOTE(inspire @ May 15 2007, 05:23 PM)
ok...i succeeded to fix this 0002 error by replacing the 2 MOSFETs like this here:http://forums.xbox-scene.com/index.php?showtopic=484726&st=120
now my problem is that when i turn on the console it start regular and after two seconds the fan get crazy and i get two red lights...
is there any solution to it???i think that maybe there is bad touch with the memories but not sure...
is there somone here who can help me with this???
Thats because its overheating, make sure the heatsinks are on the CPU and GPU dies firmly, and that you've applied the right ammount of AS5, im guessing you would havn't applied enough as people who put way too much on don't seem to experience many problems.
Post by: keithk76 on May 16, 2007, 12:58:00 PM
QUOTE(grim_d @ May 16 2007, 01:45 PM)
have you tried it on a different tv or messed around with video setings?
wow i cant believe i didnt think to try that!!
i took it out to the living room tv. with the yellow hooked up the tv says no signal. when i hooked up the components its working great on the hdtv and is not jumbled like it is on my tv. so nows its working great in the living room but i want to play in my room on my regular tv!! any ideas why the yellow output would be dead? the video setting is on 420.
Post by: keithk76 on May 16, 2007, 01:11:00 PM
Post by: kidman64 on May 16, 2007, 02:42:00 PM
Post by: grim_d on May 16, 2007, 03:06:00 PM
QUOTE(keithk76 @ May 16 2007, 08:34 PM)
wow i cant believe i didnt think to try that!!
i took it out to the living room tv. with the yellow hooked up the tv says no signal. when i hooked up the components its working great on the hdtv and is not jumbled like it is on my tv. so nows its working great in the living room but i want to play in my room on my regular tv!! any ideas why the yellow output would be dead? the video setting is on 420.
have you check the hdtv switch on the cable itself?
QUOTE(sinister slipknot @ May 16 2007, 08:14 PM)
I didn't need to modify mine. Well i had to cut about 4 fins off around each of the bolts, but i didn't have to drill the holes out to make them bigger though.
so you did modify it then (IMG:style_emoticons/default/laugh.gif)
would you mind telling me how you cut the fins off, currently im using a dremel and cutting accross the bottom, then in from the top then wiggling the fins off with some pliers, then using a grinding peice to grind away any bumps and what not.
whilst that works, and well too, i'm searching for an easier/faster way, i assume side cutters would work pretty well but my side cutters are pretty big so i cant use them.
This post has been edited by grim_d: May 16 2007, 10:09 PM
Post by: ydgmms on May 16, 2007, 03:20:00 PM
) The problem is the teeth on the tool tend to catch and run along the top of the heatsink.. some pressure and time are all that is needed to cut thru the fins enough to bend them off.
Then I use a grinding tool to kind of even them up or grind them to the main heatsink body.
Post by: RBJTech on May 16, 2007, 03:44:00 PM
I've updated the main tutorial with the FAQ and Shim details as promised and lots of other bits of info since compiling it - thanks for everyones input.
Link (same as original)
Grim - there really is no need to make the surface for the nuts totally flat - the washers you put on first will 'form' over the bumps spreading the pressure. I just wiggled mine with some long nosed pliers and they snapped close to the base. (granted I has already cut a nice slot in the h/s to make this somewhat easier..)
If you're up for a challenge and have a 360 in pieces, then I think it's worth trying a different method altogether. My thoughts were to use M5 bolts in the original threads (as per lawdawg's) but still secure it to the case. However, to do this, we still need a 'spacer' inbetween the case and the board. This is the tricky bit as there is no way it can be threaded (for obvious reasons). How about taking a M5 3mm deep nut and drilling out the thread - then sticking it (?) over the M5 sized holes in the case ? That way, you can do up the bolt from under the case into the original thread. You totally lose the 'spring' feature but as most people are doing it up tight anyway, I'm not sure that matters.. Any thoughts ?
Hmm... I see another update on the way ... (IMG:style_emoticons/default/laugh.gif)
Post by: keithk76 on May 16, 2007, 04:06:00 PM
QUOTE(grim_d @ May 16 2007, 05:42 PM)
have you check the hdtv switch on the cable itself?
thanks!! i really had no idea that switch was there i must have bumped it by accident!
my 360 is running flawlessly!!!!! i can't figure out how to vote in the other thread. another 360 brought back to life with the x clamp replacement
Post by: grim_d on May 16, 2007, 04:08:00 PM
QUOTE(RBJTech @ May 16 2007, 11:20 PM)
Grim - there really is no need to make the surface for the nuts totally flat - the washers you put on first will 'form' over the bumps spreading the pressure. I just wiggled mine with some long nosed pliers and they snapped close to the base. (granted I has already cut a nice slot in the h/s to make this somewhat easier..)
yeah i know, but i like to to at least be kinda flat, i'm just picky that way
QUOTE(RBJTech @ May 16 2007, 11:20 PM)
If you're up for a challenge and have a 360 in pieces, then I think it's worth trying a different method altogether. My thoughts were to use M5 bolts in the original threads (as per lawdawg's) but still secure it to the case. However, to do this, we still need a 'spacer' inbetween the case and the board. This is the tricky bit as there is no way it can be threaded (for obvious reasons). How about taking a M5 3mm deep nut and drilling out the thread - then sticking it (?) over the M5 sized holes in the case ? That way, you can do up the bolt from under the case into the original thread. You totally lose the 'spring' feature but as most people are doing it up tight anyway, I'm not sure that matters.. Any thoughts ?
If i had an unrepaired 360 lying around i would be up for it, but i got alot done today (IMG:style_emoticons/default/laugh.gif)
this would also reduce the amount of modification needing done to the GPU heatsink, just cut out the area above the bolt.
it might even be possible to get m5 3mm spacers, maybe not out of b&q, that's more an engineering/mechanical type item.
you could superglue them to the motherboard/cage, i mean for all intents and purposes they just need to stay on there whilst you are putting the board into the cage and tightening the bolts.
i can defo see this working.
Do you mean something like this? (quick drawing)
(IMG:http://memberuploads.xbox-scene.com/uploads/2007_05_17/00_43_30_draw.jpg)
or have i interpretted wrongly? i'm sure washers would be needed between the board and the heatsink, but i didnt draw them in. The head of the bolt would have to be a faily low profile too, to fit in between the cage and the case.
This post has been edited by grim_d: May 16 2007, 11:10 PM
Post by: RBJTech on May 16, 2007, 04:37:00 PM
QUOTE(grim_d @ May 16 2007, 11:44 PM)
yeah i know, but i like to to at least be kinda flat, i'm just picky that way
If i had an unrepaired 360 lying around i would be up for it, but i got alot done today (IMG:style_emoticons/default/laugh.gif)
this would also reduce the amount of modification needing done to the GPU heatsink, just cut out the area above the bolt.
it might even be possible to get m5 3mm spacers, maybe not out of b&q, that's more an engineering/mechanical type item.
you could superglue them to the motherboard/cage, i mean for all intents and purposes they just need to stay on there whilst you are putting the board into the cage and tightening the bolts.
i can defo see this working.
Do you mean something like this? (quick drawing)
(IMG:http://memberuploads.xbox-scene.com/uploads/2007_05_17/00_43_30_draw.jpg)
or have i interpretted wrongly? i'm sure washers would be needed between the board and the heatsink, but i didnt draw them in. The head of the bolt would have to be a faily low profile too, to fit in between the cage and the case.
Yep spot on - the bolt would need to be countersunk exactly the same as the old style (there is zero room for a cheesehead bolt..) and yes same washers. Yep we just need to hold the spacer in situ whilst the board goes in so superglue sounds just the job ! If we get the length of the bolt correct (or simply get a longer one and cut it to size (remembering to put a nut on first, then undo it to clear the thread..)), then there should be no need to touch the heatsink - there is a fair bit of thread to play with.
Yea, sounds a goer... (IMG:style_emoticons/default/smile.gif)
Post by: sully04 on May 16, 2007, 04:40:00 PM
Post by: grim_d on May 16, 2007, 04:46:00 PM
QUOTE(RBJTech @ May 17 2007, 12:13 AM)
Yep spot on - the bolt would need to be countersunk exactly the same as the old style (there is zero room for a cheesehead bolt..) and yes same washers. Yep we just need to hold the spacer in situ whilst the board goes in so superglue sounds just the job ! If we get the length of the bolt correct (or simply get a longer one and cut it to size (remembering to put a nut on first, then undo it to clear the thread..)), then there should be no need to touch the heatsink - there is a fair bit of thread to play with.
Yea, sounds a goer... (IMG:style_emoticons/default/smile.gif)
how about finding an m5 bolt, countersunk head with allen type on it? much easier to tighten up than screwdriver
i think we would need longer bolt, remember some of these fixes require abnormal amounts of pressure on the chips, so screwing the bolt in the same amount as stock may not be enough to recreate the connection. But even if they were as long as the ones being used now they would be perfect.
If i happen to be in b&q over the next few days i'll take a look, they might have something like that, but i doubt it. My dad works in the fire brigade as an fire appliance engineer, so maybe he can source something.
This post has been edited by grim_d: May 16 2007, 11:48 PM
Post by: RBJTech on May 16, 2007, 04:56:00 PM
PS - took some pics today of the undercooler - this one shows the nuts/spaces that we need quite nicely .. :-
(IMG:http://rbjtech.bulldoghome.com/photos/BDRES/rbjtech_bulldoghome_com/case/xbox%20014.jpg)
Cheers,
Richard.
Post by: grim_d on May 16, 2007, 05:01:00 PM
QUOTE(RBJTech @ May 17 2007, 12:32 AM)
I'll have a look too - a slotted M5 should be ok (how tight are you doing up your bolts ! (IMG:style_emoticons/default/blink.gif) )
doh i was thinking about the original method with the bolts attached to the cage, i did them up brutally tight because twice i had them loosen off and once i had to cut one out from the bottom with the motherboard still in the case, not good.
i would still prefer phillips over flat though, i just hate flathead.
Post by: Bravoexo on May 17, 2007, 04:58:00 AM
QUOTE(RBJTech @ May 16 2007, 11:20 PM)
If you're up for a challenge and have a 360 in pieces, then I think it's worth trying a different method altogether. My thoughts were to use M5 bolts in the original threads (as per lawdawg's) but still secure it to the case. However, to do this, we still need a 'spacer' inbetween the case and the board. This is the tricky bit as there is no way it can be threaded (for obvious reasons). How about taking a M5 3mm deep nut and drilling out the thread - then sticking it (?) over the M5 sized holes in the case ? That way, you can do up the bolt from under the case into the original thread. You totally lose the 'spring' feature but as most people are doing it up tight anyway, I'm not sure that matters.. Any thoughts ?
Hmm... I see another update on the way ... (IMG:style_emoticons/default/laugh.gif)
Hey, similar to what I did... the hybrid rbjtech and lawdawg method I mentioned before in this thread and lawdawg's thread.
(IMG:http://img186.imageshack.us/img186/3135/mg6703jm3.jpg)
(IMG:http://img256.imageshack.us/img256/3351/xbox1uz5.jpg)
but that inner lip went flat in about 2 weeks...hence it bended again. So I replace them with the nuts that came with the bolt. This has worked well for me so far.
Post by: Face on May 17, 2007, 06:32:00 AM
Gotta do my finals first though, so I have to put it on hold for two weeks.
This post has been edited by Face: May 17 2007, 01:33 PM
Post by: DragonKore on May 17, 2007, 07:12:00 AM
Thanks.
Post by: grim_d on May 17, 2007, 07:18:00 AM
QUOTE(DragonKore @ May 17 2007, 02:48 PM)
I went to Lowe's yesterday and bought all of the necessary parts (exact item numbers), but I failed to realize that the packets of screws lacked the 3mm nuts. Can I do the mod without a nut between the screw and the board, or will that cause problems? I can go back to Lowe's if I need to, but I'd rather not.
Thanks.
yeah you really need that nut.
Post by: DragonKore on May 17, 2007, 07:19:00 AM
Post by: dannywhac on May 17, 2007, 09:40:00 AM
This post has been edited by dannywhac: May 17 2007, 04:42 PM
Post by: grim_d on May 17, 2007, 09:47:00 AM
QUOTE(dannywhac @ May 17 2007, 05:16 PM)
Dunno if this helps, but B&Q/Homebase do a metre length of aluminium tubing that could be sawn/dremeled to 3mm pieces that would fit an M5 bolt like a glove - I use them to attach perspex to the bases of consolised MVS's using M5 bolts. Thought it could be a readily available alternative to sourcing M5 threadless spacers (IMG:style_emoticons/default/smile.gif) Will try and find a part no. when I'm passing BnQ next
that would be great mate.
Post by: ydgmms on May 17, 2007, 09:57:00 AM
QUOTE(DragonKore @ May 17 2007, 08:48 AM)
I went to Lowe's yesterday and bought all of the necessary parts (exact item numbers), but I failed to realize that the packets of screws lacked the 3mm nuts. Can I do the mod without a nut between the screw and the board, or will that cause problems? I can go back to Lowe's if I need to, but I'd rather not.
Thanks.
Yeah, RBJtech really needs to update that parts list with the nuts for Lowe's. A couple of people, myself included, have mentioned it doesn't come with nuts. But I guess noones given him the part number? I keep forgetting... actually ...
well i thought i still had the lil baggy it comes in, but I guess not....
oh well.. maybe next time.
Post by: DragonKore on May 17, 2007, 10:05:00 AM
QUOTE(ydgmms @ May 17 2007, 09:33 AM)
Yeah, RBJtech really needs to update that parts list with the nuts for Lowe's. A couple of people, myself included, have mentioned it doesn't come with nuts. But I guess noones given him the part number? I keep forgetting... actually ...
well i thought i still had the lil baggy it comes in, but I guess not....
oh well.. maybe next time.
Will the baggies of nuts be right next to the machine screws? Or does it not matter as long as they're 3mm?
Post by: ydgmms on May 17, 2007, 11:28:00 AM
QUOTE(DragonKore @ May 17 2007, 11:41 AM)
Will the baggies of nuts be right next to the machine screws? Or does it not matter as long as they're 3mm?
Yeah they are. And I think you're looking for 4mm nuts. All the parts should be in the same drawer for Metric M4 machine screws/nuts/bolts/washers.
Post by: DragonKore on May 17, 2007, 12:40:00 PM
QUOTE(ydgmms @ May 17 2007, 11:04 AM)
Yeah they are. And I think you're looking for 4mm nuts. All the parts should be in the same drawer for Metric M4 machine screws/nuts/bolts/washers.
Alright, thanks. I'll go pick up those nuts and a titanium 4mm drill bit later today.
Post by: kidman64 on May 18, 2007, 06:59:00 AM
Post by: waytoodeep03 on May 18, 2007, 08:32:00 AM
Ill be doing this tomorrow to bring my 360 back.
Also why is this site so slow? Time for new servers?
Post by: Hork the Zombie on May 18, 2007, 12:26:00 PM
I put the phillips screw driver under the clamp, right?
Someone really needs to make a video
Post by: DragonKore on May 18, 2007, 06:40:00 PM
Here's some helpful info that may contribute to the tutorial:
Nuts: M4-.70 Hex Nuts Class 8 (#138233)
4mm Bit = 5/32" Bit
Also, I used two washers.
Thanks for the great tutorial.
This post has been edited by DragonKore: May 19 2007, 01:42 AM
Post by: RBJTech on May 19, 2007, 01:13:00 AM
QUOTE(kidman64 @ May 18 2007, 02:35 PM)
RBJTech: i see you know use 2 washers in your tutorial. is it still better to use 3? or 2 are now "standard?(IMG:style_emoticons/default/smile.gif)
Yea 2 is now standard. When I did the original tutorial, 3 seemed to work fine but many people have said that with 3, the contact with the die becomes marginal (depends on the thickness of the washers I guess...) so I've changed it to 2 (both GPU & CPU) to decrease the chance of the the die not meeting the heatsink properly.
The design is evolving all the time - I'm trying to sort the mod so you don't need to cut the GPU heatsink too - watch this space ... (IMG:style_emoticons/default/smile.gif)
Post by: sinister slipknot on May 19, 2007, 03:45:00 AM
QUOTE(grim_d @ May 16 2007, 10:42 PM)
so you did modify it then
would you mind telling me how you cut the fins off, currently im using a dremel and cutting accross the bottom, then in from the top then wiggling the fins off with some pliers, then using a grinding peice to grind away any bumps and what not.
whilst that works, and well too, i'm searching for an easier/faster way, i assume side cutters would work pretty well but my side cutters are pretty big so i cant use them.
If your still wondering i just used scissors.. I have a decent pair that cuts through the aluminium on the heatsink easily. They didn't fit perfectly at first, but i just bent the first fin, cut into it then i did the rest.
QUOTE
Yea 2 is now standard. When I did the original tutorial, 3 seemed to work fine but many people have said that with 3, the contact with the die becomes marginal (depends on the thickness of the washers I guess...) so I've changed it to 2 (both GPU & CPU) to decrease the chance of the the die not meeting the heatsink properly.
The design is evolving all the time - I'm trying to sort the mod so you don't need to cut the GPU heatsink too - watch this space ...
The design is evolving all the time - I'm trying to sort the mod so you don't need to cut the GPU heatsink too - watch this space ...
I use 2 for my CPU, but my GPU needs 3, two is way too little and the pressure is too great on the die causing me to get the 0020 error, so i use 3 and not tightened too much. But i guess its different with every 360 so a bit of trial and error will be useful when you do this.
QUOTE(Hork the Zombie @ May 18 2007, 08:02 PM)
The Xclamps don't feel like they're going to come out, it feels like the motherboard is going to break our something..
I put the phillips screw driver under the clamp, right?
Someone really needs to make a video
I really would, but i don't have x-clamps in my 360 anymore, infact i dont even have them anymore, ceremonial burning and all that..
Post by: Bravoexo on May 19, 2007, 09:31:00 AM

slip your flat head this way, twist on the outward portion slowly, it'll pop off.
Post by: sinister slipknot on May 19, 2007, 10:46:00 AM
Post by: sinister slipknot on May 19, 2007, 01:12:00 PM
It's happened before but after either tightening or loosening the the bolts or replacing the thermal grease it normally works again, but i've spent all afternoon on it with no luck.I've tried different combos of the washers, like 3 on both the GPU and CPU, 3 on the GPU and 2 on the CPU, 2 on both and stuff like that with no luck. I can get it to boot without it freezing, but it'll only last for so long without freezing again, any suggestions of things to try which could help?
EDIT: Hmm i thought it'd merge my posts...
Post by: mchuman deluxe on May 19, 2007, 11:07:00 PM
I've tried 1 washer, 2, 3, any combination I can think of. I've loosened bolts, tightened them, tried aluminum, copper, different kinds of paste, no paste, with the fans on, fans off, dvd drive in, dvd drive out, standing up, upside down, shroud in, and shroud out, you name it, I've tried it. The closest I ever got was I had the 4 green lights blink in a circle before going back to the 3 red lights. I've had 2 and 3 red lights, but nothing has worked. I guess my system is just fried.
Post by: RBJTech on May 20, 2007, 01:12:00 AM
QUOTE(mchuman deluxe @ May 20 2007, 06:43 AM)
I had the 3RLOD today. I tried every fix imaginable, and it hasn't fixed my problem.
I've tried 1 washer, 2, 3, any combination I can think of. I've loosened bolts, tightened them, tried aluminum, copper, different kinds of paste, no paste, with the fans on, fans off, dvd drive in, dvd drive out, standing up, upside down, shroud in, and shroud out, you name it, I've tried it. The closest I ever got was I had the 4 green lights blink in a circle before going back to the 3 red lights. I've had 2 and 3 red lights, but nothing has worked. I guess my system is just fried.
Last resort time - have you tried a shim (see earlier in the post for a pic.) If that doesn't work - then agree that it's likely not a fixable problem ... (can't win 'em all ..)
Post by: wellmodded on May 20, 2007, 08:25:00 AM
ohh and both my die haeva small chip on it but i don;t think tht the problem because i inspected the die very cloesly and the little chip of the die is not big enough to meet the wefer inside so tht should ahev no problems i have worked with PC processor that had more chips off the die and thy worked
any waz hoping i can get this problem fixed has any body ever got the 0022 error fixed
Post by: keithk76 on May 20, 2007, 10:44:00 AM
Post by: keithk76 on May 20, 2007, 11:05:00 AM
Post by: sinister slipknot on May 20, 2007, 11:17:00 AM
Post by: wellmodded on May 20, 2007, 02:12:00 PM
ther reason i am askign this casue i actualyl decided to spend the time to read through all of rbj tut and he say he don't recommend heating the board
but i have fixed many xbox360 with 3rlod of death usign replacement of xclamps with bolt nuts and washer i got some the info from rbj but i never really read through all rbj tut
wht i alwayz used to do heat the board up with the heat fom the gpu and cpu and when it get hot i wil tighten down the screws so that when the board cools it should be flat as possible and i see in rbj tut he say dont heat the board he just use the pressure to hold the gpu down so it cna make contact witht he m/b
SO should i heat the board up or not ( with the heat form the gpu and cput)??
another think i never used to drill holes on my gpu or cpu i found bolts that can fit so i would screw the bolts through the orginal thread on the gpu and GPU
i used to use a plastic washer to allow theramal expansion i would use a metal washer and plastic washer in combination to give the correct hight between the m/b and gpu
wht i wondering is that plastic washer good enough for thermal explansion
the plastic washer is not a hard plastic is a plastic that will compress and expand back to orginal width easly
i actualy made the plastic washer from a plasctic i found around my house i just drill holes in it and cut to right size OHH yes the plastic washer is exact width of the metal washers
Post by: vinny1684 on May 20, 2007, 02:12:00 PM
Firstly i was getting the 3 lights, towel thing did fix it, but as said, it was only temp.
I did the clamp removal, i made alittle hash job of cutting the fins but its all good
I now get overheating, it turns on, lasts a few mins then fans go crazy and overheats, (i didnt replace the paste at first)
I think i know the problem is the paste but i would love for someone to settle my mind.
Next day...
I didnt have any decent paste, and i didnt have any gear to clean the previous paste i got a tiny bit of "silicone paste" from my friend, not even sure if its the right stuff. i cleaned the best i could but no shinnyness at all.
I get the same overheating.
I have bought some artic paste 5 off the net and some alcohol stuff to clean up, but can anone assure me that the problem is paste?
How important is the stuff?
Oh. the CPU gets red hot and the GPU gets fairly hot
Cheers for the tut! on the plus side, the xbox turns on first time everytime now.
Post by: wellmodded on May 20, 2007, 02:15:00 PM
Post by: wellmodded on May 20, 2007, 03:42:00 PM
I HOPE THIS IS THE WRITE PLACE TO POST THIS
Ok since i don't want to drill holes in my heatsink and i think using the plastic washer i made might not be that good to allow thermal expansion this is what i cape up with i hope you can comment on it and tell me how good it is or what might go wrong
instead on drilling holes i found bolts that can screw directly into the heatsink instead what i did was put a spring washer between the bolt head and the outside of the case ( normally where the bolt would screw directly onto the metal case
the spring washer outside the case will contract and expand if the heatsink starts to move becasue of thermal expansion and i think this should take care of the thermal expansion part I HOPE
SoRRY for the poor drawing i only did one side of the gpu heatink
""OHH the washer i use that might not be the number of washer i have to use to get the write spacing i just drew the washer like tht""
YOU MIGHT HAVE TO COP THE IMAGE AND ENGLARGE IT TO SEE THE WRITE PROPERLY ON IT
The blue square is spring washer
the gray square is a normal washer

Post by: wellmodded on May 20, 2007, 09:08:00 PM
QUOTE(vinny1684 @ May 20 2007, 05:18 PM)
Hi all, really like the TUT, can i take a moment to explain my current problem, and if my idea is a likely fix.
Firstly i was getting the 3 lights, towel thing did fix it, but as said, it was only temp.
I did the clamp removal, i made alittle hash job of cutting the fins but its all good
I now get overheating, it turns on, lasts a few mins then fans go crazy and overheats, (i didnt replace the paste at first)
I think i know the problem is the paste but i would love for someone to settle my mind.
Next day...
I didnt have any decent paste, and i didnt have any gear to clean the previous paste i got a tiny bit of "silicone paste" from my friend, not even sure if its the right stuff. i cleaned the best i could but no shinnyness at all.
I get the same overheating.
I have bought some artic paste 5 off the net and some alcohol stuff to clean up, but can anone assure me that the problem is paste?
How important is the stuff?
Oh. the CPU gets red hot and the GPU gets fairly hot
Cheers for the tut! on the plus side, the xbox turns on first time everytime now.
Well its nto good if u put the GPU an CPU on the die with out thermal paste that can make your chips over heat and get damaged
puttign thermal paste should solve the problem
also make i know if your heatsink don;t touch the die firmlyn your fan would go crazy and thn shut off after a few seconds
Post by: sully04 on May 20, 2007, 09:44:00 PM
Post by: mchuman deluxe on May 20, 2007, 11:24:00 PM
QUOTE(RBJTech @ May 20 2007, 03:48 AM)
Last resort time - have you tried a shim (see earlier in the post for a pic.) If that doesn't work - then agree that it's likely not a fixable problem ... (can't win 'em all ..)
No, but I am going to try the heat gun fix as a last ditch effort. I'll let you know how that goes. If not I can get a working motherboard tomorrow or a new system in a couple weeks.
Oh and I'll be getting the ext. warranty too if I get a new system.
Post by: wellmodded on May 21, 2007, 07:41:00 AM
QUOTE(mchuman deluxe @ May 21 2007, 02:30 AM)
No, but I am going to try the heat gun fix as a last ditch effort. I'll let you know how that goes. If not I can get a working motherboard tomorrow or a new system in a couple weeks.
Oh and I'll be getting the ext. warranty too if I get a new system.
If you are doing the heatgun be carefull make sure u don;t blow resistor and capacitors make sure you don't hold the gun too close and keep waving he gun all over the board and don't put it rest i one stop for more thn 2 sec ( ia m telling u this casue i had a board with 0102 error and i con;t get it working so i get frustrated and use the heatgun now i think i fucked it up and totally dead)
Post by: lmcduck on May 21, 2007, 08:25:00 AM
QUOTE(lmcduck @ May 14 2007, 10:54 PM)
Did the fix a week ago system had been locking up I did post for suggestions but no help. Any way my system locked up again tonight and I am back to 3 lights. I had the system ruining for 4 hours playing GRAW 2 and no problems then tonight from cold after about 10 minutes of GH II that was it dead. Tightened up the bolts on the GPU I have 2 washers it booted so put it all back together loaded up GH II and bang locks up and back to 3RL again. Do I go down to 1 washer?
Thanks
Hi all here's an update on mine. I now have two washers on the memory side of the GPU and three on the other (CPU side). I have three washers on the CPU the system has been running for a week with no lock ups due to heat!
Here's hoping!
Post by: mchuman deluxe on May 21, 2007, 03:42:00 PM
QUOTE(wellmodded @ May 21 2007, 10:17 AM)
If you are doing the heatgun be carefull make sure u don;t blow resistor and capacitors make sure you don't hold the gun too close and keep waving he gun all over the board and don't put it rest i one stop for more thn 2 sec ( ia m telling u this casue i had a board with 0102 error and i con;t get it working so i get frustrated and use the heatgun now i think i fucked it up and totally dead)
Ok, just got through using the heat gun on the motherboard. It's a duel temp, 700-1000 degrees. I did about 5 minutes on the lower temp setting. Top and bottom, alternating about 30 seconds each side. About 2-3 inches away and in a fast circular motion. Then bumped it up to 1000 degrees and did top and bottom for about 3 minutes. Then lowered the temp back down to 700 and did another 3 minutes. It's cooling off now, gonna let it sit about 30 minutes then put it back together and see how that works. I'll post back with updates.
Post by: Face on May 22, 2007, 04:07:00 AM
QUOTE(mchuman deluxe @ May 21 2007, 11:18 PM)
Ok, just got through using the heat gun on the motherboard. It's a duel temp, 700-1000 degrees. I did about 5 minutes on the lower temp setting. Top and bottom, alternating about 30 seconds each side. About 2-3 inches away and in a fast circular motion. Then bumped it up to 1000 degrees and did top and bottom for about 3 minutes. Then lowered the temp back down to 700 and did another 3 minutes. It's cooling off now, gonna let it sit about 30 minutes then put it back together and see how that works. I'll post back with updates.
At those temperatures you will be lucky if it still works! What are you working in Farenheit or Centigrade? Even still I think 1000 degrees F (537 C) is likely to have ruined you chips.
Time will tell I guess....
Post by: wellmodded on May 22, 2007, 07:34:00 AM
Post by: TurboJailer on May 22, 2007, 06:54:00 PM
I had a bit of trouble so I thought I'd share what I did to get mine working.
I couldn't get mine to work with 2 washers on each corner so I loosened all the nuts on the GPU heatsink until they were all just making contact with the spring washer. Then I tightened one corner at a time one full turn and tried to see if it would boot. Once I found the "bad" corner, I removed the GPU heatsink and removed one washer from that corner and re installed the GPU heatsink. It worked and has been working all weekend. I had a lockup today when my kid was playing Shrek, but I think that was a game glitch. When I ejected the disk it went right back to the dashboard and was still workng fine without a reboot.
Post by: fliptek on May 23, 2007, 12:05:00 AM
now I have 2 washers between the board and heat sink, if i loosen up the nuts so that the spring washers on the gpu is crunched halfway i get error 0102 and when i tighten the nuts so that the spring washers are flat i get error 0110...i tried using one washer between the board and heat sink and when i tighten the nuts so that the spring washers are crunched halfway i get the same error 0102 but then when i tighten it all the way i get error 0020... I tried playing around a bit with the nuts tightening it and loosening it to see if i can get it to work then after a while it started giving me error 0021 when i tighten the nuts all the way... any idea on why this is happening?
i'd try the shim trick but i can't find any old heat sink laying around the house... you think a folded and cut aluminum soda can would work?
Post by: RBJTech on May 23, 2007, 03:32:00 AM
QUOTE(fliptek @ May 23 2007, 07:41 AM)
i'd try the shim trick but i can't find any old heat sink laying around the house... you think a folded and cut aluminum soda can would work?
nope - needs to be proper FLAT piece of metal - I agree it's a long shot for most people...QUOTE(TurboJailer @ May 23 2007, 02:30 AM)
Thanks for the tutorial RBJtech it worked great.
I had a bit of trouble so I thought I'd share what I did to get mine working.
I couldn't get mine to work with 2 washers on each corner so I loosened all the nuts on the GPU heatsink until they were all just making contact with the spring washer. Then I tightened one corner at a time one full turn and tried to see if it would boot. Once I found the "bad" corner, I removed the GPU heatsink and removed one washer from that corner and re installed the GPU heatsink. It worked and has been working all weekend. I had a lockup today when my kid was playing Shrek, but I think that was a game glitch. When I ejected the disk it went right back to the dashboard and was still workng fine without a reboot.
Great - glad it worked out. Also great that you read the tutorial properly on how to diagnose where the problem is and if necessary reduce washers etc on that corner only.
PS - Using my fixed xbox daily now - I'm confident now that it is permanently fixed as I no longer give it a second thought when I turn it on - it's been a good 6 weeks now with daily thermal cycles ...
Post by: DrJeckyll on May 23, 2007, 06:40:00 AM
http://www.coolermaster.com/index.php?LT=english&Language_s=2&url_place=product_list&p_class=618
Post by: RBJTech on May 23, 2007, 06:48:00 AM
QUOTE(DrJeckyll @ May 23 2007, 02:16 PM)
You could use gap filler padding from Coolermaster
http://www.coolermaster.com/index.php?LT=english&Language_s=2&url_place=product_list&p_class=618
Er no you can't - and I quote from the above link "Caution: - Masterpad is a gap filler, it cannot be used on high power rating components such as a CPU..."
Gap filler is meant for low power components such as RAM etc as it has a relatively high thermal resistance.
Make one from an old heatsink etc A copper shim would be IDEAL ...
Post by: DrJeckyll on May 23, 2007, 06:55:00 AM
..great thermal conductivity and dielectric.
Application: - Chipsets on Mainboard and VGA cards - HDD, CD-ROM - Power components
Allthough I must agree that copper is the better conductor...and cheaper.
Post by: RBJTech on May 23, 2007, 07:55:00 AM
http://cgi.ebay.co.uk/QUALITY-BRAND-NEW-2mm-COPPER-SHEET-100mm-x-100mm- C106_W0QQitemZ160117269144QQihZ006QQcategoryZ98641QQssPageNameZWDVWQQrdZ1QQcmdZV
iewItem
You'll need to cut a 20mm x 10mm corner from it and away you go. Cut loads more and sell them on B&T ..
Post by: Ace` on May 23, 2007, 10:56:00 AM

Then I had problems with the gpu heatsink, it wouldn't make full contact with the two dies no matter how many washers I used. I knew it wasn't the motherboard at fault because even if it was a little warped the x-clamp replacement would of sorted that. Then I checked the heatsink and sure enough it was very uneven. So I decided to lap it and after a lot of elbow greese got it completely level with mirror finish.
Not had any freezes since lapping it (touch wood).

Post by: RBJTech on May 23, 2007, 11:16:00 AM
Yea the daughter-die (the 10Mbyte on-board RAM) is slightly (we are talking a fraction of a mm here) lower than the main die - the paste usually takes this difference up fine though.
PS - Superglue ... Hmm what'd ya break ...
Post by: Ace` on May 23, 2007, 12:15:00 PM
Post by: bluebronco28 on May 23, 2007, 03:08:00 PM
Instead of cutting out the fins in the heatsink to allow for the nylon nut can you maybe just get some longer bolts and maybe a wider washer and sit it onto of the heat sink?... and maybe paint the heatsink with i dunno special proof black paint that would dispose of the heat quicker.?
Post by: grim_d on May 23, 2007, 04:07:00 PM
QUOTE(Ace` @ May 23 2007, 07:51 PM)
Hehe the superglue was just the first thing I had to hand. It wasn't juse the small die not making contact, only half of the large die was making contact also. I wonder if all the stock heatsinks are this badly made. (IMG:style_emoticons/default/rolleyes.gif)
i had this problem too, except mine was more severe, lapping the heatsink didn't fix the problem so unfortunately i had to move onto a shim, which worked perfectly.
Post by: JAmerican on May 24, 2007, 12:34:00 AM
I've visited this site multiple times and decided to sign up. The mods look like suitable long-term fixes. I've tried the heat gun, and tried the rubber eraser mod. Both have failed me. I even think the rubber mod makes the situation worse. I will try to attempt RBJTech's mod but due to the lack of tools such as one to cut the heatsink, or make the case holes bigger.
My console is one from launch. It lacks the rubber addons and other enhancements. I got it off eBay for cheap. I just hope I can get it to work fully without having to open it and let the fan cool it.
JAmerican
Post by: xboxer360 on May 24, 2007, 04:00:00 AM
also with people doing towel tricks, i think removing the fan plug is a much better way as you're focusing the heat on the actual cpu/gpu dies and not trapping hot air and stuffing up your capacitors etc...
to bluebronco if you got longer bolts and sat the nuts on top of the gpu heatsink you would not be able to put your dvd drive back on without raising it and cutting your case.
This post has been edited by xboxer360: May 24 2007, 11:01 AM
Post by: bluebronco28 on May 24, 2007, 04:37:00 AM
Post by: grim_d on May 24, 2007, 05:20:00 AM
If they could move the GPU and CPU all over to the side where there is more more then they could put the same style of heatsink on the GPU as they have on the CPU, or something similar at least.
I realize it might not be possible, but they did it with xbox1, the CPU was right at the edge of the board.
but hey, with the arrival of 65nm chips right around the corner, maybe it's not needed at all.
This post has been edited by grim_d: May 24 2007, 12:25 PM
Post by: Flubster on May 24, 2007, 08:15:00 AM
QUOTE(bluebronco28 @ May 24 2007, 12:13 PM)
yeah just figured that out got the x-box working and then couldnt get the dvd drive in properly .... grrrrr so now i have cut out the heatsink and got shorter bolts.............. plus why is the dvd drive right up againt the heat sink that mustnt be good for anything poor desgin all round if u ask me...
Yeah its not a great design, but i done the other cooling mod as well as the clamp replacement and the box runs noticeably cooler
Cheers RBJTech, with your XClamp and Cooling Mod it works much better now (IMG:style_emoticons/default/smile.gif)
Flubster
Post by: baughny on May 24, 2007, 12:07:00 PM
Had a launch day console that went belly up.
I went down your route as a last ditch before breaking it for spares/repairs.
Everything went fine, I spent about 30 mins on the washers and torque of the bolts before i hit the sweet spot. When I did though, the reds were banished. Fired her up with the case back together and went for an extended blast. O.K, O.K so it's only been about 30 hours since I did it and I hate to tempt fate but so far so good. No lockups and no red ring. It's hot as hell in my living room at the mo (weather is extreme for this time of year) Gears of war took a hammering. Low and behold it's pretty positive.
For anyone who has problems, I'd just say stick with it. That sweet spot is there, you just need to find it.
I want to do the card split mod for the air tunnel but unfortunately despite trying the visio viewer on 2 of my machines the template opens as a blank Internet explorer page. I've disable active X restrictions etc, but I can see nothing.
Anybody help me out by converting it to another format I might be able to view please?
Keep up the good work and above all else, persevere.
Thanks again
D
Post by: popebone on May 24, 2007, 12:27:00 PM
Post by: wellmodded on May 24, 2007, 04:08:00 PM
and yes u need to apply pressure so that the BGA connection under the GPU make contact u doing damage your GPU if u don;t have th write spacing becasue u can crack the die on the GPU if u try to tighten it 2 much remmber the washer spot u from tighten the GPU down anymore
Post by: bluebronco28 on May 25, 2007, 08:04:00 AM
Post by: maur0 on May 25, 2007, 01:24:00 PM
Thanks for the tutorial.
I used 2 washers and was able to view the dashboard, but when I put a game I got the 3 blinking lights again.
Tried to tighten the nuts and I noticed the gpu or cpu were not hot and then checked the error code and now its 0002, whenever I turn on the xbox360 the light on the psu stays orange.
Any ideas?
Thanks!
This post has been edited by maur0: May 25 2007, 08:26 PM
Post by: FILTHY J NASTY on May 25, 2007, 05:00:00 PM
Is this normal? Or no?
Should there be a slit bending because with no screws in it now to hold down the components nothing lines up,...
please get back to me asap
Post by: JAmerican on May 25, 2007, 05:32:00 PM
Can anyone help me fix this freezing issue? I have one of the launch Xbox 360's Oct 22 2005 manufacture date.
My 360:
(IMG:http://www.jamerican.net/JJFiles/Xbox360/noXclampmod.jpg)
(IMG:http://www.jamerican.net/JJFiles/Xbox360/noxclampmod1.jpg)
(IMG:http://www.jamerican.net/JJFiles/Xbox360/noxclampmod2.jpg)
(IMG:http://www.jamerican.net/JJFiles/Xbox360/noxclampmod3.jpg)
JAmerican
This post has been edited by JAmerican: May 26 2007, 12:47 AM
Post by: JAmerican on May 25, 2007, 06:16:00 PM
Please help.
JAmerican
Post by: FILTHY J NASTY on May 25, 2007, 06:31:00 PM
Post by: JAmerican on May 25, 2007, 07:25:00 PM
JAmerican
Post by: FILTHY J NASTY on May 25, 2007, 07:39:00 PM
Post by: maur0 on May 25, 2007, 08:24:00 PM
QUOTE(FILTHY J NASTY @ May 26 2007, 03:15 AM)
I got error 0002 now lol
Let me know if you solve it!
Post by: FILTHY J NASTY on May 25, 2007, 08:26:00 PM
But now i get 3 red lights at that 0002 error, which is the network interface error as soon as i power my console on what is thi?
Post by: JAmerican on May 25, 2007, 08:30:00 PM
QUOTE(JAmerican @ May 25 2007, 10:01 PM)
Turned it on I got 0103 error now. WTF. Its spitting out errors like crazy now.
JAmerican
MY Error means cpu overheating so i have to check this.
Post by: RBJTech on May 26, 2007, 01:46:00 AM
Post by: lukebe on May 26, 2007, 05:13:00 AM
First time I did the tut I ran into random lock-ups and artifacting and eventually 3RLOD again. So I had another crack.
1. I had to redo the bolts into the chasis twice and the 2nd time I used a ruler to ensure that all the nuts were flush with the chasis points the board sits on. First time the nuts were a bit too low. This actually took quiet alot of time to ensure that all nuts would sit the board completely flat. Worth the extra time checking them from every angle.
2. I applied the 12v mod (under mobo). Way loud, so I also put in a Zalman fanmate 2 controller. So in summer I can run it at 12v and in winter I can turn it down. The controller runs out the back and I just attached it to the box with velcro. Man that controller is awesome.
3. I put in an XCM internal fan, 12v running off the Zalman fan mate controller as well. This is great for the CPU and helps the GPU. Took about 10 degress celcius off both heat sinks but reduces the temp diff the shroud mod would usually make. I cut a hole in the top of my xbox case to ensure the XCM gets a good air flow.
4. I had to make the GPU heat sinks very very tight to stop artifacting. The spring washers were completely crushed but I'm confident now it will not move at all. Took me a while to work up the courage to go that far.
5. I found a very small fan (air fed by the XCM fan) and placed it in front of the 2 ram chips not covered by the GPU (under DVD). GPU was always hotter than CPU by 10 degress but with this fan they are them same. Both run at max 36 degress celcius!!!! Ambient around 22-25 celcius.
6. While I was ripping apart everything I put some temp sensors on the GPU/CPU connected to LCD outside the back of the box.
I know my RBJTech tut was succesful as I never have a hit of red lights (after 4 weeks) and everything is running so cool. I've done all RBJ's cooling mods (ram/southbridge heat sinks/shroud/12v/thermal paste/cut out casing) and then some of my own. 36 deg for both CPU/GPU proves it.
BUT... I still got lock-ups every 20 mins so I starting try other things like firmware and media. Went back to Xtreme 3.2 from 5.2 and has not skipped a beat since. Worth a try for those with random lock-ups as I believe 5.2 is trying to do everything that I personally dont need. Talk about going around the world... but I really did need to do the x-clamp and a better cooling system. Plus it was buckets of fun even though my wife didn't like seeing my xbox in pieces.
This post has been edited by lukebe: May 26 2007, 12:26 PM
Post by: FILTHY J NASTY on May 26, 2007, 07:58:00 AM
QUOTE(RBJTech @ May 26 2007, 09:22 AM)
Don't suppose you kept any of those heatsink fins you cut off ? (IMG:style_emoticons/default/wink.gif) They would be ideal as shims (when made filed/sanded flat) which may solve your problem .. ? Have a look in the updated tutorial for pics ...
would this solve my error 0002?
Post by: FILTHY J NASTY on May 26, 2007, 08:43:00 AM
Post by: RBJTech on May 26, 2007, 08:52:00 AM
QUOTE(FILTHY J NASTY @ May 26 2007, 04:19 PM)
Just took off the gpu heat sink reapplyed thermal past and fired it up same error, whats wrong RB??? LOL
? no idea - you didn't do a heat gun first did you .. (and killed something else ...) The Network Interface controller is embedded in the Southbridge - if you're not getting anywhere, then try pressing hard on the Southbridge while booting. It is pretty rare, but I've heard of cases when the Southbridge has bad BGA solder pads too ...
If it is that - then you can probably use a very low profile Southbridge heatsink and clamp it to the board with the provided mount points..
Post by: maur0 on May 26, 2007, 09:09:00 AM
Where or what is the south bridge?
thanks
Post by: Face on May 26, 2007, 12:20:00 PM
Look at the picture, its in the bottom right, close to the AV port/Ethernet jacks.
Xbox 360 Mobo
Southbridge
This post has been edited by Face: May 26 2007, 07:30 PM
Post by: Basin on May 26, 2007, 03:21:00 PM
Post by: RATSTYLZ on May 26, 2007, 04:28:00 PM
Post by: FILTHY J NASTY on May 26, 2007, 04:33:00 PM
QUOTE(RATSTYLZ @ May 27 2007, 12:04 AM)
hi all,did my second x-clamp mod,worked fine for 4-5 hours now it freezes up after playing a game,the console is standard with no mods,any ideas
do mods to it =] upgrade fans n stuff
Post by: maur0 on May 26, 2007, 06:15:00 PM
QUOTE(Face @ May 26 2007, 07:56 PM)
The southbridge is the chip with a circular metal heatspreader and has the Xbox 360 logo stamped on top. It also has silk screen surrounding it and mounting holes where Microsoft would have mounted heatsink during testing and development.
Look at the picture, its in the bottom right, close to the AV port/Ethernet jacks.
Xbox 360 Mobo
Southbridge
Thanks!
Tried pressing the southbridge chip but didn't fix the 0002 error. (IMG:style_emoticons/default/sad.gif)
Any other ideas? (IMG:style_emoticons/default/uhh.gif)
Post by: wellmodded on May 26, 2007, 06:27:00 PM
Post by: JAmerican on May 26, 2007, 06:27:00 PM
QUOTE(RBJTech @ May 26 2007, 04:22 AM)
Don't suppose you kept any of those heatsink fins you cut off ? (IMG:style_emoticons/default/wink.gif) They would be ideal as shims (when made filed/sanded flat) which may solve your problem .. ? Have a look in the updated tutorial for pics ...
Threw them away (IMG:style_emoticons/default/sad.gif). You should put that in the tutorial. Keep any fins from Heatsink. They may be helpful later or something like that.
JAmerican
Post by: waytoodeep03 on May 27, 2007, 09:37:00 PM
QUOTE(Ace` @ May 23 2007, 06:32 PM)
Big thanks to RBJTech for the great guide. Had a couple of set backs mainly B&Q not having the right nuts and bolts and eventually finding them in the wrong place with a different ref#. Turned out they were the same but only 8 in a pack instead of 10 for the same price. (IMG:style_emoticons/default/dry.gif)
Then I had problems with the gpu heatsink, it wouldn't make full contact with the two dies no matter how many washers I used. I knew it wasn't the motherboard at fault because even if it was a little warped the x-clamp replacement would of sorted that. Then I checked the heatsink and sure enough it was very uneven. So I decided to lap it and after a lot of elbow greese got it completely level with mirror finish. (IMG:style_emoticons/default/biggrin.gif)
Not had any freezes since lapping it (touch wood).
Wait a minute. So all our heatsinks should look like this when cleaning off M$ goo? I had syome sort of silver padding on my heatsink. I only removed the gray gunk. Should I move this padding as well and have my heatsink shiny as this?
Post by: JAmerican on May 27, 2007, 11:14:00 PM
JAmerican
Post by: waytoodeep03 on May 27, 2007, 11:56:00 PM
Nevermind I got it to work (knocks on wood). I first cleaned off EVERYTHING on the GPU heatsink including the silver padding and made the heatsink smooth and spotless. Also cleaned off the GPU die(s). Then put on the AS5.
Also I put 2 washers on the memory side of the GPU and 3 washers on the other side closest to the CPU. Tightened up the nuts and PLugged it in and no more red lights for now. Played about 30 mins of test Drive. Im going to see how long this lasts and keep you all updated on this.
Post by: RBJTech on May 28, 2007, 12:37:00 AM
QUOTE(waytoodeep03 @ May 28 2007, 05:13 AM)
Wait a minute. So all our heatsinks should look like this when cleaning off M$ goo? I had syome sort of silver padding on my heatsink. I only removed the gray gunk. Should I move this padding as well and have my heatsink shiny as this?
My honest opinion is just remove the old gunk (especially early consoles with the foil) and clean so that it's all removed - no need to 'polish' at all.
Remember that the only contact area is the die - all the rest of it hangs in mid-air so pretty pointless cleaning that IMO ...
I'm actually in the process of making a tutorial on safe X-Clamp removal and cleaning (as I've been asked so many times..), so watch this space ..
Post by: JSR1954 on May 28, 2007, 04:59:00 AM
Post by: maur0 on May 28, 2007, 05:12:00 PM
I loose all nuts and didn't get the 0002 anymore, I guess they were too tight and they were making a short in the bottom of the board
Post by: keithk76 on May 28, 2007, 07:06:00 PM
QUOTE(maur0 @ May 28 2007, 07:48 PM)
FOR THOSE WITH ERROR 0002
I loose all nuts and didn't get the 0002 anymore, I guess they were too tight and they were making a short in the bottom of the board
mine was the same and i had error 0022 so that seems like a similar code.
Post by: uk_baller on May 28, 2007, 07:56:00 PM
Post by: Sn0rKy on May 28, 2007, 08:06:00 PM
just in time for FORZA 2
Post by: Bravoexo on May 28, 2007, 08:24:00 PM
Post by: grim_d on May 29, 2007, 03:23:00 AM
QUOTE(Bravoexo @ May 29 2007, 04:00 AM)
Hey, anyone know an alternative reason for 0110? Coz it says overheated mems in the FAQ, but I keep getting it on a cold booted x360 I'm trying to fix the past three weeks now.
0110 from cold boot would suggest to me that the heatsink is making insufficient contact with the CPU/GPU die.
have you done the x-clamp replacement previously?
Post by: waytoodeep03 on May 29, 2007, 06:40:00 AM
QUOTE(Bravoexo @ May 29 2007, 04:00 AM)
Hey, anyone know an alternative reason for 0110? Coz it says overheated mems in the FAQ, but I keep getting it on a cold booted x360 I'm trying to fix the past three weeks now.
Also did you clean off everything from the GPU? I know my GPU had some sort of ceramic padding on their and I had to scrape that off with a brillo pad. Then I applied some AS5 to the GPU die and along with the xclamp it works. Had it on 4 hours yesterday
Post by: loki232323 on May 29, 2007, 09:33:00 AM
Post by: JAmerican on May 29, 2007, 12:00:00 PM
QUOTE(loki232323 @ May 29 2007, 12:09 PM)
Anyone have a parts list that isn't for lowes??
I got the 12 piece washers at #8 (American Standard) from Home Depot pt # 32471. Three Washers = Notch on X-Clamp Holder.
MyXbox 360 kept giving me the 0103 error so I decided to just give up and exchange my system with my bro's then replaced it (IMG:style_emoticons/default/biggrin.gif). Now I got a working 360 and he's got a new one (IMG:style_emoticons/default/biggrin.gif)
This mod was not helpful at all and no one really helped me with my issues. I'll consider this again if my 360 goes crazy but I ain't fixing it if it ain't broken.
JAmerican
Post by: lando2k9 on May 29, 2007, 02:57:00 PM
QUOTE(Bravoexo @ May 29 2007, 04:00 AM)
Hey, anyone know an alternative reason for 0110? Coz it says overheated mems in the FAQ, but I keep getting it on a cold booted x360 I'm trying to fix the past three weeks now.
bravo, I was getting the exact same error on a 360 i bought for $35. turned of straight to 3ROL
I used both a combination of RBJtech's method...(Thanks it was very well done) and lawdog's ( also thanks to you)
After both of the I still had the 3ROL. So I read the error code again...which was the same by the way. but this time I just simply switched the video cable from HDTV to analog and what the hell do you know...the red lights went away.Turned of and back on...still good. While it was running I switched back to HDTV and it's still working.
Thanks 4 everyone's tuts. Hope this helps ur prob bravoexo.
Post by: guigz on May 29, 2007, 07:27:00 PM
First I would like to thank everyone that contributed to the knowledge base on 3rod fix. Especially RBJtech and Lawdawg.
Now, please excuse the long post.
My problem is as follow:
Case 1:
I had an xbox 360 since launch. It worked flawlessly (never ever froze) until last week when it suddenly would'nt boot at all. It was giving me the 3 rings and error 0020. Following a mix of Lawdawg and RBJtech's tutorials I fixed the xbox (without overheating, just the xclamps removing) and added a whole bunch of mods to cool it better. Now it works again flawlessly . Great!
Case 2:
I also have a friend who owns a 360 and his xbox went south almost at the same time. It started by freezing alot, rebooting, giving artifacts ... Next it only offered the dreaded ring and error code 0102. So I offered him to try to fix it for him.
I started by doing lawdawgs method (followed it to the letter). It fixed the problem but only for a short while. Then I tried RBJtech's method, no luck there. Then I tried the eraser mod, didn't work, still error 0102. I reread the post on this forum and I tried the shim, no luck.
Now, I tried every possible combination of washers and torque on the bolts (both underneath the xbox and between the heatsink and mobo). Finally, tweaking some more, I was able to find a sweetspot where the xbox would not go into 3ROD mode right after booting (Only the green light in the middle of the ring of light was flashing, nothing else was happening). One other weird thing that was happening; when I shutdown the 360, the fans would keep spinning for around 20 secs after I pressed on the power button.
Eventually after alot of on/off cycles I was able to get the 360 to boot, but then there was no video, only sound! And now it is giving me one red light and error 1022. I am really running out of options here, I want to reserve using the heat gun method as a last resort. Can someone please help me?
Also, it might be worth mentioning that my friend's 360 is only 3-4 months old and that it has been used very little (maybe 100hours) so I do not think that long term damage was incurred (no, he cannot return it for service, he voided the warranty).
Thank you,
Gus
Post by: demiurgo on May 30, 2007, 06:16:00 AM
I tried this mod yesterday.
I powered on the unit without replacing the fan vanes and dvd (poor air flow) but it started ok.
I left the unit working this way for 1 minute. After that the unit lock and I wasn't able to turn it on again without the 3ROL.
Any suggestions?
Thank you!
Post by: visualenkryption on May 30, 2007, 11:44:00 AM
Post by: tellis100 on May 30, 2007, 01:24:00 PM
This post has been edited by tellis100: May 30 2007, 08:25 PM
Post by: wheeler74 on May 30, 2007, 04:16:00 PM
thank you
This post has been edited by wheeler74: May 30 2007, 11:17 PM
Post by: nettwerk on May 30, 2007, 04:28:00 PM
QUOTE(wheeler74 @ May 30 2007, 10:52 PM)
thanks for the great info here folks. i did this xclamp replacement booted the xbox still had 3 red lights shut it off.tightened abit more still 3 redlights i then cycled power couple times not touching the nuts this time.. i know get 4 red lights. any ideas out therefor me..
thank you
4 reds are no av cable plugged in
Post by: wheeler74 on May 30, 2007, 05:29:00 PM
QUOTE(nettwerk @ May 30 2007, 05:04 PM)
4 reds are no av cable plugged in
oops somtimes i just dont think.. your so correct..i read that in a sticky few mins ago..
thank you kindly for not responding with .."did u try reading".. (IMG:style_emoticons/default/biggrin.gif)
This post has been edited by wheeler74: May 31 2007, 12:30 AM
Post by: BrooksyX on May 30, 2007, 10:23:00 PM
One problem though, the 360 fans start to spin up faster and faster. Also the heatsinks almost burn me if I touch them. Is there anything wrong, or do I just need some cooling mods. (It has been really hot lately so I am not 100% sure.)
Post by: vinny1684 on May 31, 2007, 01:11:00 AM
QUOTE(BrooksyX @ May 31 2007, 05:59 AM)
Just used this method and it fixed my launch 3 red light 360 that I just recently bought for cheap. It has been running great for the last few minutes.
One problem though, the 360 fans start to spin up faster and faster. Also the heatsinks almost burn me if I touch them. Is there anything wrong, or do I just need some cooling mods. (It has been really hot lately so I am not 100% sure.)
Same thing happened to me, xbox would turn on, goto dash, few mins later overheat.
Put the white plastic thing back on! i forgot to (IMG:style_emoticons/default/tongue.gif)
Post by: waytoodeep03 on May 31, 2007, 07:26:00 AM
QUOTE(BrooksyX @ May 31 2007, 05:59 AM)
Just used this method and it fixed my launch 3 red light 360 that I just recently bought for cheap. It has been running great for the last few minutes.
One problem though, the 360 fans start to spin up faster and faster. Also the heatsinks almost burn me if I touch them. Is there anything wrong, or do I just need some cooling mods. (It has been really hot lately so I am not 100% sure.)
Yea you should really do the fan shroud mod. It cools the xbox drastically
Post by: BrooksyX on May 31, 2007, 07:55:00 AM
QUOTE(waytoodeep03 @ May 31 2007, 06:26 AM)
Yea you should really do the fan shroud mod. It cools the xbox drastically
Ok, thanks. My 360 is running a lot cooler now but I think I still am going to do the fan shroud mod and some other cooling mods. It was really hot outside last night when I did the replacement (Like 85 F) so I think thats probably part of the reason my 360 was running so hot.
Anyways my 360 is still running great this morning, this is a really great fix.
Post by: tellis100 on June 01, 2007, 09:21:00 AM
Post by: RBJTech on June 01, 2007, 03:45:00 PM
Changes from Mk I :
1. No GPU heatsink hacking ... (IMG:style_emoticons/default/smile.gif)
2. No Drilling (IMG:style_emoticons/default/smile.gif)
3. Uses original legs and fixings on the Xbox (minus the X clamps obviously) ... (IMG:style_emoticons/default/smile.gif)
4. Uses a shim on the GPU to fix the 3ROL, to date THE most reliable way to do it. Pressure is applied directly on top of the die.
5. Board is held firm on top and below by washers and plastic fixing below...
5. Only parts needed are some easy to source 5mm washers and some 'Screw Cap' Fixings found in B&Q that are 'made' for the job ... they snap onto the legs a treat.. (IMG:style_emoticons/default/laugh.gif)
I haven't got time to do the tutorial tonight, but preview here ...
(IMG:http://rbjtech.bulldoghome.com/photos/BDRES/rbjtech_bulldoghome_com/xclamp/xbox%20077.JPG)
Watch this space ...
Post by: derrycityboy on June 01, 2007, 05:51:00 PM
QUOTE(RBJTech @ Jun 1 2007, 11:21 PM)
RBJTech X Clamp Removal Mk II is in testing and is looking very promising ...
Changes from Mk I :
1. No GPU heatsink hacking ... (IMG:style_emoticons/default/smile.gif)
2. No Drilling (IMG:style_emoticons/default/smile.gif)
3. Uses original legs and fixings on the Xbox (minus the X clamps obviously) ... (IMG:style_emoticons/default/smile.gif)
4. Uses a shim on the GPU to fix the 3ROL, to date THE most reliable way to do it. Pressure is applied directly on top of the die.
5. Board is held firm on top and below by washers and plastic fixing below...
5. Only parts needed are some easy to source 5mm washers and some 'Screw Cap' Fixings found in B&Q that are 'made' for the job ... they snap onto the legs a treat.. (IMG:style_emoticons/default/laugh.gif)
I haven't got time to do the tutorial tonight, but preview here ...
(IMG:http://rbjtech.bulldoghome.com/photos/BDRES/rbjtech_bulldoghome_com/xclamp/xbox%20077.JPG)
Watch this space ...
wow sounds good (IMG:style_emoticons/default/biggrin.gif) , although i was going to do the original method tomorrow and i have to ask...
Should i use the original method, or wait until this new one is ready ??? (i already have the nuts, spring washers etc..)
Many Thanks, your a genius RBJtech (IMG:style_emoticons/default/tongue.gif)
p.s. my error code is 0110.
This post has been edited by derrycityboy: Jun 2 2007, 12:52 AM
Post by: pacman89 on June 01, 2007, 08:59:00 PM
Post by: Face on June 02, 2007, 03:41:00 AM
QUOTE(pacman89 @ Jun 2 2007, 04:35 AM)
I did the X-Clamp Replacement, and my 360 was working for about 1 month. Now today, it gave me another 3RLOD. Maybe I have the screws on too tight or something? Any help would be appreciated. Thank you.
In theory you shouldn't get the red lights again because the heatsinks are compressing the chips down on to the motherboard. However RBJtech did say that the lock nuts can work loose over time, due to heat cycling.
I would try checking the tightness of the nuts.
I myself am fixing two 360's today. Will post my results later...wish me luck.
Post by: loki232323 on June 02, 2007, 10:28:00 AM
Any ideas?
Post by: kidman64 on June 02, 2007, 12:20:00 PM
Post by: RandomLee on June 02, 2007, 02:07:00 PM
QUOTE(RBJTech @ Jun 1 2007, 11:21 PM)
RBJTech X Clamp Removal Mk II is in testing and is looking very promising ...
Changes from Mk I :
1. No GPU heatsink hacking ... (IMG:style_emoticons/default/smile.gif)
2. No Drilling (IMG:style_emoticons/default/smile.gif)
3. Uses original legs and fixings on the Xbox (minus the X clamps obviously) ... (IMG:style_emoticons/default/smile.gif)
4. Uses a shim on the GPU to fix the 3ROL, to date THE most reliable way to do it. Pressure is applied directly on top of the die.
5. Board is held firm on top and below by washers and plastic fixing below...
5. Only parts needed are some easy to source 5mm washers and some 'Screw Cap' Fixings found in B&Q that are 'made' for the job ... they snap onto the legs a treat.. (IMG:style_emoticons/default/laugh.gif)
I haven't got time to do the tutorial tonight, but preview here ...
(IMG:http://rbjtech.bulldoghome.com/photos/BDRES/rbjtech_bulldoghome_com/xclamp/xbox%20077.JPG)
Watch this space ...
Sounds great!
If only I'd checked here today before I went to B&Q! I've just got back from buying all the parts for your MK1 fix, although I had to get brass wahsers as they were out of 4mm zinc, only had 3.5mm and 5mm. Would the brass ones be ok to use?
I might just await your new tutorial and then take the stuff I bought today back for a refund. Before I do though, is your new method for both the CPU and GPU, or only the GPU?
One more question, do you have any RAM heatsink recommendations? I'm not sure where to get ones that would be suitable.
Cheers,
Lee
This post has been edited by RandomLee: Jun 2 2007, 09:08 PM
Post by: loki232323 on June 02, 2007, 01:47:00 PM
What about using the thin fins from a heatsink?
So far the best I can get is the green lights start to circle and then it goes to red. I guess that means I am on the right track since its better than red right away
Post by: psp-pirate on June 02, 2007, 02:19:00 PM
my sons 360 would 3 red ring has soon as you powered on the system.
0102 the code was giving me.
so followed RJBtechs tut,but didnt have the following in our b n q
Machine Screws (4mm x 20mm) + Nuts (3mm thick) AVF-069314
so got the following instead
Machine Screws (4mm x 20mm) + Nuts (0.7mm thick) AVF-069840
did everything what the tut said,the 2 washer jobby under the mobo,
booted up with no dvd drive or fans let it heat up for a minute and half.
put everything back together booted 1st time all green like goodnes
sons been playing solid for 4 1/2 hrs,no freezing or whatsoever.
so once again thanx RBJtech for your tut... (IMG:style_emoticons/default/smile.gif)
Post by: derrycityboy on June 02, 2007, 04:26:00 PM
it was my fault, i didn't do it properly, but thats because it was so hard (IMG:style_emoticons/default/sad.gif) For example cutting the GPU heatsink was a nightmare..
When i turn it on it just overheats instantly, after about 1 second the fans go full speed and it shows 2 red lights (IMG:style_emoticons/default/sad.gif)
I will try tightening the screws but i cant see it working to be honest, i think i ballsed up the whole thing lol
My advice on this, is don't try this unless you really really know exactly what your doing and have the proper tools.
just one question, even if i did pay £85 to send it back to MS... Would they accept my 360 with the x clamp replacement (gone wrong!) ?
This post has been edited by derrycityboy: Jun 2 2007, 11:28 PM
Post by: esemce on June 03, 2007, 08:50:00 AM
http://www.diy.com/diy/jsp/bq/nav/nav.jsp?...oppinglist=true
Post by: RandomLee on June 03, 2007, 10:01:00 AM
QUOTE(esemce @ Jun 3 2007, 04:26 PM)
Can someone confirm this parts list please for B & Q UK ?
http://www.diy.com/diy/jsp/bq/nav/nav.jsp?...oppinglist=true
Site says "There is nothing in your shopping list"
These are the parts you need, albeit with Zinc 4mm Flat Washers (ref. AVF-064951). My local B&Q were out of stock so I had to get Brass ones pictured.
(IMG:http://img70.imageshack.us/img70/4923/partsjk6.th.jpg)
You should maybe wait until the new tutorial though as you may need less parts.
Post by: grav1ty_718 on June 03, 2007, 12:07:00 PM
Cant wait for the results (IMG:style_emoticons/default/pop.gif)
Post by: geocab on June 03, 2007, 01:52:00 PM
Post by: silvi4000 on June 04, 2007, 12:06:00 AM
Used these parts from home depot:
1 #8 - 32 x 3/4 Flat head slotted machine screw 8 pcs part # 28431 (came with 8 nuts) GREEN BAG
2 #8 - 32 Nylon Lock NUT 4 pcs part # 19241 ORANGE BAG
4 8S washers 12 pcs part #19991 ORANGE BAG
1 drill 11/64" 4.37mm
1 8-in-1 torx screwdriver set. Used T8 for heatsinks
1 termal paste (compusa)
spent around $25 plus a couple hours of my Sunday
*couldn't find small spring washers, I'll add them later
TIPS-
If you are having trouble aligning the motherboard holes with the screws, try turning the screws clockwise. This will make the screw change angle so it gets closer to the hole.
For the memory modules under the GPU heatsink, cut a small section about 4mm wide from the foamy pads from the memory under the board. This foam is very soft and a small section will easily cover the whole memory module once pressed by the heatsink.
Use 3 washers for the CPU but only 2 for the GPU
Before mod. I tried cooling it but it would 3ROL anyway
(IMG:http://img237.imageshack.us/img237/8914/pict1963oi2.th.jpg)
Added fan header
(IMG:http://img107.imageshack.us/img107/1233/pict1970lb8.th.jpg)
Moded
(IMG:http://img107.imageshack.us/img107/8048/pict1967hd7.th.jpg)
Running Gears of War:
(IMG:http://img107.imageshack.us/img107/3512/pict1974jr6.th.jpg)
Hope this helps
Post by: grav1ty_718 on June 04, 2007, 12:45:00 AM
QUOTE(silvi4000 @ Jun 4 2007, 02:06 AM)
Reporting success. Its been running for 1 hour without issues. Before mod it would go straight to 3ROL or will crash with screen corruption after a few seconds.
Used these parts from home depot:
1 #8 - 32 x 3/4 Flat head slotted machine screw 8 pcs part # 28431 (came with 8 nuts) GREEN BAG
2 #8 - 32 Nylon Lock NUT 4 pcs part # 19241 ORANGE BAG
4 8S washers 12 pcs part #19991 ORANGE BAG
1 drill 11/64" 4.37mm
1 8-in-1 torx screwdriver set. Used T8 for heatsinks
1 termal paste (compusa)
spent around $25 plus a couple hours of my Sunday
*couldn't find small spring washers, I'll add them later
TIPS-
If you are having trouble aligning the motherboard holes with the screws, try turning the screws clockwise. This will make the screw change angle so it gets closer to the hole.
For the memory modules under the GPU heatsink, cut a small section about 4mm wide from the foamy pads from the memory under the board. This foam is very soft and a small section will easily cover the whole memory module once pressed by the heatsink.
Use 3 washers for the CPU but only 2 for the GPU
For starters theres a thread at the top of this section for reporting your results - LINK
As for what you did to your 360, im speechless... I dont even know where to begin (IMG:style_emoticons/default/unsure.gif)
You definately get the award for most fans in a 360 ever
This post has been edited by grav1ty_718: Jun 4 2007, 07:46 AM
Post by: avatar1976 on June 04, 2007, 07:30:00 AM
The parts list off their quotation:
CODE
QTY DESC PRICE PER TOTAL
8 M4x20mm G316 Pan Metal Threads .85c ea $6.80
8 M4x3mm G316 Hex Nut .14c ea $1.12
8 M4 Nyloc Nut G316 .29c ea $2.32
50 M4 G316 G316 Washers .10c ea $5.00
8 M4 G316 Spring Washers .05c ea $0.40
Total Inc GST $17.20
8 M4x20mm G316 Pan Metal Threads .85c ea $6.80
8 M4x3mm G316 Hex Nut .14c ea $1.12
8 M4 Nyloc Nut G316 .29c ea $2.32
50 M4 G316 G316 Washers .10c ea $5.00
8 M4 G316 Spring Washers .05c ea $0.40
Total Inc GST $17.20
$32.20AUD is a pretty good price considering M$ wanted to charge me $200AUD.
Thanks RBJtech you are teh R0X0RZ my S0X0RZ (IMG:style_emoticons/default/tongue.gif)
This post has been edited by avatar1976: Jun 4 2007, 02:49 PM
Post by: Face on June 04, 2007, 09:37:00 AM
I have fixed two 360's that had died with 3ROL's. The first one worked first time after I had impleamented the mod. Very quick and easy.
The second one took a bit longer however. I was more focusing on the gpu heatsink when doing the mod, but found that it was the cpu heatsink that was causing the 3OL's in this box. Tightening the cpu heatsink did the trick and no problems since.
Very pleased with it all, giving them both a good blast with Halo 3 to check their 'fully' working of course (IMG:style_emoticons/default/wink.gif)
Just want to say many thanks to RBJtech for your hard work. You have made me and many other gamers very happy.
Post by: hapa17 on June 04, 2007, 09:56:00 PM
QUOTE(RBJTech @ Jun 1 2007, 03:21 PM)
RBJTech X Clamp Removal Mk II is in testing and is looking very promising ...
Changes from Mk I :
1. No GPU heatsink hacking ... (IMG:style_emoticons/default/smile.gif)
2. No Drilling (IMG:style_emoticons/default/smile.gif)
3. Uses original legs and fixings on the Xbox (minus the X clamps obviously) ... (IMG:style_emoticons/default/smile.gif)
4. Uses a shim on the GPU to fix the 3ROL, to date THE most reliable way to do it. Pressure is applied directly on top of the die.
5. Board is held firm on top and below by washers and plastic fixing below...
5. Only parts needed are some easy to source 5mm washers and some 'Screw Cap' Fixings found in B&Q that are 'made' for the job ... they snap onto the legs a treat.. (IMG:style_emoticons/default/laugh.gif)
I haven't got time to do the tutorial tonight, but preview here ...
(IMG:http://rbjtech.bulldoghome.com/photos/BDRES/rbjtech_bulldoghome_com/xclamp/xbox%20077.JPG)
Watch this space ...
i hate to be pushy but uh.... how's this coming along? i'm in xbox limbo between ponying up $140 to have it fixed, trying one of these x-clamp fixes (though i'm not super-confident doing it), swapping my busted xbox with a new one purchased from costco and returning it, or flat-out buying a brand-new one.
and i'm miserable w/o my 360 fix. (IMG:style_emoticons/default/blink.gif)
hep me
Post by: darknut on June 04, 2007, 10:46:00 PM
my xbox has came back to life.....for how long is the question. goin on 1hour strong (IMG:style_emoticons/default/smile.gif)
(my warranty was voided btw, and total cost i spent was 11 bucks)
This post has been edited by darknut: Jun 5 2007, 05:47 AM
Post by: 3reemsoflight on June 05, 2007, 12:40:00 PM
Post by: derrycityboy on June 05, 2007, 05:11:00 PM
Did X Clamp Replacement - Basically screwed my whole 360 up...
Screwed with it a bit more and battered it basically (IMG:style_emoticons/default/tongue.gif)
Then i just tightened the nuts, overheated it and its back to life !!
Hmm, i only used one washer... is that right?
e.g. before i put the cpu heatsink on, i put 1 washer for each leg and then a spring washer...
Then with the heatsink on i put on the nut or whatever you call it!
To be honest i cant see it alive for more than a month, but lets just see (IMG:style_emoticons/default/biggrin.gif)
Post by: esemce on June 05, 2007, 05:40:00 PM
Post by: slamdunkfunkk on June 06, 2007, 12:46:00 AM
QUOTE(3reemsoflight @ Jun 5 2007, 07:40 PM)
C'mon let's see the updated tutorial. I even went out to B&Q to buy those plastic screw cap covers you're using!!
Do you have the B&Q part number? Are they hard plastic or rubbery?
Slam
Post by: Ace` on June 06, 2007, 06:13:00 AM
Has anyone else noticed the raised part of the case between the fans lifts the motherboard higher than the rest of the case and makes it warp?. I'm not sure if all cases do this as I haven't noticed it before, the system I noticed it in is an early core.
Post by: RBJTech on June 06, 2007, 06:25:00 AM
Parts List :-
8 x 5mm Washers (any thickness around 0.5->1mm will do fine)
8 x 'Screw Cap Covers' from B&Q... Come in a packet of 12.
2 x Shims (*)
Getting hold of the shims is the difficult bit - all we need is a 1mm thick piece of metal. I used sheet metal but I'm toying with the idea of just using a copper coin - say a 1 pence piece (uk) and file it flat on both sides. Shouldn't be too difficult to rub it against a flat file to take off the faces.
1. Put one washer over the original legs on the heatsinks.
2. Cover the GPU die and top of the shim with AS5.
3. Put the heatsink back on.
4. Cut off the 'cap' bit of the 'ScrewCap Covers' - leaving just the bit that goes under the screw.
5. Hold the heatsink in place with a block of wood or something and press 4 of the above plastic pieces over the legs of the heatsink. Ensure the plastic base is facing down onto the board.
6. You will find that they 'snap' onto the indents on the legs very nicely indeed.
7. The 3rd and 4th one will be the most tricky as the shim will be under pressure now - so you'll need to press the board back a bit to get to the plastic bit on.
8. Do the same for the CPU...
9. The CPU/GPU feet that are closest together need a bit of care to get them to sit nicely.
10. Put the board back into the case (don't hold by the heatsinks...) - make sure it's in properly. All the interfaces should line up with the case holes - maybe 1-2mm out but nothing more.
11. Screw the board back into place using the interface holding screws.
12. Screw the heatsink legs back into place using the stock screws.
Power up - job done ...
You will note that the board is now sandwiched and held firm between (above the board) the heatsink, molded nut, extra washer and below the board, the hard plastic spacer. The pressure is created using the shim to press down on the die and because the board is held tight at the corners of the chips, it's not going anywhere ...
I'm still testing this at the moment and using it as my primary xbox but so far so good - zero issues. This is the 4th xbox 360 in my house, 1 has a MkI fix (still zero problems after months of use) and the other 2 have the original X clamps - 1 with lots of mods (the original blat I did) and the other with just the divider and rear cutouts.
If people want to do the fix now - then I would recommend the MkI, because this has been tried and tested BUT you cannot go back to the MkII at a later date (then again why would you want to if the fix works fine..)
I'll update the tut as soon as I can chaps once I find some time and give it some hours under it's belt as well ..
Cheers,
Richard.
QUOTE(Ace` @ Jun 6 2007, 01:13 PM)
(IMG:http://www.wiiupgrade.co.uk/360case.jpg)
Has anyone else noticed the raised part of the case between the fans lifts the motherboard higher than the rest of the case and makes it warp?. I'm not sure if all cases do this as I haven't noticed it before, the system I noticed it in is an early core.
That's just a 'standoff' - that's the height we need to get to on the CPU/GPU corners - it just so happens that the plastic part I found is exactly the height we need ... (IMG:style_emoticons/default/smile.gif)
QUOTE(slamdunkfunkk @ Jun 6 2007, 07:46 AM)
Do you have the B&Q part number? Are they hard plastic or rubbery?
Slam
Doesn't have a part number - they are called 'Screw Cap Covers' in the B&Q hardware section near the screws ... (IMG:style_emoticons/default/laugh.gif)
They are hard plastic - available in white, black or brown (colour does not obviously matter but I'm bound to be asked ... (IMG:style_emoticons/default/tongue.gif) )
Post by: grim_d on June 06, 2007, 06:48:00 AM
QUOTE(RBJTech @ Jun 6 2007, 01:25 PM)
I'm toying with the idea of just using a copper coin - say a 1 pence piece (uk) and file it flat on both sides. Shouldn't be too difficult to rub it against a flat file to take off the faces.
you do realise that's treason...
(IMG:style_emoticons/default/biggrin.gif)
This post has been edited by grim_d: Jun 6 2007, 09:50 PM
Post by: waytoodeep03 on June 06, 2007, 08:08:00 AM
Im starting to get worried that with all the cooling mods (ramsinks,fan shroud, talismoons, cutting the back of the 360, AS5), that it still isnt enough to keep this box cool. If I get the 3 lights once more Im done with M$
Post by: slamdunkfunkk on June 06, 2007, 08:34:00 AM
how much are the screw covers? (sorry (IMG:style_emoticons/default/tongue.gif))
You should be able to buy shims from magic supply places too. in fact: http://www.nothingupmysleeve.co.uk/marketp...;products_id=54 - is that too thin?
Cheers
Slam
Post by: andyonroad on June 06, 2007, 10:28:00 AM
Understand all the rest but where do you place the shims please.
Regards
Andy
Post by: hapa17 on June 06, 2007, 11:21:00 AM
QUOTE(RBJTech @ Jun 6 2007, 05:25 AM)
8 x 'Screw Cap Covers' from B&Q... Come in a packet of 12.
4. Cut off the 'cap' bit of the 'ScrewCap Covers' - leaving just the bit that goes under the screw.
looking for the american version of these screw cap covers, would they look like this before cutting the cap off?
(IMG:http://www.ark-plas.com/images/subclass/dsc-4.jpg)
thanks
Post by: esemce on June 06, 2007, 11:27:00 AM
hapa17, yes I think so I've just looked at B&q's site they look the same.
Post by: hapa17 on June 06, 2007, 02:24:00 PM
QUOTE(RBJTech @ Jun 6 2007, 05:25 AM)
1. Put one washer over the original legs on the heatsinks.
anyone know where to put the washers? between the mobo and the screw caps? between the mobo and the heatsink? are these the metal ones? are they supposed to be flat?
also...
QUOTE(RBJTech @ Jun 6 2007, 05:25 AM)
2 x Shims (*)
Getting hold of the shims is the difficult bit - all we need is a 1mm thick piece of metal. I used sheet metal but I'm toying with the idea of just using a copper coin - say a 1 pence piece (uk) and file it flat on both sides. Shouldn't be too difficult to rub it against a flat file to take off the faces.
i'm kinda fuzzy on the shim concept. are they ever sold as "shims" or are they something you have to fashion yourself out of spare parts? if you cut it out of sheet metal, what kind of tool do you use to cut it out? if i were to try using some american coinage instead, i'm looking for something 1mm thick and how much diameter do you think i need? how crucial is it to file it flat? finally, is the force of the pinned down heatsink legs and the AS5 what keeps these shims from coming loose?
i'm leaning toward this MKII fix since it sounds reversible.
thanks!
Post by: RBJTech on June 06, 2007, 03:13:00 PM
QUOTE(grim_d @ Jun 6 2007, 01:48 PM)
very true .. I won't tell if you won't ... (IMG:style_emoticons/default/wink.gif)
Probably have a shortage of 1p's now - bit like a shortage of 4mm washers in B&Q (IMG:style_emoticons/default/laugh.gif)
ok some more pics ...
5mm washers go on the heatsink legs :
(IMG:http://rbjtech.bulldoghome.com/photos/BDRES/rbjtech_bulldoghome_com/xclamp/mkII1.JPG)
These are the shims covered in AS5 (as you can see, I slap it on, it will smooth over when you put on the heatsink...)
(IMG:http://rbjtech.bulldoghome.com/photos/BDRES/rbjtech_bulldoghome_com/xclamp/mkII2.JPG)
So extra washer can be seen in this pic - note it takes up the small gap that there was before using the original X clamps ...
(IMG:http://rbjtech.bulldoghome.com/photos/BDRES/rbjtech_bulldoghome_com/xclamp/mkII3.JPG)
Pic of all 4 'screw cap covers'
(IMG:http://rbjtech.bulldoghome.com/photos/BDRES/rbjtech_bulldoghome_com/xclamp/mkII4.JPG)
I hope this helps until I sort out the proper tutorial ... (IMG:style_emoticons/default/smile.gif)
QUOTE(hapa17 @ Jun 6 2007, 06:21 PM)
looking for the american version of these screw cap covers, would they look like this before cutting the cap off?
(IMG:http://www.ark-plas.com/images/subclass/dsc-4.jpg)
thanks
perfect !
Post by: MarutiDriver on June 06, 2007, 03:20:00 PM
Post by: andyonroad on June 06, 2007, 03:21:00 PM
I've been a PC engineer for 15 years. As most of you all know the tops of processor dies are highly polished and we spend lots of time making sure heatsinks are completely clean with no residue so the the heat sink compound (Arctic Silver) we apply can just fill in those few micron pits and get a perfect thermal bond to the die from the heatsink.
RBJtech has done a lot of research into the Xclamp problem and I have great respect for his abilities. I have repaired over 40 consoles using his replacement method along with a properly profiled Thermal reflow of the GPU and CPU on a IR BGA rework station and none have come back in 4 months. I'm really not sure of what thermal consequences of the shims will be to the die temperatures.
I will make ups some copper shims from various grade sheets and put a thermal probe on the die against the usual heatsink / Die bond if I get chance and see if it makes any difference. If it does work it will be a much easier fix for most people.
Regards
Andy
Post by: RBJTech on June 06, 2007, 03:38:00 PM
QUOTE(andyonroad @ Jun 6 2007, 10:21 PM)
Hi all,
I've been a PC engineer for 15 years. As most of you all know the tops of processor dies are highly polished and we spend lots of time making sure heatsinks are completely clean with no residue so the the heat sink compound (Arctic Silver) we apply can just fill in those few micron pits and get a perfect thermal bond to the die from the heatsink.
RBJtech has done a lot of research into the Xclamp problem and I have great respect for his abilities. I have repaired over 40 consoles using his replacement method along with a properly profiled Thermal reflow of the GPU and CPU on a IR BGA rework station and none have come back in 4 months. I'm really not sure of what thermal consequences of the shims will be to the die temperatures.
I will make ups some copper shims from various grade sheets and put a thermal probe on the die against the usual heatsink / Die bond if I get chance and see if it makes any difference. If it does work it will be a much easier fix for most people.
Regards
Andy
If you could that would be great. In using a copper shim, we would also have the bonus of using the copper attributes to spread the heat quicker to the Ali GPU heatsink.
I've been running a shim on my 2nd MkI X-clamp for a good few months now with zero issues with heat .. I think the thermal resistance of AS5 is so low that having to go through two layers is not a problem ?
Post by: andyonroad on June 06, 2007, 03:48:00 PM
one of the reasons rbjtechs original method is so good is it applies even pressure on the die from above rather than flexing the board like the crappy xclamps
Your probably 100% right rbjtech as we only have a ali heatsink on the GPU anyway and its nowhere near as good as the CPU heatsink in terms of thermal dissipation thats one of the reason they had to give it such a large surface area. By the way I have been doing your shroud mod using Plasticard and it work brilliantly. At least a 16 degree drop on the GPU and also even cooling over the whole GPU BGA connections rather than just the back.
Post by: hapa17 on June 06, 2007, 04:01:00 PM
in regard to the divider outlined in the Visio file, all i need to do is print that thing out at 50% scale, cut the shape out of some soft cardboard (i.e., a cereal box), and tape it down to the inner air shroud flush against that inner wall area? i'm just trying to visualize it off the tutorial photos (i haven't opened my xbox up yet, and am currently at work eyeing this project once i get off).
i'm REAL nervous about popping open the console and doing this and the MKII mod, but i'm already out of warranty, so why not, right? RIGHT?!?! hehe
Post by: andyonroad on June 06, 2007, 04:07:00 PM
Post by: hapa17 on June 06, 2007, 05:13:00 PM
i looked up shims online and saw this one home-made shim people were making for use with a lock. they fasioned it out of a beer can. would that work for our purposes?
or can i literally throw a U.S. penny on top of each die?
thanks again for your help!
This post has been edited by hapa17: Jun 7 2007, 12:14 AM
Post by: geocab on June 06, 2007, 05:41:00 PM
Could you please inlcude LARGE pictures in your next tutorial? I'm having trouble seeing some of the picutres you just posted in this thread. The more detail the better as I am definitely a novice to this stuff. I really appreciate the hard work you and everyone else is doing here.
Quick OT question regarding the shroud mod, I don't have Visio, is there a way to print the file at 50% scale just using the Visio reader? I didn't see the option, but I've not seen lots of things right in front of me! (IMG:style_emoticons/default/blink.gif) (IMG:style_emoticons/default/ohmy.gif)
Thanks again,
Geo
Post by: hGTrekker on June 06, 2007, 11:10:00 PM
Post by: heroau on June 07, 2007, 02:20:00 AM
I'm about to crack open my perfectly functioning (but very out of warranty) 360 to do this as a preventative measure.
If it aint broke dont fix it? I beg to differ (IMG:style_emoticons/default/jester.gif)
I'm still not 100 percent sure which mod I want to do yet. I like the robustness of RBJTech's original method, but I dislike the drilling. I would prefer to be able to return my 360 to it's original condition in the event of M$ actually recalling all consoles for repair (LOL YEAH RIGHT!!!#)...slim chance I know but just something I prefer.
I like the sound of the MKII mod, however a couple of questions.
First off...Is it 100 percent necessary to use the shim especially with a working console? I just plain dont like that element. If it is 100% necessary I'm fine with that I'd like an explanation.
Second...I dont quite understand the following from the parts list:
QUOTE
8 x 5mm Washers (any thickness around 0.5->1mm will do fine)
Is there a reason why the variation in thickness doesnt matter? I thought they had to be precisely 0.71mm in the original mod. Why is the 0.5mm variation in the washer thickness not significant in this version of the mod?
I must say I was a bit surprised by the sheer amount of useful info on this forum. Very useful and thanks for all your research.
Cheers.
Post by: namtap on June 07, 2007, 05:11:00 AM
Good luck with finding the hardware, though. I had to go to Lowe's, a local hardware store, and two Home Depots before I had everything I needed. As a result, I got some dissimilar hardware, which probably isn't the best thing to do. I wish there were an online store that would just sell everything I need.
Post by: heroau on June 07, 2007, 05:48:00 AM
Also...what about the washer thickness variation? MKI states washer thickness strictly at .71mm whereas MKII says .5 - 1mm. I dont understand why the allowance for variation here.
Thanks.
Post by: RBJTech on June 07, 2007, 05:31:00 AM
QUOTE(heroau @ Jun 7 2007, 12:48 PM)
Are you talking about the MKII mod without using a shim? As this is what I am interested in doing.
Also...what about the washer thickness variation? MKI states washer thickness strictly at .71mm whereas MKII says .5 - 1mm. I dont understand why the allowance for variation here.
Thanks.
The washers I bought were 0.71mm so that's what I used - just use your head to get the correct thickness for the MkI - ie 3 x 0.7mm = 2.1mm so if your washers are 1mm thick, then just use 2 etc ..
For the MkII, ON A WORKING CONSOLE, then we still need to apply pressure on the die somehow. If you bolted it all together without the shim, then I would imagine that the die would 'just' sit on the heatsink - but have little to no pressure on it. Which would overheat IMO. Remember the h/s is FIXED to the case, so you need to raise the board a fraction to create the pressure (on the corners remember, don't want to press in the middle like the X clamp..) - so perhaps a washer on the feet AFTER going through the board (ie before you put on the plastic bit). This will raise the board slighly - enough to keep pressure on the die (which has no choice as it's height restricted by the fixed heatsink) ..
We only have 1mm or so to play with remember, because then the nut on the heatsink legs brace the board and stop it moving any further - however, this may be enough to fix the ROL tbh depending on the severity of the break..
Long answer - but in short, no the shim is not 100% necessary but will need some experimentation ...
Post by: andyonroad on June 07, 2007, 10:46:00 AM
Surely we dont want to push the board up from below again as this is what the xclamps do.
The shim is the way to go then we raise the die to the heatsink without flexing the board whilst keeping the motherboard as rigid as possible.
Or am i missing something?
Regards
Andy
Post by: andyonroad on June 07, 2007, 11:25:00 AM
Thought I was'nt getting that right when i read it the first time. That'll teach me to post without stopping to think. LOL
Washers on all four corners will create even pressure on the die which is what we want.
Should be good to go without the shim if we can get the spacing right.
Post by: hapa17 on June 07, 2007, 11:08:00 AM
QUOTE(RBJTech @ Jun 6 2007, 02:13 PM)
QUOTE(hapa17 @ Jun 6 2007, 10:21 AM)
looking for the american version of these screw cap covers, would they look like this before cutting the cap off?

thanks
perfect !
i would like to interject some hopefully useful information to the american MKII repairers. for the screw cap covers in question, get Lowes part number 137928 for this job. i got the #8 & #10 sized ones and the hole was too big; they wouldn't pop on the h/s legs. PN 137928 (#4 & #6 sized screw cap covers) take a little leverage to pop on the h/s legs, but once you get them on, they seem pretty solid.
unfortunately, i found this out last night, so had to wait to get the proper cap covers this morning. once bought, i only had time to pop the covers on before i had to go to work. i plan to go home for lunch later and attempt to complete the job. i used some kind of metal roofing material from Lowes to cut my shims from. all i need to do now is cut out the proper cardboard pieces for the air shroud mod, then reassemble, and we'll see how MKII does me.
one potential problem i can foresee at this point is trying to remove the screw caps off the h/s legs if i need to adjust anything (number of washers or whatever). it took quite some pressure to get these things on. i'm not quite sure how i'd go about removing them. any idea RBJtech? i mean... hopefully i'll never have to go back in again, but who knows?
Post by: hapa17 on June 07, 2007, 02:38:00 PM
now, is this something that if i turn it back on later should be fine, or is it possible i jacked something up with the fix? i also heard a little flick type noise every few seconds when it was on. might this have something to do with the shroud mod possibly?
thanks in advance for your help!
Post by: MarutiDriver on June 07, 2007, 02:52:00 PM
What kind of material did you use for the shim anyway?
Post by: hapa17 on June 07, 2007, 02:31:00 PM
QUOTE(MarutiDriver @ Jun 7 2007, 01:52 PM)
What kind of material did you use for the shim anyway?
i asked the guy at Lowes for a little sheetmetal. he directed me to the roofing area where they had little, i dunno, 6x6-inch sheets of some sort of metal. hell if i know what kinda metal it is. i was able to cut it with the metal cutters i bought.
QUOTE(MarutiDriver @ Jun 7 2007, 01:52 PM)
Two red lights mean your console is overheating. Let it cool down, then make sure the heatsinks are making good contact with the procesor dies.
how do i make sure they're making good contact? i can't really see them once the heatsinks are on.
now that i'm back at work, i can't work on it right now... but if i get the 2 red lights again when i get home in a few hours, should i try adding another washer to the setup (again, i'm doing MKII here)?
Post by: MarutiDriver on June 07, 2007, 03:42:00 PM
Post by: hapa17 on June 07, 2007, 03:13:00 PM
QUOTE(MarutiDriver @ Jun 7 2007, 02:42 PM)
In my country the only sheet metal I've seen for roofing is either zinc or plain tin, dunno if that will transfer heat efectively, so maybe you could look into that after you check for contact. Try using different washer sizes and tightening/loosening the bolts till it works.
well, the only thing i can play with here are the washers. there are no bolts for me to mess with since i'm doing MKII, which means the plastic screw cap covers are holding this whole $hit sandwich together. hopefully i can pull them off with needle nose pliers and they'll firmly re-snap into place once i've added washers.
couple questions: if i need to add washers (i currently have 1 per leg for both the CPU and GPU), do i do so uniformly? or should i just do the CPU or just the GPU? and i'm sorry if this is printed somewhere else, but what do i have to reassemble minimum to test my setup? obviously, i don't want to have to take the entire thing apart everytime i try something new. do i need to reassemble it as far as the screws? can it just be done with the power button back in place?
thanks.
Post by: MarutiDriver on June 07, 2007, 04:04:00 PM
Post by: theoyah on June 07, 2007, 06:28:00 PM
I live in canada, i cant find thermal paste anywhere. I tried 6 hardware stores, if anyone who lives in Canada found where to buy it tell me cause im just waisting my time
Post by: dR03 on June 07, 2007, 08:07:00 PM
Bosch Titanium Drill Bit for 360 case and heatsinks (respectively):
Item number-177067 5/32 (3.97mm) @ $3.96 each
Item number-177069 3/16 (4.76mm) @ $4.38 each
MACHINE SCREWS
Hillman Brand
Item number-138556 M4-.70 x 20 @ ¢0.68 each bag (2 per)
WAVE LOCK WASHERS
Hillman Brand
Item number-138220 4mm @ ¢0.56 each bag (10 per)
FLAT WASHERS
Hillman Brand
Item number-138205 4mm @ ¢0.56 each bag (10 per)
LOCK NUTS
Hillman Brand
Item number-138238 M4-.70 Insert Lock Nuts @ ¢0.68 each bag (4 per)
REGULAR NUTS (They are not packaged with the machine screws)
Hillman Brand
Item number-138233 M4-.70 Hex Nuts @ ¢0.80 each bag (10 per)
Everything except for the drill bits are found on the Hardware aisle and are located in drawer bins separated by size.
As I said before, not trying to be redundant but hopefully this will help those of you in the U.S. that are just jumping into this and need a quick part number refresher.
By the way the Arctic Silver 5 can be found in the U.S. at Radio Shack. They keep it in stock and it runs $9.99 per package. The item number for that is: 2801099
While I'm posting, has anyone tried a different material of some sort for the heatsink shroud? I would love to do it but am wary of putting something that flammable next to something that gets that hot.
Thanks and Happy Modding!
Post by: theoyah on June 07, 2007, 08:53:00 PM
Post by: dR03 on June 07, 2007, 09:14:00 PM
QUOTE(theoyah @ Jun 7 2007, 10:29 PM)
man i gotta admit Canada sucks with computer stuff. Radio shack had to close down now i dont possibly know where to get thermal paste.
You can order it online i believe.
Post by: Astro5 on June 08, 2007, 01:52:00 AM
Post by: RBJTech on June 08, 2007, 05:32:00 AM
QUOTE(andyonroad @ Jun 7 2007, 05:46 PM)
Hi,
Surely we dont want to push the board up from below again as this is what the xclamps do.
The shim is the way to go then we raise the die to the heatsink without flexing the board whilst keeping the motherboard as rigid as possible.
Or am i missing something?
Regards
Andy
The difference here is that we are raising and fixing the board using the corners - with the X-clamp the corners were not fixed and it was only raised directly under the die, thus causing BGA seperation when the board was allowed to flex due to the heatsink/chip heat, whilst the die area was held tight.
Both shim or the above method push down on the die - they just do it from different places.
Post by: scar tissu3 on June 08, 2007, 07:04:00 PM
Post by: tr4il on June 08, 2007, 07:12:00 PM
QUOTE(theoyah @ Jun 8 2007, 04:29 AM)
man i gotta admit Canada sucks with computer stuff. Radio shack had to close down now i dont possibly know where to get thermal paste.
newegg.com
Post by: heroau on June 09, 2007, 03:57:00 AM
I havent been able to find any definitive information.
Post by: ExtraSmall on June 09, 2007, 03:58:00 AM
QUOTE
I did this tutorial word for word, it at first fixed the 3 RL and after about 5 mins in the dash it overheated (fans and all hooked up) so i let it sit for a couple hours and now it instantly goes to 2 RL (overheating) after startup every time. any ideas of why?
Take off your heatsinks and see if they are making contact with the gpu/cpu dies. You can tell from the thermal paste on the heatsinks. One or both of the heatsinks is probably not screwed down tight enough.
Post by: geocab on June 09, 2007, 12:47:00 PM
I really don't want to buy another Xbox since my most of my Arcade games are registered to this console. Not to mention that who knows if the new one will last.
Post by: geocab on June 09, 2007, 01:30:00 PM
QUOTE(geocab @ Jun 9 2007, 03:23 PM)
Well, I made an attempt using MK II, but I still have the 3RLOD. For shims I filed down a couple of cents. They aren't made of copper, could that be the problem?
I really don't want to buy another Xbox since my most of my Arcade games are registered to this console. Not to mention that who knows if the new one will last.
The heatsinks do get hot to the touch before I reconnect the fans so I am getting contact, right? Does it sound like I'm out of luck?
Post by: theoyah on June 09, 2007, 08:00:00 PM
I did evrything said, added thermal paste got evrything attached
But when I turn on my xbox it goes from 3 red lights to 2 red lights and it turns off after 10 secs.
I know this might be a stupid question, but do u put the x clamps back on cause I didnt, and also the bottom of my gpu heatsink is totally flat(most pictures look like they have a chip or something). Sorry for being stupid, but i just want to play gears of war on xbox live again
Post by: esemce on June 10, 2007, 02:42:00 AM
Its a launch 360 i got it from ebay as faulty looked like previous owner tried applying thermal paste only. Another question can you 'burn out' the processors or will the console shut down before it gets critical? btw I think the MK2 fix my not be very useful for many as it does not give you many options in tightening and its easy to wear out the tread on the torx 8 screws and/or the screw driver.
Post by: com on June 10, 2007, 02:53:00 AM
Thought I would post my experiences of the MK2 x-clamp fix.
A couple of months ago, just out of warranty - surprise surprise, my release 360 got the dreaded 3RLODs. I decided to try and fix it by replacing the TIM gunk with some arctic silver and after a short period of burning in the green lights came back. Great, but after a minute or two of being on, I would just get this corrupted screen - checkerboard effect and it would crash, soon wouldn't boot up at all. So I popped down to B&Q for some bits for the MK2 x-clamp fix.
As I couldn't find any decent shim material I decided to try without and put everything together as in the guide -
heatsink | original spring washer | 1mm washer | motherboard | cap
but after putting on the caps I could still see a gap between the heatsink and cpu/gpu - I guess this is why the shim was needed. So instead I tried putting the washer on underneath the motherboard, that way the heatsinks would make the same amount contact with the processors as the original design, but 'buffer' the pins enough so the whole thing wouldn't be loose when the caps snapped into the grooves. So it would go
heatsink | original spring washer | motherboard | 1mm washer | cap
After burning in for 5 mins without the duct, the green lights came back and it's been running great for the last few days without a single lockup. Fingers crossed it will last, but thanks to RBJ for coming up with such a simple idea.
Post by: RBJTech on June 10, 2007, 05:59:00 AM
QUOTE(com @ Jun 10 2007, 10:29 AM)
Hi,
Thought I would post my experiences of the MK2 x-clamp fix.
A couple of months ago, just out of warranty - surprise surprise, my release 360 got the dreaded 3RLODs. I decided to try and fix it by replacing the TIM gunk with some arctic silver and after a short period of burning in the green lights came back. Great, but after a minute or two of being on, I would just get this corrupted screen - checkerboard effect and it would crash, soon wouldn't boot up at all. So I popped down to B&Q for some bits for the MK2 x-clamp fix.
As I couldn't find any decent shim material I decided to try without and put everything together as in the guide -
heatsink | original spring washer | 1mm washer | motherboard | cap
but after putting on the caps I could still see a gap between the heatsink and cpu/gpu - I guess this is why the shim was needed. So instead I tried putting the washer on underneath the motherboard, that way the heatsinks would make the same amount contact with the processors as the original design, but 'buffer' the pins enough so the whole thing wouldn't be loose when the caps snapped into the grooves. So it would go
heatsink | original spring washer | motherboard | 1mm washer | cap
After burning in for 5 mins without the duct, the green lights came back and it's been running great for the last few days without a single lockup. Fingers crossed it will last, but thanks to RBJ for coming up with such a simple idea.
Cool - thanks for posting this as I haven't tried this method myself (with the washer after the board) but did mention it a few posts back as a possibility instead of the shim.
As you said, a lot easier than the shim method, so keep us updated and I may put this one down as the first way to try (with the shim being the next phase if it needs a lot more pressure).
Only downside is there is only room for 1 washers worth of bend, because then the board hits the stops on the original heatsink legs but if that's enough - then great..
Thanks, Richard.
Post by: RBJTech on June 10, 2007, 06:48:00 AM
Did a quick cross section diagram to show the above ..

Obviously not to scale, but shows how the pressure is applied by putting the washer on the opposite side of the board.
Post by: esemce on June 10, 2007, 11:21:00 AM
can anyone answer my previous question please ?
Post by: RBJTech on June 10, 2007, 02:46:00 PM
QUOTE(esemce @ Jun 10 2007, 10:18 AM)
Ok guys I tried the MK2 fix using 2 UK 1p coins as shims and i have no luck, can someone answer me this when I switch on the console it does not boot (no video or sound) just straight to the 3RLOD is this still fixable? or do you need to at least get a boot up to see error codes?
Its a launch 360 i got it from ebay as faulty looked like previous owner tried applying thermal paste only. Another question can you 'burn out' the processors or will the console shut down before it gets critical? btw I think the MK2 fix my not be very useful for many as it does not give you many options in tightening and its easy to wear out the tread on the torx 8 screws and/or the screw driver.
The problem with an 'attempted' fix console is you don't know the history - it could have been heatgunned to death which has killed it beyond repair. Always buy a sealed 3ROL xbox - never a 'I took it apart to have a look' box ...
As you say, The MkII without shim cannot put much pressure on the die - enough to fix non-severe 3ROL, but in your case maybe it needs more pressure. Try the MkI as you can put as much pressure on it as you like then (within reason..).
If still no joy, then the previous owner probably killed it good an proper ...
Re-sell for parts..Post by: booker on June 11, 2007, 12:55:00 AM
Are you planning on doing a screens tutorial with this new method?
Since i´m not from US/Canada, is harder for me to follow written instructions.
It would be great to have detailed pictures from this method.
Post by: vinny1684 on June 11, 2007, 05:44:00 AM
Post it to me and let me av a look at it
Post by: com on June 11, 2007, 11:17:00 AM
QUOTE(esemce @ Jun 11 2007, 01:05 PM)
Thanks for the replies, i did the mk2 with shim and mk2 with added 1mm washer under the mboard (without shim) but had no luck with either so I guess I'll have to try the mk1 fix, though as the console does not even boot to show me any error codes I have a feeling this is unfixable.
Take a look at the FAQ to find out about the error code you're getting:
http://forums.xbox-s...howtopic=484726
Post by: RBJTech on June 11, 2007, 03:45:00 PM
QUOTE(booker @ Jun 11 2007, 08:31 AM)
RBJ,
Are you planning on doing a screens tutorial with this new method?
Since i´m not from US/Canada, is harder for me to follow written instructions.
It would be great to have detailed pictures from this method.
I'll try and sort it out this weekend - I've no time at the moment...
There is probably enough info in this post now to have a go on the MkII yourself. PM me if you want any specific details and I'll try to help you out ...
Post by: sq24 on June 11, 2007, 07:38:00 PM
Post by: booker on June 11, 2007, 09:53:00 PM
I had to do it again (although it was the other mod, matt´s).
I didn´t get 3rl but i did get freezing after 5 to 10 min into the game.
So i what i did was remove the HS, re apply AS5 (cleaning the die first, of course) and put everything back.
I do believe this "fix" need mantainance every now and then.
I don´t find any logic... maybe i´m using too little AS5 ?
I was able to play for 1 month (intense gaming) without a single issue.. after 1 month.. it started freezing again.
No 3rls tough.
Post by: booker on June 11, 2007, 10:06:00 PM
QUOTE(RBJTech @ Jun 11 2007, 11:21 PM)
I'll try and sort it out this weekend - I've no time at the moment...
There is probably enough info in this post now to have a go on the MkII yourself. PM me if you want any specific details and I'll try to help you out ...
Thanks, i already bought the items for the MK1, but since this new method don´t invovle hacking the GPU is a lot more user friendly
I´m not sure if i can buy those screw caps.. i don´t know how they are called in spanish ..
Do those cap fit perfectly on the original HS screws ? (thank god i didn´t throw them away).
Since you are "here" and you know more than anyone in here , i´m asking you directly what could be the cause of my problem?
A month ago i decided to do the Matt fix ( because i didn´t want to hack the GPU HS) and it worked for 1 month.
Now i´m getting freezzing every before 5 to 10 min in game. No 3 RLS just freezing after 5 to 10 min in game
I read your FAQ, but why it worked for 1 month?
What i did was re apply AS5 and put everything back and now is working again.
I´m using a small amount of AS5, maybe this is why it didn´t last ? i don´t get it.. do the thermal paste burn after a while so i have to replace it?
When i opened, i saw it had very little Thermal Pase left.. i was able to see most of the DIE surface.
Thanks
Looking forward to ur tutorial, hope you can make it, it is sooooooooooo much easier with pics, specially for none english speakers like myself
Post by: thavarin on June 11, 2007, 11:25:00 PM
QUOTE(booker @ Jun 12 2007, 05:29 AM)
Yes.
I had to do it again (although it was the other mod, matt´s).
I didn´t get 3rl but i did get freezing after 5 to 10 min into the game.
So i what i did was remove the HS, re apply AS5 (cleaning the die first, of course) and put everything back.
I do believe this "fix" need mantainance every now and then.
I don´t find any logic... maybe i´m using too little AS5 ?
I was able to play for 1 month (intense gaming) without a single issue.. after 1 month.. it started freezing again.
No 3rls tough.
I'm having the same issue. It freezes around the same time frame you got. I assumed it GPU but I don't know. I already took it apart twice and re applied AS5 and still no luck.
I'm also using the posted tutorial. What is the MKII and is it better ? And can someone point me to the right page, there is so many pages to look at right now. Thanks!
Post by: booker on June 11, 2007, 11:41:00 PM
QUOTE(thavarin @ Jun 12 2007, 07:01 AM)
I'm having the same issue. It freezes around the same time frame you got. I assumed it GPU but I don't know. I already took it apart twice and re applied AS5 and still no luck.
I'm also using the posted tutorial. What is the MKII and is it better ? And can someone point me to the right page, there is so many pages to look at right now. Thanks!
what method are you using? RBJ or matt?
how many washers are you using?
The first time i tried this i didn´t tight the screws enough ( i was afraid of breaking the die) but since the system kept freezing, i tight them really hard... and it worked. for 1 month.
Now i get the same problem, i re do the whole thing and so far so good.
try using 2 washers and tight the screws really really tight.
On my situation is different.. re applying AS5 did the trick, but again i´m wondering why i have to do this every now and then.. again my theory is maybe i´m using too little AS5.
I don´t know what to think
Post by: vinny1684 on June 12, 2007, 02:25:00 AM
Ive had mine ok for about a month and no problems, but the part im worried about is... im fixing peoples for £40 a pop and i dont want a ton of people coming to my doorstep lol.....
Whats the longest a person has had it working from the RBJ xclamp replacement?
Post by: scottmuller28 on June 12, 2007, 04:00:00 AM
I gas gun the gpu, yes heat that thing up to extreme temps and lightly press on the gpu & CPU and let cool. I do have experience with fixing consoles and gas guns.
For the case screws I use this combination:
spring washer underneath the case then washer, washer inside case then nut. I do all screws this way.
Put Mobo in,
I use alot of artic silver (generic brand) on ram gpu cpu.
I put spring washer on every screw then, I put heat sinks on then put another spring washer on, then regular washer, then nut.
I have been able to bring a lot of consoles back to life & last !!.
I find the gas gun is needed to repair the bad solder joins!!
Hint: when testing put the white air tunnel back on as it will over heat without it on.
Also rip out the metal dust guard that sits in the upper top shell..
Cheers,
Post by: D-an-W on June 12, 2007, 05:57:00 AM
I found these self adhesive heatsinks at Maplin yesterday, would they be helpful where I have positioned them (Not stuck down yet)? The six other RAM chips are going to be covered with this stuff (Thanks for the tip RBJ) when it arrives...
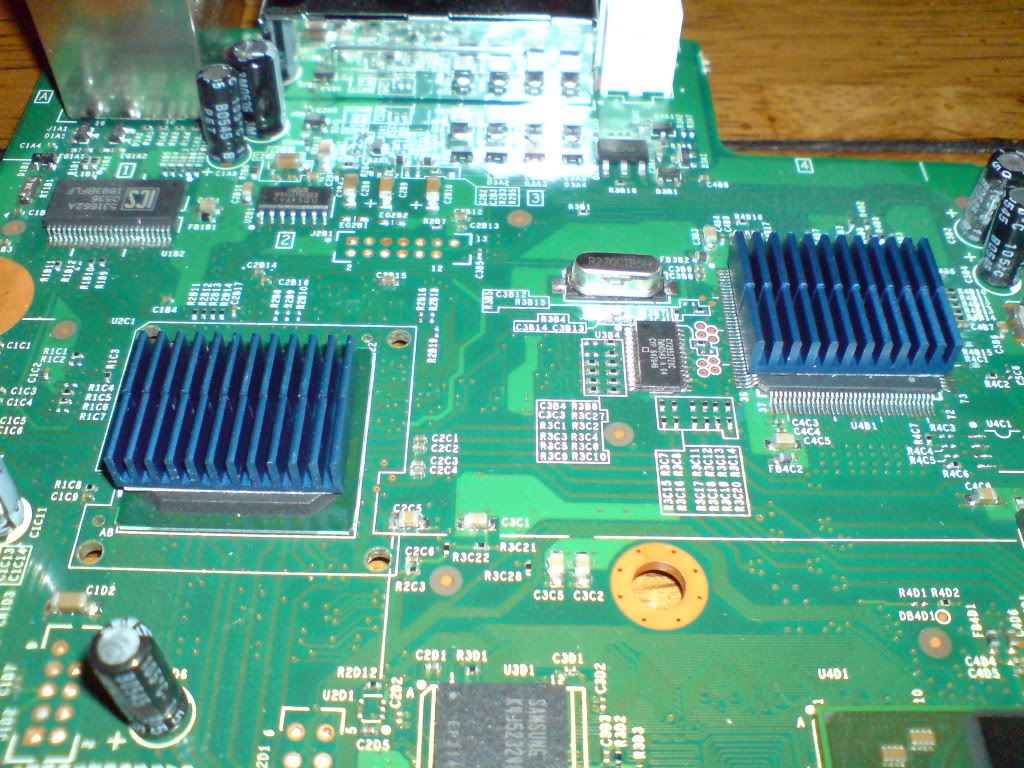
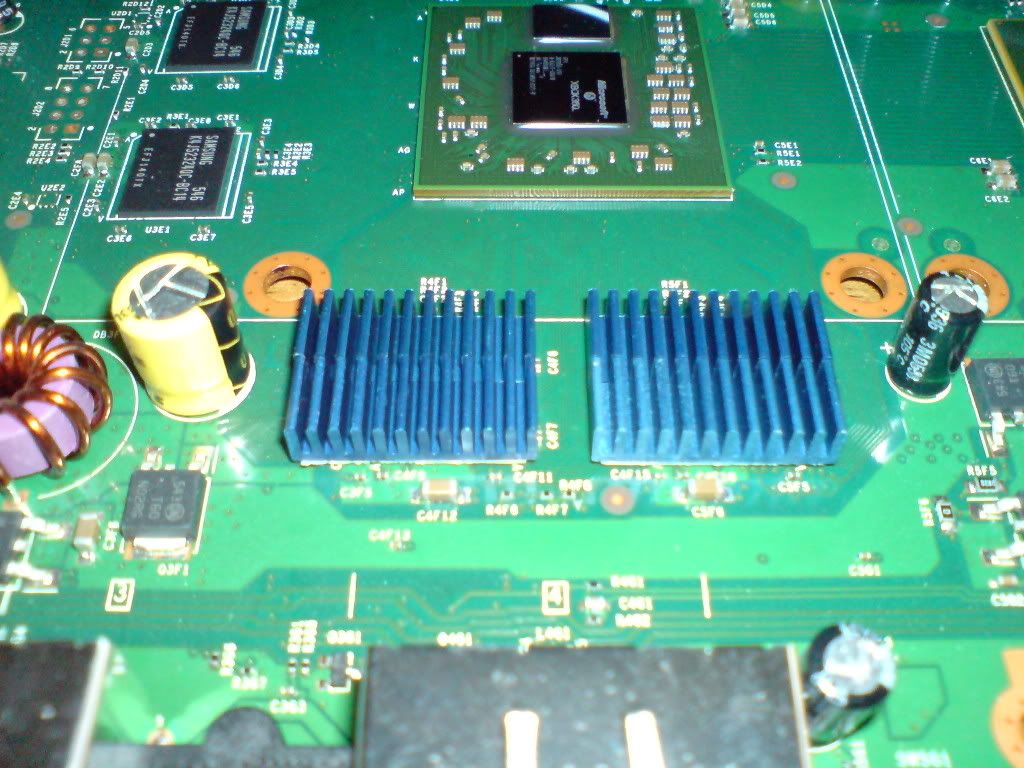

Post by: openxdkman on June 12, 2007, 09:53:00 AM
(related to method 1 & 2)
Machine Screws (4mm x 20mm) + Nuts (3mm thick) (10 pieces in packet, 1 packet is required, £1.30)
=>Machine Screws Countersunk Slotted Steel M4 x (L)20mm 10 Pack (EAN:5020789069314)
http://s7ondemand4.s...14_001c_v001_ap
Spring Washer (4mm) (30 pieces in packet, 1 packet is required, £1.30)
=>Spring Washers Medium Split Zinc Plated 4mm 30 Pack (EAN:5020789065088)
http://s7ondemand4.s...88_001c_v001_ap
Flat Washer (4mm) 0.71mm thick (70 pieces in packet, 1 packet is required, £1.30)
=>Flat Washers Bright Zinc Plated M4 (L)70mm Pack (EAN:5020789064951)
http://s7ondemand4.s...51_001c_v001_ap
Nylon Lock Nut (4mm) (4 pieces in packet, 2 packets are required, £2.60)
=>Nylon Lock Nuts Zinc Plated M4 Pack Of 4(EAN:5020789064685)
http://s7ondemand4.s...85_001c_v001_ap
Screw Cap Covers (10 pieces in packet, 1 packet is required, £1.38)
=>B&Q Screw Cap Covers (Black) (EAN:0000003211106)
http://s7ondemand4.s...06_001c_v001_zp
Unfortunately none of these pieces can be ordered online...
(Only good for UK residents)
Post by: D-an-W on June 12, 2007, 10:30:00 AM
Post by: RBJTech on June 12, 2007, 11:19:00 AM
On the 100's that have been fixed (see the sticky), to get a few repeat failures is ok.
There are a few explanations for this :-
1. The bolts have worked their way loose - I have noticed that even so called lock nuts loosen over time - thefore tighten then up and then put a 2nd nut locked into the first - hold the first nut tight and tighten a 2nd nut tight onto the first.
2. You did an 'overheat' after the X clamp fix - you should not need to do an overheat to get rid of the 3ROL - if you did then the fix may be temporary. Better to fix the problem without an overheat.
3. Remember after the X-Clamp you need better COOLING to prevent re-occurance - so do some cooling mods in conjunction with the X-Clamp fix (see my homepage, divider + rear cutout is recommended)
All my X-box's fixed have been running perfectly since the date I took the photo's in the tutorial - this must be a couple of months ago now ..
Also remember that some xbox's are more damaged than others, a single BGA break is easily fixed, whilst a multiple break BGA will need more TLC to resolve ...
Post by: booker on June 12, 2007, 03:01:00 PM
QUOTE(RBJTech @ Jun 12 2007, 06:55 PM)
1. The bolts have worked their way loose - I have noticed that even so called lock nuts loosen over time - thefore tighten then up and then put a 2nd nut locked into the first - hold the first nut tight and tighten a 2nd nut tight onto the first.
My bet .. because when i opened the case to check what was going on i was able to tight the screws more than before and i remember, i did extremely tight the first time, i couldn´t move the screws unless i force them.
But now, i was able to move them easly...
BUT
After re tight he screws it didn´t work.. it froze again.. i had to re apply as5 to make it work again.
Still not sure why. (any theory?)
RB i´m going to try your divider tutorial the next time my system freeze. BUT i don´t understand it.. How did you do the divider?..
The fan replacement and case modding is not an option for me because i don´t want to do something i can go back...
Post by: ryfoa6 on June 12, 2007, 03:18:00 PM
Post by: booker on June 12, 2007, 03:25:00 PM
QUOTE(ryfoa6 @ Jun 12 2007, 10:54 PM)
do i put AS5 on the GDDR3 RAM Chip? i heard the gpu doesnt touch the GDDR3 RAM Chip.
There is no point, the GPU HS don´t have contact with the RAM.
QUOTE(RBJTech @ Jun 12 2007, 06:55 PM)
3. Remember after the X-Clamp you need better COOLING to prevent re-occurance - so do some cooling mods in conjunction with the X-Clamp fix (see my homepage, divider + rear cutout is recommended)
RBJ,
http://rbjtech.bulld...ng/image007.jpg
"...note the white tape in the picture below now covering half of the heatsink..."
This don´t hurt the cooling? having the HS "taped?"
Or having the HS cover with card as the GPU is ?
Thanks.
Post by: RBJTech on June 13, 2007, 05:51:00 AM
QUOTE(booker @ Jun 12 2007, 11:01 PM)
There is no point, the GPU HS don´t have contact with the RAM.
RBJ,
http://rbjtech.bulld...ng/image007.jpg
"...note the white tape in the picture below now covering half of the heatsink..."
This don´t hurt the cooling? having the HS "taped?"
Or having the HS cover with card as the GPU is ?
Thanks.
Nope - the more air you can direct over the entire heatsink the cooler they will be. Tape up any gaps and funnel the air properly.
Post by: sq24 on June 13, 2007, 12:47:00 PM
Post by: booker on June 13, 2007, 01:43:00 PM
QUOTE(sq24 @ Jun 13 2007, 08:23 PM)
Well I went back after a month of gaming from the first replacement mod. Well it went back to the 3rol yesterday. Well I went back and re- screwed all the nuts down. It went right back to working again. I just wonder if I have to do this every month now.
Same thing here.. 1 month exaclty.. i had to re apply AS5 and re scred all the nuts down. it´s working again.
No 3rl though, just video freezing after 1 month on perfect gaming.
doing this every month is not that bad after all..
i´m glad i we were able to fix it
Post by: sq24 on June 13, 2007, 03:30:00 PM

Post by: RBJTech on June 13, 2007, 04:25:00 PM
QUOTE(sq24 @ Jun 13 2007, 11:06 PM)
Well besides taking all the "stuff" from both of the lowes in my town. he he I did find out one thing with this mod. What ever washer set up you did to bring it back to life. STAY WITH THAT SET-UP if you have to do it again. One thing I did do was change the lock nuts out with new ones. I want to see if the white rubber inside of the nuts can handle the heat level giving off from the heatsinks. All I notice is they were not white any more they were more like an off grey. Well it has been running fine now for four hours not stop with no problems. I guess we have to see what happens next month. If so I post pics of any washer difference of the lock nuts. Now I wonder if I have to have my 360 check every 3000 miles like my car.
I think you're on the right track with the lock nuts. All they are is half a nylon thread which is supposed to prevent the nut from coming loose on its own. However, I think what is happening is the nylon is getting very hot and softening - thus making the nut loose to turn with the vibration of the fans/DVD Rom etc.
I suggest tightening another nut ontop of the first - if you don't have room then remove the large locknut and replace with two normal nuts. Tighten one into the other - ie hold the bottom one and tighten the top nut into it TIGHT. An alternative to this is a thing called a 'shake proof washer' - it has little teeth in it and should also stop things getting loose but I've not tried this method so can't gurantee the results.
I must confess that I did the two nut lock method on my xbox's ..
but thought it was overkill so never put it in the tutorial. Perhaps it needs updating ..
Post by: booker on June 13, 2007, 04:49:00 PM
And 2nd you don´t know what other method you guys could come later on.
So far i think Matt problem is that after a certain period of time the screws get loose and your system start freezing.
Maybe with the locknuts is more secure.. but again it will be a paing to hack the HS and to find a tool to prorperly put preassure on the Locknuts to make those tight enough.
Post by: booker on June 13, 2007, 05:30:00 PM
QUOTE(D-an-W @ Jun 14 2007, 12:26 AM)
Just complete three laps of the Nurburgring with a mate of mine without issue (Case still off awaiting Dremel).
I lapped both heatsinks to a reasonable shine, prepared the CPU & GPU with TIM-clean and Arctic-clean 1&2 and gave them both a thin coat of AS5. I fixed some small heatsinks as in my previous post and also used 4mm of Termal Gap pads on each underside RAM and 2mm of it on the two RAM chips under the GPU and of course applied RBJ's Mk I fix (3 washers) to both heat sinks and the Airflow mods
Will report back once the case goes back together...
Great info!.. it really help to have more pictures..
Post by: mercury v2 on June 14, 2007, 09:55:00 PM
I followed the steps to the letter and spent the better part of my day making sure I got everything right. Long story short, I finished up a few mins ago and turned my box on and it lit up green, cycled the lights, and loaded the dashboard like normal. I flipped back and forth through the blades a couple times and then shut the box off so I could hook up my HD-DVD drive in the back. I turned it right back on and it lit up green again, started to load the Xbox logo and then froze. I got one red light in the lower right quad. Turned it off and let it sit for a few seconds and then back on. Now I don't have a picture at all. But I sure got some great 5.1 sound. I can hear it load up the logo to the dashboard, flip between blades and up and down the options. I unplugged everything and let it sit again. Plugged it all back in and fired it back up. No dice.
Where oh where did I go wrong?
Post by: D-an-W on June 14, 2007, 11:32:00 PM
QUOTE(mercury v2 @ Jun 15 2007, 04:31 AM)
First off, I give big props to everybody for coming up with some great ideas and solutions for MS's incompetence. And secondly, sorry for making my first post on the forums in this way.
I followed the steps to the letter and spent the better part of my day making sure I got everything right. Long story short, I finished up a few mins ago and turned my box on and it lit up green, cycled the lights, and loaded the dashboard like normal. I flipped back and forth through the blades a couple times and then shut the box off so I could hook up my HD-DVD drive in the back. I turned it right back on and it lit up green again, started to load the Xbox logo and then froze. I got one red light in the lower right quad. Turned it off and let it sit for a few seconds and then back on. Now I don't have a picture at all. But I sure got some great 5.1 sound. I can hear it load up the logo to the dashboard, flip between blades and up and down the options. I unplugged everything and let it sit again. Plugged it all back in and fired it back up. No dice.
Where oh where did I go wrong?
I am no expert (They will be along in a moment)...
Did you check the heatsinks are getting warm within a minute of turning it on (Mine certainly did!), I would also remove the heatsinks again and make sure you were getting a good contact onto all three dyes (The shiny bits
).Were you having 3RLOD before doing the fix?
How many washers did you use on top of the board?
Dan
Post by: mercury v2 on June 14, 2007, 11:50:00 PM
this whole mess started when i had two red lights the first night and then 3 red lights the next night last week. i got it working temp over the weekend doing the eraser trick but that failed on monday night. it was just a temp fix until i was off work yesterday so i could go pick up the needed supplies for RBJtech's method. and to his credit, i haven't got 3 red lights yet. just no video, lol. stupid MS.
Post by: loki232323 on June 15, 2007, 01:01:00 PM
QUOTE(booker @ Jun 12 2007, 12:29 AM)
Yes.
I had to do it again (although it was the other mod, matt´s).
I didn´t get 3rl but i did get freezing after 5 to 10 min into the game.
So i what i did was remove the HS, re apply AS5 (cleaning the die first, of course) and put everything back.
I do believe this "fix" need mantainance every now and then.
I don´t find any logic... maybe i´m using too little AS5 ?
I was able to play for 1 month (intense gaming) without a single issue.. after 1 month.. it started freezing again.
No 3rls tough.
As far as maintenance: Is this because the nuts are coming loose? If they are coming loose what about putting something like loctite on the threads?
Post by: C.K on July 04, 2007, 11:25:00 PM
QUOTE(PimpKillaJ @ Jul 5 2007, 03:59 AM)
**** Not for Noobs****
http://rbjtech.bulldoghome.com/pages/rbjte..._com/XClamp.htm
This is likely your last alternative if you dont have any luck. It involves drilling your mother board and heat sinks!
**** Not for Noobs****
Post by: madmardgun on July 05, 2007, 12:03:00 AM
Post by: idog on July 05, 2007, 04:55:00 AM
QUOTE(RBJTech @ Jul 5 2007, 12:17 AM)
Hmmm.. I love a challenge .. (IMG:style_emoticons/default/smile.gif)
I take it you have left the cores to overheat to 2 red lights? Not a long term solution, but it will proove that it is fixable ...
I left it to get all hot (about a minute). Didn't wait for the 2 red lights. When I was experimenting with washers and tightness I occasionally got the 2 red lights (probably because the heatsink was too loose, so the gpu couldn't get rid of it's heat).
Post by: pricemeista33 on July 05, 2007, 08:08:00 AM
I stuck with Lawdogg's method for I didn't have all the items mentioned in RBJTech's method. They're both great methods by far. So if anyone is having problems getting back up and running. Concentrate on the torque you're placing on the bolts while replacing the heatsink. I'm very pleased by all the help and information which I've received @ the Forums.
Imagine all the 360's that would have been trashed had it not been for the Xbox -Scene site!
Thanx greatly guys!
Post by: CounterBlow on July 05, 2007, 08:12:00 AM
Post by: PimpKillaJ on July 05, 2007, 01:24:00 PM
QUOTE(C.K @ Jul 5 2007, 01:25 AM)
Where does it require drilling the motherboard?
All I did was copy and paste.
2. Preparing the case
We need to drill bigger holes in the case that will hold the heatsinks in place.
Case prior to drilling :-
Post by: alfred0 on July 05, 2007, 02:12:00 PM
Post by: blackbear219 on July 05, 2007, 02:37:00 PM
I have a launch system (manufactured date of Sept. 30th, 2005) that first got the 3ROL about a month ago. At that time, I tried the towel trick and it worked for about a month (which seems much longer than average) but just a couple days ago the 3ROL stuck it's nasty head in again.
I saw the articles that said Microsoft was repairing/reimbursing consoles that were manufactured before Jan. 1, 2006 for free so I called them up and they told me that it would be $140 and that offer was for a limited time only for a limited problem. I asked to speak with a supervisor and was told by him (from what I could understand around his accent) that particular "recall" was only for 360s that couldn't automatically update themselves through Xbox Live. (If you try to tell me that NONE of those consoles that were pre 06 and fixed for free were the 3ROL error, I'll smack ya)
Long story short, I'd rather break my 360 trying to fix it than I would pay Microsoft $140 to patch their own shortsighted design flaw.
After digging around on the net, I found this method and have been using my day at work (IMG:style_emoticons/default/tongue.gif) to study up on what all is involved, I will be stopping at the hardware store tonight to pick up the bolts, nuts and washers and will try this technique. I'll be sure to come back and post my results.
Where the towel trick was a "success" for me, I am pretty optimistic that this is going to work. Wish me luck! And like I said, I shall return (hopefully tomorrow) to report my results.
Post by: blackbear219 on July 05, 2007, 05:14:00 PM
http://xbox360.ign.com/articles/801/801684p1.html
QUOTE
The warranty covers all Xbox 360 consoles. Whether you purchased an Elite, Core or regular Xbox 360 with a hard drive, the new expanded three year warranty holds from the date of purchase. Launch Xbox 360 consoles will now be under warranty from hardware failure until November 2008.
Why does this suck for me? I had JUST ripped off my warranty sticker to use RBJTech's method 10 minutes earlier. Now my 360 that is all of a sudden still under warranty has a busted label.
I'm obviously still going to call and try to get it repaired under warranty. Technically, since they just extended the warranty, it was expired when it was ripped off anyway so I just won't mention it when I call and if they give me heck about it I'll plead my case that it literally wasn't under warranty when the sticker was removed. If it's not under warranty anymore, why should I have been concerned with removing the sticker?
Grr.
Post by: PimpKillaJ on July 05, 2007, 09:08:00 PM
I tried to stop the transaction but it was too late "We do not store your credit card information here, you will have to call back in 2- 2.5 hrs!" After a while i gave in. When I called back it took 30 minutes for them to tell me "when the box comes do not do anything with it and if they do not receive it after a few days my credit card will be reimbursed!"
This was on 6/11 and the charge is still on my credit card to this day. It is a good thing that I called Visa the next day a disputed the claim. After telling the guy the story slowly three times it was finally done with. The charge is still on my account but I am not being charged interest on it. Good Enough.
I wish you luck. Nobody is going to belive your story and they record the phone calls. I would just send it in. Please update though. If they take yours I just might send my now fixed one in to see what happens.
Post by: blackbear219 on July 06, 2007, 11:34:00 AM
QUOTE(PimpKillaJ @ Jul 5 2007, 11:08 PM)
Good luck with that! After replacing the fans and failing to get the penny fix to work I decided to throw in the towel (not towel trick). I called M$ and after an hour on the phone and my credit info given, the lady basically wrapped up the conversation with....And if your seal has been broken when they receive it that they will not even look at it and put it back in the box and send it back to you.
I tried to stop the transaction but it was too late "We do not store your credit card information here, you will have to call back in 2- 2.5 hrs!" After a while i gave in. When I called back it took 30 minutes for them to tell me "when the box comes do not do anything with it and if they do not receive it after a few days my credit card will be reimbursed!"
This was on 6/11 and the charge is still on my credit card to this day. It is a good thing that I called Visa the next day a disputed the claim. After telling the guy the story slowly three times it was finally done with. The charge is still on my account but I am not being charged interest on it. Good Enough.
I wish you luck. Nobody is going to belive your story and they record the phone calls. I would just send it in. Please update though. If they take yours I just might send my now fixed one in to see what happens.
I talked to them this morning (called right at 9am EST so I could actually get through!) but I'm at work and I didn't have my serial # on me so I have to call back. I didn't even bother to plead my case because I knew I'd have to call back anyways so I'll just do it then.
You're right though, they'll probably never believe me. (IMG:style_emoticons/default/grr.gif)
They also reduced the out of warranty repair price from $140 to $99, which is nice. I think at this point, my best bet is probably to try to finagle a half and half deal out of them. If I can get the repair for $50, I could live with that.
It just really stinks that I called them Monday and was told it was out of warranty. I figured if it's out of warranty, why bother with the sticker so I just yanked it. Obviously, had I known, I would have taken a blowdryer to the sticker and preserved it, ARGH!!!
Post by: hellbelly on July 06, 2007, 11:52:00 AM
X-clamp replacement completed following this guide
Found the correct thermal gap filler thanks to another one of RBJtech's threads
Fitted the fan shroud divider and can definately feel the difference
Whilst it was open I popped heatsinks on the remaining ram chips and any other big chips that were missing any cooling (It's gotta help surely?!)
Install a front fan header thanks to another thread on here by someone else, still got to fit a fan though!
Talismon whisper fans installed
Now if only there was a way of slowing the DVD drive down on original discs, I don't want to flash my drive and backup my games just to get a quieter drive.
The box is going strong, hopefully it'll keep on going strong.
Many thanks to RBJtech and these forums (IMG:style_emoticons/default/biggrin.gif)
Pete
Post by: blackbear219 on July 06, 2007, 02:02:00 PM
I called and gave them my case # so that they could read the notes and clearly see that I had called just a day or two before the new warranty came out.
I explained that when I called earlier in the week the guy told me that my warranty was expired. After that, I saw the warranty sticker on my console and figured if I don't have a warranty what good is a warranty sticker and ripped it off. (This is a lie, I opened the case BUT I did not remove any of the internal pieces, just the shell.)
So she puts me on hold for a couple minutes and comes back and says they will take it in but if they determine that it was tampered with at all, they will just send it right back to me without working on it. I say that is fine, send the box!
I'm sure that if they try really, REALLY hard they will be able to find that one of the Torx 10 screws that holds on one half of the case have been unscrewed recently but I hope they don't pry that far. When it comes right down to it, there is nothing wrong with the box other than the 3 red light error that all the other boxes are getting so I hope they just fix it. If I get it back in the mail 2 months from now still broken then I am going to be very upset.
To think that if I had just waited another 24 hours before thinking to try to x-clamp replacement then I would never have had to deal with any of this and could have just sent it right back, ugh.
Post by: chappers4321 on July 06, 2007, 04:06:00 PM
Post by: Hello on July 06, 2007, 05:04:00 PM
Post by: Hello on July 07, 2007, 01:06:00 AM
Post by: pricemeista33 on July 07, 2007, 10:29:00 PM
By the way I wound up with two GPU heatsinks and decided to use them both as one. That was the best thing I could have ever done to cool tings down on that GPU.(IMG:style_emoticons/default/wink.gif) I just faced them both toward each other with the fins joining. Press them together tightly prior to placing the whole unit onto the GPU. THIS WORKS GREAT! I wish I would have done this when I first purchased my 360. I've managed to fix 3 with the tuts by RBJTech and LawDogg posted in the forums.
Post by: SuDDeN on July 08, 2007, 07:08:00 AM
QUOTE(pricemeista33 @ Jul 8 2007, 12:29 AM)
By the way I wound up with two GPU heatsinks and decided to use them both as one. That was the best thing I could have ever done to cool tings down on that GPU.(IMG:style_emoticons/default/wink.gif) I just faced them both toward each other with the fins joining. Press them together tightly prior to placing the whole unit onto the GPU. THIS WORKS GREAT! I wish I would have done this when I first purchased my 360. I've managed to fix 3 with the tuts by RBJTech and LawDogg posted in the forums.
Hmmm... Did you put them on top of each other...one upside down? Fin to Fin (only ends touching) or are the Fins side by side? That with a little AS5 and you might be on to something there..... got me thinking anyway, It would allow for more surface area to displace heat as well as create channels for the fan shroud to pull air through. I'm not too sure on how much the DVD drive would be loving the heat let off by it but man.... ya gots me pondering mate! (IMG:style_emoticons/default/happy.gif)
This post has been edited by SuDDeN: Jul 8 2007, 02:08 PM
Post by: danjef on July 08, 2007, 03:10:00 PM
GJ on your work tho seems it seems to be working for others (IMG:style_emoticons/default/smile.gif)
Post by: RBJTech on July 08, 2007, 05:36:00 PM
This is for those people who have opened their console and so have zero hope of getting it repaired by MS under the new warranty terms ..
It's basically a hybrid of lawdawg's and my MkI tutorial - but the best bit which you'll all be glad to hear is that it involves NO HEATSINK CUTTING. (IMG:style_emoticons/default/biggrin.gif)
I'll update main tutorial tomorrow but basic steps are as follows :-
1. Drill case holes with M5 holes and countersink (as per MkI tut but now with M5 instead of M4)
2. Use 15mm long M5 countersunk bolts
3. Insert the bolts in the bottom of the case and tape them so they don't fall out.
4. Use 3 x 5mm washers per bolt (to act as the stand off's - 5mm nuts are too high)
5. Replace main board.
6. Put 2 x 5mm washers on GPU bolts (above the board)
7. Use shim if necessary on GPU die.
8. Remove the legs from the stock GPU & CPU h/s.
9. With 360 on it's side, replace the GPU heatsink and align up the bolts with the threaded holes.
10. Removing one piece of tape at a time, so up the bolt until it 'threads'
11.Move to the next ensuring all 4 have threaded.
12 ** If the bolt comes out - you are stuffed and you'll need to start over again - hence the tape to ensure the bolts don't fall out ! (remember the washers UNDER the board, you can't get to 'em once the boards in place (IMG:style_emoticons/default/wink.gif) )**
13. Do up all 4 bolts tight.
14. For the CPU, use 1 x 5mm washer on top of the board.
Only tricky bit is aligning the mainboard with the bolts when you put it back.
Post by: |vibez| on July 09, 2007, 03:18:00 AM
Good stuff, looking forward to it. Just out of interest, I have my 360 open at the moment, not because I have the 3RLOD, but for other reasons. Is it worth me doing the x-clamp mod before I get any errors? or should try other less intense mods first?
Post by: RBJTech on July 09, 2007, 03:55:00 PM
Directly link here
Enjoy ..
Grim_d or Mods - any chance you could put this link on the first page too ... (IMG:style_emoticons/default/smile.gif)
Post by: gsm on July 09, 2007, 07:51:00 PM
The washers are 1 mm thick?
Nylon or metal washers ?
Thanks!!!!
Post by: Hello on July 09, 2007, 08:06:00 PM
Post by: gsm on July 09, 2007, 08:32:00 PM
QUOTE(Hello @ Jul 9 2007, 11:06 PM)
well i started the MKI fix, mounted the CPU heatsink as MKI addressed, screwed up the GPU heatsink... trying to get a hold of another. However, wouldn't you have to drill both Heatsinks to fit the 5mm bolts? How else would you fit the bolts through?
As far as I know, you don t have to drill the heatsinks, because the holes already are 5 mm.
Post by: Hello on July 09, 2007, 09:32:00 PM
Post by: RBJTech on July 10, 2007, 05:34:00 AM
QUOTE(gsm @ Jul 10 2007, 03:32 AM)
As far as I know, you don t have to drill the heatsinks, because the holes already are 5 mm.
Correct. They are threaded for a 5mm bolt.
If you've started the MKI and drilled the heatsinks (removed the threads), then you need to continue the MkI as you'll need the nut above the heatsink to hold it all down ..
Post by: MarutiDriver on July 10, 2007, 08:41:00 AM
Post by: danjef on July 10, 2007, 09:33:00 AM
Post by: Hello on July 10, 2007, 01:56:00 PM
Post by: MarutiDriver on July 10, 2007, 03:37:00 PM
If you mean the drilling part, use a bit with the size of the screws you'll be using, unless you're using M5 threads, then you don't need to drill at all.
Post by: DuBob4432 on July 10, 2007, 04:35:00 PM
QUOTE(MarutiDriver @ Jul 10 2007, 02:37 PM)
Prepare as in?
If you mean the drilling part, use a bit with the size of the screws you'll be using, unless you're using M5 threads, then you don't need to drill at all.
you would still need to drill the case for the larger M5 screws
QUOTE(RBJTech @ Jul 8 2007, 04:36 PM)
MkIII is on the way ... (IMG:style_emoticons/default/laugh.gif)
This is for those people who have opened their console and so have zero hope of getting it repaired by MS under the new warranty terms ..
It's basically a hybrid of lawdawg's and my MkI tutorial - but the best bit which you'll all be glad to hear is that it involves NO HEATSINK CUTTING. (IMG:style_emoticons/default/biggrin.gif)
I'll update main tutorial tomorrow but basic steps are as follows :-
1. Drill case holes with M5 holes and countersink (as per MkI tut but now with M5 instead of M4)
2. Use 15mm long M5 countersunk bolts
3. Insert the bolts in the bottom of the case and tape them so they don't fall out.
4. Use 3 x 5mm washers per bolt (to act as the stand off's - 5mm nuts are too high)
5. Replace main board.
6. Put 2 x 5mm washers on GPU bolts (above the board)
7. Use shim if necessary on GPU die.
8. Remove the legs from the stock GPU & CPU h/s.
9. With 360 on it's side, replace the GPU heatsink and align up the bolts with the threaded holes.
10. Removing one piece of tape at a time, so up the bolt until it 'threads'
11.Move to the next ensuring all 4 have threaded.
12 ** If the bolt comes out - you are stuffed and you'll need to start over again - hence the tape to ensure the bolts don't fall out ! (remember the washers UNDER the board, you can't get to 'em once the boards in place (IMG:style_emoticons/default/wink.gif) )**
13. Do up all 4 bolts tight.
14. For the CPU, use 1 x 5mm washer on top of the board.
Only tricky bit is aligning the mainboard with the bolts when you put it back.
excellent work around for not having to cut the part around the holes on top of the heatsink (IMG:style_emoticons/default/smile.gif) this will work excellent for the copper ones that i am having cut to size. just so you know that is still going on, by buddy is extremely busy but will get them cut down soon as he has been buried in solidworks making some forging dies for a large $$$ project he is also working on.
very nice process (IMG:style_emoticons/default/smile.gif)
Post by: wellmodded on July 10, 2007, 07:53:00 PM
well i wetn back to the mk1 fix but the mk1 fix i do it not like the mk1 fix rbj does it just has the basic idea of keeping the board flat and stop it flexing
all the mk1 fix work tho
my point is it seem better to screw the board down t the case unlike in mk2
Post by: wheeler74 on July 10, 2007, 08:49:00 PM
Post by: MarutiDriver on July 10, 2007, 09:21:00 PM
Oh well.
Post by: Onious on July 10, 2007, 11:35:00 PM
Thanks RBJTech for a great tutorial.
Post by: |vibez| on July 11, 2007, 02:10:00 AM
So which is it? 15mm bolts all round or 4 off 15mm and 4off 20mm?
What thickness washers do we need and do we need any nylon?
This post has been edited by |vibez|: Jul 11 2007, 09:11 AM
Post by: |vibez| on July 11, 2007, 08:21:00 AM
This post has been edited by |vibez|: Jul 11 2007, 03:22 PM
Post by: trident666 on July 11, 2007, 04:36:00 PM
if I recall case-> board should be about 3.7mm
using 3 washers make them around 1.2mm thick
Or the mkiii is a different approach regarding keeping the board flat ?
Thx for the great ideas RBJ
Post by: |vibez| on July 12, 2007, 03:11:00 AM
QUOTE(trident666 @ Jul 11 2007, 11:36 PM)
quick one about washers to use in MKIII
if I recall case-> board should be about 3.7mm
using 3 washers make them around 1.2mm thick
Or the mkiii is a different approach regarding keeping the board flat ?
Thx for the great ideas RBJ
I had to use 4 washers. Basically I just kept adding washers until I got no movement at all when pressing down on the pcb
Post by: PimpKillaJ on July 12, 2007, 03:17:00 PM
After waiting one month and one day Microsoft customer support finally called today and asked why I did not send the system in yet. Apparently there is no record of my second phone call that was made two and a half hours after I tried to cancel in the first place. Good thing I disputed the charges with my credit card company!
Post by: fireflier on July 12, 2007, 08:19:00 PM
Post by: RBJTech on July 13, 2007, 05:02:00 AM
QUOTE(|vibez| @ Jul 12 2007, 10:11 AM)
I had to use 4 washers. Basically I just kept adding washers until I got no movement at all when pressing down on the pcb
spot on - it's difficult to say with 100% accuracy how many washers you need under the board (depends on the thickness onviously) - so start with 3 and add as many as you need so the board feels 'solid' when pressed hard next to the bolt. If it flex's down a fraction - then remove the mainboard and add another washer to ALL the bolts and try again.
I'll add this to the tutorial as I've overlooked this point ...
wrt the 15 vs 20mm - I'll update that too ..
The GPU needs 15mm bolts (or they will foul the top of the sink) - so cut 5mm off a 20mm bolt(*) or buy 15mm bolts (not common) - for the CPU - anything longer than 15mm will do as there is nothing to foul them on ..
Thanks for the feedback guys...
Richard.
(*) Tip : Put a 5mm nut fully on the bolt before you cut it - then when you remove the nut, you'll clear the threads in the process meaning it will thread easily into the heatsink ... (IMG:style_emoticons/default/smile.gif)
Post by: grim_d on July 14, 2007, 11:06:00 AM
Richard, I haven't been around too much lately, is there anything needs adding or editing anywhere?
Post by: KingProzak on July 14, 2007, 03:25:00 PM
Anyway, for people having trouble with any method and debating wether or not they should overheat the machine, I had to overheat this fifth one today.
I could see the MoBo was slightly warped in the middle, least it seemed to be visually, and i couldn't for the life of me get the green lights to come on. So, i left the 3RLOD on which turned to 2RLOD and left it for about a minute, i then tightened the screw on the GPU nearest to the warping and found it could maybe turn a quarter turn more than it could previously. Likewise, the opposite screw could also turn slightly. So, i tightened those two up, left it to cool, came back it an hour ago, bingo, 360 boots.
It's been running the darkness now since then, no lockups.
Post by: RBJTech on July 15, 2007, 06:38:00 AM
QUOTE(grim_d @ Jul 14 2007, 06:06 PM)
Bump for the thread.
Richard, I haven't been around too much lately, is there anything needs adding or editing anywhere?
Hi Grim - if you could add the MKIII link to the first page and perhaps the sticky (results) then that would be good as it is a lot easier than the MKI.
Cheers,
Richard.
Post by: danjef on July 15, 2007, 07:18:00 AM
after i replaced the xclamps i had error code 0102 show but 5min with system off and another boot and all working fine will keep you updated (used MKII btw)
Thanks for the great work RBJtech
Post by: grim_d on July 15, 2007, 02:52:00 PM
QUOTE(RBJTech @ Jul 15 2007, 01:38 PM)
Hi Grim - if you could add the MKIII link to the first page and perhaps the sticky (results) then that would be good as it is a lot easier than the MKI.
Cheers,
Richard.
ok mate sorted for you, the link in the results sticky link to this thread anyway.
i will try get around to adding the new results soon, it will push the total successful to over 500 i think.
good work. (IMG:style_emoticons/default/beerchug.gif)
This post has been edited by grim_d: Jul 15 2007, 09:53 PM
Post by: Hello on July 15, 2007, 08:45:00 PM
Post by: Hello on July 16, 2007, 01:39:00 AM
Post by: Kreez on July 16, 2007, 03:21:00 AM
Anyway, I tried 2 configurations with imperial parts (No.6-32x1" machine screws)
1st configuration:
Between case and board: No.6 nut + No.6 washer. This was 3.97mm thick, instead of the 3.71mm of the metric parts.
Between board and sink: Two No.6 washers. This was 2.38mm, the tutorial asks for 1 (0.71mm) 2 (1.42mm) or 3 (2.13mm) washers.
I anchored everything down by tightening the lock nuts as tight as possible then loosening 1/2 turn.
Result: Booted up ok, froze 5 mins into the game. I then let it overheat, rebooted, and played Gears for an hour or so. Then went out, came back later to play more, got 3 red lights. I couldn't revive it using any combiniation of overheating or whatever sad.gif
2nd configuration: I went down to a single washer between the board and sink. This was 1.16mm, the tutorial asks for 1 (0.71mm) 2 (1.42mm) or 3 (2.13mm) washers.
Result: 3 red lights, tried a bunch of times to revive with heat methods, but nothing worked. sad.gif
----
I was really optimistic this would work, as my sizes were fairly close to the ones in the tutorial, but nope, I guess I'll make a bigger effort to hunt down metric parts.
Does anyone here in Vancouver or Canada have recommendations? I tried the big Home Depot, and 3 local places.
I've got the screws and nuts, I need washers and lock nuts. A local place had 4mm washers, but wanted 39c per washer and only had a few left. sad.gif
Thanks.
Post by: DJ_L3ThAL on July 16, 2007, 03:24:00 AM
Post by: TheGOAT99 on July 16, 2007, 07:14:00 AM
Post by: trueimage on July 16, 2007, 03:32:00 PM
Rona is the only hardware store here, "National" is the brand.
1 pkg (10 pcs) - #10-32 x 3/4" Metal Zinc Plated round machined scews (10 total)
1 pkg (10 pcs) - #10-32 Metal Zinc Plated round hex nuts (10 total)
6 pkg (6 pcs) - #10 Stainless Steel flat washer (36 total)
Those were all the washers of this type they had.
Also, there were no nylon/runner washers. They are a bit bigger than the space provided on the motherboard, so I was thinking if I wrap them in electrical tape and then put a hole in the middle for the bolt... that should be ok even if they are resting on traces etc then right? Can I use a nut instead? 1 nut is almost exactly the same thickness as 3 of the washers, and is small enough that it doesn't go outside the contact area around the holes in the mb.
Also, the bolts/screws are 3/4" which is 19.05mm. is this going to be a big problem with the gpu heatsink? They only seemed to have imperial sizes, so the next was 1/2" which is about 12mm only.
I will wait and order in the parts if needed....
Post by: trueimage on July 16, 2007, 04:44:00 PM
QUOTE(trueimage @ Jul 16 2007, 03:32 PM)
I'm about to do the Mk III mod. I went to the only hardware place in town and got the parts I think will work.
Rona is the only hardware store here, "National" is the brand.
1 pkg (10 pcs) - #10-32 x 3/4" Metal Zinc Plated round machined scews (10 total)
1 pkg (10 pcs) - #10-32 Metal Zinc Plated round hex nuts (10 total)
6 pkg (6 pcs) - #10 Stainless Steel flat washer (36 total)
Those were all the washers of this type they had.
Also, there were no nylon/runner washers. They are a bit bigger than the space provided on the motherboard, so I was thinking if I wrap them in electrical tape and then put a hole in the middle for the bolt... that should be ok even if they are resting on traces etc then right? Can I use a nut instead? 1 nut is almost exactly the same thickness as 3 of the washers, and is small enough that it doesn't go outside the contact area around the holes in the mb.
Also, the bolts/screws are 3/4" which is 19.05mm. is this going to be a big problem with the gpu heatsink? They only seemed to have imperial sizes, so the next was 1/2" which is about 12mm only.
I will wait and order in the parts if needed....
Ok, I found another hardware store on the edge of town and tried there. Much better selection.
2 pkg (6 pcs) Diameter 5 length 16 (mm) machine screws (12 total)
1 pkg (8 pcs) Diameter 5 nuts (8 total)
they still had the same washers ... how about putting some electrical tape down on the mb on both sides?
again, I could use bolts on at least 1 side for the gpu and both sides if needed for the cpu.
Any insight would be great.
Post by: trueimage on July 16, 2007, 09:32:00 PM
Anyone want to sell me a set of screws / metal washers / nylon or fiber washers that are the correct dimensions? That would help, please PM me, I'm in Canada.
So now I will have to wait with the xbox all apart on the table for a while, since I live in a remote area, and there are no other hardware stores. I don't want to order online either unless I'm sure they will fit, because I now have 2 sets of "#10" washers and they are too big.
Post by: Kreez on July 16, 2007, 11:10:00 PM
Anyway, I fixed my 3 red lights it seems, but now my console is spitting out an E74/1022 error at me. (IMG:style_emoticons/default/sad.gif)
This seems to indicate a problem with the A/V output. I think what might have broken it was last night when I was testing my unsuccessful repairs, I didn't have the case all the way back on, so I needed a pointy object to turn it on. I used the composite video plug that was just dangling there, and I think I heard a small discharge as i probed it into the small button area. Maybe I fried some circuitry in the video output chip or something. (IMG:style_emoticons/default/sad.gif)
Post by: ddiggler83 on July 18, 2007, 09:23:00 AM
i had a 3rloding 360. in addition, for about a month or so before it 3rlodd, it had been giving me the disk read error. after researching, i decided to go with RBJtech's MkIII fix for the 3rlod.
got 15mm and 10mm long 3/16 (5mm approx) bolts with nuts, flat washers, spring (lock) washers, and some tools from local hardware DIY, AS5 from a PC DIY. no nylon washers nor nylon nuts anywhere unfortunately. i also got 4mm bolts with nuts (at the time i was toying with the idea of doing MkI after all since making adjustments in the MkIII appeared less precise).
after drilling the case and taping the bolts in place, like trueimage i found that the washers overlapped between the CPU and GPU h/s. thought of replacing those washers with small o-rings (washer-like rubber bands used for air guns, approx 1.3 mm in thickness), but i had only 16 pieces of those which i thought to use as contact points for the underside and topside of the mobo. i didnt have enough o-rings to make the req. height to support the mobo AND get the non-conductive contact points I wanted on all bolts.
my solution was to use MKI on the CPU side and MKIII on the GPU side. this allowed me to use 1 nut and 1 o-ring on each 4mm bolt to support the underside of the mobo on CPU side and 2 flat washers and 1 o-ring on each 5 mm bolt to support mobo on GPU side. this also eliminated the overlap between the GPU/CPU bolts (4mm nuts were small enough to fit side by side with washers).
used 1 o-ring on each nut (CPU and GPU) to support h/s on mobo. used lock washers and nuts to lock h/s CPU side, and normal bolt threading to lock h/s GPU side.
on testing, both h/s were heating up, but the best i could get was about 3 seconds of boot-up before 2 rl popped up. after half a day of fumbling with adjustments, i de-threaded bolts on GPU side and re-threaded each until I felt the least bit of resistance. i then turned each bolt 90 degrees (cross-wise pattern) at a time until I felt significant resistance. i turned on the xbox360, got the 3rlod, left it on until it got 2rl (took about 5 mins), turned it off and then gave each bolt another 45 degree turn.
i let the system rest for an hour and it booted up. been running it through its paces with GOW, FNR3, and the departed hd-dvd. so far, Ive been getting the disk read error only on FNR3 (its scratched to hell anyway), and thats a vast improvement already. hd-dvd is running fine. ill make cooling adjustments (shroud mod+volt mod or new fans+case mod+additional heatsinks perhaps) just to be sure. thinking of pot adjustment on dvd-drive as well if disk read problem rears its ugly head again.
any opinion and/or advice on the set-up above would be greatly appreciated. also, I hope my story helps you find a solution to your washer overlap prob, trueimage.
Post by: getRAWed on July 18, 2007, 09:44:00 AM
"MACHINE SCREWS -M5x20mm STAINLESS Csk ProDrive - 20Pck"
RBJ said somewhere that anything over 15mm is fine but will I have to cut them down for the GPU H/S?
Post by: TheGOAT99 on July 18, 2007, 10:14:00 AM
Post by: keine on July 26, 2007, 01:34:00 PM

Anyway. I enacted the MKIII on my console for preventative reasons, but also to try clear up some artifacts on my console.
The mod went well. I used M5 machine screws with larger heads on them (cheese heads?). They were a little big and I didn't do any counter sinking. The screw heads made contact with the plastic case....and made the metal case wobble slightly in the larger plastic case. Upon putting it all together however, the case came together just fine.
I used only metal washers that were in the box labeled 5mm metric flat metal washers. I suppose these were the right ones. I don't know if the height was correct, assuming all 5mm metric flat washers are the same height.
Anyways. I used AS5 applied very thin with a business card on the CPU and 2 GPU dies. The tightness on the screws I tried to get as uniform as possible. Its very tricky, so I just used my own judgment and feel on trying to get them as all as uniform as possible. I still don't know if its right, but its working. I also didn't use a shim.
Anyway. I was first VERY glad I didn't CREATE any overheating or 3RLOD with the proactive mod which I thought I might just do if I didn't do it right. I worried when I got a black screen after first powering up, but that had to do with the switch on the av cord being set to TV instead of HDTV.
I've done about 3 2 hour gaming sessions. The heat coming out the back of the 360 is very hot, suggesting the heat sinks are performing well.
The screws won't come loose in time will they? Back out? I'm playing vertically.
So far...my color/artifact problem has not occured yet. I'm going to keep testing it out. Right now, I think I may have pro actively cured my console from the artifacts which lead to black screen. I don't know. Thats my story. Hope it helps. No 3RLOD/Overheating/Artifacts......Crosses fingers, knocks on wood.
I'll keep testing and report in.
Post by: PersianGuy on July 27, 2007, 07:30:00 AM

Post by: chappers4321 on July 28, 2007, 05:28:00 AM
Chappers4321
Post by: tewy on July 28, 2007, 04:19:00 PM
QUOTE(tewy @ Jul 26 2007, 10:21 AM)
hi guys,thanks to rbjtech for the exccelent tutorial,fixed my buddies 3rrod with an error 0102,using the mk1 tut using 2 washers between m/b and heatsink,only tested that 1 for 2 days but no probs,then when i booted mine up after fixing his mine 3rrod but with a diff error code 0201,mine threw up about 4 different error codes but the main 1 0201,did the mk1 with 2 washers and all works perfect,had mine on test for 6 or 7 hours staight and seems ok no freezez.thanks again guys keep up the good work
hi again my xbox has now 3rrod again it only lasted 2 days,oh well,not sure im gettin another 1 tho as this was my 5th 1 others replaced on warranty but i thought i was safe after a year or so and opened it
Post by: FatSean on July 28, 2007, 05:32:00 PM
QUOTE(tewy @ Jul 28 2007, 11:55 PM)
hi again my xbox has now 3rrod again it only lasted 2 days,oh well,not sure im gettin another 1 tho as this was my 5th 1 others replaced on warranty but i thought i was safe after a year or so and opened it
im rethinking buying another one, as well. screw it, M$ doesn't deserve any more of my money. im gonna make a video of me putting holes in the 360 from 100yards, put it in a box and mail it to Ballmer's office with a link to my video on youtube.
this is BS. they know damn well 3RROD had nothing to do with my 360 being opened, but they won't take it back. yet Ballmer keeps saying they are "taking care of their customers". pffff. i guess my PC will be doing all my gaming. like i'm any less of a "customer" because i sliced a shiny sticker. (actually I got it off without damage, but lost the thing. HAHAHA)
Post by: trident666 on July 29, 2007, 03:52:00 PM
QUOTE(gsm @ Jul 24 2007, 04:22 PM)
RBJtech, on your mkiii tutorial, you suggest using a single washer on the CPU. Why is that?
From what I notice, the heights of both chips, CPU and GPU are the same.
By the way, I've made the mkiii fix and work good for me for two weeks, until yesterday, 3 red lights again 0102, as usual on my xbox.
I opened the console, made the fix again, now with 4 washers below the board. Heated things up, a little bit, and it did come back from the dead again!
Yes I was wondering the same
MKI has 3 washers to reach 2.13mm, MKIII should be the same, the height shouldnt change from both methods
or there is something else I dont get?
5mm washers are usually .8 or 1.2mm thick
Post by: DuBob4432 on July 29, 2007, 05:47:00 PM
Post by: MarutiDriver on July 30, 2007, 10:27:00 AM
Post by: M4v3r1ck on July 30, 2007, 11:40:00 PM
Post by: keine on August 01, 2007, 07:22:00 AM
Are 5mm washers all the same height? What is height of each washer SUPPOSED to be (.71mm)? How can I measure this? (The calipers I found at a local hardware store might measure three washers stacked together, but not one at a time (accurately) I don't think. Are the digital calipers any good? Do they last?
How detrimental would it be if the 3 washers combined height was a little off?
I also don't know if 5mm washers completely stay within the brass rings of the holes. Seemed like mine poked out a fraction of a mm and touched a 2 traces in one spot.
Post by: uberd0gg on August 02, 2007, 01:52:00 AM
I was thinking preventative steps might be be best, but how am I supposed to tell if the mod has worked without the RLOD for guidance?
Also, I was thinking about adding a talismoon whisper fan while my console is open. Is it worth doing or will I not need it once the x-clamp is replaced?
thanks in advance
Post by: WhiteBoy on September 04, 2007, 02:18:00 PM
PS I have a tailsmoon fan did the cooking mod. What else am i missing.
Thanks Dave.
This post has been edited by WhiteBoy: Sep 4 2007, 09:21 PM
Post by: steveranda on September 04, 2007, 05:04:00 PM
QUOTE(Sporkmon @ Sep 4 2007, 05:54 PM)
I just finished this fix and things seem to be working fine. Thanks for coming up with this.
One thing I found is that getting the right screw torque was really important in my case. I needed a light touch, otherwise it wouldn't work. I drilled some holes in the outer plastic shell so that I could adjust them without disassembly, just in case I have problems in the future and it needs tweaking.
Sporkmon..Did you do up the bolts really tight? Or just somewhat tight? From what I have heard..Most people have success with tightening till you cant tighten anymore..
Post by: suprak on September 04, 2007, 06:38:00 PM
Suggestions? Ideas? What to try?
Post by: s2k on September 05, 2007, 06:03:00 PM
Tried another AV cable and still get E74.
Post by: reptilexcq2 on September 07, 2007, 01:43:00 PM
Anyway, i try to X-clamp method but i don't use the washers AT ALL like RBJtech suggest. I use aluminum foil and folded into tiny square (size of a bolt) and punch hole in the center of it so it slips through the bolt. I did that for 8 of the bolts that support the heatsinks. So the aluminum foil serve as a washer (basically 1 washer thick). And i only place this aluminum foil in between the motherboard and the heatsinks. And i didn't use any washer on the back of the motherboard or the top of the heatsinks at all. I don't think it's necessary.
Anyway, so i tighten up everything with a bolt on top of the heatsinks. Not so tight...but tight enough. In the beginning....when i switch the 360 on...it always work (green light every time), BUT the fans is so damm loud and gets hot too quick even though i just switch it on. Now i understand that the fans gets loud because it is trying to get rid of the heat. But what could possible heat up so quickly.
So i went back and get rid of the aluminum thing that i put on top of the CPU die because i thought it serve better contact...and also i get rid of the a DIME (yes a freaking dime) on top of the GPU die....of course i now realize it aint do it no good even though it works fine....just that the fan is too loud and gets hot and when it gets hot it gives me the 2 red lights and shut the system down. So anyway, i got rid of those things on top of the dies and add a bit of THermal on top of it and the heatsink and crew everything back again. By the way, I didn't reclean the thermal when i reopen the heatsink...it's all messy and cover the entire die so that's all i care about. Also I place aluminum foil on top of those memory chips that you see surrounding the GPU heatsink because i think it helps protect it from heat. Also i place a big aluminum foil to cover the top of the GPU heatsink to help trap the heat thru the vent. So anyway, i start the system and sure enough....it runs quieter.
Before the fix, I was thinking of getting the Nitro Intercooler EX because of the loud fans and heat. But something tells me that the fans should not be running that loud when first switch on...so there must be something wrong with screws or ventilation or something. I still don't know what gets hot too quickly that cause the fans to get loud. Some people suggest tighten the screws on the back of the motherboard and it helps. But to be honest...i don't use any screw on the back of the motherboard AT ALL...i think i trash them.
This post has been edited by reptilexcq2: Sep 7 2007, 08:48 PM
Post by: DuBob4432 on September 07, 2007, 07:05:00 PM
QUOTE(reptilexcq2 @ Sep 7 2007, 12:43 PM)
Woohooo...i just fix my Xbox 360 from dying and it's now working PERMANANTLY!! Here's what i did...i have tried some of those cheap methods such as erasers trick...but it works only temporary and eventually it'll run dead and no matter how often you switch it on...it's going to give you the 3 rings of death eventually...
Anyway, i try to X-clamp method but i don't use the washers AT ALL like RBJtech suggest. I use aluminum foil and folded into tiny square (size of a bolt) and punch hole in the center of it so it slips through the bolt. I did that for 8 of the bolts that support the heatsinks. So the aluminum foil serve as a washer (basically 1 washer thick). And i only place this aluminum foil in between the motherboard and the heatsinks. And i didn't use any washer on the back of the motherboard or the top of the heatsinks at all. I don't think it's necessary.
Anyway, so i tighten up everything with a bolt on top of the heatsinks. Not so tight...but tight enough. In the beginning....when i switch the 360 on...it always work (green light every time), BUT the fans is so damm loud and gets hot too quick even though i just switch it on. Now i understand that the fans gets loud because it is trying to get rid of the heat. But what could possible heat up so quickly.
So i went back and get rid of the aluminum thing that i put on top of the CPU die because i thought it serve better contact...and also i get rid of the a DIME (yes a freaking dime) on top of the GPU die....of course i now realize it aint do it no good even though it works fine....just that the fan is too loud and gets hot and when it gets hot it gives me the 2 red lights and shut the system down. So anyway, i got rid of those things on top of the dies and add a bit of THermal on top of it and the heatsink and crew everything back again. By the way, I didn't reclean the thermal when i reopen the heatsink...it's all messy and cover the entire die so that's all i care about. Also I place aluminum foil on top of those memory chips that you see surrounding the GPU heatsink because i think it helps protect it from heat. Also i place a big aluminum foil to cover the top of the GPU heatsink to help trap the heat thru the vent. So anyway, i start the system and sure enough....it runs quieter.
Before the fix, I was thinking of getting the Nitro Intercooler EX because of the loud fans and heat. But something tells me that the fans should not be running that loud when first switch on...so there must be something wrong with screws or ventilation or something. I still don't know what gets hot too quickly that cause the fans to get loud. Some people suggest tighten the screws on the back of the motherboard and it helps. But to be honest...i don't use any screw on the back of the motherboard AT ALL...i think i trash them.
follow the directions and see what you get. don't come in here and complain that it is not working correctly when you didn't follow the tutorial. honestly, what do you expect?
Post by: reptilexcq2 on September 07, 2007, 07:24:00 PM
QUOTE(DuBob4432 @ Sep 7 2007, 06:05 PM)
follow the directions and see what you get. don't come in here and complain that it is not working correctly when you didn't follow the tutorial. honestly, what do you expect?
You're an idiot...did i ever complain about anything in my post?? I simply go about addressing how i got it to work...through trial and error. Learn to read before you write.
Post by: DuBob4432 on September 07, 2007, 08:07:00 PM
QUOTE(reptilexcq2 @ Sep 7 2007, 06:24 PM)
You're an idiot...did i ever complain about anything in my post?? I simply go about addressing how i got it to work...through trial and error. Learn to read before you write.
so you are saying that your fans are too loud and you don't know what causes that and you have thrown away the screws, but i am the idiot? maybe you need to learn to write english - if you point is something other than a negative experience you surely did not convey that in your post (IMG:style_emoticons/default/blink.gif)
This post has been edited by DuBob4432: Sep 8 2007, 03:08 AM
Post by: HaZe303 on September 07, 2007, 09:43:00 PM
So anyone hesitating to do this because you think it wont work, im just saying go for it. It isnt even hard to do it if you have some basic PC skills or arent a total moron.. (IMG:style_emoticons/default/smile.gif)
Below is a picture of the ugly thing with some more mods made to it! Look also @ the apparent lack of 3rlod!! (IMG:style_emoticons/default/smile.gif)
This is my ugly Xbox360 BlackMonster303 Edition (a launch premium from nov 05)
(IMG:http://img258.imageshack.us/img258/1585/thxsmallestqv0.jpg)
All mods on this 360 are:
-RBJtech´s MK1 X-Clamp Mod
-RBJtech´s Fan Shroud Mod
-Cut Out The Plastic Mesh Behind The 360 For the 2 Rear Fans.
-Zalman VGA Memory HS´s on all the chips, memory, and Volt Regs.
-70mm Blue LED Fan with stand in front of CPU HS.
-50mm Fan on CPU HS on the backside, inside the Fan Shroud for extra cooling power.
-60mm Air Hole with grill on Case for Cool Air Intake.
-Case painted black with regular black spray can. (fast and lazy (IMG:style_emoticons/default/smile.gif))
This post has been edited by HaZe303: Sep 8 2007, 04:55 AM
Post by: reptilexcq2 on September 08, 2007, 01:18:00 AM
QUOTE(DuBob4432 @ Sep 7 2007, 07:07 PM)
so you are saying that your fans are too loud and you don't know what causes that and you have thrown away the screws, but i am the idiot? maybe you need to learn to write english - if you point is something other than a negative experience you surely did not convey that in your post (IMG:style_emoticons/default/blink.gif)
You're dumb is all i am saying. You don't have the brain to know what i am trying to convey. I am simply stating how i got it to work with my own experimentation. Wheather i am using the exact RBJtech's method is not the point...i never try. You're too stupid to know what i am trying to say and then say shyt like..."why are u mad or upset when you should have follow the exact method, then you wouldn't have the problem." Yea...like i don't f*** know. I CHOSE not to follow the exact method!! Alright?? Get it?? And i am perfectly happy with the experimentation?? Get it?? Now where in the hell did you see in the post that i am mad??? Dumb ass!!
Again you're so dumb to know that my post is not trying to "make a point" ok??? It is a description of how i went about making it work with a little experimentation of my own...faggot!
Post by: DuBob4432 on September 08, 2007, 06:39:00 AM
QUOTE(reptilexcq2 @ Sep 8 2007, 12:18 AM)
You're dumb is all i am saying. You don't have the brain to know what i am trying to convey. I am simply stating how i got it to work with my own experimentation. Wheather i am using the exact RBJtech's method is not the point...i never try. You're too stupid to know what i am trying to say and then say shyt like..."why are u mad or upset when you should have follow the exact method, then you wouldn't have the problem." Yea...like i don't f*** know. I CHOSE not to follow the exact method!! Alright?? Get it?? And i am perfectly happy with the experimentation?? Get it?? Now where in the hell did you see in the post that i am mad??? Dumb ass!!
Again you're so dumb to know that my post is not trying to "make a point" ok??? It is a description of how i went about making it work with a little experimentation of my own...faggot!
whatever junior....the internet makes people much more loud mouth than they would be in real life. this latest entry proves to me you are what 10? maybe 13 at the most? anyway, stay in school and learn how to convey what you are trying to say.
Post by: HaZe303 on September 08, 2007, 12:41:00 PM
QUOTE(DuBob4432 @ Sep 8 2007, 02:39 PM)
whatever junior....the internet makes people much more loud mouth than they would be in real life. this latest entry proves to me you are what 10? maybe 13 at the most? anyway, stay in school and learn how to convey what you are trying to say.
I Must agree with DuBob.. Learn some f...ing manners.
Post by: HaZe303 on September 08, 2007, 01:09:00 PM
This post has been edited by HaZe303: Sep 8 2007, 08:27 PM
Post by: bonsc2 on September 08, 2007, 01:28:00 PM
Post by: reptilexcq2 on September 08, 2007, 02:26:00 PM
QUOTE(DuBob4432 @ Sep 8 2007, 05:39 AM)
whatever junior....the internet makes people much more loud mouth than they would be in real life. this latest entry proves to me you are what 10? maybe 13 at the most? anyway, stay in school and learn how to convey what you are trying to say.
Learn to read and write then you wouldn't face a loud mouth. Only you show lack of understand what i am trying to convey dumb ass because your IQ is the equivalent of a donkey.
This post has been edited by reptilexcq2: Sep 8 2007, 09:28 PM
Post by: pro5 on September 26, 2007, 10:53:00 AM
I'm wondering if apart from the normal 'fault' that the x-clamp sorts out that there may be further damage (scaler chip etc) that is beyond repair in this way and best left to MS.
thanks
Post by: Tortuga2112 on September 26, 2007, 11:08:00 AM
QUOTE(pro5 @ Sep 26 2007, 05:53 PM)
please, just a quick reply from anyone who's had the (0102) RROD *AND* an E74 error aswell and has fixed both with x-clamp let me know (post here). If I just had the RROD I would consider the x-clamp fix but as I have e74 also (1 red light when turning on, previously had been 3 - 0102 errror still stored when using eject/sync buttons and E74 displayed on screen).
I'm wondering if apart from the normal 'fault' that the x-clamp sorts out that there may be further damage (scaler chip etc) that is beyond repair in this way and best left to MS.
thanks
I've had that error before and the x-clamp mod fixed it.
Post by: Adam19 on September 27, 2007, 03:29:00 AM
I have a few of these piling up and obviously £1.30 a bag soon accumilates, when i could probably buy some identical screws in a mass of 100 or whatever for a cheaper prices of buying a few packs.
Post by: Xtreme07 on September 27, 2007, 12:43:00 PM
Here's an Example:
http://www.youtube.com/watch?v=2nTC1RzcIy0
The Problem started when i was watching a movie for 3 hours, then these weird white dots appeared in the screen.
My Console Never Froze.
No ERROR codes.
No 3 red lights.
i tried updating the dashboard but it didn't work.
and i can't send it to Microsoft because my console is out of warranty...
Will the X-clamp replacement Fix this? (IMG:style_emoticons/default/unsure.gif)
Post by: ceored on October 02, 2007, 11:18:00 AM
Post by: dougMod on October 02, 2007, 08:24:00 PM
Post by: dougMod on October 02, 2007, 09:19:00 PM
Post by: ceored on October 03, 2007, 05:04:00 PM
QUOTE(dougMod @ Oct 2 2007, 08:19 PM)
well i got some 5 x 20mm and i kind of got it to work..now when i turn the console on, it goes form 3 red lights to 2 and then it basically shuts off.....
Two red lights is overheating. The problem that you probably have is that you have too many washers between the GPU/CPU and the heatsink (happened to me). Try removing one of the washers and reattaching the screws. Remember to apply new thermal paste (this is a must) and over tightening the screws can lead to 3rold. Good Luck.
Post by: Cameleon99 on October 05, 2007, 03:07:00 AM
First post but hopefully it will be helpful to some.
Firstly a big thanks to RBJtech and community for this fix. I was cosindering myself lucky until now that my box was fully working for over a year with no 3ROLD, but last week when playing Halo it struck. (IMG:style_emoticons/default/sad.gif) Good news is the box is now back and kicking! (IMG:style_emoticons/default/biggrin.gif)
Right so down to business. I used mostly the B&Q parts listed, living in the UK. My findings are what some of the others have seen, that 3 washers on the GPU are too much (i.e. you can see light between the HS and chip if you hold it to the light and get 2 lights for overheating during boot) and 2 washers was too tight - I was frighttened of the HS hitting some of the surface mounted components if I did them up tight. So my solution. I got some nylon washers (6mm from B&Q) and found them to be double the thickness of the normal metal washers. So I took them and sanded a half MM off them to make them between one and two metal washer thinkness - so now when you have one nylon and one metal it was the perfect hight. This was enough to get the HS warm under use but still the 3ROLD persisted.
So next up then was the shim solution. I cut a bit of an old Alu HS and covered it with AS5 and stuck the HS on top. Low and behold the box fired up and no more 3ROLD! (IMG:style_emoticons/default/biggrin.gif)
Another point to note is that I found some 5mmx12mm screws at my local B&Q which were the perfect length for the GPU HS. I used the normal 20mm for the CPU HS.
If anyone wants part numbers for B&Q let me know, I forgot to note them down before coming to work.
Cam
This post has been edited by Cameleon99: Oct 5 2007, 10:09 AM
Post by: trueimage on October 08, 2007, 04:25:00 PM
QUOTE(trueimage @ Aug 18 2007, 03:36 PM)
I am trying to do the Mk III method. The xbox has bee apart for about a month - I cannot find the parts.
Can someone buy the parts and mail them to me? Tell me the cost and I will pay. I'm in Canada.
PLEASE help.
Thanks!
anyone? My xbox has been sitting apart for like 3 months......
Post by: jessejames9mm on October 08, 2007, 09:00:00 PM
Post by: wellmod on February 02, 2020, 08:19:00 PM
have an xbo360 which had the mk1 fix done to it couple months ago worked fine until like 3 weeks ago whn it started actin up and giving me fuzzyness on the screen and error 0102 and every now and then i have to adjust the screw to get it to boot it work for about 30hours thn crap out
so after about a week of adjusting screws or so i decide to unplug thefan slack the screws and let it over heat and thn after tht i would tighten the screws and let it cool ( i have done this to other xboxes and it works)
when i booted i got E74 so i tought the ANA chip might have gotten burnt but i don't understand Y it would casue i have a heatsun on the ana chip shouldn't overheat at all
anywaz so i slacked the screws again and let it over heat and thn i herd a very very faint poping sound not sure if from the xbox360 or just soem cricket cause place was bit noise and whn i rebooted i got E73
after couple reboot i keeping getting E 73
so after i decide to take the board apart and put it bac in the case with same mk1 fix and when i put it back 2gether i starting getting error 0022 and well i havn't got away from that
SOME ADVICE PLZ and wht u might do
Post by: VanydotK on October 15, 2007, 03:33:00 PM
QUOTE(sabbath_dude @ Oct 11 2007, 07:35 PM)
Just wanted to add some confirmed working/compatible B&Q alternative part numbers to anyone having problems finding those already listed in RBJTech's MKIII tut. They were all sold out of the 5mm x 15mm screws when I was in so I picked up a pack of "Pan Headed Slotted 5mm, 0.8mm x 16mm, 8pc" instead. The part code/ref you're looking for is AVF-069864. They are the perfect size for both GPU and CPU heatsinks + there's 8 per pack so you only need one @ £1.30 (IMG:style_emoticons/default/biggrin.gif) . I was able to fix a customers 3rlod 360 first try with them the other day no problems.
On the parts list it said to buy 5mm x 20mm or 5mm x 15mm (which do not exist btw). I went to my local hardware store and found 5mm x 20mm and 5mm x 16mm and I was wondering if you had to cut the 16mm down any for the GPU or did it just fit perfectly? Do you happen to have pictures of the machine screws? Thanks.
Post by: sabbath_dude on October 15, 2007, 03:54:00 PM
QUOTE(VanydotK @ Oct 15 2007, 10:33 PM)
On the parts list it said to buy 5mm x 20mm or 5mm x 15mm (which do not exist btw). I went to my local hardware store and found 5mm x 20mm and 5mm x 16mm and I was wondering if you had to cut the 16mm down any for the GPU or did it just fit perfectly? Do you happen to have pictures of the machine screws? Thanks.
The 16mm machine screws fit just fine on the GPU (no need to cut (IMG:style_emoticons/default/biggrin.gif) ). They will just start to cut into the heatsink fins but not enough to cause any damage/problems. I don't have any left or I'd take a pic to show you. They have a larger, rounded head with a big flathead screwdriver slot cut into them. I found adjusting and fitting them was much easier than what I'd used previously so I'll be getting them again for the next repair.
Post by: JAmerican on October 16, 2007, 12:58:00 AM
QUOTE(sabbath_dude @ Oct 15 2007, 05:54 PM)
The 16mm machine screws fit just fine on the GPU (no need to cut (IMG:style_emoticons/default/biggrin.gif) ). They will just start to cut into the heatsink fins but not enough to cause any damage/problems. I don't have any left or I'd take a pic to show you. They have a larger, rounded head with a big flathead screwdriver slot cut into them. I found adjusting and fitting them was much easier than what I'd used previously so I'll be getting them again for the next repair.
16mm ones are the best to get. Since those actually exist and work without modification for both the GPU and CPU (IMG:style_emoticons/default/smile.gif). My site has a whole bunch of pics (IMG:style_emoticons/default/smile.gif)...
(IMG:http://jamerican.net/JJFiles/Xbox360/HeatsinkMod/xbox360heatsinkmod_8.jpg)
Pic of the 5mm x 16mm screw in GPU heatsink (left) | 5mm x 20mm screw in CPU heatsink (right)
http://www.jamerican.net
JAmerican
This post has been edited by JAmerican: Oct 16 2007, 07:59 AM
Post by: VanydotK on October 16, 2007, 10:21:00 AM
Thanks for the info guys, I think I'll pick up 8 of these machine screws now. 20 isn't necessary for the CPU and 16 should work as well, right? Thanks.
Post by: boaby on October 16, 2007, 01:34:00 PM
Post by: Dyer13 on October 30, 2007, 07:20:00 PM
Update, I followed the tutorial exactly, this time using RBJTech's method (I used LawDawg's before), and now I am getting the secondary error code 0001--->Power Supply issue....this is seriously frustrating me. It seems like my xbox is giving me random error codes just to make me angry. If the issue is the power supply I should be able to plug in a different power supply and it would work...theoretically, but that also means I can test my power supply on another xbox to see if it works... The LED on the power supply is orange even after turning on the xbox, and the RRoD comes on, but before tightening everything down, I tested it, and the LED was green after turning it on.
With my luck I think my xbox may be unfix-able... I will try everything before shelling out 300 bucks though...
Post by: Relix on October 30, 2007, 07:35:00 PM
Post by: Yankee427 on October 31, 2007, 12:10:00 PM
Big thanks to RBJtech and others for the original tut and their input. Will be trying this in the next few days.
Now I am going to go to Lowes today or tomorrow and get the bolts and washers. I will use JAmerican's part #'s. Thanks for those (They should really be added into the tutorial since I had to do some searching to find the correct part numbers.
Here is JAmericans part #'s again if anyone needs them. Took me a while to find them so Im sure someone else could use them also.
LOWES - USA - MKIII Parts [Here you go RBJTech for your guide ] (UPDATED - Aug-16-2007)
2 packs - Oval Head Phillips - M5-.8x20mm (Qty:2) Sales # 138573 - $.92 each pack
2 packs - Oval Head Phillips - M5-.8x16mm (Qty:2) Sales # 138566 - $.68 each pack
5 packs - 5mm Flat Washers (Qty:10) Part # 138319 - $.56 each pack
LOWES stores these screws in drawers. Look for a pinkish purple band on the drawer. In White Text, it should say Metric M5-.8 and other info.
Also, I picked up a Kobalt Torx 8-in-1 Driver. T4 to T15. Sales # 239384 - $5.98
JAmerican
Will try it probably on Friday or Saturday and will see how it goes. I bought the as5 off of newegg today so will probably get it tomorrow or Friday. (I get one day shipping from newegg being 2 hours from their NJ warehouse, which is nice)
I am going to try leaving the pennies on with the ram and then doing the x-clamp fix along with fan shroud mod. I would love to do some other fan mods also, but want to have it working first before I touch anything else.
Post by: arq_danilo on November 01, 2007, 06:29:00 PM
i'm new in the forum and i have entered because my xbox 360 has the 3LOD...
i hope some help from you.. (IMG:style_emoticons/default/biggrin.gif)
so, my synopsis is:
xbox with 3rl... error code 0020
so, i tried the RBJtech's method (MK I)...
i have used 4 washers from case to mobo, 2 washers from mobo to gpu/cpu and bolts with 5mm X 20mm...
the error code changed, from 0020 to 0110... (IMG:style_emoticons/default/blink.gif)
so, i tried the rubber fix... it's the same as the penny fix, but it's uses rubber...
nothing... the same error code... 0110...
i tried 1 and 3 washers from mobo to GPU die... when i do this, the error change... sometimes 0020 and others 0110...
I don't used the SHIM method... i'm still thinking of it...
can anyone help me? i'll try the JAmerican method: 1 washer from mobo to CPU and 2 washers from mobo to GPU...
but a help is always welcome! (IMG:style_emoticons/default/biggrin.gif)
Sorry for my bad english... (IMG:style_emoticons/default/unsure.gif) i'm a brazilian guy... hehehehe
Thanks!!! (IMG:style_emoticons/default/wink.gif)
Post by: arq_danilo on November 01, 2007, 07:09:00 PM
QUOTE(arq_danilo @ Nov 1 2007, 10:29 PM)
Hi everybody...
i'm new in the forum and i have entered because my xbox 360 has the 3LOD...
i hope some help from you.. (IMG:style_emoticons/default/biggrin.gif)
so, my synopsis is:
xbox with 3rl... error code 0020
so, i tried the RBJtech's method (MK I)...
i have used 4 washers from case to mobo, 2 washers from mobo to gpu/cpu and bolts with 5mm X 20mm...
the error code changed, from 0020 to 0110... (IMG:style_emoticons/default/blink.gif)
so, i tried the rubber fix... it's the same as the penny fix, but it's uses rubber...
nothing... the same error code... 0110...
i tried 1 and 3 washers from mobo to GPU die... when i do this, the error change... sometimes 0020 and others 0110...
I don't used the SHIM method... i'm still thinking of it...
can anyone help me? i'll try the JAmerican method: 1 washer from mobo to CPU and 2 washers from mobo to GPU...
but a help is always welcome! (IMG:style_emoticons/default/biggrin.gif)
Sorry for my bad english... (IMG:style_emoticons/default/unsure.gif) i'm a brazilian guy... hehehehe
Thanks!!! (IMG:style_emoticons/default/wink.gif)
Just updating...
i have tried the JAmerican's method... i have used 1 washer from mobo to CPU and 2 washers from mobo to GPU... no changes... same error... 0110... (IMG:style_emoticons/default/sad.gif)
What can I be doing the wrong? The SHIM method will solve the problem??
Wainting for answers... Thanks!!
Post by: arq_danilo on November 01, 2007, 07:47:00 PM
QUOTE(Oakley568 @ Jun 29 2007, 10:27 PM)
Just an quick synopsis of my x-clamp replacement saga...I originally did Lawdawg's method but that only worked for a week...so I did RBJ's and it didn't work at first...for the longest time I tried so many washer/tightening combinations it wasn't funny. I dealt with 0102...0110...0020/2...all of them. The only thing I didn't try was the shim method...and it worked! I used 4 of the washers that his tut had called for, one on the smaller die on the gpu and 3 on the larger die (it all looks like a diamond shape)...applied a good bit of as5...and used 2 washers underneath the gpu. I also applied as5 to the bottom of the mobo on the 4 RAM chips...and taped a single US penny on top of it (each from 1980 or earlier for the copper) and this has helped. I did not put any of the long silver screws back in and I also used the fan shroud mod (will add a talismoon fan later)...I hope this might help anyone out there...thanks a lot RBJ for your awesome webpage tuts. I am posting this just to get my success story out there and hopefully it helps others.
hi! congrats for your sucess!
i'm having the same errors that you had... but i still not used the shim method... i'm still thinking about it...
but i don't understand... you said that you used one washer on the smaller die and 3 washers ond the larger die... What do you mean? I don't get it...
could you please explain to me exactly what you did? How mutch washers did you used from case to mobo? And from mobo to GPU/CPU heatsinks?
Please, i need your help... my problem is the same that you had...
again... sorry for my bad english... (IMG:style_emoticons/default/happy.gif)
thanks!!!
Post by: Yankee427 on November 02, 2007, 10:49:00 AM
I found a 4.8 mm and 5.2 mm but could not find any 5mm drill bits. Am I just not looking hard enough? If that is all that is here, which one should I use the smaller one, or bigger one? I am thinking the smaller one.
Post by: arq_danilo on November 02, 2007, 10:04:00 PM
tody i have tried the SHIM method...
so, my xbox 360 now contains:
> rubber fix under the 4 rams
> x-clamp replacement
> SHIM
> cooler 12v
after the SHIM method, the error 0110 has gone...
but a new one has come... 0022... (IMG:style_emoticons/default/blink.gif)
can anyone help me to solve my quest???? please! (IMG:style_emoticons/default/uhh.gif)
thanks!! (IMG:style_emoticons/default/wink.gif)
Post by: makjum on November 04, 2007, 01:05:00 AM
i tried replacing the xclamp over my 360 (error 0102)
i ended up with no lights showing at all on my xbox
when i connect the power brick and turn it on the led on the power brick blinks to red from the default orange for a fraction of second
and my xbox is totally DEAD... (IMG:style_emoticons/default/blink.gif)
man what did i mess up???
pls help (IMG:style_emoticons/default/uhh.gif) (IMG:style_emoticons/default/huh.gif)
Post by: makjum on November 04, 2007, 04:17:00 AM
i have definitely done smthing wrong wid ma front panel.... wireless controller doesnt bootup and none of the 5 leds are working....
and i thought i was making the screws too tight....
so i tried loosening up a bit....
and it did show green light (on the power brick) and the fans started to roll but only for a few seconds and the fans turned off again
and i don't know what the lights are showing... coz they are all turned off
sm1 pls HELP!!!!
Post by: slasher007 on November 08, 2007, 12:02:00 AM
However, a friend's xbox (a 2006-03-30 premium) that also had error 0102 didn't get fixed (IMG:style_emoticons/default/sad.gif) . I'm willing to try the shim if someone can tell me where I can get one on the net or here in montreal?!?! Thanks.
Post by: PersianGuy on November 09, 2007, 06:37:00 AM
I put it on the both sides, but system did overheat.
Now is this better to put it just on the one side of shim, or put a fresh AS5 on the both sides again but this time more than before?
This post has been edited by PersianGuy: Nov 9 2007, 02:39 PM
Post by: arq_danilo on November 10, 2007, 05:39:00 PM
QUOTE(PersianGuy @ Nov 9 2007, 11:37 AM)
Should I put AS5 on the both sides of the shim, or just on the side that sits on the GPU core?
I put it on the both sides, but system did overheat.
Now is this better to put it just on the one side of shim, or put a fresh AS5 on the both sides again but this time more than before?
You must put on the both sides of the SHIM... and the SHIM must be placed over both cores...
just like the picture on the tutorial...
if it continues, try to loose a litle bit the screws...
i hope ot works! (IMG:style_emoticons/default/happy.gif)
QUOTE(slasher007 @ Nov 8 2007, 05:02 AM)
Fixed my xbox that had error 0102 with RBJtech's MKIII, no shim (yet), works great, several hours of HD content been playing with no probs. (IMG:style_emoticons/default/biggrin.gif) (IMG:style_emoticons/default/tongue.gif)
However, a friend's xbox (a 2006-03-30 premium) that also had error 0102 didn't get fixed (IMG:style_emoticons/default/sad.gif) . I'm willing to try the shim if someone can tell me where I can get one on the net or here in montreal?!?! Thanks.
The SHIM can solve the problem... its a very important and helpful method...
and you can make your own SHIM with a single piece of Aluminium or Copper...
this piece must have 1mm and you can get it from an old heatsink... like i did...
i had an old heatsink of the Xbox 360 GPU and i've cuted the external flap..
try this and follow my other quote.. (IMG:style_emoticons/default/wink.gif)
Post by: slasher007 on November 11, 2007, 11:00:00 PM
QUOTE(arq_danilo @ Nov 10 2007, 07:39 PM)
The SHIM can solve the problem... its a very important and helpful method...
and you can make your own SHIM with a single piece of Aluminium or Copper...
this piece must have 1mm and you can get it from an old heatsink... like i did...
i had an old heatsink of the Xbox 360 GPU and i've cuted the external flap..
try this and follow my other quote.. (IMG:style_emoticons/default/wink.gif)
Had to look trough an old pile of pc parts I had there, finally found some aluminium part the was good enough (from an old AMD processor). I cut off of it two 14x24x1mm parts, now both xboxes work great. BTW shim mesurements in the tut should be 24x14x1mm, not 20 x 10 x 1mm, because that comes off too short and doesn't cover both cores fully. Also, although my shim was 1mm thick, 3 washer over the GPU gave me RROL, because it didn't let the shim make good enough contact with the heatsink. So 2 washers were enough, it just has to be snug and not that tight otherwise the board will bend.
Anyways thanks again RBJtech. (IMG:style_emoticons/default/smile.gif) (IMG:style_emoticons/default/smile.gif) (IMG:style_emoticons/default/smile.gif)
This post has been edited by slasher007: Nov 12 2007, 07:01 AM
Post by: arq_danilo on November 12, 2007, 05:38:00 AM
QUOTE(slasher007 @ Nov 12 2007, 04:00 AM)
...work great. BTW shim mesurements in the tut should be 24x14x1mm, not 20 x 10 x 1mm, because that comes off too short and doesn't cover both cores fully. Also, although...
I agree!
but... worked for me with a 20x10x1mm SHIM.. (IMG:style_emoticons/default/blink.gif)
in doubt, i recommend to use the 24x14x1mm method... certainly will fill the spaces of the cores..
just remembering that this method just solve the erros 0102, 0110 and 0020.. (IMG:style_emoticons/default/wink.gif)
Post by: Digital_sin on November 12, 2007, 05:18:00 PM
I bought a new premium 360 that has a mfg date early 2007, didn't set it up yet but it seems to work fine.
My concern is this; should I do this MKIII mod eventhough my 360 works fine to prevent the 3RLOD from happening in the future, or leave things as it is right now?
Also; if you're suggestion is to do the mod, my understanding so far is to:
1) Follow these steps literally but without a shim
2)Do the 12v fan mod
3)Do the divider/shroud mod
Am I missing something else here?
This post has been edited by Digital_sin: Nov 13 2007, 01:29 AM
Post by: xen0cide on November 13, 2007, 01:16:00 AM
I was recently one of the lucky ones to have successfully did the x-clamp fix (lawdawg method). Unfortunately it died on me again after about 1month+ of extensive use. While trying to fix it again, i found out that one of the screws i used got real loose. So i figured after retrying the fix a few times, and getting it to work for max 2 days, I opted to use the 'shim' method.
Now here's what got strange, after the shim method and overheating it for 2 mins, my xbox lived again. I played fine for about 2 days, but suddenly, during a game of pgr4, the color suddenly went green/yellowish (but the game is still playing!). When i turned it off and turned it back on again, the xbox did not 3ringed, and booted up fine with green lights and sound. But.... theres no picture @_@
Re-doing the fix, the shim and thermal compound, it finally ran again. But after another day, the same problem with the color appears, and after shutting it off, it will turn on but with no picture.
Now as strange as this problem is, I'm asking if anybody every experienced something like this, or has any pointers on what should i do next, because at this stage i've tried removing the shim, re-applying the shim, all sorts of screw tightness for about a week now, and the result is always a running xbox360 with no picture.
I'd really appreciate any help/pointers I can get. Thanks.
Post by: maxfisher05 on November 13, 2007, 04:36:00 PM
QUOTE(xen0cide @ Nov 13 2007, 03:16 AM)
Now as strange as this problem is, I'm asking if anybody every experienced something like this, or has any pointers on what should i do next, because at this stage i've tried removing the shim, re-applying the shim, all sorts of screw tightness for about a week now, and the result is always a running xbox360 with no picture.
I had the same problem. Are you using an HDTV and component cables? This may sound weird but try switching the cable to regular TV and plugging in the old yellow RCA cable and see if you get a picture then...
What I found was that I would not get any picture when it was switched on HD and I thought I had killed my 360, but switching to regular gave me a picture but it had glitches and artifacts everywhere. I think it was a result of tightening the heatsinks TOO MUCH. adjusting the tightness of the bolts seemed to help.
Post by: arq_danilo on November 13, 2007, 05:03:00 PM
QUOTE(Digital_sin @ Nov 12 2007, 10:18 PM)
Hey guys, just a simple question...
I bought a new premium 360 that has a mfg date early 2007, didn't set it up yet but it seems to work fine.
My concern is this; should I do this MKIII mod eventhough my 360 works fine to prevent the 3RLOD from happening in the future, or leave things as it is right now?
Also; if you're suggestion is to do the mod, my understanding so far is to:
1) Follow these steps literally but without a shim
2)Do the 12v fan mod
3)Do the divider/shroud mod
Am I missing something else here?
Yes... change the original thermal paste... put the AS5...
And that's it! But don't forget that you will loose the warranty doing this...
Good luck!
Post by: danjef on November 14, 2007, 03:58:00 AM
any help appricated and great tutorial have fixed every other xbox np with it
Post by: xen0cide on November 14, 2007, 06:27:00 AM
QUOTE(maxfisher05 @ Nov 14 2007, 06:36 AM)
I had the same problem. Are you using an HDTV and component cables? This may sound weird but try switching the cable to regular TV and plugging in the old yellow RCA cable and see if you get a picture then...
What I found was that I would not get any picture when it was switched on HD and I thought I had killed my 360, but switching to regular gave me a picture but it had glitches and artifacts everywhere. I think it was a result of tightening the heatsinks TOO MUCH. adjusting the tightness of the bolts seemed to help.
well i thought of that possibility (even went as far as thinking that the video out from the mobo is not workin right inspecting it further, I didn't see anything wrong with it) I'm using an official x360 vga to play on my monitor. I thought that was a problem, so i tried it with a normal component cable with same results, no picture. Then i tried it with the rca yellow cable with no luck too (IMG:style_emoticons/default/sad.gif) (and this is all with the switch set on tv, since i don't have an hdtv to use). I also tried all sorts of tightness of the bolts (really tight to really loose)
I'm really starting to think that my 360 is dead... but i'm still hoping theres some way to revive it again...
Post by: arq_danilo on November 14, 2007, 08:25:00 PM
QUOTE(danjef @ Nov 14 2007, 08:58 AM)
i have recently tried fixing a 0102 and it worked for a short time so i reapplied paste and tightend screws and it worked again for another short while 1-2days but i feel its pointless trying the same thing over and over, i didnt however use a shim as the heatsync seems to be making good contact with the GPU with 2 washers on, even if it appears to be making good contact do you guys think trying a shim will solve the problem?
any help appricated and great tutorial have fixed every other xbox np with it
the SHIM method may solve your problem... better, it almost certainly that will solve your problem...
its a very important method and must be used in errors like yours: 0102, 0110 or 0020
try it and then post your results... you got nothing left to loose.. (IMG:style_emoticons/default/wink.gif)
good luck!
Post by: nukem419 on November 16, 2007, 03:34:00 AM
QUOTE(sinister slipknot @ Apr 22 2007, 08:54 AM)
The idea of this is to eliminate the X-clamps as they force pressure on the board so that after heat/time the chips become loose, supposedly giving the 0102/0020 error.
Flat washers:
(IMG:http://www2.gpmd.com/image/d/dubq3308.jpg)
Spring washers:
(IMG:http://img.alibaba.com/photo/51061182/Spring_Washer.summ.jpg)
those are lock washers, spring washers are different.
Post by: eugenile on November 17, 2007, 05:51:00 AM
It has been working fine for about a year, no problems iwth gears of war either. Then just started playing mass effect, and then it started to freeze in that game. It got worse and worse, so I did this mod.
Took a few adjustments, and settled with 2 washers for each on the gpu and cpu. Using some no name compound, everything else stock. Stock fans everything.
I was getting the 3 reds, then I got it to 2 reds. wasn't doing anything, so I followed what someone said here, and just let it run until it got more hot (i didnt have the fan shroud in place), not even 5 mins, it was hot, and tightened it down a bit. Then it worked.
But it would freeze after a few mins of play nba2k8 and blacksite area 51. I did the same, got it hot agian, and tightened it a bit more (it was already so tight, none more I could do unless i really forced it). Seem to do the trick, played several games of 2k8, and first level of area 51. With the entire thing reassembled.
Post by: mortuus on November 19, 2007, 04:10:00 AM
Now it is onces every 5 mins offline, online, without disk.
So i already changed my ven voltage to 12v.
Still freezes.
so i decided to do this mod. I already ordered some articlean and new pasta.
this afternoon i am getting some bolts and spring washers, i searched this whole damn topic what kind of washers. I think springs are the best right? metal onces.
I'll buy both in case someone reply to me i need others (IMG:style_emoticons/default/tongue.gif)
I will also do the divider mod for better airflow. and cut the back of the vens.
Then at last i will add another ven from the niko cooler inside to provide cooling!
Mort out!
Post by: VanydotK on November 19, 2007, 11:11:00 AM
Post by: Digital_sin on November 19, 2007, 07:13:00 PM
QUOTE(mortuus @ Nov 19 2007, 08:33 PM)
ok
so i removed the xclamps and the heatsinks!
and this is what i found beneath it
http://members.upc.n...ox/image005.jpg
http://members.upc.n...ox/image006.jpg
When i say that: because of the overheating problem the thermal pasta melded away from my chips and now overheats even more and the game freezes?
is this right?
So i clean the cpu and gpu, put new pasta on it. and improve my cooling in the case the problem should be solved?
mort
the thermal paste is supposed to be a VERY thin layer. If you're going to apply your own thermal paste do not put too much on the cores, an extremely thin (almost transparent) layer will do just fine.
Post by: Samy`D on November 22, 2007, 05:41:00 AM
Now, I don't know what error code I'm getting because I have no video either... oh well, my xbox warranty is very voided haha (mfg 2006-03-17 if it matters). Anyway, hoping this fixes it.
Just a couple of questions - reading the tutorial you seem to stress a single washer on the cpu bolts and 2 (or 3) on the GPU bolts. Now my washers are thicker than yours (0.8mm as opposed to 0.71mm) and if I understand this correctly, Im going to need more than a single washer as a spacer between the mobo and the heatsink over the cpu, the die stands up easily more than 0.8mm above the mobo... does that sound right?
Oh and anyone wanting to do the shim thing and dont happen to have a bunch of old heatsinks lying around, I just go to a big hardware store (Bunnings here in aus) and they have lengths of 1mm thick alu bar that will do the job perfectly...
Post by: enforcer2150 on November 22, 2007, 07:17:00 AM
Post by: gatorayde on November 22, 2007, 07:48:00 AM
Now if you open it to flash the firmware or something, then I would do the x-clamp replacement, yes.
And no, you wouldn't have to overheat it.
Post by: doctordoomfury16 on November 25, 2007, 08:42:00 PM
Your opinions will be greatly appreciated. thanks!
Post by: mortuus on November 26, 2007, 04:38:00 AM
I just wanted to add that I am NOT having any problems.
I replacement my X-clamps (as a I posted before) because I had freezing problems after 30mins of one hour.
When I replaced the clamps I also went for some new pasta on my chips.
When I was done with all the mods (also placed a NEW fan 5v) my console keept freezing after 15 sec.
So I tried different types and numbers of rings (washers).
BUT i succeded! I screw the bolts loose and so loose that the chips dint make contact with the heatsinks (wich will cause 2 red lights error)
After that i tied them all up, a little bit everytime. until it wont freeze. So the bolts arnt that tied up now, but tied enough to keep the heatsinks on there place.
Everything is working perfect! no freezing, even after 3 hours! I could never hoped for this succeed!
Anyway since I dint had any problems with RROD, so I am not posting in the succes tread.
Just wanted to let you know if you have freezing problems after 15 sec, you prob screw the bolts to TIED.
cheers
mortuus
Post by: Samy`D on November 26, 2007, 05:15:00 AM
QUOTE(doctordoomfury16 @ Nov 26 2007, 03:18 PM)
I was able to reduce the 3RLOD to two, when I boot my console it just shows 2 red lights. My question is: is there an alternative for the arctic silver thermal compound? Because here in the philippines i am only able to find what is called "Silicon Compound", it is white in color and has a consistency similar to that of a facial cream.
Your opinions will be greatly appreciated. thanks!
Sounds like you could have too many washers and the heatsinks arent making good contact with your chips. That silicone thermal compound is fine. And make sure the pressure on the chip is even.
Post by: dpbmt on November 26, 2007, 05:53:00 PM
QUOTE(dpbmt @ Nov 25 2007, 04:27 PM)
Can i get the screws and washers in Do it all? nearest B&Q is over an hours drive away.
(part numbers would be nice to
)Post by: mk500 on November 27, 2007, 01:36:00 PM
I am attempting the MKIII process, but have a couple questions:
It is extremely difficult to find the 15mm screws here in the US, but I was able to find 16mm ones. I was thinking about installing 1mm worth of washer(s) on the outer metal shield. This should give me the same effect as a 15mm screw, right? Otherwise I will foul the heatsync, right?
I was able to find spring washers. Once I make sure I have enough washers to be the same height as the standoffs, do I just replace one of them with the spring washer? Probably the one closest to the heatsync?
Post by: doctordoomfury16 on November 28, 2007, 06:39:00 AM
Post by: hotwheel6661 on November 28, 2007, 03:41:00 PM
I finally got my xbox working using MKIII i did exactly what it said followed it step by step the only thing diffrent was i used the artic silver Best Buy sells and its working great
Here are the Lowes part#'s i used
Machine Screws Oval Head Phillips 138566 (M5-.80 x 16)
5mm Flat Washers 138319
Thank to RBJtech and to JAmerican for the part #'s from lowes
Post by: absami on November 29, 2007, 10:39:00 AM
it worked fine for 3 days and now its freezing within two min, even freezes on startup
now when i tighten up screws of GPU 3ROD comes in and when i loose them freezing starts.....
what should i do now?
i have done RBJtech's MK3 with shim.....
it worked fine for 3 days and now its freezing within two min, even freezes on startup
now when i tighten up screws of GPU 3ROD comes in and when i loose them freezing starts.....
what should i do now?
This post has been edited by absami: Nov 29 2007, 06:38 PM
Post by: InFaMoUs RooKi3 on November 29, 2007, 11:45:00 AM
QUOTE(absami @ Nov 30 2007, 04:15 AM)
i have done RBJtech's MK3 with shim.....
it worked fine for 3 days and now its freezing within two min, even freezes on startup
now when i tighten up screws of GPU 3ROD comes in and when i loose them freezing starts.....
what should i do now?
i have done RBJtech's MK3 with shim.....
it worked fine for 3 days and now its freezing within two min, even freezes on startup
now when i tighten up screws of GPU 3ROD comes in and when i loose them freezing starts.....
what should i do now?
I had a similar problem with mine, I didn't do the shim though.
I finger tightened all 8 screws and then plugged it in and pushed down on each individual screw until I got green lights. You will have to reboot for each screw. Hope this helps you out.
This post has been edited by InFaMoUs RooKi3: Nov 29 2007, 07:46 PM
Post by: absami on November 29, 2007, 12:39:00 PM
Post by: absami on November 29, 2007, 12:56:00 PM
This post has been edited by absami: Nov 29 2007, 09:00 PM
Post by: mk500 on November 30, 2007, 01:25:00 AM
QUOTE(hotwheel6661 @ Nov 28 2007, 03:17 PM)
Here are the Lowes part#'s i used
Machine Screws Oval Head Phillips 138566 (M5-.80 x 16)
5mm Flat Washers 138319
Did you have to trim the 16mm screws down to 15mm to avoid fouling the heatsync? I have 16mm screws also, and am trying to figure out if I need to modify the procedure with an extra washer...
Post by: hotwheel6661 on November 30, 2007, 07:06:00 AM
QUOTE(mk500 @ Nov 30 2007, 04:01 AM)
Did you have to trim the 16mm screws down to 15mm to avoid fouling the heatsync? I have 16mm screws also, and am trying to figure out if I need to modify the procedure with an extra washer...
No i didnt have to trim them they work perfectly
Post by: danooch13 on November 30, 2007, 09:44:00 AM
The entire process took about 45 min, and worked flawlessly. BE PATIENT WHILE DOING IT!!!, THATS MY ONLY ADVICE.
Thanks for the idea!
Good luck to everyone else who tries it.
Post by: flergle on November 30, 2007, 05:59:00 PM
Post by: flergle on November 30, 2007, 10:46:00 PM
Post by: gust on December 01, 2007, 03:20:00 PM
I mean i am about to flash my drive and since i will open the console i thought it might be a good idea to help my console never face the 3LOD.
I am thinking of adding an extra head fan at the cover and a talismoon fan at the back.
Also i will apply the air flow trick with the paper by RBJtech.
Should i just stick there or should i also remove the x-clamps.
Is this a fix for the 3LOD only or is it also helpful for a brand new fully fanctional console!
Thank you all for the replies!
Post by: mk500 on December 04, 2007, 01:41:00 AM
QUOTE(flergle @ Nov 30 2007, 10:22 PM)
Sry for the double post but I was desperate and used the bake method from this post http://forums.xbox-s...howtopic=629455 booted right up no problems so far.
I also was having trouble making RBJtech's method working until I combined it with the bake (highly experimental) process. I have not experienced a single RROD since the bake method, and was unable to get more than a few minutes of play time with RBJtech MIII alone. Of course, I only have played for a few hours so far, so we will see what the long term effects of the bake will be (longest documented run post bake is about a month).
Post by: lamborman on December 04, 2007, 05:53:00 AM
got code 0203 when I used only one washer on GPU bolts. Fixed that and after that it worked.
Cheers..
Post by: dpbmt on December 04, 2007, 04:01:00 PM
Post by: [TONE] on December 04, 2007, 05:17:00 PM
This post has been edited by [TONE]: Dec 5 2007, 01:25 AM
Post by: doctordoomfury16 on December 07, 2007, 07:57:00 PM
Post by: doctordoomfury16 on December 14, 2007, 07:57:00 PM
I have replaced the x-clamps, used no washers underneath or above the board.
It worked fine, shows green lights when i boot up the console.
I was able to play for 3 minutes or so then 2 red lights show up.
I put silicon compound on the GPU and CPU dies.
I boot it up again, still fine, and was able to play for 5 minutes or so.
Then I decided to clean the heatsink and GPU and CPU dies, removed residues of thermal compound underneath the heatsinks, on top of the dies and also on the sides of the dies (black gooey thing).
When I turned the console on, 3RLOD.
I also noticed that the board is somewhat bent, and when i look under the board, there is a curve or lump where the CPU and GPU are soldered.
I am currently using the shim method, placed 1 washer underneath the board, 2 washers above the board.
When I boot the console, still shows 3RLOD for about 3 seconds then 2RLOD.
So, was it wrong for me to clean the processors of any residues of thermal compound? (IMG:style_emoticons/default/sad.gif)
Post by: Digital_sin on December 19, 2007, 01:24:00 AM
Post by: Kinitex on December 19, 2007, 02:18:00 AM
QUOTE(Digital_sin @ Dec 19 2007, 10:00 AM)
I've seen some people do this mod by using shorter bolts and tightening the heatsinks right to the motherboard (not to the metal RF shield), I kindda like this method because it doesn't include any drilling, will it produce the same results?
Where do you find such bolts? My local homedepot only has 5x16mm which is what I use. But that does sound much easier/better working.
Post by: Digital_sin on December 19, 2007, 04:57:00 AM
QUOTE(Kinitex @ Dec 19 2007, 11:18 AM)
Where do you find such bolts? My local homedepot only has 5x16mm which is what I use. But that does sound much easier/better working.
I later found out that this method is called "LAWDAWG0931's method";
X-Scene Thread
Tutorial link
I really don't know which method to go for right now, One needs drilling and one doesn't. The thing is I'm modding a functional 360 which so far didn't give me RROD (I've only been using this 360 for like 2 month) I'm not even sure if i should mod it or not (If it aint broke, don't fix it) However if i'm gonna mod it, i think i'll go with LAWDAWG0931's method first because it doesn't require drilling, then if someday in the future it does give me RROD i might then switch to RBJtech's method.
As for where did i found the 10mm bolts required for LAWDAWG0931's method, I actually live in Egypt so I probably can't help you much there. I had trouble finding them too. However; 16mm bolts are less common here than the 10mm ones, another reason why I'll probably go for LAWDAWG0931's method.
Post by: Mastershredder on December 20, 2007, 10:31:00 PM
QUOTE(Kinitex @ Dec 19 2007, 04:18 AM)
Where do you find such bolts? My local homedepot only has 5x16mm which is what I use. But that does sound much easier/better working.
From grim_d:
Here are the offical home depot part numbers:
Qty - 8 Machine Screw Pan - Phillips 5 x 10mm (DR# - 313) UPC - 030699 801282
Qty - 16 Flat Washer Nylon #10 (DR# - 610) UPC - 030699 869381
Qty - 16 Flat Washer Steel / ZINC Plated 5mm (DR# - 606) UPC - 030699 363087
Post by: kniceguy on December 26, 2007, 02:53:00 PM
I have tried 3 different fixes. I used Lawdawgs first, worked for about 2 months. Then red ringed again.
I then switched to RBJtech's MKIII minus the shim. I also bolted the heatsink to the mobo and drilled the case to allow the head to sit down lower. (I'll try and update with a picture for clarity). This worked for about 3 weeks. Same thing as the last fix, graphics froze and on reboot 3RLOD. (IMG:style_emoticons/default/sad.gif)
Last week I used the MKIII with a shim. I am using 15mm 5m bolts with a .6mm aluminum shim. 2 washers, one 1mm metal, one nylon (I think it's .5mm). I have one Nylon shim on the bottom side of the mobo. I've also added the fan divider and cut away the grill on the case. Worked great for a 6 hour Halo 3 session last Friday night.
Last night I was watching a HD-DVD (Shooter - great flick) and all of a sudden the black colors turned green. I popped out the blade and it was heavily distorted. Reboot gave me the same thing in about 5min. I switched to my other box (Nov-05 system, unmodified) and it played the movie straight through.
Any ideas? I will test it tonight playing some more Halo 3 and some Gears of War (those both seem to really push the GPU for a good test). This really sounds like a GPU problem but I'm not sure. After reading here today I think I may have put too much AS5 on the die.
One question, could this be RAM related? I have not added anything to the RAM chips as of yet. Thinking this might be the next step. (IMG:style_emoticons/default/uhh.gif)
Post by: cellblockfour on December 27, 2007, 07:45:00 AM
Im in UK so for ease of finding parts im goign with the MKIII X-clamp method.
One thing i was wondering is that my console does not load up and then get 3 ROD it instantly does to it. So unless its overheating in like a split second surly its more than just an overheat issue?
How would the xbox know that it is now equiped to deal with the heat better after the mod? surly it would just go straight to error again?
This leads me to my next question, will i need to almost certainly do the overheat bake trick?
Cheers
Post by: getsleepy on December 27, 2007, 07:52:00 AM
because the heat sink isn sitting on the processor it over heats in about 2 secs.
you need to remove the heat sink clean the chip reapply themal paste and make sure the heat sink is on really tight and hard down onto the chip.
remove the xclamp and use 15mm m5 studs.
flush headed m 5 studs are best cos if not the will short on the case and it will not work unless you drill hole in the tin case for the studs to go in so they dont touch.
when you have reclamped everything down connect up but leave fan of for 3 mins green light will turn to 2 reds this melts paste and ensures every thing is well bonded.
it does work have faith
This post has been edited by getsleepy: Dec 27 2007, 03:55 PM
Post by: cellblockfour on December 27, 2007, 07:56:00 AM
Also if the bolts are going through the metal case surly they would short anyway?
Post by: kniceguy on December 29, 2007, 03:18:00 PM
QUOTE(getsleepy @ Dec 27 2007, 07:28 AM)
flush headed m 5 studs are best cos if not the will short on the case and it will not work unless you drill hole in the tin case for the studs to go in so they dont touch.
when you have reclamped everything down connect up but leave fan of for 3 mins green light will turn to 2 reds this melts paste and ensures every thing is well bonded.
it does work have faith
What is shorting? The heat sink? What the heck are you talking about?
Post by: sammydad1 on January 05, 2008, 12:41:00 AM
I did the fix, and now the cpu & gpu won't heat up at all. I am still getting the 3 Lights flashing upon power up.
I have tried loosenign up the screws and wiggling the heat sinks and then power back on....still no go...
I am thinking the motherboard is mucked beyond repair using this method....??
Any help or other ideas ?
SD1
Post by: armani on January 05, 2008, 01:52:00 PM
And it did not work. The 360 doesn't even turn on now. I can hear the psu clicking but, no green light.
I changed 2 things from the tutorial, not sure if they had an impact. I live in Canada and the Radio Shack equivalent store, The Source, doesn't carry Artic Silver. So, I used NEXXTECH Heatsink Compound. I believe it's just as good. Also, I was three washers short for the top of the board, so I used two 5 mm nylon washers for 2 of the studs on the GPU heat sink.
When I get a chance today, i'll get the additional 5mm washers i need and retry. But, it doesn't look good. I'm not sure why I'm not getting any lights at all. Any suggestions?
Armani
Post by: sammydad1 on January 07, 2008, 12:47:00 AM
Quick followup to my post from last nite or so...
As a passing thought, since this problem is pretty much heat related, I decided to super-cool the motherboard before trying to power it up, since I wasn't getting anything other than the 3RD's anyhow.
Well...I used some of that "DUST OFF" stuff for dusting your computer (and what not) that I had gotten at Costco some time back....
Well...I tipped the can upsides down and gently sprayed around the heatsinks and on a few of the larger chips on the motherboard. Then I tried turning it on, and it tried to boot properly this time. I let it get to overheat zone and then let it cool off and tried a normal power up. Bang...nothing..3RDs again...
I repeated my super cooling test again and it powered up again....let it overheat...cool down....Nuthin !! 3RDs again...
I repeated it a thrid time and still ended back at the 3RDs again, altho it did power up again in between...
SO I am in a quandry now....What piece on the motherboard when super-cooled shrinks up just that teeny bit as to allow the motherboard to power up...that once heated back to normal temp, yields the 3RDs.
I guess I will try the heat gun next since I now have the motherboard back up and the heat sinks off....
When I reassemble it for testing after heat gunning it, I am going to use only nylon washers as another guess/test since I have read so much about flexing boards...
Any thoughts ?
SD1
Post by: Samsun on January 07, 2008, 11:50:00 AM
QUOTE(doctordoomfury16 @ Dec 15 2007, 03:33 AM)
Here's the story for me so far..
I have replaced the x-clamps, used no washers underneath or above the board.
...
I also noticed that the board is somewhat bent, and when i look under the board, there is a curve or lump where the CPU and GPU are soldered.
I am currently using the shim method, placed 1 washer underneath the board, 2 washers above the board.
When I boot the console, still shows 3RLOD for about 3 seconds then 2RLOD.
So, was it wrong for me to clean the processors of any residues of thermal compound?
Of course the board was bent if you didn't use any washers! What do you expect? I'd imagine you would need more than 2 washers when using a shim.
When you say you cleaned the thermal compound, you did then replace it didn't you??
Post by: sammydad1 on January 07, 2008, 11:10:00 PM
Woo HOO !! Got this bad boy figured out !!!
After doing some testing late last nite with my upsides-down can of DUST OFF I was able to determine where on the motherboard it was losing (or making connection when super cooled) connection yielding the 3 light error.
Th easiest way to describe it: facing the Copper Cooling pipe on the CPU heatsink, at the base of the CPU to the immediate left edge, if I super-cooled that area, it worked. NO WHERE else on the motherboard yielded ANY change in the 3 light error !!!!
Using that observation, (and Wiki info that solder melts by approx 370 F) I used a heat gun obtained from Home Depot (Milwaukee Model 3300 $39.99) and set it for 550 F to 750 F and did the heat gun fix, focusing it extra on the edge area of the CPU I observed as mentioned above. Per other's instructions when using the heat gun fix, I did the tin-foil wrap before the heat gun was used. I actually repeated the heating process a second time again focusing on the edge of the CPU at the 950 F setting moving gingerly back & forth for about 30 seconds. Then I let it cool down completely per instructions.
So far so good !! I am certainly NOT going to totally reassemble it until I have mucked around with it for a while using my step-son's game & controller.
Want to THANK YOU ALL !! for keeping this site alive and up to date !!
SD1
Post by: doctordoomfury16 on January 08, 2008, 02:57:00 AM
QUOTE(Samsun @ Jan 8 2008, 03:26 AM)
Of course the board was bent if you didn't use any washers! What do you expect? I'd imagine you would need more than 2 washers when using a shim.
When you say you cleaned the thermal compound, you did then replace it didn't you??
Well, the guide stated to clean off any residue of thermal compound, so i kinda removed all residues of the old thermal compound..
Post by: devilspy on January 14, 2008, 08:31:00 PM
I already have the parts from Lowes for Lawdawg0931's method. But my box got 3rod again.
Want to do it proper this time.
This post has been edited by devilspy: Jan 15 2008, 04:34 AM
Post by: ShuJinkO on January 15, 2008, 01:38:00 AM
Iv'e read so many tutorials the parts "lists" are just plain confusing me now.
think I bought the wrong sized stuff :/
and no 5mm Nylon/Spring washers at work! :\ (B&Q)
Only 5mm x 20mm machine screws.
they have 5x10/5x12/5x16 though.
Post by: robio on January 21, 2008, 04:45:00 AM
i dont have the 3RLOD yet, however my console wont boot up properly and just constantly freezes.
would this fix my problem if i attempt this fix?
thanks in advance. rob.
Post by: sammydad1 on January 21, 2008, 10:41:00 PM
Well...I guess I spoke too soon from my original posts in here....
Couple days later it started 3ROD again...nothing could stop it.... Ended up opening the box again...
Refer to the 12 penny fix Thread here....I ended up using 1 penny plus Double sided foam tape and once it was all put back together....it seems to run like a Real champ now....
Much better than just the XClamp by itself... The trick as others point out is to find what screw tightenings will work for your specific system... AND that can take a while....
But stick with it !!!
SD1
Post by: liquidmc420 on January 24, 2008, 09:25:00 PM
Post by: EvanVanVan on January 29, 2008, 06:55:00 AM
Post by: UniqueDisease on February 09, 2008, 01:08:00 AM
Thanks
Post by: UniqueDisease on February 13, 2008, 05:54:00 PM
Post by: busa on February 21, 2008, 02:31:00 AM
1. How do you get the old paste off chips and heatsinks + safely?
2. Where do you get new thermal paste from (should it be a specific one? (uk))?
3. How should i apply the new thermal paste?
4. Iv'e heard thermal pads be mentioned?? What are these n do i need to worry about them???
If anyone can answer any please do.
Thankyou v much
Post by: zazarider on February 28, 2008, 10:58:00 PM
Busa
1.Use a razor or credit card to scrape off the old paste. after that use some goo gone or other product to clean of the GPU as well as the CPU whatever your doing.
2.Thermal paste can come in many varieties. AS5 seems to be the fave. Another one that I use and have used in many PC builds is Di Electric compund. Basically its a silicone base that does the exact same as AS5 and some others. AS5 would be the better route if its available.
3.When you add the compound, add about the size of a grain of rice. A little can go a long way. Just be sure to cover the CPU and the GPU all the way around to make sure you get good contact with the heatsinks.
4.Like I said I'm kinda new to the xbox moddings but I think that the thermal pads are used to dissipate heat from the ram chips that are in the board. When you see this 12 penny fix posted in some of these tuts this is the place where they use these at.
If I am wrong please let me know. I just want to make sure things are correct
later
This post has been edited by zazarider: Feb 29 2008, 06:59 AM
Post by: jwood700 on March 18, 2008, 05:53:00 PM
Post by: DeLuXe360 on March 20, 2008, 11:13:00 PM
Any ideas would be great.
Thanks
Post by: Wheezy13 on March 21, 2008, 12:18:00 AM
QUOTE(jwood700 @ Mar 18 2008, 07:29 PM)
Hey guys, i have went through with it and now instead of the 3 lights flashing it is 2 lights (1, and 3 are flashing red) It doesnt even boot up just goes right to the 2 lights any ideas?
Try loosening/tightening your X-Clamp screws. If you get the 2 lights (overheated) right away, the screws are probably too loose.
QUOTE(DeLuXe360 @ Mar 21 2008, 12:49 AM)
hey all, i tried the mkIII method but it didnt work, it comes up with the 3rlod and the fans dont even start, the other day i got it to work but onlt 2 lights came on(overheating) so thats when i tried the mkIII method, but now im back where i started,
Any ideas would be great.
Thanks
This happened to me, chances are your X-Clamp screws are too tight and you're warping the motherboard. Loosen the screws and it should be fixed.
Post by: DeLuXe360 on March 21, 2008, 12:58:00 AM
Post by: stoopidmnkey on March 21, 2008, 09:25:00 AM
QUOTE(DeLuXe360 @ Mar 21 2008, 03:34 AM)
ok thanks, well ive got it going now, but after 2 mins it will overheat, is this because i dont have the full case around it, its still open and i guess the fans cant do there job when its open?
I just did the x-clamp replacement however my xbox doesn't fully boot up... starts to, turns the fans on but immediately shuts them back off... after a couple of mins the heatsinks are ice cold???
Any thoughts that this was changed in an update from MS?
Guess I have no choice but to look for a heat gun!
Post by: Wheezy13 on March 21, 2008, 04:35:00 PM
QUOTE(DeLuXe360 @ Mar 21 2008, 02:34 AM)
ok thanks, well ive got it going now, but after 2 mins it will overheat, is this because i dont have the full case around it, its still open and i guess the fans cant do there job when its open?
You don't need the "full" case on it (the top and bottom white plastic case pieces aren't necessary for it to run), but you do need the white plastic fan shroud in place that covers both heatsinks and the fan. If you aren't using that, then the fans are just pulling air out, but not necessarily the hot air from the heatsinks.
Post by: Tim46 on March 22, 2008, 06:52:00 PM
Post by: stoopidmnkey on March 26, 2008, 05:57:00 PM
QUOTE(Tim46 @ Mar 22 2008, 09:28 PM)
Hi I did the x-clamp repair and now i have no picture but i do have sound. I have tried one washer, two washers i have taken it apart and put it back together about four time trying different things each time but still no pic any advice on what i should try next.
Seems minimal, but make sure you have the selector on the right setting (HDTV or regular). I had this problem too but the x-clamp fixed it.
Post by: wllazer17 on April 02, 2008, 04:27:00 PM
I have seen some sites say yes and some say no... and I don't think a lot of people in this thread had this specific error.
Any clarification would be great, thank you (IMG:style_emoticons/default/smile.gif)
This post has been edited by wllazer17: Apr 2 2008, 11:27 PM
Post by: thepwnage on April 02, 2008, 04:33:00 PM
Post by: wllazer17 on April 02, 2008, 04:39:00 PM
QUOTE(thepwnage @ Apr 2 2008, 06:09 PM)
The Xclamp fixed my friends e74 box for a week. Then I had to heatgun the southbridge and scaler chip...so it might it might not...
Hey thanks for the reply. Could you describe where the southbridge and scaler chip are or do you know where I can see a picture that shows it? I am going home from college this weekend and we are going to try to fix my brothers' xbox. We are going to try the xclamp replacement first then I guess we will try what you described. What kind of a heatgun did you use and how long did you heat it? Just lookin for some more details so we don't completely brick his xbox, thanks.
Post by: wllazer17 on April 05, 2008, 03:12:00 PM
X-Clamp fix did not fix my 1 red light e74 1022 error. It caused 3rrod (0020) when the screws were not tightened enough. Then after fixing that I heated the ANA chip with a hair dryer for 2 mins and now the xbox works. Thanks
Post by: DeLuXe360 on April 08, 2008, 12:44:00 AM
i got my xbox working, played for a couple hours non stop, very happy, BUT, for some reason it doesnt play a couple games,, FIFA08, Madden08, NBA live 08, all others it plays, and i know the disks are ok cause they work on another xbox, any ideads would be great, they're the only 3 games i want to work!!!
thanks
Post by: blahdah on April 18, 2008, 06:47:00 PM
Know before the mk3 actually came out i performed a fixed very similar to what RBJ has i have never performed the MK1 fix
wht i was wondering pull the heatsink down onto the board VS pushing the heatsink down onto the board they all seem the same in the end
Just wanted 2 know which one people thinks works better
Post by: Zikmorf on April 18, 2008, 07:21:00 PM
This post has been edited by Zikmorf: Apr 19 2008, 02:23 AM
Post by: RYU81 on May 08, 2008, 11:53:00 AM
Post by: glitch666 on May 13, 2008, 01:47:00 AM
Post by: Zikmorf on May 13, 2008, 05:12:00 AM
QUOTE(glitch666 @ May 13 2008, 09:23 AM)
Hi, I would like to do this as a preventive measure. Will 5x10mm screws work or should I opt for longer screws for RBJs method? I have like 60 5mm washers, lawdawg promotes nylon washers, is this important?
Now I'm new to the x-clamp fix, but I too did it as a preventive measure. Now I'm not sure how important nylon washers are but I'd imagine they'd be alright, surely all they'd do is ground the heatsink. As for the bolts, I don't know 'cos I did lawdawgs method. Sorry I wasn't much help but I can't see what's wrong with normal washers. If I'm wrong I'm sure someone will correct me.
Post by: Tone666 on May 14, 2008, 11:00:00 PM
Took the whole thing apart and tried again.. worked for 5 mins.. and the games just froze and then rrod again...
so i redone the whole thing again.. also done the penny trick under the ram pads (2 x 1p) on each.. also done the fan shroud mod.
Works so far.. have hammered the 360 for the last 5 hours and all is good
Am wondering about the cardboard over the GPU heatsink tho... now my GPU heatsink gets really really hot, as in so hot i cant touch it for long.. same goes with the little heatsink attatched to it by the copper heatpipe (360 Elite)
Can RBJ confirm that the cardboard cant catch fire
I dont think it gets hot enough to set it on fire tho. reading from what he said.. his heatsink is cool to the touch.. mine is hot.
Post by: jc123rules on June 13, 2008, 08:27:00 AM
Can anyone help?
Post by: Lovemuffin15 on June 14, 2008, 03:22:00 PM
Right now I resorted to no heatsinks and letting it sit for a couple minutes, but I don't feel any heat at all from the chips...
I wonder if anyone has any ideas?
Post by: HackerSupreme on June 14, 2008, 06:10:00 PM
Post by: Lovemuffin15 on June 14, 2008, 07:31:00 PM
Post by: Brains_1969 on June 15, 2008, 07:57:00 AM
QUOTE(jc123rules @ Jun 13 2008, 04:03 PM)
When i click on the links on the first page of this topic i cant view the two tutorials for RBJtech's Method 1 and 2. I get an error when i click on the links and i really would like to view these two tutorials.
Can anyone help?
Same here is there any possiblity of somebody else re-posting these tutorials as all links to RBJ's methods seem dead. This would be very much appreciated.
Thanks
Post by: HackerSupreme on June 15, 2008, 10:54:00 AM
QUOTE(Lovemuffin15 @ Jun 14 2008, 10:07 PM)
is that what's supposed to come up on the TV.. cuz my TV stays black/blank... I didn't realize it was supposed to show something. Yikes.
http://www.llamma.co...error-codes.htm
Post by: Lovemuffin15 on June 15, 2008, 01:44:00 PM
Mine's 0001 Power Supply Problem.
My question is, is there any good way to check for shorts in the motherboard/etc?
I don't think it's the PCU, but I know how to check that.
(If anyone wants to move this to the proper thread, I'd actually be grateful)
Post by: SlipperyBits on June 16, 2008, 02:31:00 AM
Anyone?
Post by: HackerSupreme on June 16, 2008, 10:59:00 AM
QUOTE(Lovemuffin15 @ Jun 15 2008, 04:20 PM)
Okay, I had no idea about the secondary error codes.
Mine's 0001 Power Supply Problem.
My question is, is there any good way to check for shorts in the motherboard/etc?
I don't think it's the PCU, but I know how to check that.
(If anyone wants to move this to the proper thread, I'd actually be grateful)
If you can, try the system with a different power supply.
Post by: robinfinck1610 on June 18, 2008, 05:06:00 AM
Post by: HackerSupreme on June 18, 2008, 07:53:00 AM
Post by: tengai on June 22, 2008, 05:09:00 PM
Post by: mackemsrule on June 24, 2008, 02:43:00 PM
Post by: Zait on June 29, 2008, 11:37:00 AM
QUOTE(mackemsrule @ Jun 24 2008, 10:19 PM)
Hi have these tutorials been removed, when i click on the links all i get is error 404
Ya. Anyone have this tutorial mirrored somewhere?
Post by: vdorza on July 10, 2008, 07:34:00 PM
QUOTE(Zait @ Jun 29 2008, 07:13 PM)
Ya. Anyone have this tutorial mirrored somewhere?
I found the tutorial on http://www.robinhood.../...=511&p=2599
I did the fix, and it worked very fine. I only played one hour, but without problems.
I will continue testing.
Than you all for the help.
Post by: clubfederation415 on July 12, 2008, 08:09:00 AM
Thanks! im going to try this tut as soon as i get my broken xbox
Post by: zzleezz on July 12, 2008, 05:01:00 PM
QUOTE(tengai @ Jun 23 2008, 12:45 AM)
I did the rbjtech mk.3 mod a few months back and it's working fine. I may need to do another for a friend, but I can't remember the bolt lengths (tutorial/site is down). Please, somebody jog my memory...
Just completed this fix using the llama tutorial, only M5 bolts I could find at local DIY store were 25mm so I dremmeled the GPU bolts down to 12mm. Looking at the bolts in place I could have made the 3 or 4 mm longer. Also did th CPU heatsink but didnt bother to cut down the bolts as they rise up next to the sink without getting in the way, in fact its a bit more surface area for the sink!
Has error code 0102. Followed the tute pretty closely, when I turned on the xbox the first time before heating it I still had the error. Heated it for 10 mins with the fans blowing only on the CPU and the GPU covered by the DVD drive. Left it to cool for 15 mins and when I tried it again it worked perfectly. Been playing Rockband all afternoon without any problems at all.
Removing all the fluff from the case and improving the heatsink thermal compound has made the xbox far quieter, pretty sure the fluff started the problem in the first place.
Forum has been amazingly usefull to me over the last few years, from modding original xbox to this, thanks Scenyx and all involved.
Post by: michael196 on July 18, 2008, 10:07:00 AM
Im out of ideas...
any help?
Thanks a lot
-Mike
Post by: Lynas on July 22, 2008, 07:36:00 AM
Many thanks guys.
Post by: michael196 on July 23, 2008, 12:21:00 AM
Post by: M2X on July 30, 2008, 06:20:00 AM
First I've got to thank Richard for this wonderful fixing method.
Then I've got to say these methods are really time consuming and they require a lot of patience.
I have tried Lawdawg0931's method too but it sucks.
It is just fast but the fix won't last long enough.

Here are some notes about my fix:
1) Both of the consoles were dead with error number 0102.
2) None of the 2 consoles booted up the first or the second time. I had to play with the tension of the bolts and/or number of washers and it was really a pain in the butt.
3) For the first one I repaired I used 3 washers (for GPU and CPU). 2 washers would give me 0020. But for the second one, 3 washers and the heatsinks didn't touch the core.
4) What was really bother me was error code 0020 after the fix. I know it's not overheating or anything but if the bolts are too tight then this error pops immediately after the power on. Someone has to discover the root of this error.
5) I didn't use ANY heat method. I just played with the screws until I saw some green lights.
6) I measured the thickness of all the washers, nuts, etc with a vernier caliper and they matched the sizes given in this tutorial.
7) The worst part of the fix was modding the GPU heatsink with took about an hour to complete.
8) I'm sure that the fixes are lasting fixes because the second one ran really hot (before the cooling mods) and produced artifacts but never froze and never gave me any RRoD. So I'm sure the solder points are pressed together tightly.
9) For the second console, I couldn't find 2cm long screws so I used 2.5cm ones and it later created several problems. IE when I wanted to tight the nuts with a socket wrench, it couldn't catch the nut. So I used another spring + flat washer underneath the lock nut. But I don't have any problem mounting the DVD-Drive.
I suggest anyone do the fix for RRoDed consoles and on new consoles to prevent further problems.
Good luck.

Post by: jackmegood on August 01, 2008, 09:22:00 AM
QUOTE(M2X @ Jul 30 2008, 12:56 PM)
3) For the first one I repaired I used 3 washers (for GPU and CPU). 2 washers would give me 0020. But for the second one, 3 washers and the heatsinks didn't touch the core.
4) What was really bother me was error code 0020 after the fix. I know it's not overheating or anything but if the bolts are too tight then this error pops immediately after the power on. Someone has to discover the root of this error. (IMG:style_emoticons/default/unsure.gif)
I am having this exact same problem!
Post by: M2X on August 01, 2008, 01:04:00 PM
QUOTE(jackmegood @ Aug 1 2008, 07:28 PM)
I am having this exact same problem!
What do you mean?
If you mean you are always getting 0020 then try this:
First you've got to discover which screw is causing 0020. You can loosen the screws a little bit then each time before powering up the box press hardly on one of the four corners of the heatsink and see what happens. For me for example, the the upper left side of the heatsink pressed would give me 0020. Then I screwed the other bolts tight but not too much and the problem was gone for two of the 3 boxes but I was still left with some 0102.
So that was the point that after 2hours I felt really screwed up. I untightened all of the four bolts on the gpu side and out of nothing I just pressed the power button and TADA!!! The damn thing booted right up.
This method also worked for another box.
I played with it a little and then little by little tightened the screws (except for the screw that caused the 0020) I did this until I saw the console would freeze if I go any further.
Hope this would solve your problem two.
PS:
WOW! Richard and MKI rule!
I fixed another 0102 xbox that also had the shytty 0002!
It's been working fine for 2 days now and I'm gonna return it to the owner within a few days.
Pitty the DVD-Drive is well screwed up and only some old games run fine! The funny thing is that it's not able to read any Verbatim but rather some fake HPs!
So total of 3 boxes are (hopefully if God will) revived with this method!
Post by: strikey on August 01, 2008, 02:06:00 PM
I already did the 12V mod that didn't help much (IMG:style_emoticons/default/uhh.gif).
The 'checkerd' screen is like artifacts with a over clocked gfx card so I assume I have to replace the GPU x clamps.. This method fixes that right? otherwise Ill kick my xbox out of my home and get a elite (IMG:style_emoticons/default/tongue.gif)
(IMG:style_emoticons/default/love.gif)
Post by: M2X on August 01, 2008, 02:28:00 PM
QUOTE(strikey @ Aug 2 2008, 12:12 AM)
Good day,My xbox has died.. a bit..lol Got the checkered screen during 2 min of play.
I already did the 12V mod that didn't help much
.The 'checkerd' screen is like artifacts with a over clocked gfx card so I assume I have to replace the GPU x clamps.. This method fixes that right? otherwise Ill kick my xbox out of my home and get a elite
Yes! It will fix it! At least I know that MKI method surely will fix it. Thus for your situation I don't recommend snugging the screws tight. Cause a simple/gentle pressure on the chip will do the trick.
Happy fixing!
Post by: M2X on August 01, 2008, 02:56:00 PM
I just wanted to add that since 12v mod didn't help preventing this problem, the thermal compund under you heatsink is damaged. Mine was like this and I realized it after I removed the heatsink. So clean it and apply some good AS5.
Post by: Derfuhrer on August 01, 2008, 06:42:00 PM
Post by: zero.Fx on August 02, 2008, 03:11:00 AM
Thanks.
Post by: CamaroGuy on August 02, 2008, 04:26:00 AM
mirrored over there
Post by: strikey on August 02, 2008, 02:03:00 PM
Coudnt find it.. All to high serial numbers.. bah.
So I think Ill buy a good elite (at least I hope so) and keep this 'broken' one to mod more
Btw The link to the MK1 mod doesn't work anymore does some1 have that for me? because the robin hood thing is MKIII
Thnx for the answers tho
Post by: M2X on August 03, 2008, 10:32:00 AM
QUOTE(strikey @ Aug 3 2008, 12:09 AM)
Thnx for the advice.. I Tried ! tried to buy a mod-able elite today..
Coudnt find it.. All to high serial numbers.. bah.
So I think Ill buy a good elite (at least I hope so) and keep this 'broken' one to mod more
Btw The link to the MK1 mod doesn't work anymore does some1 have that for me? because the robin hood thing is MKIII
Thnx for the answers tho
I have both DOC and PDF versions that I found while googling. Since I can't post attachments I can't upload it here. But you'll find it with a little searching. If not, I could email it to you.
EDIT:
Damn! I found the link, here you are:
http://www.croccobis...Replacement.pdf
This one is MKI and I always use this.
Post by: strikey on August 03, 2008, 12:14:00 PM
(IMG:style_emoticons/default/sleeping.gif) Ill post when its done
Post by: strikey on August 08, 2008, 06:41:00 AM
Post by: goatlike on September 14, 2008, 12:26:00 PM
I've only played a half game of COD4 since the fix, but everything seems ok so far. While I had the box open I also did the fan mod with some card stock sent by a politician I don't like. I have not snipped off the grid behind the fan... yet.
All the hardware was available at Aubuchon Hardware. It's the only place within 20 miles of my small town that has any hardware at all, so I was very glad to find metric screws and nylon washers. From the sounds of things, it seems the smaller hardware stores actually carry a greater variety of bits than HD or Lowes.
It took 4 hours, which includes a run to the store for more nylon washers, they seem to fit better.
I'll spare everyone the step-by-step, and just say thank you! Even if that 10 minute game I played was all I get, it's still more than I expected. I'll check back in if it craps out again, or if it runs fine.
Now, if only M$ would take your advice and build the thing properly!
Thanks again!
- Mark
Post by: zzleezz on September 14, 2008, 06:56:00 PM
Xbox now properly dead.
rrod kept coming back, tried to fix it in different ways, attempting to even the pressure on the motherboard. Whatever I tried the rrod returned after shorter and shorter amounts of time.
In a fit of frustration I tried heatgunning the motherboard as a last ditch attempt and although I no longer get 0102 error I now get 0021. Bought a new xbox and I wont void the warranty on this one....
Post by: federico69 on September 17, 2008, 09:57:00 AM
Another sucessful mod.
Just finished doing the RBJtech MKIII method except for one GPU bolt which I had to cut the heatsink and use a nut on as I totaled the thread on the heatsink ...
(took me three attempts but finally got it).Good news is that the XBOX is alive for now. I started testing it with Assasins Creed but with all it's trippy effects, in the begining, I couldn't tell if I was getting artefacts or not.
Soul Caliber 4 works perfect though ...
Finding the right parts in Australia was a royal b.... so I'll throw a little help out those Aussies that want to attempt this fix.
3/16" Machine Screws work fine (thread-wise) but don't use the 3/16" washers get the smaller ones ... or you wont be able to get them on both the CPU and GPU bolts.
Bunnings was the go.
Cheers,
Fed.
Post by: goatlike on September 19, 2008, 01:18:00 PM
Post by: Bradl3y on September 22, 2008, 03:06:00 PM
Instructions for both MKIII and MKI are here. It'd be nice if a mod could update the original post.
Post by: devi0uz_d on October 11, 2008, 03:23:00 PM
The link to the visio template of the fan shrouds links to the old host, which no longer exists.
Would anyone here happen to have that template?
TIA and thanks to RJBTech for the tutorials, nice work!
This post has been edited by devi0uz_d: Oct 11 2008, 10:23 PM
Post by: newkind on December 10, 2008, 11:33:00 AM
1. sometimes when i tighten or loosen the m5's when i turn on my xbox everything looks fine but there's no screen/sound (no red lights at all)
2. when xbox is running it freezes after a while ...
any solutions ?
Post by: Nickans on December 18, 2008, 01:20:00 PM
First time I'm posting in this site, but it been awhile since I'm lurking around
I quickly want to congrats & thanks the mods and admin of this site, who has been really helpful many times.
I got a little Issue with the X-clamp replacement and I hope someone can help me... Here the issue:
First of all, I already repair an xbox 360 with the code 0102 by doing the xclamp fix and it still working so great. Now, one of my friend bring me his xbox360 with the code 0103 (which is pretty similar of the 0102). I done the xclamp fix but at the moment it normally work, it do not. I have a "new" error while starting the xbox, the error is 0110 (Memory error or overheating).
I tried to fix it again by playing with the heatsink and the screws, but still the same new error... I'm almost out of solution now (I'm even thinking about using the heat gun trick). I know that I had some issues with the big heatsink (the four "legs" was not straight and I had an hard time to put the 4 screw in), I change to put some longer screws and it fit fine. However the 3led are still there.
Anyone have an idea of what can I try now, or how this new error can be relate to the old one after the xclamp fix?
Thanks
Post by: adamsmith on January 20, 2009, 11:31:00 AM
This method (Mk3) is not possible on the new heatsinks I think, but then I found this
has anyone done this mod in this way?
Is it bad? good?
Post by: adamsmith on January 22, 2009, 02:28:00 PM
Post by: JAmerican on February 18, 2009, 07:51:00 PM
I did the mod when my system started to freeze once a day. I decided to take action before it got RRODed.
http://www.jamerican.net/?p=48
I highly recommend RBJTech's X-Clamp Replacement III Mod. I am not sure if he has made any others but this one still works for me
. Regards,
JAmerican
Post by: movfx on March 08, 2009, 10:50:00 AM
QUOTE(grim_d @ May 17 2007, 03:01 AM)
not at all, it's just ive seen alot of people saying this method is "too hard" because you need to modify the heatsink, if people have a guide, they find it alot easier.
well done job,thanks
Post by: newf on March 13, 2009, 05:13:00 PM
Everything up here is in inches, not MM.
Can anyone help? I have no idea what any of this is in Canada
a ) 8 M5-.80 x 10 Machine Screws #138433
b ) 16 #10 Flat Washers Nylon #139065
c ) 16 5mm Flat Washers Metal #138319
This post has been edited by newf: Mar 14 2009, 12:14 AM
Post by: newf on March 15, 2009, 11:12:00 PM
Post by: thestanleycup on March 16, 2009, 12:19:00 AM
QUOTE(newf @ Mar 13 2009, 07:49 PM)
Hey guys, I just went through this entire thread, and unless I'm blind, I didn't see any part list for us Canadian's. And for two days now, the Seach just gives me a error and doesn't work
Everything up here is in inches, not MM.
Can anyone help? I have no idea what any of this is in Canada
a ) 8 M5-.80 x 10 Machine Screws #138433
b ) 16 #10 Flat Washers Nylon #139065
c ) 16 5mm Flat Washers Metal #138319
hey man i live in mtl canada , i've been repairing 3 red light for some time now, just go at home depot and get (#10 nylon washers) and for the screws get machine screws (10-32x1/2 part no.174-717.) that is all you need , one nylon at bottom of motherboard and one nylon at top of motheboard. that is all you need , don't bother for steel washers. just do it like i told you.. make sure you use artic silver 5 compound paste on both cpu gpu then tighten the screws with both nylon washers underneath and on top , put back your motherboard in case. no need to drill to steel case by the way... when you turn on the 360 put fan on top on cpu and dvd drive , so the cpu will continue to receive air but gpu will boil for abtout 15 mins(to reflow solder) then turn off machine for 20 minutes to let it cool down, then turn on machine and you should be good to go... boosting your fans to 12v is highly recommended also to prevent 3red lights all over again, good luck
Post by: newf on March 16, 2009, 11:23:00 AM
QUOTE(thestanleycup @ Mar 16 2009, 07:55 AM)
hey man i live in mtl canada , i've been repairing 3 red light for some time now, just go at home depot and get (#10 nylon washers) and for the screws get machine screws (10-32x1/2 part no.174-717.) that is all you need , one nylon at bottom of motherboard and one nylon at top of motheboard. that is all you need , don't bother for steel washers. just do it like i told you.. make sure you use artic silver 5 compound paste on both cpu gpu then tighten the screws with both nylon washers underneath and on top , put back your motherboard in case. no need to drill to steel case by the way... when you turn on the 360 put fan on top on cpu and dvd drive , so the cpu will continue to receive air but gpu will boil for abtout 15 mins(to reflow solder) then turn off machine for 20 minutes to let it cool down, then turn on machine and you should be good to go... boosting your fans to 12v is highly recommended also to prevent 3red lights all over again, good luck
thanks man, I don't have a home depot here, but I'll try the same things from Canadian tire.
Post by: XClampman360 on March 16, 2009, 11:30:00 AM
Every Xbox 360 made doesn't short out does it?, Nylon is bad due to the heating up and cooling down,then the GPU heatsink starts to press down on the RAM chips and can somtimes short!!
In my experance its metal all the way, Nylon were used as part of the first old style kits things have moved on as gamers want reliability! So thats were our kit works better than the rest! its now tryed and tested see for your self?
We also supplies console fixing companys with the Xclamp fix ,sorry if some people disagree but it works for us and lasts
Post by: abd640 on March 21, 2009, 05:06:00 AM
Guys, i try to do the fix but i got error for many times... every time i try to do it i got 3 ROD then after 5 seconds 2 Red light then immediately it power off.
i'm using the shim method(MKI III), why is that ??? is it before it's to tight or what?? i tried to uptight it but it's not working!!! why is that ???
before 1 year i success in doing it and it works after a hard work for 1 week... i don't know why now it's not working... i did it know because recently the 360 start with audio and without video...
i hope any one can give me an explanation why is all that happen ???
Post by: nonix on May 05, 2009, 03:02:00 PM
my 3RROD story (so far):
*graphical errors after purchasing from ebay 10 mo ago.
*3r after a couple days (0102)
*xclamp removed and installed
+machine screws with "spring washers" outside
+nylon and original washers inside
*3 rod after plugging in AV and AC cables
*allowed to overheat for 2 min (2r)
tried plugging in the dvd-rom drive but error persists (0020), will try different pressures on the corners tonight.
This post has been edited by nonix: May 5 2009, 10:13 PM
Post by: CosmoKramer420 on May 06, 2009, 05:17:00 PM
Post by: cubgrant23 on June 14, 2009, 10:45:00 AM
Post by: JAmerican on July 27, 2009, 11:45:00 PM
...http://www.jamerican.net/?p=48
JAmerican
Post by: Andim on April 17, 2010, 08:00:00 AM
I just want a temporary solution, and I've been hearing people have been lucky with this method.
Post by: jblitz360 on July 10, 2010, 04:19:00 PM
So sorry wrong thread
Post by: Flandor on August 09, 2010, 01:29:00 PM
QUOTE
Guys, i try to do the fix but i got error for many times... every time i try to do it i got 3 ROD then after 5 seconds 2 Red light then immediately it power off.
Sounds like your heatsinks aren't making good contact with the chips. The chips will get really hot really fast if this is the case, and the xbox is likely shutting it down to prevent damage.
Post by: v0lcom on December 23, 2010, 10:56:00 AM