Post by: lawdawg0931 on March 26, 2007, 04:14:00 PM
http://www.megaupload.com/?d=PZOPZSBU
MOD EDIT
I'm also hosting it here on my site||CLICKY||
I converted it to pdf, too.
This post has been edited by C o s m o: Apr 3 2007, 04:06 AM
Post by: handles25 on March 26, 2007, 04:01:00 PM
Thanks.
This post has been edited by handles25: Mar 26 2007, 11:03 PM
Post by: dokworm on March 26, 2007, 05:17:00 PM
Post by: belke on March 26, 2007, 06:44:00 PM

Post by: Something_Guy on March 26, 2007, 06:49:00 PM
QUOTE(lawdawg0931 @ Mar 26 2007, 10:45 PM) 
Several people have contributed to this tutorial, but dokworm started the thread that brought it to my attention. Hopefully this will help others out, as it has fixed mine. There are step-by-step instructions, and illustrations. Parts have part #'s listed to help in getting the correct pieces. Hope this helps out:
http://www.megaupload.com/?d=PZOPZSBU
Any chance of getting that video on another server or maybe even youtube in it? I get the"All the servers for your download are in use for the corresponding country Venezuela)" message all the time from megaupload. it would be appreciated, thanks.
This post has been edited by Something_Guy: Mar 27 2007, 01:53 AM
Post by: mcatrage on March 26, 2007, 06:37:00 PM
http://www.divshare....load/291181-b22
Should work
Post by: Kurto2021 on March 26, 2007, 06:39:00 PM
Post by: lawdawg0931 on March 26, 2007, 07:14:00 PM
Thanks for the extra link...I had no other choice I could think of besides Megaupload (had major trouble just getting it uploaded there). & I didn't want to put a 3 page tutorial on the forum. Couldn't find rules regarding how big posts can be & didn't want to chance it.
Post by: dokworm on March 26, 2007, 07:59:00 PM
http://www.mudgee.net/ot/FIX FOR THE 3RLOD.rar
This post has been edited by dokworm: Mar 27 2007, 03:01 AM
Post by: lawdawg0931 on March 26, 2007, 08:58:00 PM
FIX FOR THE 3RLOD
POSTED BY LAWDAWG0931
As with most tutorials that Ive seen written, this is not at all my invention or information. This is a collaboration of many peoples ideas and theories that have been tested by many others, but as a whole seem to benefit the entire Xbox Scene community. Do this at your own risk, only if youre like me Out of Warranty. I take no responsibility if you destroy your Xbox further. With that said, lets get to the fix:
1. First off, we are reading this because we have a problem with the Xbox 360. Either it is caused by a solder problem, where points on the GPU/CPU have worked loose or a temperature problem causing the same result: The 3 Red Lights of Death. First thing we need to do is open the 360 & remove all the internal parts. Several tutorials for this here is 1 of them: http://www.xboxchopshop.com/catalog/man_360_open.php
2. Once you have all the parts removed, DVD drive out, fans off, motherboard removed .then remove the X clamps holding the heat sinks to the motherboard. Again, several tutorials here is 1 of them: http://www.anandtech.com/systems/showdoc.aspx?i=2610&p=6
3. At this point, you need to clean the old thermal compound off of the chips. Be very careful in how you do this, not to damage the chips themselves. I used alcohol & Q-tips, and patience. Dont rush this part, as it is crucial for the surfaces to be perfectly smooth for optimal conduction of heat. Someone stated the chips will reveal a mirror finish when clean, and they will so clean until you see that finish.
4. Dokworm from Xbox Scene forums started the original post that brought this to my attention see post here: http://forums.xbox-scene.com/index.php?sho...588032&st=0. I am just trying to put together a tutorial with some insight & illustrations that could help others. Basically what dokworm found out was that the X clamps are a serious design flaw. They force the motherboard to flex up at the anchor points, causing solder points to become compromised over time/heat. So, we will throw away these X clamps, and replace them with other hardware that distributes the clamping of the heat sink uniformly.
5. Lowes and Home Depot are large hardware supply stores in the U.S., so many of you can use these part #s others will have to adapt, but the ideas are the same. The part #s that I use come from Lowes, and the necessary parts for this mod are very inexpensive. You will need the following parts:
a. 8 M5-.80 x 10 Machine Screws #138433
b. 16 #10 Flat Washers Nylon #139065
c. 16 5mm Flat Washers Metal #138319
d. Artic Silver thermal compound
I know that some people have used Fiber washers instead of Nylon. It probably doesnt matter. If you can find Fiber, I would suggest that instead. I could only find Nylon, so there you go.
6. Ok, now we have clean chips & all necessary equipment for the fix. Here is an illustration with the hardware replacing of the X clamps.
(IMG:http://i107.photobucket.com/albums/m285/stickman81/X-clampfix.jpg)
Note that the Nylon washers are up against the motherboard on both sides not metal. With two washers (1- nylon, 1- metal) on each side of the board, this matches the original spacing provided by the X clamp posts we have removed. In my situation with these parts listed, I could tighten down the #5 bolts completely because the spacing was identical to what it was before.
7. Here is probably the most important portion of this tutorial. PLEASE PAY CLOSE ATTENTION! Once you have replaced the heat sinks like the illustration above (dont tighten the bolts down just snug for now), set the motherboard back into the bottom case. Dont screw it down yet. Replace the Power button board with the lights, so we can see when the 360 overheats. I plugged in the DVD & set it aside on the edge of the case (not sure if this is necessary). Leave the fans off for this part. The video plug must be inserted or the 360 will auto-shut off, and the power brick must be plugged in. Turn on the Xbox & most likely you will see the 3RLOD Red Lights Of Death. Without the fans, its a matter of time until the box overheats. When this happens, it will change to only 2 lights (both left side lights). I waited 2 minutes exactly, then shut it off. This allows the solder problems to fix themselves by getting hot enough to re-solder themselves in place. As this is cooling off, take the board out to where you can tighten the M5 bolts down snug. Dont over-tighten them, but in my case I got them very snug.
8. Let it cool down completely, then put everything back together. Any cooling mods that you could add to this fix will only help the situation. There are several out there: 12V mod to the existing fans, aftermarket fans, or even the cut-out of the case itself. All will help the temperature overall. Now cross your fingers & hope youve joined the others whove been blessed by this fix.
This post has been edited by lawdawg0931: Mar 27 2007, 04:02 AM
Post by: ferrari_rulz_02 on March 26, 2007, 09:06:00 PM
This post has been edited by ferrari_rulz_02: Mar 27 2007, 04:07 AM
Post by: mattygabe on March 26, 2007, 09:20:00 PM
This is exactly the kind of thing that the XS boards produce that make it such a great community. Love the tutorial. A++
Post by: lawdawg0931 on March 27, 2007, 03:11:00 PM

Post by: Something_Guy on March 27, 2007, 11:46:00 PM
One last question I am not in the U.s. at the moment so I ask.
(IMG:http://ec2.images-amazon.com/images/P/B000FN1YY8.01-AIUBT5HP6PMAF._AA212_PIcountsize-10,TopRight,0,0_AA212_SH20_SCLZZZZZZZ_.jpg)
is this thesame screw?
Post by: lawdawg0931 on March 28, 2007, 07:41:00 AM
It looks a little long for my tutorial, but I would take a look at what was done in post # 126 of this thread:
http://forums.xbox-scene.com/index.php?sho...032&st=120#
Post by: bmdubya on March 28, 2007, 11:31:00 AM
Post by: lawdawg0931 on March 28, 2007, 01:26:00 PM
Post by: SnufftheCrimeDog on March 28, 2007, 12:07:00 PM
This post has been edited by SnufftheCrimeDog: Mar 28 2007, 07:09 PM
Post by: peppelepugh on March 28, 2007, 02:19:00 PM
Post by: lawdawg0931 on March 28, 2007, 06:08:00 PM
QUOTE(SnufftheCrimeDog @ Mar 28 2007, 02:22 PM) 
one thing he want's to know is if it necesarry to remove the heatsinks or if its ok to just replace the x-clamps with nuts and washers.
Well, you have to remove them to get the portion of the heatsink that the "X" clamp hooks to. Remove that, and replace with the nuts & bolts. The new M5 bolt screws straight into the heatsinks.
Post by: moogster66 on March 28, 2007, 07:05:00 PM
This post has been edited by moogster66: Mar 29 2007, 02:08 AM
Post by: SnufftheCrimeDog on March 28, 2007, 07:10:00 PM
One thing we do wanna make sure is if we are gonna to put new thermal pasted on we do it right. Clean all thermal paste of die and heatsinks right? Now with the GPU there are two die on the chip, do we put a dab on both dies or just the larger one? and is only a dab right?
Besides that we should be good to go, will wait for the Xbox 360 gurus to answer those last final question, but besides that, alls we can do now is fix and pray.
This post has been edited by SnufftheCrimeDog: Mar 29 2007, 02:11 AM
Post by: Heet on March 28, 2007, 08:29:00 PM
http://forums.xbox-s...howtopic=467045
To open, undo the clips on the front, then flip it over and push the plastic tabs in with an eyeglass screwdriver. Its easy as pie. Start at one end, pull up as you go so they dont click back into place.
With the thermal, put just a touch (rice sized peice) and smear it with a card. Let it sit for a day before you power on the console.
Good luck!

Post by: peppelepugh on March 29, 2007, 06:06:00 PM
thanks
Post by: SnufftheCrimeDog on March 29, 2007, 06:15:00 PM
Post by: ferrari_rulz_02 on March 29, 2007, 09:08:00 PM
QUOTE(SnufftheCrimeDog @ Mar 30 2007, 11:30 AM)
My friend xbox is now working too. This is deffinetly without a doubt the problem with the xbox 360s. He said he played fro 2 hours last night no problems. I let you guys know in a week or so if the xbox is still working this was awesome! What great news for people fretting about there broken xbox. I almost wanna go into my xbox even though it under warranty and remove those damn clamps!. I know probably not the best idea, but since it would prevent this I'm itching to perform the procedure. Also, this is deffinetely a problem that is cause by the heat produce by the GPU. I'm sure time could be a factor aswell, one thing I'm wondering is by constantly cooling the system with external cooler wouldn't help at all? That what Im currently doing right now I have the Intec Glow Stand, and whenever I play, and for abotu 30 minutes to and hour after Im done playing I leave it on to cool the system. I just wanna know if that will prevent at all, or not. If it trully won't help, I may just take the risk and remove the clamps.
running it after the system isnt a bad idea, but i don't think it will help much (it also will not hinder it remember).
personally, it would say if its under warranty, leave it alone. when the warranty expires, then do this
Post by: tdawg36 on March 30, 2007, 03:48:00 AM
I could'nt get arctic silver 5 so had to settle for actic silver ceramique. Every thing went exactly to plan & no more red lights, also my system fans don't work half as hard as they used too. thanks alot for this fix it works great.
Post by: lawdawg0931 on March 30, 2007, 06:02:00 AM
Post by: RBJTech on March 30, 2007, 08:50:00 AM
QUOTE(lawdawg0931 @ Mar 30 2007, 02:17 PM)
Great to hear...., I know there are a couple of ways to do this - but we should start keeping track of how many fixes we actually get from the "X" clamp removal (regardless of method). I'm getting a Xbox360 I bought off E-bay with the 3RLOD (today or tomorrow I hope), and will see if this fix brings it back as well. Let you know.
Agreed - sounds like we need a poll of some sort to keep track on this - it's looking promising but that could just be the sheer number of 3ROL's ...

We also need a way to combine these threads - as I've seen a few now on the X clamps, I've done a full tutorial myself now (Here) but don't want to start another thread on it....
Good work everybody - lets keep out fingers crossed...
Post by: ferrari_rulz_02 on March 30, 2007, 11:52:00 PM
QUOTE(RBJTech @ Mar 31 2007, 12:57 AM)
Agreed - sounds like we need a poll of some sort to keep track on this - it's looking promising but that could just be the sheer number of 3ROL's ...
We also need a way to combine these threads - as I've seen a few now on the X clamps, I've done a full tutorial myself now (Here) but don't want to start another thread on it....
Good work everybody - lets keep out fingers crossed...
thats a good tut....well done. try submitting it to go on the main xbox-scene page.
and i think it would be good to have a poll to see how many people have tried this, and how many worked/didnt work
Post by: lawdawg0931 on March 31, 2007, 09:10:00 AM
See if that helps out my video freezing.
Post by: dvsone on March 31, 2007, 08:59:00 AM
Post by: SnufftheCrimeDog on March 31, 2007, 09:08:00 AM
Post by: lawdawg0931 on March 31, 2007, 09:32:00 AM
Post by: bigg92 on March 31, 2007, 07:21:00 PM
Much thanks
This post has been edited by bigg92: Apr 1 2007, 02:21 AM
Post by: majzor on April 01, 2007, 07:08:00 AM
Thanks! (IMG:style_emoticons/default/biggrin.gif)
Tutorial (Portugues): http://www.savefile.com/files/597443
This post has been edited by majzor: Apr 1 2007, 02:10 PM
Post by: lawdawg0931 on April 01, 2007, 08:25:00 AM
Outstanding, excellent to continue hearing about fixes! Appreciate the translation as well.
This post has been edited by lawdawg0931: Apr 1 2007, 03:26 PM
Post by: Mysta on April 01, 2007, 11:43:00 AM
This post has been edited by Mysta: Apr 1 2007, 06:54 PM
Post by: bigg92 on April 01, 2007, 01:13:00 PM
QUOTE(Mysta @ Apr 1 2007, 01:58 PM)
Ok, i bought all the parts/paste and stuff, about to clean off the old paste. I have two questions. How much arctic 5 do you put on the chips/how(i realize you use the syringe but how do you spread it over the chips). and do you wait 2 minutes from turning it on or 2 minutes from when the lights switch to 2 red lights instead of 3?
You should but about the size of a grain of rice, acually a little smaller. You can spead it with a credit card,gift card, playing card. After you apply the artic silver 5 i would let it set for a few hours.
Post by: lawdawg0931 on April 01, 2007, 01:02:00 PM
Post by: Mysta on April 01, 2007, 01:24:00 PM
Post by: poisonousjuice on April 01, 2007, 06:59:00 PM

Post by: Mysta on April 01, 2007, 06:14:00 PM
So, while i've got it open, how would i go about lighting up the vents?(IMG:style_emoticons/default/biggrin.gif)
This post has been edited by Mysta: Apr 2 2007, 01:15 AM
Post by: ferrari_rulz_02 on April 01, 2007, 08:48:00 PM
QUOTE(Mysta @ Apr 2 2007, 11:29 AM)
Ok. done. Plugged it in without fans and got a green light. So i turned it back off. Only thing is, i think the heads ont he screws i bought are too big and cause the mobo to not go all the way down without bending, which would negate what i just did, so i have to go find some with more.. flatness tomorrow. Thanks guys.
So, while i've got it open, how would i go about lighting up the vents?

wire up some LED's to point across/out of the vents. if you do some searching, you will be able to find many tut's on how to install leds
Post by: Mysta on April 01, 2007, 07:55:00 PM
Post by: ElDom on April 01, 2007, 09:48:00 PM
I just posted about something like this.......
But, ine\stead of new clamps, I placed weights on it and let it overheat. It worked like a charm!
Post by: mattygabe on April 01, 2007, 09:57:00 PM
I saved the word document tutorial that you had because I knew the day was coming. Luckily I was home and had free time. Got the parts, followed the tutorial judiciously. I must say the tutorial was somewhat lacking compared to other tutorials, but if you can't follow along on this one you probably shouldn't be hacking open a 360 to begin with.
One problem I had was that I really didn't tighten the heatsinks down much at all. I tightened them conservatively with my fingers, but I believe the CPU sink was a bit off. Right off the bat after powering it up to attempt a reflow (or at least a board flex, from what someone has suggested), I got the 2 red lights, and left it on for 2 minutes. To no avail. Then, I tightened the sinks down to where they were snug (I was VERY careful to make sure that they were equally tightened and not tight at all, actually:)). I then turned it on (fans off still), and let it sit for two minutes. This time I noticed the CPU sink was definitely warmer, so the heat dissipation was there this time. I never got the 2 red lights, only the 3 lights the entire time. Shut it off, let it cool for 5-10 minutes as I grabbed a drink. Came back, powered it on, and it worked!
The heat gun trick worked for a little over 2 weeks (didn't have a 360 game until exactly 2 weeks ago), so I will keep track of the system and how it progresses with this fix in place. Starting today, Monday, April 2, 2007, I'll track my system's progress to see how well this truly does work.
Thanks again, Lawdawg. The parts numbers are a GREAT idea, I have EXACTLY what was intended and ran into no installation problems - hopefully we can translate these part numbers for those of you who are unlucky enough to not have a Lowe's nearby.
Post by: ferrari_rulz_02 on April 01, 2007, 10:02:00 PM
QUOTE(Mysta @ Apr 2 2007, 01:10 PM)
Yeah i looked around, i understand circuitry, i just don't feel like messing with power supply, so i'm not gonna mess with it.
its not that difficult, all you need to do is grab 12v off somewhere
Post by: grim_d on April 02, 2007, 06:14:00 AM
Thanks.
Post by: Mysta on April 02, 2007, 01:32:00 PM
Post by: PureThermite on April 02, 2007, 06:14:00 PM
Post by: grim_d on April 02, 2007, 05:39:00 PM
QUOTE(PureThermite @ Apr 3 2007, 12:45 AM)
I have a 360 that was recovered from a 3RL error via the heating method, would this still be worth it to do?
yes, its well known that the heatgun method is only a temporary fix.
This method seems to yeild good results..and although having never tried it, would probably reccomend it.
Post by: PureThermite on April 02, 2007, 06:18:00 PM
Just one question, would the part #'s be the same at Home Depot? I don't think there's a Lowe's near me.
Post by: ferrari_rulz_02 on April 02, 2007, 06:36:00 PM
QUOTE(PureThermite @ Apr 3 2007, 09:49 AM)
Alright, i'll pick up the parts tonight or tomorrow then.
Just one question, would the part #'s be the same at Home Depot? I don't think there's a Lowe's near me.
they will most likely be different. but you should be able to find something to fit if you know what you are looking for
Post by: Mysta on April 02, 2007, 07:26:00 PM
getting 0020 error now >.<.
Post by: ferrari_rulz_02 on April 02, 2007, 07:24:00 PM
QUOTE(Mysta @ Apr 3 2007, 10:57 AM)
Hrms, now i'm getting some turn ons, bust mostly 3rlod's still. This possible because the boards warped?
getting 0020 error now >.<.
yeah your problem might be due to a warped board.
if you take the board out, does it look warped? it wont have to be warped much
Post by: lawdawg0931 on April 02, 2007, 08:35:00 PM
The parts listed are HILLMAN brand, if Home Depot sells them - should be same part #'s (printed on the plastic bag).
Post by: bigg92 on April 02, 2007, 09:06:00 PM
Post by: lawdawg0931 on April 03, 2007, 08:58:00 AM
If you have a system that is working at the moment, I wouldn't touch it! I have friends who have 360's way older than mine, and they've never had a problem. Print the tutorial out & use it if you have to, but I wouldn't do it on a system that is in working condition.
Post by: poisonousjuice on April 03, 2007, 08:36:00 AM
QUOTE(bigg92 @ Apr 3 2007, 03:37 AM)
Im going to try to pick up the supplies for this mod tommorow at a local hardware store if i dont find it there i guess ill take the trip to homedepot. Im going to get the stuff and try it on my messed up mobo but I really am going to use it as a preventative for my new mobo.
if it ain't broke, don't fix it.
Post by: handles25 on April 03, 2007, 10:35:00 AM
QUOTE(poisonousjuice @ Apr 3 2007, 03:43 PM)
if it ain't broke, don't fix it.
I don't agree. Chances are good the thing will die without doing something like this tutorial. It's better to fix a problem before it happens in case the damage is so great you can't salvage it.
Post by: Rflame on April 03, 2007, 10:48:00 AM
This post has been edited by Rflame: Apr 3 2007, 05:49 PM
Post by: biga55 on April 03, 2007, 11:04:00 AM
I know I can screw the cage to the mobo but for now I've got it working so I don't want to redo the screws.
You shouldn't have any problems finding the parts at Home Depot like I did in the screws section. Unfortunately I threw away the white plastic bags for the ref#s. so I can't post them

Post by: poisonousjuice on April 03, 2007, 11:46:00 AM
QUOTE(Rflame @ Apr 3 2007, 05:19 PM)
Can somebody plz post some pics of the bolts and washers? It will really help if i know what they look like. And is it neccessary to apply a new thermal compound.
it is necessary if you want to dramatically increase the efficiency of the heatsinks. otherwise it's possible you are making it worse if you remove the heatsinks and then put them back w/o cleaning off the old thermal paste completely and applying fresh thermal paste.
Post by: JHC on April 03, 2007, 02:57:00 PM
THANK YOU SOOOOOO MUCH!
it is now up and running, all seems to be going great.
Post by: biga55 on April 03, 2007, 09:17:00 PM
Post by: Mysta on April 04, 2007, 12:24:00 AM
Post by: Rflame on April 04, 2007, 02:00:00 AM
Post by: FIGS on April 04, 2007, 03:18:00 AM
(8) M5 0.8 x 12mm hex head machine screws
(16) #10 nylon washers
total cost with the metal washers also (didnt end up using them) was $4.56
I didnt need the metal washers because on the bottom side they raising the mobo too high and on the top side the heatsinks werent touching the CPU and GPU even when tightened as much as possible. The reason for this is because the nylon washers i picked up from canadian tire were like twice the height or more of the metal washers... the US ones must be smaller because there is no way u could fit those washers and the metal ones and have the same spacing as the original heatsinks.
On a side note... are those tiny caps on the bottom of the board underneath the CPU really neccessary? about 4 fell off and they are so small and spaced so close i dont have the tools or skills to replace them, the 360 boots without them, but i dont know how stable it would be... anybody know what those caps are for?
Forgot to mention HOME DEPOT (at least here in london, ont) did not have nylon washers OR M5 machine screws... they were useless
This post has been edited by FIGS: Apr 4 2007, 10:31 AM
Post by: lawdawg0931 on April 04, 2007, 07:58:00 AM
Description -- Part # -- Qty in Bag -- # of Bags Needed -- Cost
M4-.70x20 Screws -- 138556 -- 2 -- 4 -- $2.72
M4-.70 Hex Nuts -- 138233 -- 10 -- 1 -- $0.80
4mm Flat Washers -- 138205 -- 10 -- 5 -- $2.80
M4-.70 Insert Lock Nuts -- 138238 -- 4 -- 2 -- $1.36
4mm Wave Lock Washer --138220 -- 10 -- 1 -- $0.56
Here's RBJTech's tutorial: http://rbjtech.bulldoghome.com/pages/rbjte..._com/XClamp.htm
@RBJTech - I sent you PM with this, if you want to add it to your tutorial for reference
This post has been edited by lawdawg0931: Apr 4 2007, 03:05 PM
Post by: RBJTech on April 04, 2007, 07:38:00 AM
QUOTE(lawdawg0931 @ Apr 4 2007, 02:29 PM)
For those who want to upgrade their mod to RBJTech's way of doing this, and I recommend it (much more secure) - here is a list of parts with part #'s for U.S. people. LOWES hardware store carries HILLMAN machine screws, and these are the HILLMAN part #'s needed. Also, with these particular parts, you DON'T need to drill out the heatsinks....just the bottom case (a little + countersink).
Description -- Part # -- Qty in Bag -- # of Bags Needed -- Cost
M4-.70x20 Screws -- 138556 -- 2 -- 4 -- $2.72
M4-.70 Hex Nuts -- 138233 -- 10 -- 1 -- $0.80
4mm Flat Washers -- 138205 -- 10 -- 5 -- $2.80
M4-.70 Insert Lock Nuts -- 138238 -- 4 -- 2 -- $1.36
4mm Wave Lock Washer --138220 -- 10 -- 1 -- $0.56
Here's RBJTech's tutorial: http://rbjtech.bulld..._com/XClamp.htm
@RBJTech - I sent you PM with this, if you want to add it to your tutorial for reference
Will do - at work atm so will update later on today ... tks for the info.
We're getting some good success stories with either of these methods - maybe that X clamp has been the cause of the 3ROL - I guess we'll find out for sure when the Elite is released .. ?
Post by: RBJTech on April 04, 2007, 01:25:00 PM
QUOTE(RBJTech @ Apr 4 2007, 02:45 PM)
Will do - at work atm so will update later on today ... tks for the info.
We're getting some good success stories with either of these methods - maybe that X clamp has been the cause of the 3ROL - I guess we'll find out for sure when the Elite is released .. ?
Updated the tut showing the US parts - now put the hyperlinks back manually again as I lost them when I did the edit ...
 .
.totally off topic - but does anybody know a decent HTML editor (WYSIWYG) that lets you add images via web hyperlinks - in all the editors I've tried so far, I've had to manually go into the HTML code and edit the local image to a web hyperlink (as my images are stored elsewhere away from web server).. All I want to be able to do is 'insert image' paste in a hyperlink - job done but no...
Post by: brywalker on April 04, 2007, 04:22:00 PM
Now that we have tackled the actual clip and gotten the board to not flex and transfer more heat to the sinks, I think we need to find the balance between heat and noise. I think if we use the Talismoon fans as the basis and put a resistor on the power in order to change the curve of the voltage going to the fans effectively slowing them down and making them quieter. I don't know what the starting voltage is (obviously max is 12v), and I don't know the lowest these can run on. On this thinking, we can match the stock CFM (which should be good enough after doing the other mods) but with FAR less noise. I think we can sacrifice a bit of cooling to quiet these things down when doing stuff other than playing games off of disc. Watching an HD DVD is unbearable.
Any insight or am I just talking out my arse?
This post has been edited by brywalker: Apr 4 2007, 11:28 PM
Post by: bigg92 on April 04, 2007, 03:48:00 PM
QUOTE(lawdawg0931 @ Apr 4 2007, 08:29 AM)
For those who want to upgrade their mod to RBJTech's way of doing this, and I recommend it (much more secure) - here is a list of parts with part #'s for U.S. people. LOWES hardware store carries HILLMAN machine screws, and these are the HILLMAN part #'s needed. Also, with these particular parts, you DON'T need to drill out the heatsinks....just the bottom case (a little + countersink).
Description -- Part # -- Qty in Bag -- # of Bags Needed -- Cost
M4-.70x20 Screws -- 138556 -- 2 -- 4 -- $2.72
M4-.70 Hex Nuts -- 138233 -- 10 -- 1 -- $0.80
4mm Flat Washers -- 138205 -- 10 -- 5 -- $2.80
M4-.70 Insert Lock Nuts -- 138238 -- 4 -- 2 -- $1.36
4mm Wave Lock Washer --138220 -- 10 -- 1 -- $0.56
Here's RBJTech's tutorial: http://rbjtech.bulld..._com/XClamp.htm
@RBJTech - I sent you PM with this, if you want to add it to your tutorial for reference
Thank you so much ill try to pick these up over the weekend
Post by: RBJTech on April 04, 2007, 04:25:00 PM
QUOTE(brywalker @ Apr 4 2007, 10:53 PM)
RBJTech:
Now that we have tackled the actual clip and gotten the board to not flex and transfer more heat to the sinks, I think we need to find the balance between heat and noise. I think if we use the Talismoon fans as the basis and put a resistor on the power in order to change the curve of the voltage going to the fans effectively slowing them down and making them quieter. I don't know what the starting voltage is (obviously max is 12v), and I don't know the lowest these can run on. On this thinking, we can match the stock CFM (which should be good enough after doing the other mods) but with FAR less noise. I think we can sacrifice a bit of cooling to quiet these things down when doing stuff other than playing games off of disc. Watching an HD DVD is unbearable.
Any insight or am I just talking out my arse?
It's on my list of things to do ....
I've bought the variable voltage regulators to do exactly as you've described above - find and graph the relationship between temperature and fan voltage / noise for both the CPU and GPU.
Stock voltage is 5.4v - the fans themselves IMO are pretty quite, I'm not sure if we could go much lower without the fans stalling - we could use a PWM power circuit to get the voltage really low (possible but another circuit to build..) but I think we could only drop to 5v or so before the temps start creeping up anyway ...
Post by: lawdawg0931 on April 04, 2007, 05:19:00 PM
Post by: SnufftheCrimeDog on April 04, 2007, 05:27:00 PM
This post has been edited by SnufftheCrimeDog: Apr 5 2007, 12:31 AM
Post by: mattygabe on April 04, 2007, 08:22:00 PM
The 360 starts flawlessly now. No video issues at all. I can play game demos flawlessly, watch video flawlessly (though I have not tested the box hardcore, no more than 5 minutes continuous use since the fix - have been busy), but the box is extremely sluggish when I start Crackdown. At first I thought it was a freeze, but it is not. It is merely a very sluggish moment. Hitting the 360 button (or holding it) will eventually (within a minute or two) bring up the appropriate menu. Crackdown also loads eventually, but it takes it 2-3 minutes. I can also load a game with no problems, and I can play. I see no problems in gameplay, but whenever a menu or loading sequence is initiated this is when I see the sluggishness - and only for major loads (like the beginning menu, etc).
My theory is that perhaps the board did not get warm enough to flex back enough (I did not touch a heat gun, I followed Lawdawg's tutorial verbatim). I am now planning to do a heat gun to hopefully warp the board back for good. I will, of course, exercise much caution when doing so - but I truly believe that this x-clamp removal is the end-all for the 3ROL.
Post by: ferrari_rulz_02 on April 04, 2007, 08:18:00 PM
QUOTE(mattygabe @ Apr 5 2007, 11:53 AM)
Alright, well I did the fix (I am quite happy with it, it was a painless procedure!), however, I am having some issues.
The 360 starts flawlessly now. No video issues at all. I can play game demos flawlessly, watch video flawlessly (though I have not tested the box hardcore, no more than 5 minutes continuous use since the fix - have been busy), but the box is extremely sluggish when I start Crackdown. At first I thought it was a freeze, but it is not. It is merely a very sluggish moment. Hitting the 360 button (or holding it) will eventually (within a minute or two) bring up the appropriate menu. Crackdown also loads eventually, but it takes it 2-3 minutes. I can also load a game with no problems, and I can play. I see no problems in gameplay, but whenever a menu or loading sequence is initiated this is when I see the sluggishness - and only for major loads (like the beginning menu, etc).
My theory is that perhaps the board did not get warm enough to flex back enough (I did not touch a heat gun, I followed Lawdawg's tutorial verbatim). I am now planning to do a heat gun to hopefully warp the board back for good. I will, of course, exercise much caution when doing so - but I truly believe that this x-clamp removal is the end-all for the 3ROL.
yeah i think your problem is that the board is still a fraction warped. just please be careful with the heat gun
Post by: bigg92 on April 04, 2007, 09:01:00 PM
also
When he sais
"My bolts were M4 (4mm) therefore I drilled each hole with a 4mm drill. I also countersunk each hole lightly so that the bolts would sit flush to the outer case. To do this (and for the drilling) place a block of wood under the case or youll just end up bending the case out of shape. There is no need to get the bolts perfectly flush as we have some space to work with. Do not over countersink the holes, or the bolts will go straight through ..
"I get that I have to drill the whole to enlarge it to 4 mm but i dont get the counter sinking part. Would someone please explain this to me?
Post by: RBJTech on April 05, 2007, 07:44:00 AM
QUOTE(bigg92 @ Apr 5 2007, 03:32 AM)
Is it just me or are some of the pics missing for RBJs
also
When he sais
"My bolts were M4 (4mm) therefore I drilled each hole with a 4mm drill. I also countersunk each hole lightly so that the bolts would sit flush to the outer case. To do this (and for the drilling) place a block of wood under the case or youll just end up bending the case out of shape. There is no need to get the bolts perfectly flush as we have some space to work with. Do not over countersink the holes, or the bolts will go straight through ..
"I get that I have to drill the whole to enlarge it to 4 mm but i dont get the counter sinking part. Would someone please explain this to me?
Hi - yea I was doing a bit of server maintenance earlier on today on all my tuts and moved some images around - I've checked all the links and they all look good now. Try an F5 to refresh the page ..
wrt your question - I'm using countersunk bolts - basically these sit flush/level with whatever you bolt them to but in order to do this, the surface your bolting to also has to be countersunk. The metal used for the case is soft steel, so don't go too mad with the countesink or you'll literally drill out too much and the bolt will fall though the now too big hole ...
if you don't have a countersink, then a large drill will do - but again, just a light touch to take the edge off the metal. There is about 2-3mm of clerance from the bottom of the case to the outer plastic case, so as long as the bolt heads fit in there ok they you're good to go.wrt to the 4mm vs 5mm thread.
There are two types of install here - one is using the existing thread in the heasinks - this is 5mm for which you must obviously use 5mm bolts .. However, this bolts the h/s to the board NOT the case. You cannot pass a 5mm bolt through the case, put a 5mm nut on, then the board, then the h/s, then the nuts etc - it's impossible - you can do it if just bolting to the board, hence this method.
My version uses 4mm bolts (I could have used 5mm) but I am NOT using the thread in the h/s. In am drilling this out because I want the h/s to be FREE and have movement. The downward pressure is held by the nuts and spring washers on the bolts pressing DOWN on the heatsink, the board and the case all at the same time.
I'll modify my X clamp diagram shortly and post it - a picture explains a thousand words ...
Post by: RBJTech on April 05, 2007, 08:50:00 AM
This is the original X clamp method :-
(IMG:http://rbjtech.bulldoghome.com/photos/BDRES/rbjtech_bulldoghome_com/360heatsink.gif)
This is my attempt to provide something better :-
(IMG:http://rbjtech.bulldoghome.com/photos/BDRES/rbjtech_bulldoghome_com/360heatsink_redesign.gif)
I hope this explains it better than I can in words ... (IMG:style_emoticons/default/wink.gif)
Thanks,
Richard.
Post by: durrtmcgurrt on April 05, 2007, 10:29:00 AM
Post by: Tfizzle on April 05, 2007, 11:12:00 AM
most of the picture links are still broke on your tutorial page. dont know if your still doing maintenance. just letting you know.
Post by: RBJTech on April 05, 2007, 01:47:00 PM
QUOTE(Tfizzle @ Apr 5 2007, 05:43 PM)
RBJ -
most of the picture links are still broke on your tutorial page. dont know if your still doing maintenance. just letting you know.
thanks for letting me know - I think the HTML has screwed up somewhere as it works in my browser (IE) no problem but looking at the HTML it's got secondary src as local files ... I've now forced them all to the web images ...
I'll redo it tomorrow so it's clean HTML ... nightmare ...

QUOTE(lawdawg0931 @ Apr 4 2007, 11:50 PM)
After thr RBJTech mod, my fans run at full speed/volume. They never seem to quiet down like before. So I'm all for the Talismoon fans, or another mod of some sorts.
.. then somethings not sitting square. To run at full pelt probably means the h/s are not on the die's properly ..
Post by: bigg92 on April 05, 2007, 02:28:00 PM
Post by: RBJTech on April 05, 2007, 02:04:00 PM
QUOTE(bigg92 @ Apr 5 2007, 08:59 PM)
ok so you countersink the board so the end of the bolt " /____\ " fits like a glove in the case. Would this really inprove it? Im am going to atempt this with a dremel once i get one lol
..have a look at post #82 - countersink the case not the board !
Post by: bigg92 on April 05, 2007, 03:00:00 PM
Post by: N00bvin on April 05, 2007, 06:46:00 PM
QUOTE(mattygabe @ Apr 4 2007, 05:53 PM)
Alright, well I did the fix (I am quite happy with it, it was a painless procedure!), however, I am having some issues.
The 360 starts flawlessly now. No video issues at all. I can play game demos flawlessly, watch video flawlessly (though I have not tested the box hardcore, no more than 5 minutes continuous use since the fix - have been busy), but the box is extremely sluggish when I start Crackdown. At first I thought it was a freeze, but it is not. It is merely a very sluggish moment. Hitting the 360 button (or holding it) will eventually (within a minute or two) bring up the appropriate menu. Crackdown also loads eventually, but it takes it 2-3 minutes. I can also load a game with no problems, and I can play. I see no problems in gameplay, but whenever a menu or loading sequence is initiated this is when I see the sluggishness - and only for major loads (like the beginning menu, etc).
My theory is that perhaps the board did not get warm enough to flex back enough (I did not touch a heat gun, I followed Lawdawg's tutorial verbatim). I am now planning to do a heat gun to hopefully warp the board back for good. I will, of course, exercise much caution when doing so - but I truly believe that this x-clamp removal is the end-all for the 3ROL.
Is your dvd drive installed back correctly? This almost sounds like a DVD drive issue more than anything. Maybe some kind of pressure on top of the drive?
Post by: mattygabe on April 05, 2007, 09:24:00 PM
QUOTE(N00bvin @ Apr 5 2007, 08:17 PM)
Is your dvd drive installed back correctly? This almost sounds like a DVD drive issue more than anything. Maybe some kind of pressure on top of the drive?
I thought perhaps, because it does make quite a bit of noise (perhaps is not properly fastened), but, so far it is proving that it was indeed what i thought.
Either I
A. Did not let the board flex back enough to make usable solders
or
B. The above fix does not satisfactorily flex the board enough.
I'm more than likely going to stick with A, as it seems most are having great success with Lawdawg's method alone.
What I did was I applied a quick and conservative heatgun fix (only 1 minute and not the maximum of 2 on high), taking EXTRA caution not to cake the board (believe me, I am VERY nervous doing that method). I re-assembled the box, and the loading issue was resolved. As of right now the box works perfectly, and I am content to believe that it was simply not enough flexing for the board to re-solder the connections.
I will mark today's date on my calendar, and will track and let you know if and when the box decides to crash again, hopefully to provide feedback for everyone on a possibly better solution (if this is indeed not the end-all).
Thanks again to Lawdawg and everyone else on here. Great to have such educational and informative discussions.
Post by: pricemeista33 on April 05, 2007, 10:58:00 PM
I do know from my experience that those crappy X CLAMPS causes us all a bunch of problems 5 months later after the purchase of a 360. I had no choice but to proceed with this brilliant, genius, extravagant, marvelous, wonderful.....you name it procedure. All you guys are the BEST and I mean even smarter than Mr.Gates himself. M$ can't touch many of you who share great knowledge here @ the Scene. I love this site so much that I recommend over ANY other out there.
Remember for you all who still haven't accomplished this task yet. I had four.....four 4RLOD and I was sure that you guys would point me in the right direction. Thank you all so much for all of your hard work and effort lent to those who really need you in those bad times. IT REALLY WORKED FOR ME.
Oh one last thing....I didn't even have the LOD after I had turned the system back on to check if it would overheat again in that specific step of the tutorial. I just snugged the bolts and everything was fine. You guys are the greatest!
Post by: Daburbs on April 06, 2007, 09:21:00 AM
Post by: poisonousjuice on April 06, 2007, 08:59:00 AM
QUOTE(Daburbs @ Apr 6 2007, 03:52 PM)
I'm trying to perform this tut but can't find the parts at home depot. Anyone have home depot part list or exact sizes of bolts and washers? I've seen them around here before i'll keep searching.
the exact size are listed, but yea the Home Depot #s would be great if anyone can get those. I was only able to find the washers at my local Home Depot and had to go to Lowes for the screws.
Post by: TooHuge on April 06, 2007, 09:53:00 AM
Thanks
Post by: TooHuge on April 06, 2007, 10:39:00 AM
Post by: Daburbs on April 06, 2007, 12:54:00 PM
Post by: Mister Me on April 06, 2007, 01:53:00 PM
Post by: chucksd on April 06, 2007, 02:36:00 PM
Echo all the props given so far to you both!
I modified RBJs tut just a bit as I do not want movement of any sort so I did not include the spring but did include the wave washer (to ensure that I would not damage the board while locking the nuts down).
Otherwise I followed all the steps and it has been working just fine.
One question, the box I was working on did not have thermal pads on the mems (older model) and I did not have any so I left that part... I am curious as to how many of you do or do not use the pads in addition to this fix?
Thanks again!
Chucksd
Post by: JHC on April 06, 2007, 06:52:00 PM
any help is much appriciated
Post by: pricemeista33 on April 06, 2007, 11:18:00 PM
QUOTE(Daburbs @ Apr 6 2007, 03:52 PM)
I'm trying to perform this tut but can't find the parts at home depot. Anyone have home depot part list or exact sizes of bolts and washers? I've seen them around here before i'll keep searching.
Hey "Daburbs" check out Lowes over Home Depot for you won't find what you need at Home D. Lowes are a bit more organized with better selections on products. I went to both and I was about to panic in HD because they were closing at 10:00pm and I was running out of time. Lowes saved the day for me plus it's way easier to locate the materials @ Lowes provided that we have been given the serial and product numbers. HD's parts numbers haven't been posted yet I don't believe, that's if they have them.
Post by: booker on April 07, 2007, 03:18:00 AM
QUOTE(pricemeista33 @ Apr 7 2007, 05:49 AM)
Dude all I can tell you is to double and triple check all the steps you've performed. This is indeed a brilliant fix to the annoying 3 or 4RLOD problem. I followed all the steps just as they were explained and voila! The only thing I didn't do was allow my Box to overheat for the second time. It wasn't necessary for me as it may have been for others. It is a thermal issue as explained for sure which occurs somewhere after 4-6 months of play.
Hey "Daburbs" check out Lowes over Home Depot for you won't find what you need at Home D. Lowes are a bit more organized with better selections on products. I went to both and I was about to panic in HD because they were closing at 10:00pm and I was running out of time. Lowes saved the day for me plus it's way easier to locate the materials @ Lowes provided that we have been given the serial and product numbers. HD's parts numbers haven't been posted yet I don't believe, that's if they have them.
replace the X lamp?. I followed the tutorial on this site but i´m not there. I don´t speak English as my native language so that could be the reason... Could you explain me what this do, and how it does?
thanks
Post by: SnufftheCrimeDog on April 07, 2007, 12:38:00 PM
QUOTE(JHC @ Apr 6 2007, 08:23 PM)
well, i did the x clamp replacment and it worked great for 2 days, then i got the 0102 error. i then applied a few rubber pads to the bottom of my case under the ram, worked for 1 day. then i recieved error 0020. i have now fasened the MB to the metal housing as descibed in post #82. I am still getting error 0020. is there anything else that i can try?
any help is much appriciated
After you fastened the board to the case did you overheat again? This is pretty much the only other thing I could think of. Replacing the "X-clamps" is a good progressive step forward, but I think to actually get the full affect of the fix, the board should be fastened to the case. What I'm getting at is now that you have the board firmly fastened to the case overheating it again may flex the board and change the board back to it proper state.And then being firmly fastened should prevent it from happening again. I'm not 100% sure about this mind you.
Post by: burt_bladers on April 07, 2007, 02:23:00 PM
Post by: ferrari_rulz_02 on April 07, 2007, 06:16:00 PM
Post by: wellmodded on April 07, 2007, 10:24:00 PM
2mmrow i am going to another board but i won;t put the bolts straight through the metal case i just bolt them striagh up the M/B
and i see which board last longer
i also did the earser trick witht eh rammodules under the board but icut out the centre of the eraser and put thermal bpad tht MS had stock opn the board so it can still transfer heat
and also added some heatsink to the south bridge and ram module at the top of the board
http://img182.imageshack.us/my.php?image=0407213314ev4.jpg
http://img182.imageshack.us/my.php?image=0407213337hh4.jpg
http://img182.imageshack.us/my.php?image=0407213350pa6.jpg
http://img223.imageshack.us/my.php?image=0407213426lr7.jpg
This post has been edited by wellmodded: Apr 8 2007, 05:28 AM
Post by: Tfizzle on April 08, 2007, 01:13:00 AM
so i messed with it a whole bunch and couldnt figure it out. so today i decided to remove the metal washers and just use the fiber washers. put everything back together and powered up. only this time it worked. i think with the metal washers the heatsinks were sitting to high off the CPU and GPU.
i have had it running a match of GRAW for the past 5 hours. no lockups at all.
anyways, one question i wanted to ask was is anyone having problems getting the motherboard to fit back in the metal casing when using these screws? mine doesnt rest all the way in. looks like im gonna have to drill out the 8 holes on the bottom. dont know if i got the wrong machine screws or not.
Post by: rec0ndite on April 08, 2007, 08:41:00 AM
Post by: lawdawg0931 on April 08, 2007, 08:40:00 AM
@Tfizzle
Thanks for your input, I have a box I bought off E-bay that is giving me the 1 & 3 lights after the "X" clamp mod. I'll try to remove one set of washers & check results.
@ All
I think people need to pay close attention to the board as a whole when securing it back into the bottom case. The screws around the video input, the screws around the power supply input, the portion where wired controllers are plugged in.....pay close attention to the board as you tighten those areas down. If the board isn't sitting down in the case as it should (maybe too many washers on the "X" clamp mod), then as we tighten down those screws - "WE" are flexing the board in doing that! Original spacing is critical in this mod, so just pay attention to this area. If you see flexing as you tighten those screws, then maybe remove one set of washers from the mod. This would definitely be the set under the motherboard, as that is where it would be too high. Just a thought - any others agree here?

Post by: langnao on April 08, 2007, 10:39:00 AM
QUOTE(lawdawg0931 @ Apr 8 2007, 10:47 PM) 
Glad to hear about all the fixes, and even temp. fixes. I still feel that this is in trial phase, as we're still getting mixed results. Overall I believe this is a necessary fix for anyone experiencing the 3RLOD, but I DO NOT recommend this on a working box (even as preventative measures). If it 'aint broke - don't fix it!
@Tfizzle
Thanks for your input, I have a box I bought off E-bay that is giving me the 1 & 3 lights after the "X" clamp mod. I'll try to remove one set of washers & check results.
@ All
I think people need to pay close attention to the board as a whole when securing it back into the bottom case. The screws around the video input, the screws around the power supply input, the portion where wired controllers are plugged in.....pay close attention to the board as you tighten those areas down. If the board isn't sitting down in the case as it should (maybe too many washers on the "X" clamp mod), then as we tighten down those screws - "WE" are flexing the board in doing that! Original spacing is critical in this mod, so just pay attention to this area. If you see flexing as you tighten those screws, then maybe remove one set of washers from the mod. This would definitely be the set under the motherboard, as that is where it would be too high. Just a thought - any others agree here?
For my case, a definite 'no go' with those washers. Too high ...
It is just the bolt directly onto the mobo. Even this setup, it is still a few MM too high. Could have cut away the portion of the metal that touches the bolt but it is rather troublesome.
anyway, i added additional rubber spacer onto the heatsink just to make sure everything sits evenly before tightening the bolt. Might have applied too much pressure.
till the red light appears again ...
(finger crossed)
Post by: RBJTech on April 08, 2007, 10:40:00 AM
QUOTE(lawdawg0931 @ Apr 8 2007, 03:47 PM)
Glad to hear about all the fixes, and even temp. fixes. I still feel that this is in trial phase, as we're still getting mixed results. Overall I believe this is a necessary fix for anyone experiencing the 3RLOD, but I DO NOT recommend this on a working box (even as preventative measures). If it 'aint broke - don't fix it!
@Tfizzle
Thanks for your input, I have a box I bought off E-bay that is giving me the 1 & 3 lights after the "X" clamp mod. I'll try to remove one set of washers & check results.
@ All
I think people need to pay close attention to the board as a whole when securing it back into the bottom case. The screws around the video input, the screws around the power supply input, the portion where wired controllers are plugged in.....pay close attention to the board as you tighten those areas down. If the board isn't sitting down in the case as it should (maybe too many washers on the "X" clamp mod), then as we tighten down those screws - "WE" are flexing the board in doing that! Original spacing is critical in this mod, so just pay attention to this area. If you see flexing as you tighten those screws, then maybe remove one set of washers from the mod. This would definitely be the set under the motherboard, as that is where it would be too high. Just a thought - any others agree here?
100% - that's why I checked the height of the PCB against the standoffs in my tut. The theory is to keep the board all level and secure - then put the pressure on the die, not the board itself. There is 3 - 3.5mm of clearance from the board to the metal case, so if people are using your method and the bolts have thicker heads than this, then they are going to run into seating problems...
Seeing the results in the sticky that Grim_d setup is fairly promising tbh, it's up to 14 now with 3/4 failures - that's not bad at all.
I'm also interested in the longevity of the fix - so far so good with mine - I've been using it instead of my regular xbox - it's had the whisper fan upgrade, airflow divider, RAM thermal pads(4 under, 2 GPU h/s) + passive h/s on the front RAM - and it's been without a hickup or freeze thus far ... (2 weeks ish..)
Edit <sp>
Post by: lawdawg0931 on April 08, 2007, 08:26:00 PM
Post by: RBJTech on April 09, 2007, 02:11:00 AM
QUOTE(lawdawg0931 @ Apr 9 2007, 03:33 AM)
Well, fixed another box that had the 3RLOD....sort of. Everything works great, out of the shell. As soon as I put everything back together, I get the lights again. I'm stumped for now, gonna look closer in the morning. I'm considering leaving it out of it's shell - kind of as a test. It's bound to run much cooler, but there is much less protection...ie spills, dust, pet hair etc. I know others have had this because I've seen this before. Any ideas what might be causing this? I'm sure its flexing somewhere ever-so-slightly, but I'm trying to be very careful when putting it back into its shell.
Weird - unless your bolts are hitting the bottom of the case (doubt it..) then putting the mainboard in the case and screwing it down should make zero difference (unless the weight of the h/s are causing it to bend?) - in which case it's probably worth trying my mod which secures the h/s firmly to the case as well - maybe ?
Post by: lawdawg0931 on April 09, 2007, 07:49:00 AM
Post by: chucksd on April 09, 2007, 09:32:00 AM
QUOTE(SnufftheCrimeDog @ Apr 7 2007, 01:09 PM)
After you fastened the board to the case did you overheat again? This is pretty much the only other thing I could think of. Replacing the "X-clamps" is a good progressive step forward, but I think to actually get the full affect of the fix, the board should be fastened to the case. What I'm getting at is now that you have the board firmly fastened to the case overheating it again may flex the board and change the board back to it proper state.And then being firmly fastened should prevent it from happening again. I'm not 100% sure about this mind you.
I agree,
I followed RBJtechs tut but did change a few things in that I wanted to limit the boards flexibility as much as possible so I only used the wave washers instead of the springs. I found that when I really cranked down the H/S & board (you can break it be careful) I did not even need to re heat it (towel/heat gun trick etc) and the 3 rol was already gone. I had a difficult time with cutting the vanes on the heat sink (lack of good tools) and it took a few tries to get the nuts tight enough to ensure the GPU/CPU heated up properly... You may want to make sure you have the H/S tight enough. Also did you really clean the GPU/CPU of old therm paste? and go back with AS5 (side note not neccesary I dont think but I use AS5 ceramique on the GPU)? I always spread it out with a credit card (others don't) but that is another thing to consider.
Check these out and let us know...
QUOTE(Tfizzle @ Apr 8 2007, 02:20 AM)
just wanted to post my results. i went ahead and went with the original pdf tutorial. went to the local hardware store yesterday and picked up the parts. put everything together with AS5. powered it up and immediately got the two left overheating leds(1 and 3).
so i messed with it a whole bunch and couldnt figure it out. so today i decided to remove the metal washers and just use the fiber washers. put everything back together and powered up. only this time it worked. i think with the metal washers the heatsinks were sitting to high off the CPU and GPU.
i have had it running a match of GRAW for the past 5 hours. no lockups at all.
anyways, one question i wanted to ask was is anyone having problems getting the motherboard to fit back in the metal casing when using these screws? mine doesnt rest all the way in. looks like im gonna have to drill out the 8 holes on the bottom. dont know if i got the wrong machine screws or not.
I did use the fiber washers on the bottom and top of the mobo and did not have any problems...
Not sure if that is coincedence or not though...
QUOTE(lawdawg0931 @ Apr 8 2007, 09:47 AM)
Glad to hear about all the fixes, and even temp. fixes. I still feel that this is in trial phase, as we're still getting mixed results. Overall I believe this is a necessary fix for anyone experiencing the 3RLOD, but I DO NOT recommend this on a working box (even as preventative measures). If it 'aint broke - don't fix it!
@Tfizzle
Thanks for your input, I have a box I bought off E-bay that is giving me the 1 & 3 lights after the "X" clamp mod. I'll try to remove one set of washers & check results.
@ All
I think people need to pay close attention to the board as a whole when securing it back into the bottom case. The screws around the video input, the screws around the power supply input, the portion where wired controllers are plugged in.....pay close attention to the board as you tighten those areas down. If the board isn't sitting down in the case as it should (maybe too many washers on the "X" clamp mod), then as we tighten down those screws - "WE" are flexing the board in doing that! Original spacing is critical in this mod, so just pay attention to this area. If you see flexing as you tighten those screws, then maybe remove one set of washers from the mod. This would definitely be the set under the motherboard, as that is where it would be too high. Just a thought - any others agree here?
I do agree as I used fewer washers than what was called for in the tut and the only metal ones I used was the wave washers. The rest were nylon (same size but not sure if they compress more?) To go along with your thoughts on board flex I am lazy and use a drill with a ratchet setting of 3 for all the screws (outside of the H/S which I did by hand) this is likely helping to stabilize the board...
QUOTE(lawdawg0931 @ Apr 8 2007, 09:33 PM)
Well, fixed another box that had the 3RLOD....sort of. Everything works great, out of the shell. As soon as I put everything back together, I get the lights again. I'm stumped for now, gonna look closer in the morning. I'm considering leaving it out of it's shell - kind of as a test. It's bound to run much cooler, but there is much less protection...ie spills, dust, pet hair etc. I know others have had this because I've seen this before. Any ideas what might be causing this? I'm sure its flexing somewhere ever-so-slightly, but I'm trying to be very careful when putting it back into its shell.
Is the shell bent at all? I am just guessing here but maybe it was bent when drilling it? and putting it back in the case and securing magnifies the bend? again creating a flex issue?
Post by: lawdawg0931 on April 09, 2007, 10:41:00 AM
QUOTE(chucksd @ Apr 9 2007, 10:03 AM)
Is the shell bent at all? I am just guessing here but maybe it was bent when drilling it? and putting it back in the case and securing magnifies the bend? again creating a flex issue?
It's not bent, I had a block of wood under it while drilling. I put it back together again, but this time only tightened the bolts until they were flush with the case (no further tension). This seemed to work, I guess tightening them down upon putting the case back together - I was tightening them too much!
Post by: compuguy01 on April 09, 2007, 01:41:00 PM
Post by: chucksd on April 09, 2007, 01:47:00 PM
QUOTE(compuguy01 @ Apr 9 2007, 02:12 PM)
Hey guys I've been following this exellent tutorial on the 3RLOD and was wondering if my system can have the same problem w/ out any error lights. When my box boots up it just hangs on the boot screen and doesnt go any further. When I first start it up after letting it sit for a while unplugged it will boot to the dashboard but then after about 3 minutes or so it freezes. But no red lights no matter what, so do you think that the system is over heating and I just need to replace the thermal compound and the x-clamp?
I have seen that before but usually after applying new paste and not getting the H/S level and tight. ? for you; did you buy the box new or used? If new it could still be heat related but I would try to reset the console before you crack it open and pull the clamps. Usually you will see the ROL indicate the problem when hardware is involved. If you bought it used I would check to see if someone attempted to work on it as they may have used a lesser quality paste or used too much of it etc...
Post by: compuguy01 on April 09, 2007, 02:14:00 PM
QUOTE(chucksd @ Apr 9 2007, 08:54 PM)
I have seen that before but usually after applying new paste and not getting the H/S level and tight. ? for you; did you buy the box new or used? If new it could still be heat related but I would try to reset the console before you crack it open and pull the clamps. Usually you will see the ROL indicate the problem when hardware is involved. If you bought it used I would check to see if someone attempted to work on it as they may have used a lesser quality paste or used too much of it etc...
The system was bought new, I havnt messed the the thermal compound or x clamps yet. This may be a stupid question but how do I reset the console? To make things a little more wierd on this system this all started after we were playing guitar hero for hours and I threw in a backup got a disc read error then the system just went to hell after that. Probably doesnt have anything to do w/ it but just throwing that out there.
Post by: rbt on April 09, 2007, 02:21:00 PM
- Manufacture date March 06
- System frooze during GRAW 2 demo, the box did start again a few times, but finally it ended with 3ROL.
- The box did get amazingly hot during sessions, when turned off it used to snap, crackle and pop
- Error code 0022, which interprets as GPU Error / GPU Overheating
- Have NOT done any previous attempt (Heatgun, toweltrick etc)
- I followed RBJTech's X-clamp replacement tutorial and implemented it fully (thanks for a great tut!)
- Tested the mod succefully!!! Amazing! Turned it on and it booted up, shut it down again.
- Screwed everything back together
- Tested the assembled box - back to 3ROL........ sigh....
- Took everything apart again and been testing and testing BUT no more success.
- Still have the error code 0022
So, i'm quite stuck right now.
Any suggestions? Should i perhaps give the "eraser" mod a try as well?
Post by: lawdawg0931 on April 09, 2007, 02:37:00 PM
QUOTE(lawdawg0931 @ Apr 9 2007, 11:48 AM)
I put it back together again, but this time only tightened the bolts until they were flush with the case (no further tension). This seemed to work, I guess tightening them down upon putting the case back together - I was tightening them too much!
This is worth a shot, as it's exactly what happen to me. On the bench - disassembled it worked great. Put it back in the case - back to 3RLOD.
Post by: sirsmooth on April 09, 2007, 03:22:00 PM
With this you have to watch you dont tighten it to much, But it worked for me on my last box.
Post by: chucksd on April 09, 2007, 02:55:00 PM
QUOTE(compuguy01 @ Apr 9 2007, 03:21 PM)
The system was bought new, I havnt messed the the thermal compound or x clamps yet. This may be a stupid question but how do I reset the console? To make things a little more wierd on this system this all started after we were playing guitar hero for hours and I threw in a backup got a disc read error then the system just went to hell after that. Probably doesnt have anything to do w/ it but just throwing that out there.
If you can keep it running long enough it is in the system (far right tab when you boot up). There is an option to reset back to factory.
Doubt the disc did anything...
QUOTE(sirsmooth @ Apr 9 2007, 03:53 PM)
Or try to take a washer away from under the locking nut on the gpu, so its just 1 washer and spring washer,
With this you have to watch you dont tighten it to much, But it worked for me on my last box.
Just to be sure... You did clean the CPU/GPU to shine like new and added new paste?
Also check the alignment of the board when bolted down, is it even?
After you put the H/S back in did you check to be sure they both became warm quickly? I think this part is fairly critical as it tells you early on if the H/S is seated properly...
I am betting on the low profile H/S is not level and tight.
Post by: rbt on April 09, 2007, 03:09:00 PM
QUOTE(lawdawg0931 @ Apr 9 2007, 10:44 PM)
This is worth a shot, as it's exactly what happen to me. On the bench - disassembled it worked great. Put it back in the case - back to 3RLOD.
Thanks for the tip, but I cant get it to work at all as "disassembled" anymore, thats whats weird...
I have had a few problems with bolts that broke when tightening things up. Maybe because of too crappy quality in the bolts and nuts. I have tried two variants, but both break sometimes when tightening using a socket.
Since they broke on me, I have tightened more carefully and maybe i don't get enough pressure...
I have noticed that too little pressure immediately gives 2ROL (overheating).
Maybe I need to find better quality bolts, but then again as someone mentioned; it's not an engine top we are trying to assemble.

Still stuck though

Post by: rbt on April 09, 2007, 03:20:00 PM
QUOTE(chucksd @ Apr 9 2007, 11:02 PM)
Just to be sure... You did clean the CPU/GPU to shine like new and added new paste?
Also check the alignment of the board when bolted down, is it even?
After you put the H/S back in did you check to be sure they both became warm quickly? I think this part is fairly critical as it tells you early on if the H/S is seated properly...
I am betting on the low profile H/S is not level and tight.
Clean and shiny CPU/GPU
The board is actuelly not quite even at the end where the LAN-port is. I'll see to why its flexing there.
I felt the HeatSinks and the CPU got warm quickly, the GPU didn't feel really as warm, but it did get warmer and warmer.
I will try to take it all out once more. Thanks!
Post by: chucksd on April 09, 2007, 03:26:00 PM
QUOTE(rbt @ Apr 9 2007, 04:16 PM)
Thanks for the tip, but I cant get it to work at all as "disassembled" anymore, thats whats weird...
I have had a few problems with bolts that broke when tightening things up. Maybe because of too crappy quality in the bolts and nuts. I have tried two variants, but both break sometimes when tightening using a socket.
Since they broke on me, I have tightened more carefully and maybe i don't get enough pressure...
I have noticed that too little pressure immediately gives 2ROL (overheating).
Maybe I need to find better quality bolts, but then again as someone mentioned; it's not an engine top we are trying to assemble.
Still stuck though
If you are breaking bolts I would make sure you drill out your hole with a bigger bit. The H/S should easily slip all the way down. If the veins on the lower H/S is causing problems you can clip the large portion all the way around the nut (where you can easily slip on the socket) and file it down to the base.
Post by: DaniloMQ on April 09, 2007, 04:12:00 PM
a 0102 and 0020
working perfect
The 0020 worked first time after the replacement... didnt even get the 3rl to heat up lol
Post by: compuguy01 on April 09, 2007, 04:39:00 PM
Post by: Aphextwin911 on April 09, 2007, 06:15:00 PM
The steps I took:
1.) I disassembled the whole damn thing (naturally) and heat-gunned (Wagner digital heat gun from Lowe's runs about $30, well worth it) the Southbridge, GPU and GPU RAM as shown in the tutorials. Then I let the whole thing cool down
2.) Replaced the x-clamps on the GPU using the tutorial as a guide, and it worked like a dream. I walked into Lowe's with the part numbers for all the components needed and was in-and-out in 10 minutes. Once I removed the legs on the existing heat sink, I used rubbing alcohol and q-tips to clean the existing thermal paste of the GPU (both chips) until they had a mirror-shine to them. (You can actually read the engraving on them if you get them clean enough). I applied new thermal paste to the heatsink and the GPU and put everything back together.
3.) Heat-gunned the mobo again just to be on the safe side, let everything cool down, re-assembled everything - then played Guitar Hero and GoW for 2+ hours without a single hitch. This my not be a *permanent* solution (time will tell), but I was more than happy to jam out to some GH2 for 2 hours with no lock-ups or issues. I'll be able to give it some more time this week, but so far everything seems to be good. Again, just a thank you to those who put all this together! If anyone has any questions on the procedures, etc I'm more than willing to help out, so just shoot me an email.
Post by: DaniloMQ on April 09, 2007, 07:06:00 PM
http://forum.jogos.u...c.php?t=1174425
Credits to LAWDAWNG of couse
[]'s
Post by: chucksd on April 09, 2007, 07:08:00 PM
QUOTE(compuguy01 @ Apr 9 2007, 05:46 PM)
I started the system and was able to navagate for about 4 minutes or so, didnt find anything in there that says reset to factory defaults or anything close to the meaning. Ive read somewhere else that there is a key sequence on the controller to get the defaults loaded, is this true? It does seem to be getting hot but nothing out of the ordinarary.
ok
Go to the System area of the Xbox Dashboard.
Select Network Settings.
see the setting that says reset to factory defaults....
Post by: compuguy01 on April 09, 2007, 07:47:00 PM
QUOTE(chucksd @ Apr 10 2007, 02:15 AM)
ok
Go to the System area of the Xbox Dashboard.
Select Network Settings.
see the setting that says reset to factory defaults....
Well I tried that and it just resets the Network settings. Does anyone know the correct controller sequence to reset to factory defaults?
Post by: lawdawg0931 on April 09, 2007, 08:24:00 PM
Thanks for the translation for all our Brazilian family out there. Appreciate it, taking it further than I could on my own.

Post by: compuguy01 on April 09, 2007, 09:32:00 PM
system is still freezing up, even froze up on the setting screen after I did the factory reset it froze up on the language screen. I guess it has to be a heating issue then. Do all overheat issues have error lights? Cause mine seems normal, just freezes.
Post by: RiPpN-N-TrIppN on April 09, 2007, 08:57:00 PM
* Go to the Xbox Dashboard, select the System Blade, and select Memory.
* Highlight the HD symbol and press Y.
* Press X, X, Left Bumper, Right Bumper, X, X.
didnt even notice this thread till then
i had come to the same conclusion a few weeks ago the X clamps are the cause of ALOT or problems with the 360
to fix mine i removed the x clamp and rebent so it was in a diffrent shape and this seems to work for me at the time being
but i think ill soon be doing this method if my box keeps fucking up
just have to keep it going till we get some more info on the elite boxes
Rip
Post by: TooHuge on April 10, 2007, 06:37:00 AM
Thanks
Post by: SecurityGuy on April 10, 2007, 06:42:00 AM
QUOTE(rbt @ Apr 9 2007, 04:28 PM)
Hello guys. I've been following this thread and have the following MIXED result so far:
- Manufacture date March 06
- System frooze during GRAW 2 demo, the box did start again a few times, but finally it ended with 3ROL.
- The box did get amazingly hot during sessions, when turned off it used to snap, crackle and pop
- Error code 0022, which interprets as GPU Error / GPU Overheating
- Have NOT done any previous attempt (Heatgun, toweltrick etc)
- I followed RBJTech's X-clamp replacement tutorial and implemented it fully (thanks for a great tut!)
- Tested the mod succefully!!! Amazing! Turned it on and it booted up, shut it down again.
-
Did you let it get hot for a few minutes after this step? If not then you might want to let it get hot again.
Post by: RBJTech on April 10, 2007, 07:11:00 AM
QUOTE(rbt @ Apr 9 2007, 10:16 PM)
I have had a few problems with bolts that broke when tightening things up. Maybe because of too crappy quality in the bolts and nuts. I have tried two variants, but both break sometimes when tightening using a socket.
Since they broke on me, I have tightened more carefully and maybe i don't get enough pressure...
What are you using to do them up - a breaker bar ?!  Bolts will need a serious amount of torque to snap them - are you sure you're not mixing imperial nuts with metric bolts etc ? The nuts should spin on by hand - nylon lock nuts will need a bit of twisting on but a screwdriver attachment will provide more than enough torque ...
Post by: chucksd on April 10, 2007, 10:02:00 AM
QUOTE(compuguy01 @ Apr 9 2007, 10:03 PM)
Okay well I called M$ and was able to get the reset code sequence which is LT, RT, X, Y, LB, RB, and the last four are unique to your serial number.. I thought it would be a pain to get but I think it took me about 10 minutes to get the code..lol. But anyways that didnt work
system is still freezing up, even froze up on the setting screen after I did the factory reset it froze up on the language screen. I guess it has to be a heating issue then. Do all overheat issues have error lights? Cause mine seems normal, just freezes.I hate to answer this as a definite. IMO I would say heat combined with the clamps is still causing the problem and if I remember other threads and repair situations you may have just not gotten bad enough for to recieve the rol yet.
QUOTE(TooHuge @ Apr 10 2007, 07:44 AM)
I just got my 360 back from ms for the 4th time and so far it is working. I am out of warranty does anyone think that I should do some of these tips to prolong the time before the next 3 red lights. I did order the replacement fans for more air movement so I am planning on opening everything up anyway.
Thanks
I would wait... while this seems to be a very good repair we don't have enough time tested just yet to say it is "the fix". Stay with what you have till it breaks.
Post by: TooHuge on April 10, 2007, 09:54:00 AM
I am however still going to open it up and install the new fan that I ordered for some more air flow.
Post by: Mrcon on April 10, 2007, 09:59:00 AM
Post by: poisonousjuice on April 10, 2007, 11:13:00 AM
QUOTE(TooHuge @ Apr 10 2007, 01:44 PM)
I just got my 360 back from ms for the 4th time and so far it is working. I am out of warranty does anyone think that I should do some of these tips to prolong the time before the next 3 red lights. I did order the replacement fans for more air movement so I am planning on opening everything up anyway.
Thanks
May want to check out http://www.xbox.com/...rantyupdate.htm. From what it sounds like, if you get your 360 repaired recently, you get a fresh 1-year warranty added to it. I could be wrong though. I've never been one to deal with warranties, other then voiding them!

Post by: Mrcon on April 10, 2007, 01:51:00 PM
What is the RED LIGHTS???? they are the 2 left ones.
Post by: rbt on April 10, 2007, 02:03:00 PM
QUOTE(RBJTech @ Apr 10 2007, 03:18 PM)
What are you using to do them up - a breaker bar ?! Bolts will need a serious amount of torque to snap them - are you sure you're not mixing imperial nuts with metric bolts etc ? The nuts should spin on by hand - nylon lock nuts will need a bit of twisting on but a screwdriver attachment will provide more than enough torque ...Hehe, I did use a small socket-wrench (dont really know the exact English name of it since I am from Sweden).
BUT i did REDO everything, tightening up more with caution this time and let it overheat (waited for the 3ROL to turn 2ROL) for exactly 2 minutes. Then directly after I turned it off, I tightened up the GPU nuts about 45 degrees (1/8 turn or pi/4 radians). Then turned it on again and it booted again. Great!
Now I am waiting a few more minutes to let it cool completely and will test again in the disassembled state to see if it stays fixed.
I'll keep you guys posted!

QUOTE(Mrcon @ Apr 10 2007, 09:58 PM)
So i follow the guide, change the x clamps and all i get now is 2 RED LIGHTS, the fans come o0n then stop, and when i open the drive it just shuts off, the red lights still flash but the drive wont close.
What is the RED LIGHTS???? they are the 2 left ones.
Might be sign of overheating the console if it is the two left ones flashing.
You might have:
1. Not tightened at all
2. An extra washer to much. Remove one and try again.
Post by: Mrcon on April 10, 2007, 02:34:00 PM
Post by: mzone on April 10, 2007, 03:07:00 PM
no more freezes or rol?
as i might do this tomm as i just got 3 ring of light after 2 weeks useing hot air gun
Post by: compuguy01 on April 10, 2007, 03:15:00 PM
QUOTE(chucksd @ Apr 10 2007, 04:33 PM)
I hate to answer this as a definite. IMO I would say heat combined with the clamps is still causing the problem and if I remember other threads and repair situations you may have just not gotten bad enough for to recieve the rol yet.
Okay well I've got the MOBO out, heat sinks off cleaned, processors cleaned, Im ready to apply the Arctic Silver and put the heat sinks back in place. Since I do not get the 3RLOD or any light errors but the system just completely freezes do you think I should follow the 7th step and let the system heat up to join any broken solder points or is that only for the 3RLOD?
Post by: ferrari_rulz_02 on April 10, 2007, 03:17:00 PM
QUOTE(Mrcon @ Apr 11 2007, 06:41 AM)
Well i didn't use the parts in the diagram, im going to leave it tonight and try again 2moz, I only used one washer and not the same parts.
how close were the parts that you used? you may be right
Post by: Mrcon on April 10, 2007, 04:02:00 PM
QUOTE(ferrari_rulz_02 @ Apr 10 2007, 10:24 PM)
how close were the parts that you used? you may be right
I didnt have any washers, so i used the same size screw and a small bolt where the washer was. if it doesnt work tomoz, im going to open it back unscrew abit and put the black spacers from the x clamps on.
just to show how much space is needed. its really pissing me off tho.
Post by: rbt on April 10, 2007, 03:31:00 PM
IT FRIGGIN WORKS!
Thanks a bunch guys for all the assistance. I must admit i was close to lay the project down, but luckily I didn't!
For all of you out there searching for information. My xbox 360 was a 3ROL with error code 0022 (GPU Failure/Overheat) and I successfully got it back to life using RBJTech's X-clamp removal tutorial (thanks again mate).
I anyone wants, I took a few high-res pictures (8Mpx) with my CANON EOS 350D from the things needed and also some pics of the bolts in place.
Let me know if there is some interest in looking at those pictures, and if so also some tips to where I can upload the images.
Post by: Mrcon on April 10, 2007, 04:28:00 PM
Post by: DaniloMQ on April 10, 2007, 05:41:00 PM

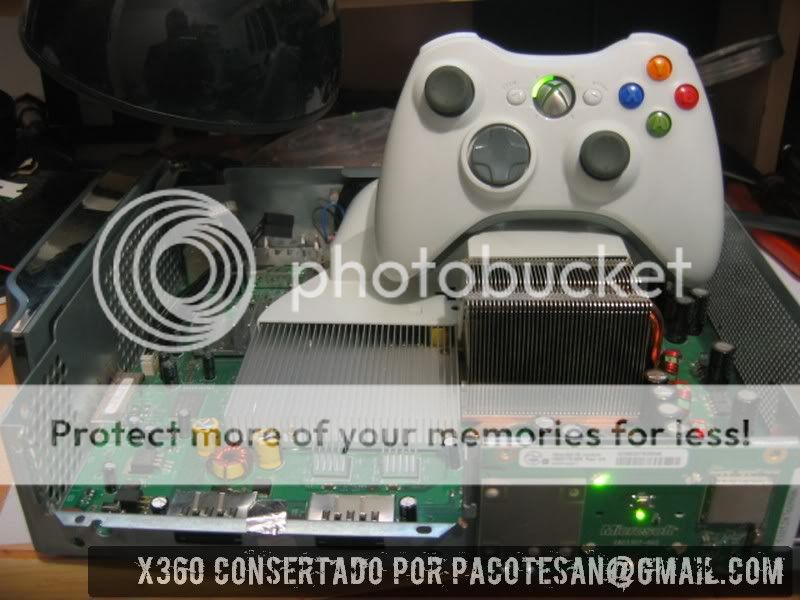
Post by: Mrcon on April 10, 2007, 05:54:00 PM
Post by: RedTenshi on April 10, 2007, 06:02:00 PM
I also want to add that there is one thing that I did additionally, when cleaning the GPU and CPU - I scraped off the thermal paste as much as possible with alcohol, and then went ahead and used ARTICLEAN Solution 1 and 2 by Arctic Silver to clean the GPU ( i bought mine at Microcenter, or you can also buy it on Newegg.com)- it was too troublesome to actually use Alcohol - I think I went through like 30 q-tips ( cotton swabs) before I said screw it, and decided to go get the Arcticlean stuff. THe articlean took the crap off in about 30 seconds so Im very pleased - pure mirror finish on the processors.
Just also wanted to add that I had to get the GPU fairly snug, but to combat over tightening, I used a small screw driver ( a really small one) to tighten the bolts, as that requires a considerable amount more strength to turn instead of a big one - just a thought for those of you worried about tightening too much.
Also, just as a sidenote - my GF's company makes those crappy x-clamps. I went ahead and yelled at her and told her that her company produces useless products. She did say that her company was only following MSFT schematics on building the xbox, but i felt a lot better being able to blame someone close by
Anway - thanks again!
Post by: poisonousjuice on April 10, 2007, 06:56:00 PM
Post by: ferrari_rulz_02 on April 10, 2007, 07:40:00 PM
QUOTE(Mrcon @ Apr 11 2007, 09:25 AM)
ahhhhhhh thats just fcuking shit, as I loosened the screws and i still get the over heating error, 2 RED LIGHTS left of the circle.
did you follow the tuts properaly?
Post by: RedTenshi on April 10, 2007, 09:33:00 PM
QUOTE(poisonousjuice @ Apr 10 2007, 06:03 PM)
she works for the company that makes the x-clamps? that's it. you have to dump her!
If my xbox actually cooked and kept me warm in bed... yeah, woulda been grounds for a breakup. i just accept it as one of her faults, and move on...
Post by: ProphetOfPain on April 10, 2007, 11:38:00 PM
QUOTE(RedTenshi @ Apr 11 2007, 04:04 AM)
If my xbox actually cooked and kept me warm in bed... yeah, woulda been grounds for a breakup. i just accept it as one of her faults, and move on...
I hope you atleast gave her the crappy clamps back. I've got 6 now.. I was thinking about stringing them all together.. thougt is, by xmas I should have enough to go around the tree with em.
Post by: ydgmms on April 11, 2007, 12:22:00 AM
He brought it back and on March 30th, I did the replacement of the X-Clams using Lawdawgs tutorial (it was before RBJs came out, like a day). Anyway, that night it froze twice while playing Tiger Woods 07, but has been flawless ever since. I have played it EVERYDAY for easily 3-4hours a day. *A LOT* more over the weekends and Easter holiday days. It froze only once after that, but I believe it was caused by my impatience (internet went down... tried to make it do a lot of Live tests, while getting music, while loading games and pressing the Guide button a lot)..
Anyway.
Its been over a week and like I said, has been used EVERYDAY for 3-4 hours average. Probably more.
In addition to the X-Clamp removal:
Heatsinks on two RAMs and SouthBridge
Thermal conductive pad on 6 RAM (2 under GPU and 4 on bottom)
hardwired the gpu side of the fan to 12V (for testing purposes - want to replace the fans with talismoon)
Arctic Silver 5 on CPU/GPU
air duct mod
Post by: RBJTech on April 11, 2007, 04:42:00 AM
QUOTE(Mrcon @ Apr 11 2007, 12:25 AM)
ahhhhhhh thats just fcuking shit, as I loosened the screws and i still get the over heating error, 2 RED LIGHTS left of the circle.
Simply put, your heatsinks are not making the correct contact with the die on the CPU or GPU or both. Try removing some washers as maybe they are too thick....
Post by: Mrcon on April 11, 2007, 05:45:00 AM
update just turned it on, getting the 3RED LIGHTS now :-), i left it on to cook for 2minutes exaclty and now its cooling, will see whats happens when i put it back together.
Post by: RBJTech on April 11, 2007, 07:04:00 AM
QUOTE(Mrcon @ Apr 11 2007, 12:16 PM)
Ok one question, do the heat sinks have to be flush with the cpu gpu??
.. not sure we are on the same page here - what tutorial have you been following ? The OP's or my modified version here ? then we can try and help you as success rate is high (80%) according to the poll setup and maintained by grim_d ...
Post by: lawdawg0931 on April 11, 2007, 07:11:00 AM
QUOTE(ydgmms @ Apr 11 2007, 01:29 AM)
In addition to the X-Clamp removal:
Heatsinks on two RAMs and SouthBridge
Thermal conductive pad on 6 RAM (2 under GPU and 4 on bottom)
Which two rams & whats southbridge. Also, I went to Altex (electronics specialty store) & no thermal pads. Anyone know where to buy any of these? Thanks
Post by: chucksd on April 11, 2007, 08:24:00 AM
QUOTE(compuguy01 @ Apr 10 2007, 04:22 PM)
Okay well I've got the MOBO out, heat sinks off cleaned, processors cleaned, Im ready to apply the Arctic Silver and put the heat sinks back in place. Since I do not get the 3RLOD or any light errors but the system just completely freezes do you think I should follow the 7th step and let the system heat up to join any broken solder points or is that only for the 3RLOD?
I would. Just make sure you have it level when you do it and then follow the rest of the steps.
Post by: RBJTech on April 11, 2007, 07:51:00 AM
QUOTE(lawdawg0931 @ Apr 11 2007, 02:18 PM)
Which two rams & whats southbridge. Also, I went to Altex (electronics specialty store) & no thermal pads. Anyone know where to buy any of these? Thanks
I guess he means the only two 'exposed' RAM chips in front of the GPU h/s - all the others need thermal gap filler pads - 2 under the GPU h/s and four under the board using the case as a heatsink. Southbridge is the I/O chip next to the DVD power and SATA cables - it gets mighty hot too so well worth a heatsink if you've got a spare one ...
Gap Filler pads are pretty specialist ('T-FLEX 200 is a brand name that may help you search..') - I found a UK store that sells them (rapidonline.com) but haven't seen any US stores on these forums yet...
Post by: chucksd on April 11, 2007, 08:03:00 AM
QUOTE(ydgmms @ Apr 11 2007, 01:29 AM)
In mid-March a 0102 3rlod xbox came to me. I did the heat gun tricked. It worked fine for me while I tested it for a few hours. After giving it back to the customer, he called me a couple of days after - 0102 again.
He brought it back and on March 30th, I did the replacement of the X-Clams using Lawdawgs tutorial (it was before RBJs came out, like a day). Anyway, that night it froze twice while playing Tiger Woods 07, but has been flawless ever since. I have played it EVERYDAY for easily 3-4hours a day. *A LOT* more over the weekends and Easter holiday days. It froze only once after that, but I believe it was caused by my impatience (internet went down... tried to make it do a lot of Live tests, while getting music, while loading games and pressing the Guide button a lot)..
Anyway.
Its been over a week and like I said, has been used EVERYDAY for 3-4 hours average. Probably more.
In addition to the X-Clamp removal:
Heatsinks on two RAMs and SouthBridge
Thermal conductive pad on 6 RAM (2 under GPU and 4 on bottom)
hardwired the gpu side of the fan to 12V (for testing purposes - want to replace the fans with talismoon)
Arctic Silver 5 on CPU/GPU
air duct mod
I have a theory on the "freeze" we see every so often... I beleive it is actually the DVD player, specifically the belt. I may be wrong of course but I tried to recreate the freeze and was unable too with an xbox that I had cleaned up (includes full break down of the dvd). However when I tried it on a box that I only performed the xclamp removal and had yet to clean it I did get an occasional freeze (1 -2 during a demo that was playing for about 15 hours - was testing the xclamp from RBJ). I thought it may have been the T-Paste had not yet covered the processors however after I cleaned up the unit and put the covers back on to give to the customer I was running my final test and it never froze again. I checked my inventory list and noticed that the dvd player was a samsung. I normally just replace the belts when I clean the units but this time I was out of replacement belts and just cleaned the existing one. Again this is a theory but it is possible that a timing interruption due to a momentary belt slip could produce a freeze. Not writing this to you specifically its just your reply reminded me of it... Anyone else notice this?
Post by: booker on April 11, 2007, 08:12:00 AM
I was getting the 0102 error code. I´m wondering what i should try first... the Ereaser fix or this fix ? or both at the same time?.
Any ideas?
Post by: chucksd on April 11, 2007, 08:50:00 AM
QUOTE(RBJTech @ Apr 11 2007, 08:58 AM)
I guess he means the only two 'exposed' RAM chips in front of the GPU h/s - all the others need thermal gap filler pads - 2 under the GPU h/s and four under the board using the case as a heatsink. Southbridge is the I/O chip next to the DVD power and SATA cables - it gets mighty hot too so well worth a heatsink if you've got a spare one ...
Gap Filler pads are pretty specialist ('T-FLEX 200 is a brand name that may help you search..') - I found a UK store that sells them (rapidonline.com) but haven't seen any US stores on these forums yet...
Still checking it out but here is a potential site for cooling. Don't see T-pads yet though...
http://www.sidewindercomputers.com/gpumeco.html
Post by: Mrcon on April 11, 2007, 04:23:00 PM
Thanks for the guide, i didnt use the exact parts but it still works
Post by: lawdawg0931 on April 11, 2007, 05:22:00 PM
QUOTE(DaniloMQ @ Apr 10 2007, 06:12 PM)
Anyone know where (in the U.S.) to get small heatsinks like in this picture? The one on the southbridge chip & the two in front of the GPU? Thanks in advance
Post by: DaniloMQ on April 11, 2007, 07:12:00 PM
one with 0102, one with 0020 e another with 0110
All of them tested with an hour of Graw 2LawDawg, i lov u
Another screen (i usually send them to the customer to get them happy lol)
on the side is the 2 clamps + 8 small black screws and heatsinks pins

Post by: mzone on April 11, 2007, 08:33:00 PM

spent over a hour doing all the parts drilling etc, then applyed artic silver to heat sinks still got red lights
feel a bit gutted now
Post by: luth4 on April 11, 2007, 09:08:00 PM
Post by: FIGS on April 11, 2007, 10:38:00 PM
Post by: ferrari_rulz_02 on April 11, 2007, 11:19:00 PM
QUOTE(mzone @ Apr 12 2007, 12:40 PM)
i done the "x" Clamp Replacement tonight dont seem to work for me
spent over a hour doing all the parts drilling etc, then applyed artic silver to heat sinks still got red lights
feel a bit gutted now
have you overheated it a couple of times to set the thermal compound and re-set the gpu?
Post by: Solmod on April 12, 2007, 03:28:00 AM
Post by: RBJTech on April 12, 2007, 03:19:00 AM
QUOTE(FIGS @ Apr 12 2007, 05:45 AM)
.. i dont see the point of drilling the bottom pan to fix the mobo to it... honeslty there are so many screws down there anyway that those extra few are just overkill no need. just bolt the clamps down to the mobo and screw the mobo back together like normal.
Then you are not understanding where the problem lies. In stock form, the 8 screws fix the h/s to the case - the board has NO central fixing other than the X clamp. By removing this fixing (which you have done) then the board now has no central support what-so-ever. By doing my mod, you are not only fixing/supporting the board with 8 extra central standoffs (meaning NO board flexing), but you also also supporting the h/s weight. Especially important if you have the 360 vertical...
Don't get me wrong - both methods 'work' but I'd be concerned that the board is left to support itself as the only fixed points are now around the edge.
Post by: DaniloMQ on April 12, 2007, 09:48:00 AM
Post by: chucksd on April 12, 2007, 09:34:00 AM
QUOTE(DaniloMQ @ Apr 12 2007, 10:19 AM)
With the screws i use , the top of them (wich is flat) lies in perfect contact with the bottom of the metal case
Lets be sure everyone fully understands this as RBJ stated above. If you do not bolt the board to the case you should not add your result to the % fixed vs not. By not bolting it to the case you are only creating another temporary situation. Lawdog who gets the credit from creating the bolt to board only procedure even stated that he is now using the bolt to case process as his did not produce a long term fix. By having the bolts just setting on the bottom of the case does not prevent the board from flexing in the most critical spot which is beneath the GPU/CPU. Not trying to toss anyones idea's but to date the ONLY method that has produced lasting results is the BOLT from the BACKSIDE of the mobo DRILLED through the H/S and secured with a LOCKNUT. If you are new and reading this for the first time make sure you educate yourself on the different opinions in this thread. I personally bolt my units following the above method and have had zero reoccurnces of the 3 ROL (0102 or 0020) I have repaired 3 machines now with this method and am exstensively testing them (which is why I only have 3) by running each of them through different situations based on up time for two units (15 hrs a day every day now for 8 days setting vertical) another setup the same but horizontal and the last one I actually play whenever possible to ensure actual game play vs demo modes.
My two cents - follow the tut!
Post by: Tortuga2112 on April 12, 2007, 10:13:00 AM
I fixed a box today which I had previously heat gunned. the heat gun fixed it for a while ( this box was done in mid jan ) but it 3rl on me yesterday.
I was looking for a way to put pressure on the corners of the GPU and not just the die itself.
see this post # 162 in the 3rl and heat gun thread GPU foam pads
if you can find some foam pads like the ones in the pic, it may help.
I tried the screws alone , but it didn't work. since I couldn't find any of those pads , I used some silicone gasket maker (I think household goop would probably also work) instead.
just put a dab on the four corners of the GPU. a little bit thicker than the die itself so when the screws are tightened the heatsink will exert pressure on the corners. just be careful not to put so much that the heatsink doesn't touch the GPU die.
I was going to re-heatgun but thought I'd try this first. I applied the gasket maker, let it sit for the night to cure and used the screws alone and it booted up perfectly the first time. its been playing for a few hours now without a problem.
I didn't bolt everything to the case like this tut suggests (I keep it horizontal), but if you're using your box in the vertical position I'd follow the tut and bolt everything together.
If it fails again I'll probably bolt everything together, but I'll see how long this lasts as it is.
Post by: mzone on April 12, 2007, 10:39:00 AM
i got the xbox 360 to boot up ok, but it just freezes when playing a game then goes to 2 lights.
also noticed the fans start to spin faster

tryed messing about with the nuts tightning a bit more and loosening.
just seems to keep crashing after like 2-3 mins of play.
anyone else had this.
Post by: lawdawg0931 on April 12, 2007, 11:12:00 AM
QUOTE(chucksd @ Apr 12 2007, 10:41 AM)
If you do not bolt the board to the case you should not add your result to the % fixed vs not. Lawdog who gets the credit from creating the bolt to board only procedure even stated that he is now using the bolt to case process as his did not produce a long term fix.
Actually Dokworm wrote it down, and I think I applied it to a tutorial, either way...RBJTech's way is much more secure & seems to be a longer term fix. But if one fix (either one) gives you good results, stay with it until you need to do something different! Also chucksd is correct, I think the % results posted are for RBJTech's version....
Post by: compuguy01 on April 12, 2007, 11:58:00 AM
Post by: Navillos on April 12, 2007, 12:03:00 PM
Post by: RBJTech on April 12, 2007, 12:12:00 PM
QUOTE(lawdawg0931 @ Apr 12 2007, 06:19 PM)
I think the % results posted are for RBJTech's version....
I think they are for both actually lawdawg - they are effectively doing the same 'fix' as such so I think it's perfectly valid to have both in the same poll. Results are looking very promising ...
Post by: RBJTech on April 12, 2007, 12:41:00 PM
QUOTE(Navillos @ Apr 12 2007, 07:10 PM)
ok since theres no thread on RBJTech's tut, i will post here. ok i have a few suggestions. what about using a cylindrical washer thats the right height. so those points are even with the standoffs of the cage. use the existing holes in the heatsinks for the screws like in lawdawg's tut. with the washers in between the sinks and the mainboard. so the only thing to drill is the cage. just an overall cleaner way of doing it, if theres washers the right size. whats the height of the standoffs from the x-clamp holes?
Whilst a valid idea - I think you're missing the point on which direction the pressure comes from and most importantly the flexibility of it. If you bolted the h/s using the existing thread then it would be up to the tighness of the bolt on how much pressure was exerted on the h/s - caused by the compression between the case and the heatsink only - the board is not fixed as such.
By fixing the bolts to the case - we create a fixed and solid point where we can fix other stuff. In our case we start with the board, and then use the top part of the fixed bolt to secure a spring which pushes down on the h/s legs/body. The h/s is free to move a fraction up/down if it wishes (thermal expansion) but it will always maintain equal pressure on the die via the spring.
Here is a side elevation pic of the setup (obviously not to scale or anything but shows the mechanics)

An improved idea would be to get some proper springs that site over the 4mm bolts rather than spring washers, but that's all I could find that was easily available.
QUOTE(compuguy01 @ Apr 12 2007, 06:29 PM)
Ok I followed lawdawgs tut. to a T and my system is still freezing up at the boot screen. Even on a cold boot its freezing. I didnt go any longer than 2 minutes when I let the processors overheat. Should I let it sit longer? If so how long do you think? Or should I just send it away for a new MOBO.
Cool the CPU side down (fan or whatever) and let the GPU either shut the console down or produce the two red overheating lights - this will take 5 minutes approx. Turn off the power give it 5 minutes to cool, then restart the system with normal cooling ....
QUOTE(mzone @ Apr 12 2007, 05:46 PM)
ok just updating this thread.
i got the xbox 360 to boot up ok, but it just freezes when playing a game then goes to 2 lights.
also noticed the fans start to spin faster
tryed messing about with the nuts tightning a bit more and loosening.
just seems to keep crashing after like 2-3 mins of play.
anyone else had this.
Try reducing the number of washers on both the GPU and CPU side - try 2 instead of 3. I think there are slight variations on cases etc so 3 may not be the best for your setup. The fact you're getting 2 lights and the fans are speeding up suggests the h/s is not making a good enough contact with CPU die, the GPU is likely the same. Maybe worth just doing the CPU and see how you get on before doing the GPU ...
Post by: Navillos on April 12, 2007, 12:45:00 PM
well by having the cylindrical washer under the mobo would cause it to layflat and fix it to the case as a nut and washer would, with a bolt in the hole. i would still use the washers in the same places, as the heatsink pressure (just like in your pic) would be the same. it would still put the same force on the mobo while keeping it level, by using the existing holes. the only difference is these bolts wouldnt be stationary.
Post by: RBJTech on April 12, 2007, 12:57:00 PM
QUOTE(Navillos @ Apr 12 2007, 07:52 PM)
@RBJTech
well by having the cylindrical washer under the mobo would cause it to layflat and fix it to the case as a nut and washer would, with a bolt in the hole. i would still use the washers in the same places, as the heatsink pressure (just like in your pic) would be the same. it would still put the same force on the mobo while keeping it level, by using the existing holes. the only difference is these bolts wouldnt be stationary.
sure - not dismissing your idea, ideas thrown about are great and that's what I love about this forum. Best thing to do is try it ! If it works then great we can add to the list of X clamp fix's or I could put as an alternative fixing method in my tut ..
Post by: compuguy01 on April 12, 2007, 07:56:00 PM
QUOTE(RBJTech @ Apr 12 2007, 07:48 PM)
Cool the CPU side down (fan or whatever) and let the GPU either shut the console down or produce the two red overheating lights - this will take 5 minutes approx. Turn off the power give it 5 minutes to cool, then restart the system with normal cooling ....
Ok I did what you said and when I turn the system on (w/ the heat sink loose on the gpu) I get the 2 red lights imediately. So I let it sit for a few minutes like that , I dont really feel any heat radiating from the GPU heat sink, or the cpu for that matter. I turned it off let it cool and tightend everything down, but the screen still freezes at boot. Plus no red lights just looks like a normal boot sequence. Also I do still hear the sound at boot even after the screen freezes.
Post by: ydgmms on April 12, 2007, 10:44:00 PM
QUOTE
Try reducing the number of washers on both the GPU and CPU side - try 2 instead of 3. I think there are slight variations on cases etc so 3 may not be the best for your setup. The fact you're getting 2 lights and the fans are speeding up suggests the h/s is not making a good enough contact with CPU die, the GPU is likely the same. Maybe worth just doing the CPU and see how you get on before doing the GPU ...
I had to use 2 washers instead of 3. 3 barely let the heatsink touch the die (when I took it off after overheating within seconds) there was little to know AS5 paste on the heatsink (i only put some on the die). I removed one washer all around and tested it.. worked.
Though in my personal xbox something is not quite sitting right. I had tested it and all was well, so I was going to put the case back on. I saw one screw was not tightened all the way (i could see the threads). So I tightened up and closed the case.... 3RLOD. After some examinations, that last screw was putting too much pressure on the board or causing it to flex. Without it perfect working xbox. With it (Or me putting some pressure on that area) caused 3RLOD.
I'm too tired to mess with it again.... so I just left it out ... i know its horrible. But when my new 60mm fan comes in in a few days, I'll rip her apart again and try to fix it.
RBJ - is there any other method of removing the fins on the gpu heatsink. I couldn't get them off for the life of me. SO I ended up doing Lawdawgs/dokworms fix on the GPU and yours on the CPU. Until I could figure out another way to rip off some of the fins.
Post by: makaveli86 on April 12, 2007, 11:31:00 PM
Also, countersinking is solely for making flush with the casing right? Has no other purpose? Doesn't help the method in any other way?...I ask cause i suck and drilling stuff and not even sure if i have the material to countersink the hole....dont mind if the bolt head sticks out, so jus curious if i'll need to countersink...thanks, hope to hear from you guy !!
Post by: DaniloMQ on April 12, 2007, 11:33:00 PM
like the picture below

Washers that a 1mm thick is PERFECT
TWO of them on each side of the board


Oh and RBJTech if you want you can use the pics below in your tutorial, if you are interested i can get the pics again from the camera and upload them withou the marketing lol
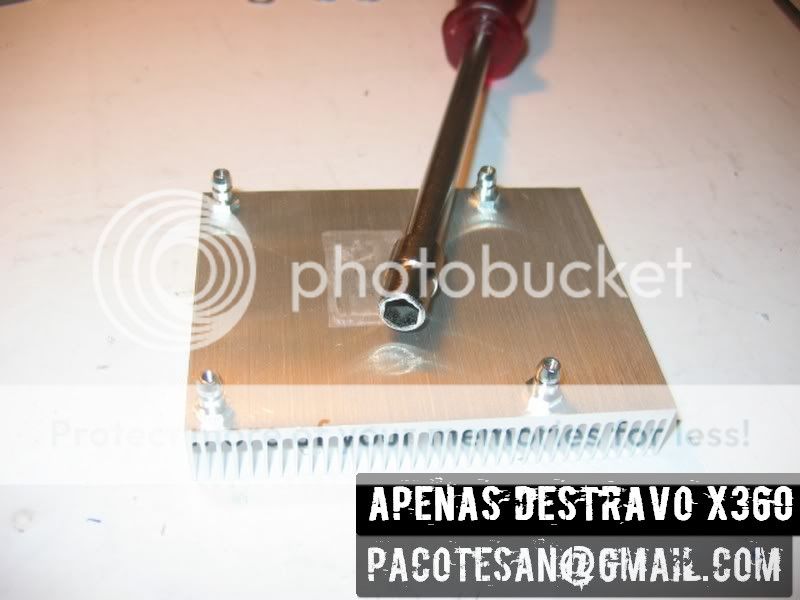
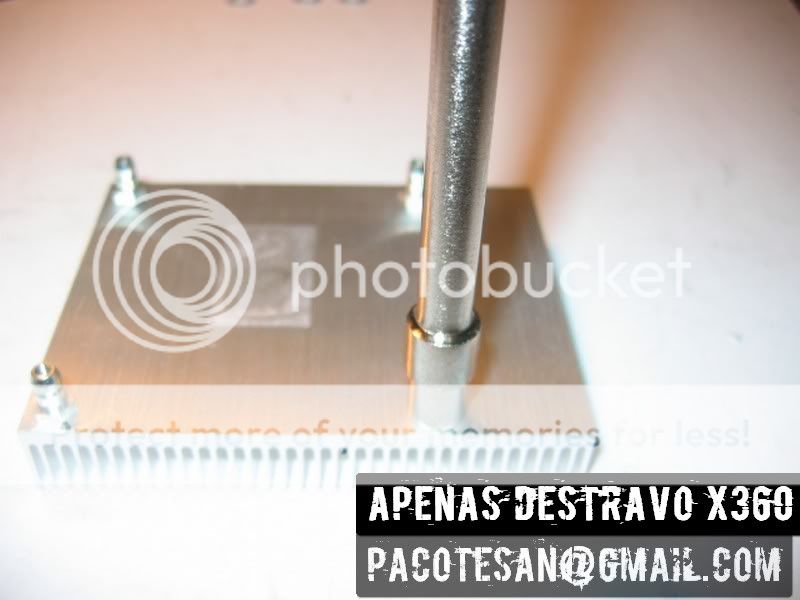
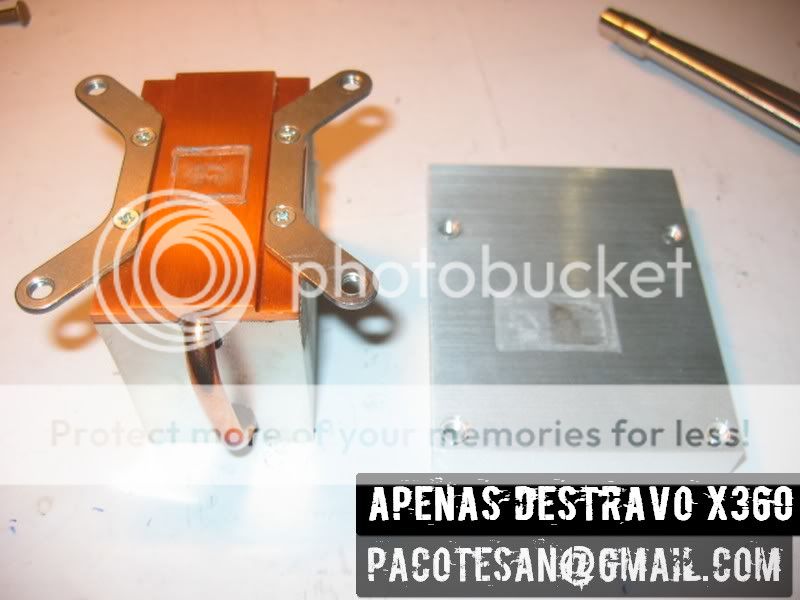
Post by: Mrcon on April 13, 2007, 03:34:00 AM
Post by: RBJTech on April 13, 2007, 04:10:00 AM
QUOTE(makaveli86 @ Apr 13 2007, 06:38 AM)
I got a question... So i plan to do RBJT's method tomorrow, and so i've been lookin over the instructions... Seems pretty straight forward, however i dont get how you were able to cut the vanes on the GPU?
Also, countersinking is solely for making flush with the casing right? Has no other purpose? Doesn't help the method in any other way?...I ask cause i suck and drilling stuff and not even sure if i have the material to countersink the hole....dont mind if the bolt head sticks out, so jus curious if i'll need to countersink...thanks, hope to hear from you guy !!
Yep - countersinking (or very low height cheesehead bolts) are needed otherwise the bottom case will foul them when you put the plastic case back on. They are not needed if you do lawdawg's mod instead.
Cutting the GPU h/s is a little tricky, try using some heavy duty side cutters to just snip the fins (they are only soft ali) then hold them in some long nosed pliers, rock back and forth a few time and them will snap off. Once you've made suitably sized areas for the nuts, then straighten out any fins. It won't look great, but it'll do the job....
An alternative which I've just been thinking about is to just drill suitably sized holes into the DVD case (obviously take the innerds out of the case first..
), so the nuts can sit ONTOP of the fins (with a large washer to spread the load over 3-4 fins) - this will be a lot easier than trying to cut out the fins .... not sure if there is room in the DVD drive though .. hmmmm... will have a play over the weekend ...Post by: dagretchen on April 13, 2007, 05:48:00 AM
As a side note, I've noticed that once I took off my GPU heatsync I see stock thermal greese has leaked out from underneath the silver sticker, and is currently covering a few of the components (not sure what they are) on the GPU directly beside the die. Does anyone know if this will create an issue? If it is infact an issue, I'll have to get a product to remove the thermal greese, because I don't think I'll ever manage to clean off these components with the alcolhol method.
Post by: RBJTech on April 13, 2007, 06:59:00 AM
QUOTE(dagretchen @ Apr 13 2007, 12:19 PM)
First off, thanks to everyone who's contributed to this method =) I'm gathering all the required equipment to attempt to fix my 0102 3RLOD over the weekend, in regards to cutting the heatsync, I think I'm going to try using a dremmel with a grinding wheel attachment. I'll let you guys know if I have any success.
As a side note, I've noticed that once I took off my GPU heatsync I see stock thermal greese has leaked out from underneath the silver sticker, and is currently covering a few of the components (not sure what they are) on the GPU directly beside the die. Does anyone know if this will create an issue? If it is infact an issue, I'll have to get a product to remove the thermal greese, because I don't think I'll ever manage to clean off these components with the alcolhol method.
It's fine - leave it alone rather than risk breaking them off or something. PS Carburettor cleaner is MUCH better than alcohol at getting off h/s paste - you may have some of this lying around in the garage ...
Finish off the clean with alcohol though to ensure the die is spotless...
Post by: dagretchen on April 13, 2007, 07:55:00 AM
Post by: Irishman65 on April 13, 2007, 07:35:00 AM
Just wanted to drop a big THANK YOU to lawdog and the rest of the contributors in this forum for the info and fix for the 3RLOD. I got my son a box at release for Christmas in 2005 and it went pffffft! with the red lights about 2 weeks ago. I used lawdogs fix about a week ago (after I found these forums) and it has been running like a champ for a week now under HEAVY gameplay.
Two things I feel might be relevant from my experience:
1. Use the Lowes parts numbers that LD provides in the tute. I took my own measurements and he has nailed the correct thicknesses for the right amount of pressure on the cpu/gpu dies. If you use parts other than those listed, you run the risk of getting too thick or too thin due to manufacturer variations.
2. I followed the tute to the letter but still had a problem after the first boot ups. My solder breakage problem was maybe a little more severe than some. With nothing to really lose, I increased my "cook" time from two to three minutes (which still didn't result in a 2 light overheat) but was finally sufficient to reflow the solder and repair the problem. After a little Arctic Silver 5 applicaton, I was good to go.
Once again, Thanks a load for all the help!
Post by: chucksd on April 13, 2007, 08:33:00 AM
QUOTE(makaveli86 @ Apr 13 2007, 12:38 AM)
I got a question... So i plan to do RBJT's method tomorrow, and so i've been lookin over the instructions... Seems pretty straight forward, however i dont get how you were able to cut the vanes on the GPU?
Also, countersinking is solely for making flush with the casing right? Has no other purpose? Doesn't help the method in any other way?...I ask cause i suck and drilling stuff and not even sure if i have the material to countersink the hole....dont mind if the bolt head sticks out, so jus curious if i'll need to countersink...thanks, hope to hear from you guy !!
If you use the screws he has listed with Lowes part #s you will see that the heads of the screw are sloping i.e. counter sunk. The drilling piece is fairly simple in that you just need the original hole both in the case and the H/S big enough to allow the screw to slip in. The case is simple by just using a piece of wood below it or if not just dont bend it out of shape. I used a vice grip (any clamp or pliers will work) to hold the H/S while I drilled it (using the same bit that you drilled the case)... Do this outside and away from your mobo as to not get metal shavings in it. The bolt head does not need to be "flush with the case after you drill it. In fact if you use to big of a bit your bolts will slip through. I used masking tape to hold all the bolts in place when I flipped the case over to add the nut to clamp the bolt to the case... As far as the veims go on the H/S I did not have good tools so I used a pair of long nose pliers and kept bending a section of an individual vein till it broke (doesn't take long). I use a dremel now and its very quick clean and easy.
hope this helps....
Post by: poisonousjuice on April 13, 2007, 09:48:00 AM
QUOTE(Irishman65 @ Apr 13 2007, 09:42 AM)
2. I followed the tute to the letter but still had a problem after the first boot ups. My solder breakage problem was maybe a little more severe than some. With nothing to really lose, I increased my "cook" time from two to three minutes (which still didn't result in a 2 light overheat) but was finally sufficient to reflow the solder and repair the problem. After a little Arctic Silver 5 applicaton, I was good to go.
Once again, Thanks a load for all the help!
actually with the two 360s I fixed, I let it "cook" until the 2 light overheating notice came which took several minutes of letting it run with the 3 lights, then I waited an ADDITIONAL 2 minutes once the 2 light warning came on.
I assume that is the correct method? it certainly worked for me.
Post by: dagretchen on April 13, 2007, 10:08:00 AM
Post by: chucksd on April 13, 2007, 11:20:00 AM
QUOTE(dagretchen @ Apr 13 2007, 11:15 AM)
chucksd: What type of dremel bit did you use? A grinding wheel or cutoff wheel?
I use a diamond wheel 1/8 in.
Post by: ydgmms on April 13, 2007, 02:31:00 PM
QUOTE(RBJTech @ Apr 13 2007, 05:17 AM)
Yep - countersinking (or very low height cheesehead bolts) are needed otherwise the bottom case will foul them when you put the plastic case back on. They are not needed if you do lawdawg's mod instead.
Cutting the GPU h/s is a little tricky, try using some heavy duty side cutters to just snip the fins (they are only soft ali) then hold them in some long nosed pliers, rock back and forth a few time and them will snap off. Once you've made suitably sized areas for the nuts, then straighten out any fins. It won't look great, but it'll do the job....
An alternative which I've just been thinking about is to just drill suitably sized holes into the DVD case (obviously take the innerds out of the case first..
), so the nuts can sit ONTOP of the fins (with a large washer to spread the load over 3-4 fins) - this will be a lot easier than trying to cut out the fins .... not sure if there is room in the DVD drive though .. hmmmm... will have a play over the weekend ...I was thinking that too. Not about the dvd drive. But its easy to get the fin right about the hole in the GPU heatsink off. So I was thinking of clamping it on like that, get a slightly longer bolt and a larger washers to clamp it down from the top of the fins. Because I couldn't get the fins off nicely/easily.
My wirecutters were too large
.
Post by: makaveli86 on April 14, 2007, 12:22:00 AM
Post by: makaveli86 on April 14, 2007, 12:46:00 AM
Post by: sirsmooth on April 14, 2007, 04:07:00 AM
Try to tighten the bolts up a bit more, dont think you heatsinks are sitting on the dye properly.
Hopefully someone can make this mod so we dont have to hack/cut the fins on the GPU, I have done 3 now and I dont mind hacking/cutting the fins but it seems to be a long process (if you want it flush and decent room for washers)
The extended bolt trick with larger washers might do the trick, anyone want to check clearences and have a go at it?
Cheers Smooth
Post by: makaveli86 on April 14, 2007, 09:13:00 AM
Post by: brywalker on April 14, 2007, 09:26:00 AM
QUOTE(sirsmooth @ Apr 14 2007, 11:14 AM)
Hopefully someone can make this mod so we dont have to hack/cut the fins on the GPU, I have done 3 now and I dont mind hacking/cutting the fins but it seems to be a long process (if you want it flush and decent room for washers)
All you need to do is find an M5 bolt with a smaller head.
Post by: makaveli86 on April 14, 2007, 10:32:00 AM
Post by: RBJTech on April 14, 2007, 11:27:00 AM
QUOTE(makaveli86 @ Apr 14 2007, 07:29 AM)
ok, so i followed the tutorial real close, and now i think i might have fixed teh 3ROL problem...but now i have another one...now i have two lights blinking...its the two on the far left. basically when i press the power button, it starts up, then it i hear the fan kick in, and then it starts blinking 2 lights...when this happens the fan shuts off, and the system continues to blink. not sure what this all means....
Take out some washers - the h/s is not touching the die properly. For some 360's it's 3 washers, for others 2 seem to work better. Have a bit of a play to see what works for you ...
Post by: DaniloMQ on April 14, 2007, 12:14:00 PM
Today i got a 3rl from a customer that tried the lawdawg mod with some crazy screw and washers. it was all over the place randomlly used in the heatsink, nasty nasty stuff
Post by: henmill on April 14, 2007, 12:36:00 PM
thanks to everyone who contributed to this fix, and most especially lawdog and rbjtech for helping me to resurrect my 360....again!
Post by: ydgmms on April 14, 2007, 01:24:00 PM
QUOTE(ydgmms @ Apr 11 2007, 01:29 AM)
In mid-March a 0102 3rlod xbox came to me. I did the heat gun tricked. It worked fine for me while I tested it for a few hours. After giving it back to the customer, he called me a couple of days after - 0102 again.
He brought it back and on March 30th, I did the replacement of the X-Clams using Lawdawgs tutorial (it was before RBJs came out, like a day). Anyway, that night it froze twice while playing Tiger Woods 07, but has been flawless ever since. I have played it EVERYDAY for easily 3-4hours a day. *A LOT* more over the weekends and Easter holiday days. It froze only once after that, but I believe it was caused by my impatience (internet went down... tried to make it do a lot of Live tests, while getting music, while loading games and pressing the Guide button a lot)..
Anyway.
Its been over a week and like I said, has been used EVERYDAY for 3-4 hours average. Probably more.
In addition to the X-Clamp removal:
Heatsinks on two RAMs and SouthBridge
Thermal conductive pad on 6 RAM (2 under GPU and 4 on bottom)
hardwired the gpu side of the fan to 12V (for testing purposes - want to replace the fans with talismoon)
Arctic Silver 5 on CPU/GPU
air duct mod
Addendum:
Customer came to pick it up Friday (April 13) - heh friday the 13th -... came back today(Saturday the 14th) WORSE.
I had put it away Wednesday nite to hook mine and test mine out. So I hadn't played his xbox since then. His carrying case causes the xbox to lay on the backend. So the back of the 360 becomes the bottom and the front becomes the top. So I THINK the weight of the heatsinks at that angle caused the board to bend more. And now it barely boots up half the time, after over a week of full hardcore playing (or at least in my opinion)
So now, if thats the case, I do believe RBJTech to be a much more secure fix possbily longterm fix, especially if you use the 360 vertically. Since the weight of the heatsinks will be supported by the metal cage.
Now, only to find a better way to cut the fins off the GPU heatsink...
*pissed off it didn't stay fixed*
Post by: makaveli86 on April 14, 2007, 01:01:00 PM
Post by: sirsmooth on April 14, 2007, 01:27:00 PM
QUOTE(brywalker @ Apr 14 2007, 04:33 PM)
All you need to do is find an M5 bolt with a smaller head.
Smaller head?
The head is not an issue because its nicely countersunk at the bottom of the shell.
Does anybody know the clearence gap between the dvdrom and the GPU heatsink?
Enough room for a washer and nut?
That way only 1 fin will be needed to be cut.
cheers smooth
Post by: makaveli86 on April 14, 2007, 02:20:00 PM
Post by: mzone on April 14, 2007, 07:26:00 PM
i done the x clamp method, but my 360 still freezes, i get graphic errors then it goes to 3 lights.
ive tryed tightning / lossing screws, letting 360 over heat ( 2 lights) lthen let cool down, its boots ok but it seems the freeze pretty quickly when putting a game on.
watched a dvd earlyer after i messed with bolts small turn each, worked ok all through dvd but soon as i put a game in it freezed, i rebooted 360 and darn 3 lights
Post by: makaveli86 on April 14, 2007, 09:02:00 PM
. tightened up some nuts, and tried again, green lights....so i'm GUESSING thats the problem...atleast with mine...trying to figure out how i could make it so that the nut doesn't loosen up. probalby due to parts vibrating and since i dont have a flush surface on the gpu heatsink, it causes it to come off easy... thinkin about purchasing a dremel tool and simlpy redo the gpu heatsink..p.s. wat do u think about the idea of soldering the nuts to the bolts, might this prevent further problems with nuts comin loose?
Post by: lawdawg0931 on April 15, 2007, 12:59:00 AM
I keep reading peoples success stories using my original method, so I figure it's worth a shot - and converted this second xbox back to my tutorials method. Everything seems to be working fine for now, no more freezing video.
My point: It appears by multiple peoples posts that both tutorials are having very good results overall. If you apply one method over the other, but get mixed results...try the other tutorials method & see what kind of results you get. DO NOT deviate from the listed parts (or at least the parts technical specs) , as RBJTech & myself have checked & re-checked clearances using said part #'s. The only allowable deviation seems to be the # of washers used between the motherboard & the heatsink (2 or 3 washers) - you just have to see which allows a little play. This ensures that the heatsink is resting firmly on the GPU/CPU, and not on the washers. Just a thought..
Post by: makaveli86 on April 15, 2007, 02:31:00 AM
Post by: DaniloMQ on April 15, 2007, 01:57:00 AM
All the customers are playing happilly
A few of them are hardcore GOW players so the test is extensive lol, hours and hours in the night playing online and all working fineHere in Brazil i saw some people going to the store to get a m5-.80x12mm and when this person sended me the picture of the screw it had 12mm allrighm but just the body! another 1.5mm with the head, so , he asked for the screw and got the wrong one and when he tried his x360 kept freezing
So maybe this has got something to do with all the freezing cause i still havent got a x360 that showed this prolem after the clamp mod.
Post by: sirsmooth on April 15, 2007, 03:10:00 AM
You HAVE to make sure the fins are fully cut off to the base of the heatsink, if you have tiny bits of fins sticking up the washers will not sit flush and neat, so after time(the heat of the heatsink does not help) the small bits of fins gets crushed and then the washer will drop a little.
Make sure you get a dremel or something similar and smooth those fins down so its nice and flush.
Make sure the first washer on the GPU sits down flat.
Post by: lawdawg0931 on April 15, 2007, 09:51:00 AM
When we're talking about board flexing, we're talking about very minut amounts. It's just the possibility of one flexing a little different than the other one. I still feel that RBJTech's method is a more secure method, but like I said...if one doesn't give good results - try the other!
@DaniloMQ
The 12 you have had success with...which tutorial were you using? Just curious
Post by: dagretchen on April 15, 2007, 04:00:00 PM
I've only had it running for an hour, but things are looking good. I made one minor adjustment to RJBTechs method, as I could not find any spring washers, I replaced that portion with an actual spring, which was a serious hassle to get on the machine screw as it kept flying off and hitting the ceiling, lol. For the baking portion, I only let it run for 3 minutes without cooling (which did not cause a 2 light error), the GPU heatsync became so hot that it was beginning to burn me, the CPU heatsync however only became warm, and the smell coming from the GPU was fairly strong so I stopped. Anyways, hopefully everything continues working. Thanks again everyone
Post by: DaniloMQ on April 15, 2007, 07:21:00 PM
QUOTE(lawdawg0931 @ Apr 15 2007, 04:58 PM)
@makaveli86
When we're talking about board flexing, we're talking about very minut amounts. It's just the possibility of one flexing a little different than the other one. I still feel that RBJTech's method is a more secure method, but like I said...if one doesn't give good results - try the other!
@DaniloMQ
The 12 you have had success with...which tutorial were you using? Just curious
All using your guide
like the pics below
http://img7.photobuc.../x360fix_06.jpg
http://img7.photobuc.../x360fix_07.jpg
PS: yep, im pacote, but i was banned long ago so i register with this new nickname
Post by: ferrari_rulz_02 on April 15, 2007, 07:32:00 PM
QUOTE(DaniloMQ @ Apr 16 2007, 11:28 AM)
PS: yep, im pacote, but i was banned long ago so i register with this new nickname
thats illegal in these forums...
Post by: makaveli86 on April 15, 2007, 08:20:00 PM
Post by: RBJTech on April 16, 2007, 12:54:00 AM
QUOTE(makaveli86 @ Apr 16 2007, 02:51 AM)
DaniloMQ, you used lawdawgs method? and everything seems to be working fine? interesting....now i did RBJT's, jus curious on what the actual difference is between the two
Fundamentally they are the same thing - they certainly use the same method of fixing the actual problem - ie squeeze the cpu/gpu and heatsink together on the corners rather than the single central point.
The differences are that mine fix's the above points to the main case also, whilst lawdawgs doesn't. I don't think there is a 'best' option tbh from the responses on the threads, I think mine gives a structural advantage if you use the 360 on it's side , but if you sit it flat, then the advantage is less. It also allows minute movement which may or may not help things to sit flat. Lawdawgs main advantage is it's very simple and reversable also. BOTH need a little experimentation with the number of washers due to the variying thicknesses of washers etc out there but as I said about, they are both good fixes, either works great as shown in the sticky 'poll' thread.
Post by: naoneo on April 16, 2007, 07:31:00 AM
As a note, i'm in the uk so i used these parts, from B&Q :
Flat washer 5mm (Code AVF-064968)
Machine screws 5mm 0.8mm x 30mm (Code AVF-069871)
The screws were fine for the larger heat sinc, but i had to dremel the heads off the flat heat sinc level with the top of the heat sinc to install the dvd drive, the B+Q didn't actually have anything smaller than 30mm in 5mm-0.8mm at the one i went to but im sure they'll probably have the right size elsewhere?
The washers however are spot on, i used one on the underside, and two on the top between motherboard and heat sinc.
Thanks a mill anyway, seems to work fine since doing the fix
Post by: DarrenR on April 16, 2007, 06:59:00 AM
Post by: sirsmooth on April 16, 2007, 01:56:00 PM
Post by: slunk on April 16, 2007, 05:54:00 PM
Whilst removing my heatsinks for the first time I noticed that I had no thermal compound or pads on what I assume to be two memory chips under the GPU heatsink. I put a dollop of arctic silver 5 on each and completed the x clamp replacement mod and shes been running fine since. However, the lack of these pads concerns me. Do I need them?
Cheers
Post by: nettwerk on April 16, 2007, 07:06:00 PM
But im glad most everyone got theirs fixed and if my other 2 xboxes ROD im sure it will work on those lol.
Post by: jameswalter on April 16, 2007, 07:48:00 PM
QUOTE(slunk @ Apr 16 2007, 05:01 PM)
Whilst removing my heatsinks for the first time I noticed that I had no thermal compound or pads on what I assume to be two memory chips under the GPU heatsink. I put a dollop of arctic silver 5 on each and completed the x clamp replacement mod and shes been running fine since.
They don't have pads stock....nor will AS5 do anything, because the space is so large between the heatsink and ram. You need to use some sort of thermal pad (check another thread in the case mod forum....something about cooling methods and proof that they work). I got the same stuff they mention in there and it works great.
Post by: Rapachooi on April 16, 2007, 09:25:00 PM
I have an MS28 box manufactured June I think. I never had a single problem with overheating. Played GRAW2, installed the update as required, box died with checkerscreen 2 days later when it was just playing MP3's off the HDD.
I used RBJTech (I think that was the author?) method and hacked into the CPU heatsink for it... Still got the 3RL so had to overheat it to bring it back to the 2RL, then cooldown then badabing. STUPID ME didnt put the fan shroud on at first and was wondering why from a cold start, the fans spun faster and faster sounding like a jet engine.
Anyway thanks heaps.
But I have a question. Now that its all fixed I reflashed it back to 5.2C (I flashed back to orig because I was going to try to send it back to M$) but now the DVD drive makes a pretty rotten noise. Im downgrading to 5.2D now to see if slower spins take it away, but it happened on 5.2A as well...
What happens is that the DVD drive spins up to fullspeed on games, then it stops loading by what sounds like applying the brakes... you can hear the disc shudder in the drive, and feel it if ya put your hand onto the drive door.
Does anyone know of a fix for this? I dont mind opening the DVD drive if there is some kind of fix... I prefer speed over sound... But I dont want to leave it how it is now because Im concerned it will start to scratch discs and worse still will kill the drive.
Thanks again to the people who put in that effort to get the 3RLOD fixed.
PS I used flat washers that were 0.83mm thick, instead of 0.71 and if I used 3 washers on the larger heatsink (GPU I think it was), then it wouldnt work for me. I ended up going with 2 flat washers, and 1 of those megathin wave washers from the xclamp.
Post by: killer12rm on April 17, 2007, 02:19:00 AM
The 3RLOD have now gone, however i can only play a dvd game for approximatly 5-10 (max) mins.The 360 will sit at the dashboard for 12 hours + without any faults, can play arcade games but as soon as i use a dvd game it lasts, as i said before, 5 mins ish
The screen has a small ammount of graphical crashing but the box will not respond to commands except the off button onthe media remote. Please help as this is driving me insane.
Post by: RBJTech on April 17, 2007, 07:12:00 AM
QUOTE(killer12rm @ Apr 17 2007, 09:26 AM)
I used RBJTech method. Just a few questions if anyone can help.
The 3RLOD have now gone, however i can only play a dvd game for approximatly 5-10 (max) mins.The 360 will sit at the dashboard for 12 hours + without any faults, can play arcade games but as soon as i use a dvd game it lasts, as i said before, 5 mins ish
The screen has a small ammount of graphical crashing but the box will not respond to commands except the off button onthe media remote. Please help as this is driving me insane.
Play with the number of washers and tightness of the nuts on the GPU, go down to 2 if you currently have 3 on the GPU. It sounds like an issue I had with the bolt fix - the thermal heat increases when you start to use the GPU properly (ie not in dash or video sequence for that matter) and that's enough to break the BGU joint again.
Post by: sharnock on April 17, 2007, 07:48:00 AM
I couldnt get the nuts out of the GPU heatsink. Any idea of what specific tools i need to use?
Post by: RBJTech on April 17, 2007, 07:14:00 AM
QUOTE(sharnock @ Apr 17 2007, 02:19 PM)
I am using lawdawg's method.
I couldnt get the nuts out of the GPU heatsink. Any idea of what specific tools i need to use?
1/4" socket or ring spanner - pliers will also do it but likely to slip so be carefull...
Post by: nettwerk on April 17, 2007, 07:37:00 AM
QUOTE(sharnock @ Apr 17 2007, 01:19 PM)
I am using lawdawg's method.
I couldnt get the nuts out of the GPU heatsink. Any idea of what specific tools i need to use?
I used a crescent wrench, they are not on really tight.
Post by: lukebe on April 17, 2007, 03:05:00 PM
1. Why do you need to drill 5mm holes in the CPU/GPU heat sinks when they are already 4mm and the nuts go through them?
2. Unless I'm doing something wrong. I've but out the sections of the GPU heat sink and it looks a bit hacked. Does this affect heat dissappation much?
3. Now I actually had trouble with 1 GPU stock bold that I had to remove before drilling and it snapped off. Real bad. But I drilled out the stock bolt. After working it out there are a few scratches under the heat sink around the bolt. Will this affect anything? If so, so I sand paper to smooth it out?
Having to drill the bolt out let this particular GPU hole at 6mm. I dont think this will have an impact. Please correct me if I'm wrong.
Post by: lawdawg0931 on April 17, 2007, 03:42:00 PM
1. Because you have drilled out a broken bolt from the heatsink (6mm now) - you will be using RBJTech's method for X clamp replacement.
2. You do need to clean up the bottom of the heatsink, as it should be extremely smooth. Not regular sandpaper, but use Silicon Carbide 600 Ultra Fine (or finer IMO). Also, you must go in the original direction of the heatsink. Don't go across the grain (so to say). One direction is best also.
Post by: lukebe on April 17, 2007, 05:34:00 PM
Did you notice the issue I identified in Question 1? dont want to drill unless I have to.
One thing that did interest me as well is I notice on this pic:
http://rbjtech.bulldoghome.com/photos/BDRES/rbjtech_bulldoghome_com/xclamp/xclamp%20001.jpg
that there was some thermal paste near the edge of the GPU heat sink.
Now I dont have this so I guess RBJTech added thermal paste on top of the pink thermal pads.
Is this right?
Should everyone be doing that as part of the tutorial?
Actually is appears to be a different paste. You can see it on the pads here:
http://rbjtech.bulldoghome.com/photos/BDRES/rbjtech_bulldoghome_com/xclamp/xclamp%20009.jpg
Post by: RBJTech on April 17, 2007, 05:14:00 PM
QUOTE(lukebe @ Apr 18 2007, 12:05 AM)
Correct I am using RBJTech's method. Have his tutorial printed out beside me at all times.
Did you notice the issue I identified in Question 1? dont want to drill unless I have to.
One thing that did interest me as well is I notice on this pic:
http://rbjtech.bulld.....clamp 001.jpg
that there was some thermal paste near the edge of the GPU heat sink.
Now I dont have this so I guess RBJTech added thermal paste on top of the pink thermal pads.
Is this right?
Should everyone be doing that as part of the tutorial?
Actually is appears to be a different paste. You can see it on the pads here:
http://rbjtech.bulld.....clamp 009.jpg
Hi - this thread is getting long now but the answer to your Q is here somewhere ... Anyway I'll answer it again. When you go to put the heatsink over the bolts, more than likely it will snag on the bolt and thread of the leg. If you drill it out, then it won't snag. Try it without drilling, it it works great, if not then you need to strip the thread on the legs (by drilling it..)
The paste on the pads was simply put there so that I had an indicator that it was making good contact thats all - there is no need for it tbh, but then again there is no harm in having it there either ... And yea it's cheapo standard thermal paste (white) - I wasn't going to waste AS5 on that ...
I hope that helps ...
QUOTE(lawdawg0931 @ Apr 17 2007, 10:49 PM)
@lukebe
1. Because you have drilled out a broken bolt from the heatsink (6mm now) - you will be using RBJTech's method for X clamp replacement.
2. You do need to clean up the bottom of the heatsink, as it should be extremely smooth. Not regular sandpaper, but use Silicon Carbide 600 Ultra Fine (or finer IMO). Also, you must go in the original direction of the heatsink. Don't go across the grain (so to say). One direction is best also.
If scratches are not in the die contact area, then IMO there is no need to clean them up.
Post by: PureThermite on April 17, 2007, 05:49:00 PM
I might take some next time I have my 360 opened...
Oh yeah, did the mod, and it works perfectly by the way.
Post by: jameswalter on April 17, 2007, 06:33:00 PM

Took it after cleaning the CPU and GPU. You can see the screws and washers in the holes. I lapped my heatsinks too....just some 1500 grit wetsanding, and Mother's Mag Polish and 30 minutes of work.
Just to add to the success stories:
5mm x 10 x 0.8 screws
5mm Metal washers
#10 Nylon washers
Zalman ZM-STG1 Super Thermal Grease
Asetek HDD 3.5" Waterblock Heat Conductive Pad (cut for use between the ram and GPU block)
Swiftech MC14 VGA Forged Copper BGA Ramsinks (fit perfectly on the 2 exposed ram chips)
Enzotech One-Piece Forged Copper Southbridge Heatsink (with clips cut off, still too big though, currently on at an angle to fit)
Works great now. No issues whatsoever.
Post by: makaveli86 on April 17, 2007, 08:34:00 PM
QUOTE(jameswalter @ Apr 17 2007, 08:40 PM)
I have this picture.....
Took it after cleaning the CPU and GPU. You can see the screws and washers in the holes. I lapped my heatsinks too....just some 1500 grit wetsanding, and Mother's Mag Polish and 30 minutes of work.
Just to add to the success stories:
5mm x 10 x 0.8 screws
5mm Metal washers
#10 Nylon washers
http://www.performance-pcs.com/catalog/index.php?main_page=product_info&cPath=58&products_id=20318
http://www.performance-pcs.com/catalog/index.php?main_page=product_info&cPath=242&products_id=20811 (cut for use between the ram and GPU block)
http://www.performance-pcs.com/catalog/index.php?main_page=product_info&cPath=43&products_id=3811 (fit perfectly on the 2 exposed ram chips)
http://www.performance-pcs.com/catalog/index.php?main_page=product_info&cPath=197&products_id=21311 (with clips cut off, still too big though, currently on at an angle to fit)
Works great now. No issues whatsoever.
damn straight u shoudlnt' have issues, look at how freakin clean that cpu and gpu's look! niceee job james. gettin jelous, feel like i shoudl take mine apart and clean it up even more now, lol. good stuff
Post by: lawdawg0931 on April 17, 2007, 08:07:00 PM
QUOTE(lukebe @ Apr 17 2007, 04:12 PM)
there are a few scratches under the heat sink around the bolt
Good catch Richard...."If scratches are not in the die contact area, then IMO there is no need to clean them up."
Like he said...
Just found this on the net. Anybody ever try anything like this? Looks promising
http://www.frozencpu...tml?id=mf9teL92
Post by: jameswalter on April 17, 2007, 10:13:00 PM
QUOTE(makaveli86 @ Apr 17 2007, 07:05 PM)
damn straight u shoudlnt' have issues, look at how freakin clean that cpu and gpu's look! niceee job james. gettin jelous, feel like i shoudl take mine apart and clean it up even more now, lol. good stuff
Thanks....and it took awhile....because the GPU looked like this:


Guess someone at the factory got a little ambitious with the thermal grease they used. If I open my 360 again, I will try to get some better pictures of what my clamp replacement looks like.
QUOTE(lawdawg0931 @ Apr 17 2007, 07:14 PM)
Just found this on the net. Anybody ever try anything like this? Looks promising
http://www.frozencpu...tml?id=mf9teL92
Pretty much just an alternative to thermal compound....it will basically melt upon first heating up, and become a metal liquid/grease film, like AS5. It may perform a little better, but I will go with something that I know works.
Post by: DaniloMQ on April 17, 2007, 10:49:00 PM
QUOTE(lawdawg0931 @ Apr 18 2007, 03:14 AM)
Just found this on the net. Anybody ever try anything like this? Looks promising
http://www.frozencpu.com/products/5508/thr-34/Coollaboratory_Liquid_MetalPad_Thermal_Interface_GPU_Pad_501248.html?id=mf9teL92
Its crap, it gives a few degrees more then artic silver 5 so not worth it. AS5 is better
I fixed another 4 x360 with your method
All working fine till know
Post by: ferrari_rulz_02 on April 18, 2007, 12:18:00 AM
QUOTE(jameswalter @ Apr 18 2007, 02:20 PM)
Thanks....and it took awhile....because the GPU looked like this:
Guess someone at the factory got a little ambitious with the thermal grease they used. If I open my 360 again,
id say... just a wee bit too much. but hey, you got it off without wrecking it
Post by: DaniloMQ on April 18, 2007, 01:05:00 AM
I always focus in cleaning the core

no need to spend time cleaning the old thermal paste, and here are some x360 that i got to fix... clamp mod didnt work and you can see on the screens below why... probably the owned tried to clean the cpu/gpu with some hard tool...


Another one

Too bad
Post by: Wince on April 18, 2007, 02:25:00 AM
I opened it up again and fiddled with washers and the like and ended up getting it going again, so i have a quick go on gears and then let it sit on the main menu running the demo to see how long it lasts, i come back half an hour later to find it crashed and rld'ing on me again. So again i take it apart to fiddle with the clearance a bit more. This time i get 2 red lights, the over heating issue, with an error code of 0011 so obviously i hadnt done the nuts up tight enough. Did them up a bit tighter and voila. No rld at all. BUT i havent yet played anything. I left it running the Oblivion main menu and demo all through the night with no crashes, and put the GoW disc in to do the same this morning before i came to work. So i shall see how it fares when i get home.
Unfortunately im not in the mood to play at the moment. So i dunno when im gonna get a chance to hammer at it and see if it withstands gameplay.
Hopefully its all fixed because my box is less than 3 months old.
Wince.
Post by: sunsrun on April 18, 2007, 03:20:00 AM
I spent all day yesterday with inadequate parts (was missing the 4mm nuts for the initial stages) and by the end of it all, I was pretty depressed with the results. Considering I got the 360 off of eBay with nothing but the core console, letters written on the side.. you could say I was prepared for the worst. But for 75 bucks, hey! And when I got it I noticed it had already been completely dissected! Warranty sticker broken, screw missing, etc. Nothing but 3 red light errors. Then I was getting 2 red lights but it would shut off instantly. The fans would hardly turn on half the time (it was looking grim). To make matters worse, this entire time, the video was not functioning. After several hours of tweaking and thinking, I'd had enough, and put away the tools for the night.
Today, I went to Lowe's and picked up the 4mm nuts that I was missing (this is what happens when people want to run errands for you). Loaded up RBJ's tutorial and got to work right away. Believe me...it is much easier to tighten nylon nuts when you have a steady bolt! LOL that makes it all the more important that you get those 4mm nuts (3mm thick) for the first part.
I'm very familiar with modding computer components so RBJ's whole guide was right at home... I followed every step perfectly, and saw video for like 2 seconds! Some more tightening.. longer stints of video. After placing weights on top of the GPU, it almost made it to the main menu. I didn't have any way to tighten the nylon nuts on the GPU because my spanner wouldn't fit, so I used a pair of plyers and twisted them (yes, hardcore). By God it worked! I now have a running Xbox 360, which I've left on the menu screen for a couple hours to test it. The fans stay pretty low, thanks to the AS5 on the cores, the fan shroud mods, and the snipping of the inner fan grill. I highly suggest everyone uses these mods, because it's less noisy AND the cooler operating temps will put some extra life on your components.
I can't wait to flash this ms25 tomorrow.
Post by: makaveli86 on April 18, 2007, 09:44:00 AM
Post by: tollboothwillie on April 18, 2007, 02:34:00 PM
Post by: SnufftheCrimeDog on April 18, 2007, 05:34:00 PM
Post by: makaveli86 on April 18, 2007, 05:33:00 PM
Post by: sunsrun on April 18, 2007, 08:37:00 PM
As for the memory chips, in my case, I didn't have any thermal pads on the GPU side (quite the stupid idea Microsoft - thermal paste wouldn't make good contact either) when I uncovered everything. So, I took two of the sticky pads and cut them in half. They expand enough when you squish them to use only one half of each pad per chip. Of course, copper ramsinks would work alot better than straight sticky pads, but that would be more of a permanent solution. I recommend that if anyone wants a permanent bond that gives out AS5 temps to pick up some Arctic Silver Thermal Adhesive. Much better than glue, heh. I would not recommend using it on the GPU or CPU, only because I like the option of being able to disassemble everything (this stuff is pretty much permanent).
I would consider RBJ's method a permanent fix, though; and keeping temps under control will only help. The shroud mod lowered my fan noise considerably. The more degrees cooler the better. That will lessen the chance of anything happening again.
The problem with the X Clamps is that they stressed the motherboard...bowing it, even, right underneath the most critical components. Factor in the lack of screws near the middle part of the board, but all on the outside. That contributes to the bowing effect.
With the intense heat (from another poor design) from all the gaming, it all comes together and I think this is why we're seeing so many 'broken' 360's these days. RBJ's method is very basic, yet fundamental - that is what's important. The X Clamps are just a quick fix to what they were trying to accomplish, IMO. Obviously, Microsoft didn't do too much in-house testing.
Post by: soul-assassin on April 18, 2007, 09:46:00 PM
Happiness pictured below!
Post by: ferrari_rulz_02 on April 19, 2007, 12:32:00 AM
QUOTE(soul-assassin @ Apr 19 2007, 01:53 PM)
Happiness pictured below!
and happiness looks very good.
the fact that they can go dead like yours out of the blue was me worried....not 100% sure wether i want to take the plunge and crack it open
ive had it since launch (im in Australia....March 23)
Post by: benfinkel on April 19, 2007, 08:15:00 AM
Two questions for the community:
1) Has this had success resolving error code 0020? That's the error I'm getting and I don't see a lot of info regarding who has what error and if it worked or not.
2) You mention in the tutorial:
"They force the motherboard to flex up at the anchor points, causing solder points to become compromised over time/heat."
But you don't appear to offer any solution to "reverse" the damage that has been done to those Solder points. Am I missing something?
Thanks,
-Ben
Post by: lawdawg0931 on April 19, 2007, 08:50:00 AM
1. Error 0020 is not known for sure, but possibly caused by overheating
2. By removing the X clamps and re-flowing, this basically fixes (or reverses) what the X clamps broke. The overheating step in my tutorial helps in that aspect, but should only be done if the X clamp replacement itself didn't clear the existing errors.
Post by: makaveli86 on April 19, 2007, 10:01:00 AM
Post by: benfinkel on April 19, 2007, 10:53:00 AM
QUOTE(lawdawg0931 @ Apr 19 2007, 03:57 PM)
@benfinkel
1. Error 0020 is not known for sure, but possibly caused by overheating
2. By removing the X clamps and re-flowing, this basically fixes (or reverses) what the X clamps broke. The overheating step in my tutorial helps in that aspect, but should only be done if the X clamp replacement itself didn't clear the existing errors.
Thanks for the reply
I read the part about the overheating after I had posted. My bad for not reading through fully.
As for error 0020 I was just wondering if many or even any of the 50 success started with code 0020. Maybe thats something that could be added to the success sticky? A spreadsheet breaking down specific errors and the success or failure with those errors.
Thanks again!
Post by: joeboyc2 on April 19, 2007, 11:11:00 AM
started following the thread a few days ago and was really interested in the results, after a bit of thinking I decided to go for RJBTechs method as it seemed to be getting the most coverage and did seem to be the most sound of the two, it dose involve a bit more work but I was up for the challenge
I gathered all the required bits and followed the tutorial (Excellent by the way) don't think it could be any more straight forward + the parts guide was spot on, although think B&Q might have cottoned on to the demand and have hiked the price by 20p, whats an extra 20p against the price Microsoft would try to charge me if I sent it in for repair
anyways I set to work, dismantled her and started drilling and lining up, took me in all about 2-3 hours as I spent a lot of time cleaning the die's and the GPU heat sink was a bit of a challenge( might have been down to the fact I didn't really have the right tools HA) got it all together and booted it up, 3ROLD straight away so I let it on with no fan and no shroud and let it over heat, turned it back on after letting it cool down for a bit, booted to the dash no problem, left it there for a few min and then whacked in PGR3, left it on the demo screen for about an hour and came back,
IT WAS STILL RUNNING Before this mod I was lucked if it even gave me any video out put so as you might gather I was very pleased, I turned it of as I dint really want to leave it on all night
First thing this morning I fired the old girl up and she started first time, and thats from cold, left it on the demo and got ready for work, about half an hour passed and I came back, still on
, started playing and it was fine, could stop for long as I was already late for worknot really had a chance to give it a good work out but hopefully tonight ill do some Xbox live, give the girl a run for her money, ill post again soon just to give an update,
Guess it 50+ fixes now, when it going to get on the front page??????????
Post by: benfinkel on April 19, 2007, 11:50:00 AM
I picked up the parts for RBJC's tutorial today at lunch and I'm going to start tonight. I'll let everyone know how it goes.
Can I ask you: How did you countersink the bolt holes?
Post by: joeboyc2 on April 19, 2007, 01:57:00 PM
don't put to much pressure down as it will bend the metal, you only need to counter sink it a little anyways, don't go to far or the screws will go straight through

Post by: WhiteBoy on April 19, 2007, 03:37:00 PM
Post by: lukebe on April 19, 2007, 03:32:00 PM
QUOTE(benfinkel @ Apr 20 2007, 03:00 AM)
Thanks for the reply
I read the part about the overheating after I had posted. My bad for not reading through fully.
As for error 0020 I was just wondering if many or even any of the 50 success started with code 0020. Maybe thats something that could be added to the success sticky? A spreadsheet breaking down specific errors and the success or failure with those errors.
Thanks again!
benfinkel - I can confirm I started with an 0020 and I'm have just finished RBJ's tutorial. All signs look good at the moment but I really have not stretched it legs.
Post by: lukebe on April 19, 2007, 03:48:00 PM
For the record, MS25 on Aus launch (23rd-ish of March). Starting locking up and recently gave the 3 light. It would work for a bit and then go red. Always at the worst time so I decided something needed to be done hence the X-clamp fix RBJ style.
When done I just plugged the RF plate onto the motherboard alone to start it up and got the same error code as I initially had (0020). So I thought, I'll screw the mother board properly into the housing so I can heat it up and let it flex and sit. BUT when I screwed it in I notice movement around the edges of the board. I was thinking, this is BAD. But I gave it a shot anyway when done and it started fine. Is this right??? Makes me nervous but worked.
My parts were sourced from Australia so had to find them around the place.
For the aussies... I found most parts at Jaycar (washers, nuts) and got the bolts from Home Hardware (Bunnings had some too). Forget DSE and Tandy.
1. I used 2 washers between the board and the 2 heat sinks. 3 didn't even touch in my case. Probably the same for all the Aussies as I found all of the local products a little larger than RBJ's figures.
2. All the bolts I could find in Aus had quiet a high head on them (both hex and phillips). So I took 30 mins and ground them down with my bench grinder to ensure they would not hit the plastic casing when all snapped together. You can see they actually protrude below the metal housing so I thought this was time well spent.
3. I forked out a couple of bucks and got a very thin metal file (like a nail file) to smooth out the GPU chunks I took out. This was to ensure the washers and nut sit a little more firmly and dont move on the flaky pieces where I snapped the blades off. This just gave me a warm fuzzy feeling that I was making it solid.
While I had it apart I noticed a few people placing a small heat sink on the southbridge chip. I thought, yeah that wont hurt. BUT... when I placed the DVD down the power and SATA cables dangle too close for my liking. If these cables touch the heat sink will it melt them or cause bad stuff?
WhiteBoy - like I just said. While I have it apart I'm looking at RBJ's cooling fan shroud mod and also cutting our the metal casing behind the fans to increase air flow. Already had the whisper fans in place of stock.
I'll post my success on the right thread once I have verified it with an intense gaming session.
Post by: svincent on April 19, 2007, 05:26:00 PM
thanks for your added info, I'm in AUS as well, I will be attempting the fix soon on my MS28 as last night i got the dreaded 3RLOD error code 0102. I have a Jaycar just down the road too..
I will of course post after I have given it a go.
SV
Post by: jimbobjim on April 19, 2007, 05:21:00 PM
To me it really does look like the x clamps are the main culprit of the failiures. I imagine the only reason M$ have left them in is because replacing them would be admitting it was all their fault. I feel for the people who've paid big money to have their console repaired by M$, only to have it returned with the motherboard bending clamps still in place.
I know this is all speculation at the mo', but to me this fix looks really promising.
Thank you.
Post by: DaniloMQ on April 19, 2007, 07:59:00 PM
Maybe heating the memory? anyone?
Post by: soul-assassin on April 19, 2007, 08:14:00 PM
QUOTE(DaniloMQ @ Apr 19 2007, 06:30 PM)
I got two x360 with error 0110 that i cant fix with this...
Maybe heating the memory? anyone?
Maybe heating the memory? anyone?
I had that same error, this fix worked for me. I used the first method posted by lawdawg.
Post by: DaniloMQ on April 19, 2007, 08:46:00 PM
Error 0102 again
I opened and realized that some of the case screws that attach the motherboard to it (not the 6 long screws) were loose
I used the same screw but one size ticker and worked fine, got all motherboard pretty tight to the case and working fine
Some pics of the screw that i used


Post by: RichMoney on April 19, 2007, 09:18:00 PM
The 5m screws I used weren't the flat "head" style but the height of the "head" looked the same to me, but since the height from the mobo to the metal cage was thicker than my thermal padding I had to use two layers on all four bottom side RAM chips. Is that a no-no?
And thanks for your devoted time to the xbox scene to everyone, without you i'd still be playing the regular xbox...haha....not that it's bad but I just like the high-def gaming.
Post by: ferrari_rulz_02 on April 19, 2007, 09:39:00 PM
QUOTE(DaniloMQ @ Apr 20 2007, 11:30 AM)
I got two x360 with error 0110 that i cant fix with this...
Maybe heating the memory? anyone?
quite possibly. try adding some small heat sinks to the memory chips.
if, however, this error comes up straight away, the chips may not be sitting properly on the board.....which is not good
Post by: pimpmaul69 on April 19, 2007, 10:47:00 PM
QUOTE(jimbobjim @ Apr 20 2007, 12:28 AM)
I've done the mod, coupled with the heatgun fix on two red light consoles this week and both now work fine.
To me it really does look like the x clamps are the main culprit of the failiures. I imagine the only reason M$ have left them in is because replacing them would be admitting it was all their fault. I feel for the people who've paid big money to have their console repaired by M$, only to have it returned with the motherboard bending clamps still in place.
I know this is all speculation at the mo', but to me this fix looks really promising.
Thank you.
i made an observation that made it a fact that the x-clamps are faulty.. i did this mod with the nylon and metal washers.. but only on the top side.. now the problem was that i had to buy more bolts and all home depot had was hex head ones.. now i had matched them up to the x-clamp bolt and the part where the x-clamp clips to the part that would screw to the case and the hex head was smaller than that part, but when i put it back in it bowed the board really bad... wich means one thing, when you put it in with the x-clamps it pushes pressure on it and loosens the pressure from the cpu/gpu and seperates the processors from the heatsinks... personally i have more than enough evidence to believe that a heatgun followed by replacing the x-clamps with what was listed as parts on first post is a permanent fix.. honestly i dont think the board warping is really a problem except that the x-clamps seperate the processors and heatsinks about 2 millimeters wich gives the processor room to lift... now on the other hand i see the new apoxy on the elites is a bad idea and here is why i think that... seperating the processors from the heatsink for long periods of time can cause mass damage to the processors from overheating.. and our saving grace was the solder balls breaking before the processors did.. but imo the nylon and metal screws are unneccessary on the bottom side of where the machined head is
Post by: fahrenheit on April 20, 2007, 03:49:00 AM
QUOTE(pimpmaul69 @ Apr 20 2007, 04:54 PM)
honestly i dont think the board warping is really a problem except that the x-clamps seperate the processors and heatsinks about 2 millimeters wich gives the processor room to lift...
In my observations, the X-clamps once removed are compromised. You need to apply alot of pressure to remove them and reattach them and they don't seem to go back aswell as they were from stock state. Your observations have come after you've removed and reattached them.
A 2mm seperation of heatsink from processors would cause overheating and shutdown.
People experience failure after months of perfect operation simply because thermal cycling causing board warp pushes and pulls the BGA chips to breaking point. The X-Clamps are certainly part of the problem that allows this to occur more readily but I don't agree with your assessment of what is happening. If the board was of better quality ie. more rigid and less susseptible to warp, the X-Clamps would suffice as is.
The boards do warp and thats the problem that we always come back to. If that problem goes away, then all of the other things that aren't quite up to scratch, like the excessive heat and the mounting become less problematic.
Amazing what a little bit of heat can do to poor quality PCB - http://www.youtube.com/watch?v=CQgLBD3F6Bg
Post by: RBJTech on April 20, 2007, 06:19:00 AM
QUOTE(fahrenheit @ Apr 20 2007, 10:20 AM)
Amazing what a little bit of heat can do to poor quality PCB -
.. it's just science - heat the copper tracks rapidly with a heatgun and just like a bimetalic strip, the copper expands quicker than the fibreglass and it bends ... no big deal. Heat both sides equally (like you're supposed to) and it won;t....
Post by: fahrenheit on April 20, 2007, 07:15:00 AM
QUOTE(RBJTech @ Apr 21 2007, 12:26 AM)
.. it's just science - heat the copper tracks rapidly with a heatgun and just like a bimetalic strip, the copper expands quicker than the fibreglass and it bends ... no big deal. Heat both sides equally (like you're supposed to) and it won;t....
But the question is, can the PCB used to construct the 360 mainboards withstand the thermal cycles that it is subjected to? I don't think so. Its cheap and its not fit for purpose. Surely you've seen how wavy the boards are with your own eyes? Good PC mainboards don't smack of the cheapness of these things.
If it was of better manufacturing quality, we wouldn't be having this debate.
Post by: pimpmaul69 on April 20, 2007, 11:16:00 AM
Post by: lawdawg0931 on April 20, 2007, 12:13:00 PM
QUOTE(pimpmaul69 @ Apr 20 2007, 12:23 PM)
an example: take a 2 inch long piece of 1x4 and a 12 inch long piece of 1x4 and tell me wich one bends easier
That's not really the point...we're not talking about major flexing. We're talking about the most minut amount of flexing - but enough to comprimise the connections. There's too many people benefitting from this replacement. I don't think anybody is stating that X clamps are "THE" problem...but they definitely contribute to the red lights & freezing. As far as the h/s being pulled away from the chip, that's not at all possible with the replacement tutorials as is. If anything, this would prevent any gap that might have existed with the warping from the clamps.
Unless I'm mis-interpretting what you're saying....
Post by: pimpmaul69 on April 20, 2007, 12:44:00 PM
QUOTE(lawdawg0931 @ Apr 20 2007, 07:20 PM)
That's not really the point...we're not talking about major flexing. We're talking about the most minut amount of flexing - but enough to comprimise the connections. There's too many people benefitting from this replacement. I don't think anybody is stating that X clamps are "THE" problem...but they definitely contribute to the red lights & freezing. As far as the h/s being pulled away from the chip, that's not at all possible with the replacement tutorials as is. If anything, this would prevent any gap that might have existed with the warping from the clamps.
Unless I'm mis-interpretting what you're saying....
yes you mis-interpereted it... i said the x-clamps cause this.. and i was pointing out that that video was completely a useless point.. i can make any board do that warping when suspended in air and applying 1000 degrees to it.. and yes i think their is possible board warping problems with the x-clamps because the heatsink doesnt fit snug by any means.. i was saying that the new bolts fix all that
Post by: brywalker on April 20, 2007, 01:28:00 PM
QUOTE(fahrenheit @ Apr 20 2007, 10:20 AM)
Amazing what a little bit of heat can do to poor quality PCB -
That is the stupidest thing I have ever seen. Those chips never see over 110C. If they did, they would fail.
OF COURSE a 1000F will make the board bend. Throw a PC motherboard on there and it will do the same thing.
Post by: SnufftheCrimeDog on April 20, 2007, 03:21:00 PM
Post by: pimpmaul69 on April 20, 2007, 03:03:00 PM
QUOTE(SnufftheCrimeDog @ Apr 20 2007, 09:52 PM)
Sorry if this has been asked before, I know from experience the x clamp tutorials works for 0102 boards, but will it take care of 0020 as well? My friend is getting this error on his xbox 360, and since I've now fixed two 0102s with the x-clamp replacement he wants to know if I could possibly fix his with this method as well this according to this site, 0020 is a overheating error so, but basically again my question is can I fix and 0020 error with this method?
after the heatgun...yes
Post by: fahrenheit on April 20, 2007, 04:04:00 PM
QUOTE(pimpmaul69 @ Apr 21 2007, 06:51 AM)
and i was pointing out that that video was completely a useless point.. i can make any board do that warping when suspended in air and applying 1000 degrees to it..
QUOTE(brywalker @ Apr 21 2007, 07:35 AM)
That is the stupidest thing I have ever seen. Those chips never see over 110C. If they did, they would fail.
OF COURSE a 1000F will make the board bend. Throw a PC motherboard on there and it will do the same thing.
Lets establish some facts here. I made that video and I have no idea where you guys are pulling this '1000 degree' figure from??? The temperature never exceeded 200 degrees centergrade. Do you see the red-hot reflection of the heatgun in the mirrored core? No, because the gun never got hot enough!
I experiemented on an old PC motherboard before proceeding to do the heatgun fix (which is what that video was orginally intended to document) and it did not react the same way as the 360 mobo, it remained flat.
Of course that video shows dramatic sagging in the center because there is no support and of course it shows more movement than what would occur to a normally functioning board, but that is only for illustrative purposes. Its replicatable, try it and draw your own conclusions. The point is, it only takes a fraction of movement each way with thermal cycling and before you know it, you've stressed the joints to breaking point.
The question needs to be asked, despite having the flimsy x-clamps, the poor mounting, and the excessive heat, would the BGA's still be compromised if the board never changed shape in the first place? I think the answer is 'No'.
I think you'll find that although mounting the boards without the X-clamps will help keep contact in the vital areas, the outer parts of the board will still be free to flex. Thats not neccesarily going to mean failure, but it does suggest that the root problem is the board itself and its ability to resist the environment it is subjected to.
PS: I'm in no way dismissing the replacement of the x-clamps because I think under the curcumstances, its the only real choice we have to get long lasting results.
This post has been edited by fahrenheit: Apr 20 2007, 11:05 PM
Post by: GrandPipe on April 20, 2007, 04:21:00 PM
Also, i used 2 washers up top and 2 on the bottom. I've screwed the heatsink down so they're snug with no real force. Is there any way to tell if the spacing is perfect? I cant see any spaces if i look closely at the gpu/heatsinks. Im just trying to make sure nothing explodes when i turn it on.
Post by: DaniloMQ on April 20, 2007, 05:53:00 PM
QUOTE(GrandPipe @ Apr 20 2007, 11:28 PM)
got the 3rlod after updating GH2. Going through lawdawg tutorial, but my m5x10 screws have a domed head and when i put it back the board doesnt quite fit back into the metal case. So im assuming its ok to drill holes in the bottom of the metal case so there is space for it to fit through? (ie. srews to the heatsinks no longer touch the metal case on the bottom).
Also, i used 2 washers up top and 2 on the bottom. I've screwed the heatsink down so they're snug with no real force. Is there any way to tell if the spacing is perfect? I cant see any spaces if i look closely at the gpu/heatsinks. Im just trying to make sure nothing explodes when i turn it on.
the worst that can happen is 2rl when you turn it on, indicating that the heatsink is not in perfect contact with the core
Post by: lukebe on April 20, 2007, 07:40:00 PM
QUOTE(SnufftheCrimeDog @ Apr 21 2007, 06:52 AM)
Sorry if this has been asked before, I know from experience the x clamp tutorials works for 0102 boards, but will it take care of 0020 as well? My friend is getting this error on his xbox 360, and since I've now fixed two 0102s with the x-clamp replacement he wants to know if I could possibly fix his with this method as well this according to this site, 0020 is a overheating error so, but basically again my question is can I fix and 0020 error with this method?
As I said 2 pages ago in this thread. I have fixed my 0020 with RBJ's tutorial.
By correcting the board flex you possibly correct all whole range of issues.
Post by: pimpmaul69 on April 20, 2007, 07:40:00 PM
QUOTE(GrandPipe @ Apr 20 2007, 11:28 PM)
got the 3rlod after updating GH2. Going through lawdawg tutorial, but my m5x10 screws have a domed head and when i put it back the board doesnt quite fit back into the metal case. So im assuming its ok to drill holes in the bottom of the metal case so there is space for it to fit through? (ie. srews to the heatsinks no longer touch the metal case on the bottom).
Also, i used 2 washers up top and 2 on the bottom. I've screwed the heatsink down so they're snug with no real force. Is there any way to tell if the spacing is perfect? I cant see any spaces if i look closely at the gpu/heatsinks. Im just trying to make sure nothing explodes when i turn it on.
remove the washers that are on the bottom side and you will be fine and no drilling
Post by: lukebe on April 20, 2007, 08:22:00 PM
QUOTE(GrandPipe @ Apr 21 2007, 08:28 AM)
got the 3rlod after updating GH2. Going through lawdawg tutorial, but my m5x10 screws have a domed head and when i put it back the board doesnt quite fit back into the metal case. So im assuming its ok to drill holes in the bottom of the metal case so there is space for it to fit through? (ie. srews to the heatsinks no longer touch the metal case on the bottom).
I would recommend if your going to start drilling to use RBJ's tutorial (links all through this thread) as it is the current method of choice. If you insist I dont see any reason why drilling there will cause a problem. You could also grind the heads down a mm.
Post by: benfinkel on April 20, 2007, 08:32:00 PM
Took me some time, particularly "modifying" the CPU heatsink, but I got it working.
Only needed two washers on top of the MB under the heatsink, otherwise went well.
I've only been running it for a few minutes, we'll see how it goes for the next few days.
-Ben
QUOTE(SnufftheCrimeDog @ Apr 20 2007, 09:52 PM)
Sorry if this has been asked before, I know from experience the x clamp tutorials works for 0102 boards, but will it take care of 0020 as well? My friend is getting this error on his xbox 360, and since I've now fixed two 0102s with the x-clamp replacement he wants to know if I could possibly fix his with this method as well this according to this site, 0020 is a overheating error so, but basically again my question is can I fix and 0020 error with this method?
I had code 0020. It has seemed to work for me. More to come later.
Post by: wellmodded on April 20, 2007, 08:37:00 PM
i fixing another one that has a 0020 error i first did the heatgun fix and test the m/b witt eh xclamps and it worked fine ( i didn't test it for lng just want to make sure the heatgun got it works
thn i used the screws and bolt the m/b through the case and the heatsinks but whn i finish doing all of tht tightn down everythink it jus give me back the 3rlod
so i decide to slack the screws and over heat the board
after i did tht and allowed it to cool it worked i ddin;t test it for long just wanted to see it truned on and didnt get he 3rlod so i bolt upback the heatsinsk tightly and turned it on and i got the 3rlod
wht couldbe casuing this ( is it that i tightne it too much casugint eh cold weld not too touch
I nver had a problem like this on the other m/b i fixed
Post by: wellmodded on April 20, 2007, 09:35:00 PM
QUOTE(wellmodded @ Apr 20 2007, 11:14 PM)
ok thsi is weird i have fixed many 360 before using the this screwing heatinsk down the m/b and using the eraser trick and thy all worked
i fixing another one that has a 0020 error i first did the heatgun fix and test the m/b witt eh xclamps and it worked fine ( i didn't test it for lng just want to make sure the heatgun got it works
thn i used the screws and bolt the m/b through the case and the heatsinks but whn i finish doing all of tht tightn down everythink it jus give me back the 3rlod
so i decide to slack the screws and over heat the board
after i did tht and allowed it to cool it worked i ddin;t test it for long just wanted to see it truned on and didnt get he 3rlod so i bolt upback the heatsinsk tightly and turned it on and i got the 3rlod
wht couldbe casuing this ( is it that i tightne it too much casugint eh cold weld not too touch
I nver had a problem like this on the other m/b i fixed
OK i can;t figure otu y i can't edit my post any waz
i slackened the screws for the heatsinka nd GPU and it stoped give mte 3RLOD tht weird well i can guest tht one conetact have problem whn 2 tight but i have another problem i am worried now that the heatinks arn't tight enough on the die
( maybe i might be wrong well the heatinsk feel fermlyin place so does tht mean thy tight enough on the die
ok i thik i figure itout the board been pulled dow onto the metal casue and it flesing 2 much i gotta put adtion washer uner the baord
This post has been edited by wellmodded: Apr 21 2007, 04:41 AM
Post by: grim_d on April 21, 2007, 06:53:00 AM
RBJtech's Method
Lawdawg0931's Method
Please use these threads from now on to discuss The individual Methods.
This post has been edited by grim_d: Apr 21 2007, 01:53 PM